
Unit Testing in Angular: Modern Testing with Vitest

Summarize with AI:
See how to use Vitest in Angular as the more modern alternative to Jasmine, Web Test Runner and Karma.
Now, with Karma deprecated and the Angular team without a decision about the future of unit testing in Angular, our projects continue building on top of Karma and Jasmine. It is our responsibility to find other alternatives.
In a previous article about testing in Angular, we learned about how to implement Web Test Runner in Angular. it works fine, but the Web Test Runner builder is currently EXPERIMENTAL and not ready for production use. So let’s move to another modern and stable solution—Vitest! If you play with other frameworks like Vue, React and Svelte, they use Vitest as a test runner with Vite.
Vitest … Vite? Sounds a bit confusing. Well, let’s break it down.
What Is Vite?
Vite is a modern build tool for frontend (created by Evan You, the same creator of Vue). It makes building and compiling our projects easier and faster than webpack. One great feature of Vite is that it works in phases with development and build.
When Vite works in development mode, it serves files using native ES Modules, it saves time because it doesn’t need to bundle, increasing the speed, and when it works in production, it uses Rollup to optimize, minifies, and creates bundles fast.
What Is Vitest?
Vitest was built by the Vite community; it focuses on running and providing feedback quickly for our tests and is compatible with Jest, has native support for TypeScript and uses Vite under the hood to make it faster.
When we want to use Vitest with Angular, something changes. When we use Vitest in Angular, it uses esbuild to run our tests, making it faster.
Did you know Angular uses Vite under the hood for the development server?
As always, the best way to learn to play with Vitest is by doing things, but not in the nice, perfect world of greenfield and projects from scratch with Vitest. We are going to migrate an existing project with our beloved Karma and Jasmine to Vitest.
Let’s go with our scenario!
Scenario
We want to move forward from Web Test Runner, making our app more modern using Vitest for testing. But we have some challenges in the project because we already have a few existing tests (like in other real projects) and if we’re moving to a modern way of testing, it is a good moment to also remove Jasmine? Why or why not?
So, let’s break down what we will do in the project:
- We are going to remove Jasmine, Web Test Runner and Karma (yes, the project will still have Karma in the packages, for old references with Jasmine).
- Install and configure Vitest.
- Run our tests (check if everything is green).
- Replace Jasmine test with a modern alternative (it’s a surprise).
Let’s go!
Set Up the Project
First, clone the existing project by running the following code in your terminal:
git clone https://gitlab.com/danywalls/testing-kendo-store.git
Cloning into 'testing-kendo-store'...
remote: Enumerating objects: 112, done.
remote: Counting objects: 100% (112/112), done.
remote: Compressing objects: 100% (67/67), done.
remote: Total 112 (delta 52), reused 99 (delta 39), pack-reused 0 (from 0)
Receiving objects: 100% (112/112), 294.87 KiB | 1.85 MiB/s, done.
Resolving deltas: 100% (52/52), done.
Next, create a new branch from master, with the name move-to-vitest. In this branch, we are going to make our changes to move to Vitest.
cd testing-kendo-store
git checkout -b move-to-vitest
Switched to a new branch 'move-to-vitest'
Finally, install all dependencies and run the test to be sure everything works.
npm install
npm run test
Perfect!! The test worked, but it currently uses the Test Runner and Jasmine. We’re going to switch things up and swap those out for Vitest!
Removing Karma, Jasmine and Web Test Runner from Angular
First, in the terminal we run the following commands, to remove all Karma and Jasmine stuff and test-runner.
npm uninstall karma karma-chrome-launcher karma-coverage karma-jasmine karma-jasmine-html-reporter @types/jasmine jasmine-core

npm uninstall  @web/test-runner
OK, now it’s time to move to Vitest!
Moving to Vitest
Vitest is not natively supported by Angular, but thanks to the great work of the @analogjs team, we can bring Vitest easily into any Angular project.
npm install @analogjs/platform --save-dev
Also, they provide great schematics to configure Vitest easily, by running the following command:
ng generate @analogjs/platform:setup-vitest
Learn more about Analog.js.
But what does platform:setup do for us?
CREATE src/test-setup.ts (327 bytes)
CREATE vite.config.mts (510 bytes)
UPDATE package.json (1070 bytes)
UPDATE tsconfig.spec.json (286 bytes)
UPDATE angular.json (2365 bytes)
It creates the test-setup.ts file to configure to testBed:
import '@analogjs/vitest-angular/setup-zone';

import {
  BrowserDynamicTestingModule,
  platformBrowserDynamicTesting,
} from '@angular/platform-browser-dynamic/testing';
import { getTestBed } from '@angular/core/testing';

getTestBed().initTestEnvironment(
  BrowserDynamicTestingModule,
  platformBrowserDynamicTesting()
);
Create the vite.config.mts to configure the jsdom, vitest plugin for Angular and Vitest configuration.
/// <reference types="vitest" />

import angular from '@analogjs/vite-plugin-angular';

import { defineConfig } from 'vite';

// https://vitejs.dev/config/
export default defineConfig(({ mode }) => {
  return {
    plugins: [
      angular(),

    ],
    test: {
      globals: true,
      environment: 'jsdom',
      setupFiles: ['src/test-setup.ts'],
      include: ['**/*.spec.ts'],
      reporters: ['default'],
    },
    define: {
      'import.meta.vitest': mode !== 'production',
    },
  };
});
And update the angular.json to use the analog:builder
 "test": {
          "builder": "@analogjs/vitest-angular:test"
        }
      }
OK, everything looks ready so let’s run our test! 🤞
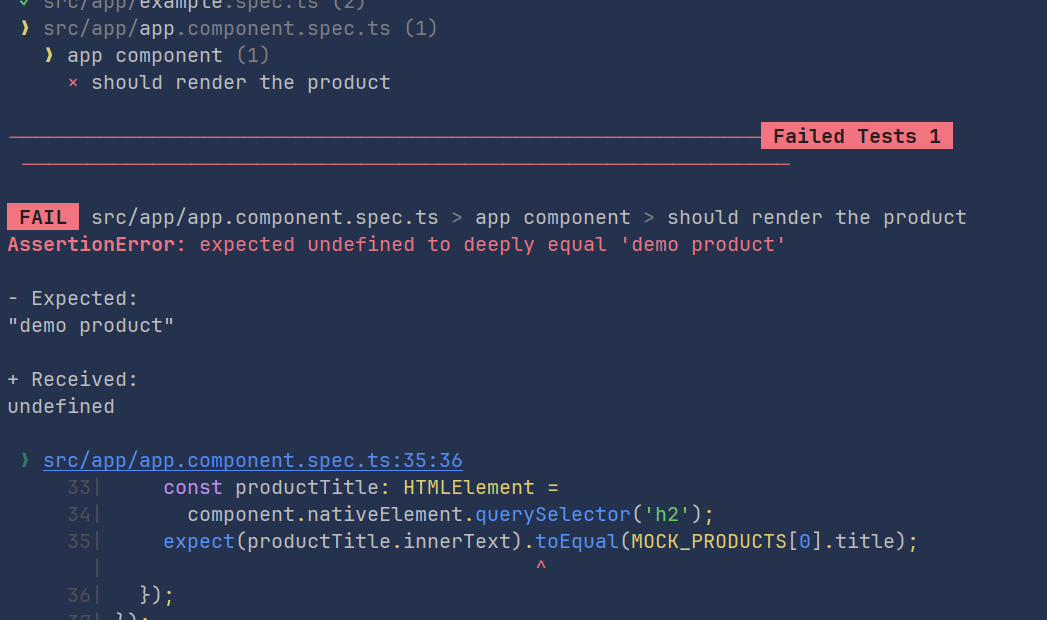
Tada!!! Oops!! 🙃 Two passes but one fail. :’( If we read the message, the failed test is app.component.spec.ts.
Let’s take a look into the app.component.spec.ts:
import {
  ComponentFixture,
  TestBed
} from "@angular/core/testing";
import {AppComponent} from "./app.component";
import { ProductsService} from "./services/products.service";
import {of} from "rxjs";
import {MOCK_PRODUCTS} from "./tests/mock";

export class MockProductService {
  public products$ = of(MOCK_PRODUCTS)
}

describe('app component', () => {
  let component: ComponentFixture<AppComponent>;

  beforeEach(() => {
    TestBed.configureTestingModule({
      providers: [
        AppComponent,
        {
          provide: ProductsService,
          useClass: MockProductService,
        },
      ],
    }).compileComponents();

    component = TestBed.createComponent<AppComponent>(AppComponent);
  });

  it('should render the product', () => {
    component.detectChanges();
    const productTitle: HTMLElement =
      component.nativeElement.querySelector('h2');
    expect(productTitle.innerText).toEqual(MOCK_PRODUCTS[0].title);
  });
});
Mmmm… this test relay in ComponentFixture , TestBed.configureTestingModule and works with lifecycle detectChanges() and query elements in the DOM. I think if we are using modern Vitest, why not move to a modern way to test in the browser? So let’s move to Angular Testing Library.
Moving to Angular Testing Library
Before we start, what is Angular Testing Library? It is a complete testing utility to help us write better and easier tests, simplify UI testing, and save time by taking care of implementation details, writing maintainable tests. It works for React, Vue, Angular, Svelte and many frameworks. If you want a post fully focused on Testing Library, leave a comment 👍, and I promise to write about it soon.
OK, let’s get back to work. We did a great job moving from Web Test Runner to Vitest so it’s time to test the UI using Angular Testing Library.
Angular Testing Library is a wrapper of Testing Library focus in Angular.
Open your terminal to run the schematics ng add @testing-library/angular, it will install and configure the testing library in our project. During the install, it will recommend installing jest-dom and user-event; answer no.
ng add @testing-library/angular
Perfect! We are ready to move to Testing Library. It is easier than TestBed configuration because it provides two amazing functions, render and screen.
The render function helps us to configure our component to render in the DOM and provide all dependencies and screen simplifies how we query elements in the DOM, providing a huge set of methods like getById, getByText and more.
To refactor our test to the Testing Library, first remove the beforeEach method because the render will initialize the component in each test.
Finally, using the render function, we provide the AppComponent and its dependencies, similar to the configureTestingModule.
  await render(AppComponent, {
      providers: [{provide: ProductsService, useClass: MockProductService}],
    })
And finally, using screen.getByText() we query the same values as the test and expect the productTitle to exist using toBeDefined.
   const productTitle = screen.getByText(MOCK_PRODUCTS[0].title);
    expect(productTitle).toBeDefined()
The final code looks like:
import {AppComponent} from "./app.component";
import {ProductsService} from "./services/products.service";
import {of} from "rxjs";
import {MOCK_PRODUCTS} from "./tests/mock";
import {render, screen} from "@testing-library/angular";
import {expect} from "vitest";

export class MockProductService {
  public products$ = of(MOCK_PRODUCTS)
}

describe('app component', () => {

  it('should render the product', async () => {

    await render(AppComponent, {
      providers: [{provide: ProductsService, useClass: MockProductService}],
    })

    const productTitle = screen.getByText(MOCK_PRODUCTS[0].title);
    expect(productTitle).toBeDefined()
  })
});
If VS Code complains about it and
describe, please open tsconfig.json, add"types": ["vitest/globals"]in the compilerOptions.
OK, save changes and run the test again!
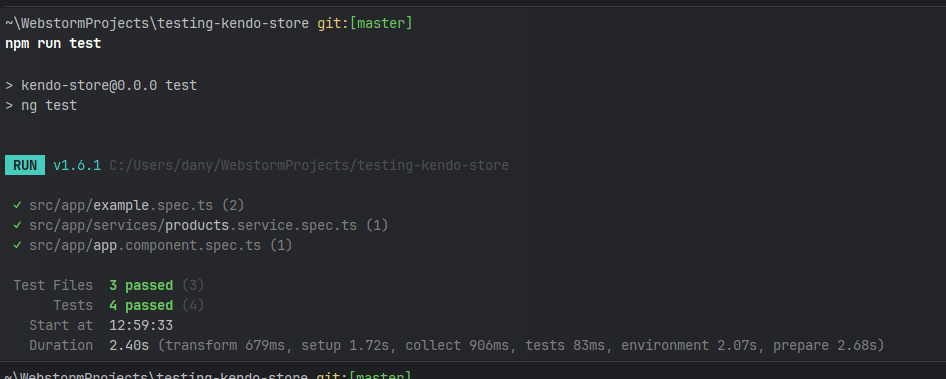
Perfect! We have all tests in green using Vitest and Angular Testing Library!!!
For VS Code users, I recommend this extension for Vitest: https://marketplace.visualstudio.com/items?itemName=vitest.explorer.
Recap
We learned how move forward to a modern way to testing in Angular with Vitest and Testing Library. Thanks to Vitest, we can speed up our test in Angular with a very easy configuration. And combined with the power of Testing Library we can create robust UI tests without pain.
Now we don’t have any excuse not to use Vitest in our existing or new projects.
Happy testing!
Source Code:

Dany Paredes
Dany Paredes is a Google Developer Expert on Angular and Progress Champion. He loves sharing content and writing articles about Angular, TypeScript and testing on his blog and on Twitter (@danywalls).
Related Posts
Comments
All articles
Topics
Web MobileMobile
Desktop
Design
Productivity
People
