Routing in Next.js

Summarize with AI:
Routing is an important concept in web applications, and in this post we will go through the different ways to implement page routing in a Next.js application.
Next.js, also known as the React framework for production, introduces better and more efficient ways of building React applications, ranging from its server-side rendering feature to its built-in client-side routing support with optimized prefetching and so on. Next.js adopts a file-based approach to routing, which results in less code and less work. In this article, we will build a simple demo application to understand how routing works in Next.js.
This article assumes you have a basic understanding of React.
File-Based Routing
In traditional React applications, routing involves integrating with external routing libraries, such as React Router or TanStack’s React Location, and so on. This may be fine for small to mid-level applications, but the routing configurations can get complex as the application grows and multiple pages get added.
On the other hand, Next.js defines routes and paths using folders and files. In Next.js, we create and export React component files in a special folder called pages and let Next.js work out the routes based on the file name and folder structure.
Routing in Next.js can be compared to how we started with multiple-page routing in web development. It was a simple concept where we created HTML files, and the names of those files defined the path and how we could access the pages in the application.
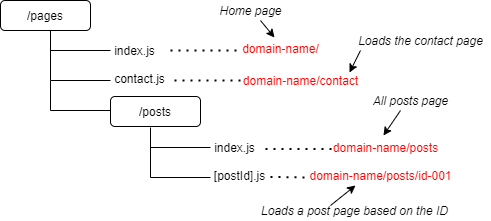
The image below shows an example of the routing architecture in Next.js.

From the image above, we can see how the routes for pages are set up in Next.js. Every page in Next.js is a React component exported from a file in the pages directory, and every file in the pages directory is treated as a route
based on its file name. The index.js file in each directory is the root entry for that directory. If, for example, our domain name is mywebsite.com, the /pages/index.js file will map to the homepage mywebsite.com while /pages/posts/index.js will be associated with mywebsite.com/posts.
Project Setup
Run this command in your terminal:
npx create-next-app routing-demo
After that, run the following command to change into the newly created directory and start up the development server:
cd routing-demo
npm run dev
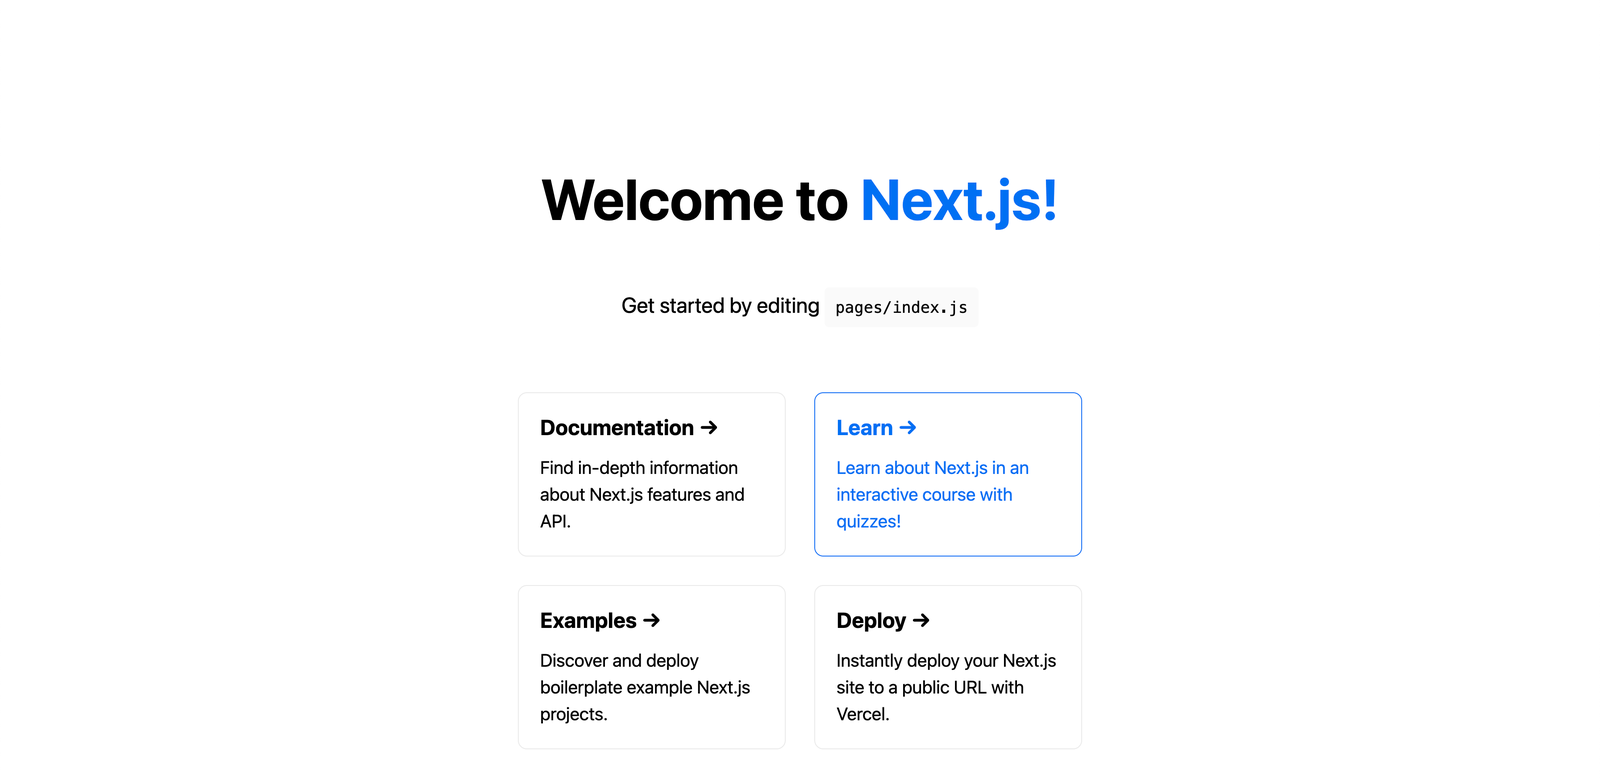
You should see a page similar to the one below.

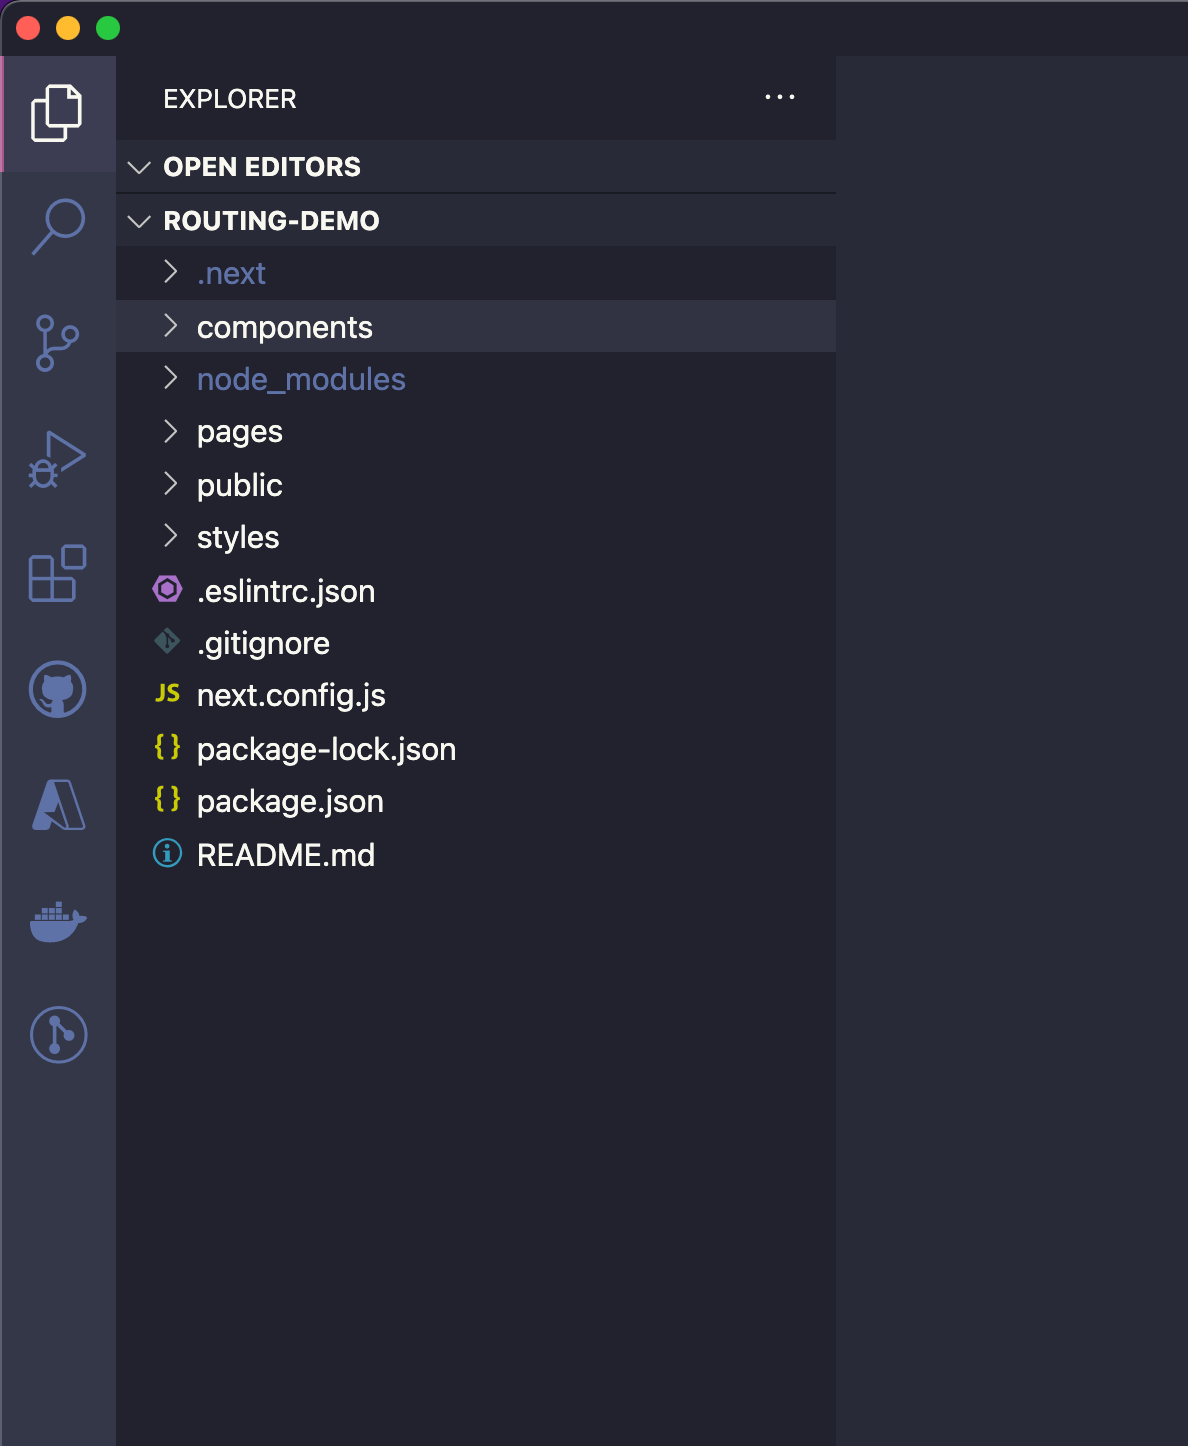
Throughout this tutorial, we will mainly deal with three folders: the pages directory, which will store our page components; the styles directory, which will
hold our styles; and a folder called components, which we are yet to create. In the root level of your application, create a folder called components. This folder will hold the components we will use in this
application.
Your folder structure should look like this:

Now replace the code in your index.js file with the following:
import styles from '../styles/Home.module.css';
export default function Home() {
  return (
    <div className={styles.container}>
      <h1>Home Page</h1>
      <p>This is the home page</p>
    </div>
  );
}
In the code above, we removed the code in the index.js file and updated the file with different content. This index.js file will be associated with the “/” route because it is the root of the directory.
With that, we’ve completed the creation of our first page.
Static Routes
Now we’ll add a static route to our site. We can do this by creating a file in the /pages directory. Create a file called about.js in the pages directory and add the following to it:
import styles from '../styles/Home.module.css';
export default function About() {
  return (
    <div className={styles.container}>
      <h1>About Us</h1>
      <p>This is the About page</p>
    </div>
  );
}
We created an About component that returns static data. This about.js file will be associated with the /about route. Now you can save the changes and navigate to http://localhost:3000/about to view the page.

Nested Routes
Nested routes can be created in the pages directory using a nested folder structure. To create a nested route in our application, let’s create a posts folder in the pages directory and also create an index.js file in the posts folder. After that, add the following to the index.js file:
import styles from '../../styles/Home.module.css';
export default function Index() {
  return (
   <div className={styles.container}>
      <h1>All Posts</h1>
      <p>This page contains the list of posts in this application</p>
   </div>
  );
}
The index.js file we just created in the posts directory is the root entry for that directory, so it will be associated with the /posts route. We can add more nested pages by adding more files to the posts directory. For example, if we have a file named my-first-post.js, it will map to the /posts/my-first-post route.
Navigation Using the Link Component
We’ve added several sample pages for our application; however, the only way to navigate between them is to manually change the URL in the browser, which isn’t ideal. In the right sense, we want to navigate using links or programmatically when
an action is performed. We use the <a> tag to link between pages; Next.js does not condemn this practice, but it gives us a Link component from the next/link API to carry out client-side navigation in our
applications.
Now, let’s create a Header component with links to navigate between the different pages.
Create a file called Header.js in the components folder and add the following to it:
import Link from 'next/link';
import styles from '../styles/Home.module.css';
export default function Header() {
  return (
    <div className={styles.header}>
      <ul>
        <li>
          <Link href="/">Home</Link>
        </li>
        <li>
          <Link href="/about">About</Link>
        </li>
        <li>
          <Link href="/posts">Posts</Link>
        </li>
      </ul>
    </div>
  );
}
As seen in the code above, we start by importing the Link component. Then we created a Header component containing an unordered list of items that links to different pages of the application. The Link component has
an href prop that takes a string with the path we want to navigate. To learn more about the Link component, click here.
Next.js also provides an alternative way of setting the value of the href prop for the Link component. Instead of taking a string as a value, which can become quite lengthy, it can take an object instead. The syntax is shown
in the example below:
<Link href={{
    pathname: "/about"
    }}>About</Link>
Now, because the header will appear on every page of our application, we need to place the Header component at the top level of our app to prevent repetition. Update your _app.js file with the following:
import Header from '../components/Header';
import '../styles/globals.css';
function MyApp({ Component, pageProps }) {
  return (
    <>
      <Header />
      <Component {...pageProps} />
    </>
  );
}
export default MyApp;
Add the following to your /styles/Home.module.css file:
.container {
  padding: 0 2rem;
}
.header > ul {
  display: flex;
  list-style: none;
  justify-content: center;
}
.header > ul > li {
  margin: 1rem 2rem;
}
.header > ul > li > a {
  font-size: 1.5rem;
}
.posts {
  list-style: none;
  padding: 0;
  color: #0000ff;
}
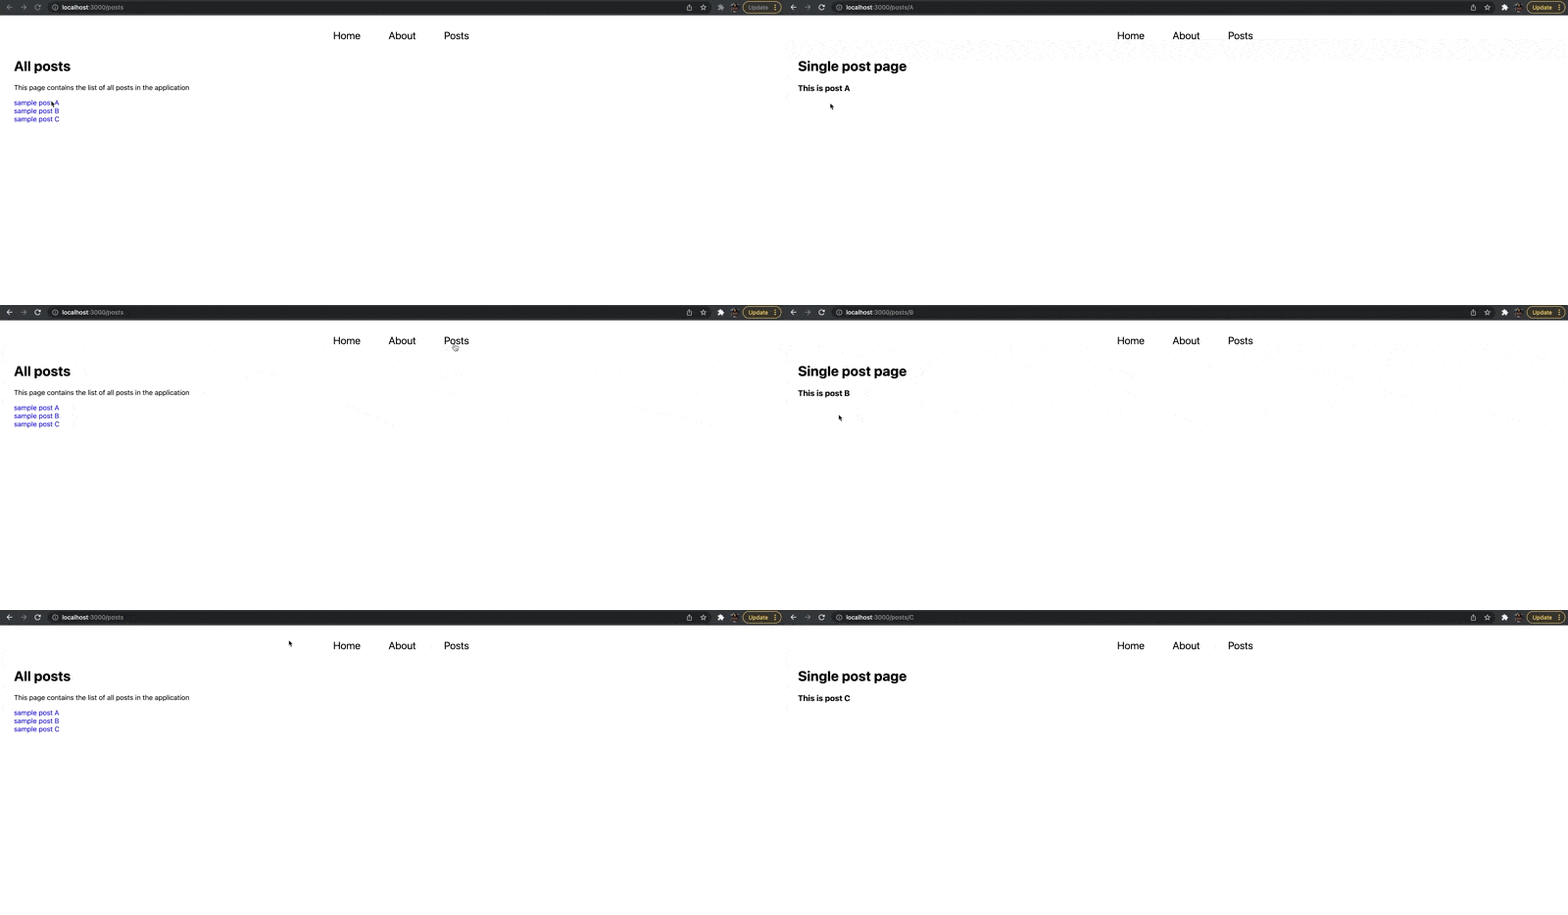
We can navigate through the different pages in our application, as seen below.

Dynamic Routes
We can define dynamic routes in Next.js using square brackets, [id].js. Let’s assume we have a posts page that displays all the posts in our case. When someone clicks on a post, a single post page is displayed that routes to /posts/{postId}.
In that case, /posts/1 should render the first post.
In Next.js, creating a dynamic route requires creating a file whose name is enclosed in square brackets [filename].js. Create a new file in the /pages directory named [postId].js and add the following to it:
import styles from '../../styles/Home.module.css';
export default function Post() {
  return (
    <div className={styles.container}>
      <h1>Single post page</h1>
    </div>
  );
}
In the code, we’ve created a simple dynamic route. Now, we can use the Link component to navigate to a dynamic route or page. Let’s add some posts to the posts page, which, when clicked, navigates to a single post page.
Update the /pages/posts/index.js file with the following:
import Link from 'next/link';
import styles from '../../styles/Home.module.css';
export default function Index() {
  return (
    <div className={styles.container}>
      <h1>All posts</h1>
      <p>This page contains the list of all posts in the application</p>
      <ul className={styles.posts}>
        <li>
          <Link href="/posts/A">sample post A</Link>
        </li>
        <li>
          <Link href="/posts/B">sample post B</Link>
        </li>
        <li>
          <Link href="/posts/C">sample post C</Link>
        </li>
      </ul>
    </div>
  );
}
We updated the file by adding an unordered list with links that point to the different posts using the Link component.
Now, to access the value that the user entered in the URL, Next.js provides a special hook named useRouter. This gives us access to the router object whose query property can be used to access the dynamic data. Update your [postId].js file with the following:
import { useRouter } from 'next/router';
import styles from '../../styles/Home.module.css';
export default function Post() {
  const router = useRouter();
  const data = router.query;
  console.log(data);
  return (
    <div className={styles.container}>
      <h1>Single post page</h1>
      <h3>This is post {data.postId}</h3>
    </div>
  );
}
First, we imported the useRouter hook, and then we created an instance of useRouter to get the router object. The data constant then points at the query property of the router object, whose value is an object containing a key-value
pair of the filename enclosed in square brackets and the dynamic data in the path. Finally, we display the dynamic data. Learn more about the useRouter hook here.

In Next.js, we can also nest dynamic routes. For example, a use case is having a dynamic post page with a dynamic comments sub-path that loads different comments under the post page. The process of creating a dynamic nested route in Next JS is similar
to the previously stated way of creating static nested routes, except that the folder names for dynamic routes are enclosed in square brackets (e.g., /pages/posts/[postId]/[commentId]).
Catch-All Route
There may be cases where we have different URL formats we want to support, and maybe we want to support them with the same component. So no matter what the path is and the number of segments it has, we always want to load the same component. Next.js provides an extension or variation for working with dynamic path segment data using the catch-all route.
The catch-all is an extension to the dynamic route, but instead of just using square brackets and any identifier of our choice, we can add a special JavaScript’s spread-like notation plus the identifier in the square brackets, e.g., […slug].js.
Note the slug identifier can be any other identifier, e.g., […param].js, etc.
The step to extract the parameters from the path is similar to how it is done with the dynamic paths, except that the query object will have a key-value pair with the file identifier as the key and an array of strings containing all the dynamic path segment data as value.
An illustration of how the catch all route works is that pages/authors/[…slug].js will match /authors/authorA, and also match /authors/authorA/authorB, and so on. The router query object after extraction on
both occasions will have the objects { "slug": ["authorA"] } and { "slug": ["authorA", "authorB"] }, respectively. To learn more about the catch-all route, click here.
Imperative Navigation
Although the Link component from next/link can handle most of our routing requirements, sometimes we need to navigate programmatically maybe because an action was carried out (e.g., a button was clicked). Next.js provides a way
of handling client-side navigation using the useRouter hook instead of the Link component. To show how imperative navigation works, let’s add a simple button to our individual post page, which navigates to the list
of posts page.
Update your [postId].js file to match this:
import { useRouter } from 'next/router';
import styles from '../../styles/Home.module.css';
export default function Post() {
  const router = useRouter();
  const data = router.query;
  console.log(data);
  const handleClick = () => {
    router.push('/posts');
  };
  return (
    <div className={styles.container}>
      <h1>Single post page</h1>
      <h3>This is post {data.postId}</h3>
      <button onClick={handleClick}>See all posts</button>
    </div>
  );
}
We updated the code by adding a function called handleClick, responsible for the imperative navigation. In the handleClick function, we called the push method of the router object to navigate to a different page.
The handleClick function is then added to the onClick listener on the button created.

Shallow Routing
In cases where the rendering of an application involves fetching data from some external sources, shallow routing involves changing the URL without running data-fetching methods again. An updated pathname and the query will be received via the router
object (added by useRouter or withRouter) without losing state. To enable shallow routing, you need to set the shallow option in the push method of the router object to true.
router.push('/some-other-route', undefined, { shallow: true });
Conclusion
Routing is important in web applications. In this post, we’ve seen different ways and how easy it is to implement page routing in a Next.js application without installing libraries, such as react-router. See this documentation to learn more about routing in Next.js.


