Mastering .NET MAUI Shell—Part 3

Summarize with AI:
Learn everything you need to master the use of Shell in your .NET MAUI applications. In the final series post: Navigate between pages and create SearchHandlers to add search functionality to your pages.
This is the final part of the Mastering .NET MAUI Shell series, where you’ve learned what’s necessary to quickly create cross-platform applications using Shell. If you’ve followed the series, you already know how to create your own Shell, how to add new pages to the hierarchy through the Flyout and tabs, as well as how to customize colors. In this post, you’ll learn how to navigate between pages and create SearchHandlers to add search functionality to your pages. Let’s begin!
Navigation in .NET MAUI Shell
In a previous article, we saw how to create a hierarchical structure in a Shell file, which creates an automatic navigation system. However, what if we want to navigate from code to other pages? This is what we’ll see next.
Assigning Routes to Shell Elements
The first thing you should know is that the Shell navigation system allows you to assign the Route property to each Shell element, with the purpose of identifying them, as in the following example:
<FlyoutItem
    Title="Productivity Tools"
    Icon="dotnet_bot.png"
    Route="ProductivityTools">
    <Tab
        Title="Text Tools"
        Icon="dotnet_bot.png"
        Route="TextTools">
        <ShellContent
            Title="Word Counter"
            ContentTemplate="{DataTemplate UtilPages:WordCounter}"
            Icon="dotnet_bot.png"
            Route="WordCounter" />
        <ShellContent
            Title="Color Generator"
            ContentTemplate="{DataTemplate UtilPages:RandomColor}"
            Icon="dotnet_bot.png"
            Route="ColorGenerator" />
    </Tab>
</FlyoutItem>
The complete route of each element will be concatenated with the name of the higher hierarchical element. That is, the route for WordCounter in the previous example will be:
//ProductivityTools/TextTools/WordCounter
This way, if two ShellContent elements have the same name, the route won’t be the same, which avoids navigation conflicts. Now that you know how to assign routes to Shell elements, let’s see how to navigate from code to them.
Adding MenuItems to the Flyout
Something I haven’t told you before now is that it’s possible to add MenuItem elements to a Flyout. These MenuItems can be used to perform operations that are not associated with navigation to another page.
Examples of this type could be if you want the user to log out, or send the user to a webpage for additional information.
In my case, I’m going to use a MenuItem to perform different navigation tests. The code you should add to the Shell should look like the following:
<Shell...>
...
<Shell.MenuItemTemplate>
    <DataTemplate>
        <Grid
            ColumnDefinitions=".2*, .8*"
            HeightRequest="75"
            RowSpacing="0">
            <Rectangle
                x:Name="background"
                Grid.ColumnSpan="2"
                Fill="Black"
                Opacity=".5" />
            <Image
                HeightRequest="30"
                Source="{Binding FlyoutIcon}"
                VerticalOptions="Center" />
            <Label
                Grid.Column="1"
                Margin="20,0,0,0"
                FontSize="20"
                Text="{Binding Title}"
                TextColor="White"
                VerticalOptions="Center" />
            <VisualStateManager.VisualStateGroups>
                <VisualStateGroupList>
                    <VisualStateGroup x:Name="CommonStates">
                        <VisualState x:Name="Normal">
                            <VisualState.Setters>
                                <Setter TargetName="background" Property="Rectangle.Fill" Value="Black" />
                            </VisualState.Setters>
                        </VisualState>
                        <VisualState x:Name="Selected">
                            <VisualState.Setters>
                                <Setter TargetName="background" Property="Rectangle.Fill" Value="DarkRed" />
                            </VisualState.Setters>
                        </VisualState>
                    </VisualStateGroup>
                </VisualStateGroupList>
            </VisualStateManager.VisualStateGroups>
        </Grid>
    </DataTemplate>
</Shell.MenuItemTemplate>
...
<FlyoutItem...>
<FlyoutItem...>

<MenuItem Clicked="Navigation_Clicked" Text="Navigate" IconImageSource="dotnet_bot.png"/>

</Shell>
In the code above, I’ve added a MenuItem with text, a reference for the Clicked event, and an icon. To make the appearance the same as the menu elements, you need to apply the same style of Shell.ItemTemplate to Shell.MenuItemTemplate.
Navigating Between Shell Elements Through Code
Once we have the XAML code ready, the next step is to go to the code-behind of MyShell.xaml (although you can also do this from a ViewModel), specifically to the Navigation_Clicked event handler. To carry out navigation, we must use the GoToAsync method that is part of the global Shell instance, which we can access as follows:
private async void Navigation_Clicked(object sender, EventArgs e)
{
    await Shell.Current.GoToAsync("Route");
}
In the code above, you should change the word Route to the route you want to navigate to. In a previous section, I had mentioned that the final route of a ContentPage is determined by the names of the ancestor pages, so we could navigate to WordCounter using the complete route I showed you earlier:
await Shell.Current.GoToAsync("//ProductivityTools/TextTools/WordCounter");
This way, when pressing on the MenuItem we have added, navigation to the Word Counter tool will be carried out.
Now, you might wonder, what happens if we haven’t assigned a name to one of the hierarchical elements superior to ShellContent. In this case, the framework will assign a generic name to the Shell element, so we couldn’t navigate with a complete route as we have done previously.
The alternative is to directly use the route of the ShellContent, using three slashes (///), as follows:
await Shell.Current.GoToAsync("///WordCounter");
This way, we can now perform correct navigation. In this case, we must have unique routes for each ShellContent to avoid navigation problems.
Fifth Utility: Dictionary
So far, we have created single-page tools. Let’s create a new dictionary-type example, which will consist of a first page where the user can enter a word to search for and a second page for the search results.
The first page we’ll add will be called Dictionary.xaml and will be composed of the following elements:
- A
VerticalStackLayoutto group the controls - A
Labelto display text to the user - A
RadBorderto improve the visual aesthetics of aRadEntry - A
RadEntryfor the user to enter the word to search for
The RadBorder control is very useful for grouping elements and at the same time, applying a border to give a different visual appearance. The XAML code is as follows:
<VerticalStackLayout
    HorizontalOptions="Center"
    Spacing="15"
    VerticalOptions="Center">
    <Label
        FontSize="25"
        HorizontalOptions="Center"
        Text="Search in dictionary:"
        VerticalOptions="Center" />
    <telerik:RadBorder
        AutomationId="border"
        BorderColor="#2679FF"
        BorderThickness="3"
        CornerRadius="5">
        <telerik:RadEntry
            x:Name="searchTerm"
            Completed="RadEntry_Completed"
            FontSize="14"
            Placeholder="Telerik"
            PlaceholderColor="#99000000"
            WidthRequest="250" />
    </telerik:RadBorder>
    <Button Clicked="Search_Clicked" Text="Search!" />
</VerticalStackLayout>
The second page will be called DictionaryDefinition.xaml and will be composed of the following controls:
- A
Gridas the main container, divided into two rows—the first with 20% space and the second with the remaining 80%. - A
VerticalStackLayoutfor the header, which in turn will contain twoLabelcontrols to display the word and its phonetic expression. - A second
VerticalStackLayoutthat will contain a series ofLabelcontrols to show the type of word, definitions, synonyms and antonyms.
The XAML code for the page is as follows:
<Grid RowDefinitions=".2*,.8*">
    <Grid Background="#4a4a4a">
        <VerticalStackLayout Spacing="15" VerticalOptions="Center">
            <Label
                FontSize="25"
                HorizontalOptions="Center"
                Text="{Binding Word}"
                TextColor="White"
                VerticalOptions="Center" />
            <Label
                FontSize="20"
                HorizontalOptions="Center"
                Text="{Binding Phonetic}"
                TextColor="#9c9a9a"
                VerticalOptions="Center" />
        </VerticalStackLayout>

    </Grid>
    <ScrollView Grid.Row="1">
        <VerticalStackLayout Margin="20">
            <Label
                FontAttributes="Bold"
                FontSize="16"
                Text="Noun"
                TextColor="#363535" />
            <Label Text="{Binding Definitions}" />
            <Label
                Margin="0,20,0,0"
                FontAttributes="Bold"
                FontSize="16"
                Text="Synonyms"
                TextColor="#363535" />
            <Label Text="{Binding Synonyms}" />
            <Label
                Margin="0,20,0,0"
                FontAttributes="Bold"
                FontSize="16"
                Text="Antonyms"
                TextColor="#363535" />
            <Label Text="{Binding Antonyms}" />
        </VerticalStackLayout>
    </ScrollView>
</Grid>
Once we have the two XAML pages ready, don’t forget to add the main page that will belong to the Shell navigation to the hierarchy. For this example, I have added the Dictionary.xaml page to the TextTools tab:
<Tab
    Title="Text Tools"
    Icon="dotnet_bot.png"
    Route="TextTools">
   ...
   <ShellContent
       Title="Dictionary"
       ContentTemplate="{DataTemplate UtilPages:Dictionary}"
       Icon="dotnet_bot.png" />
</Tab>
With this, it is now possible to navigate to the new page in the graphical interface, as shown below:
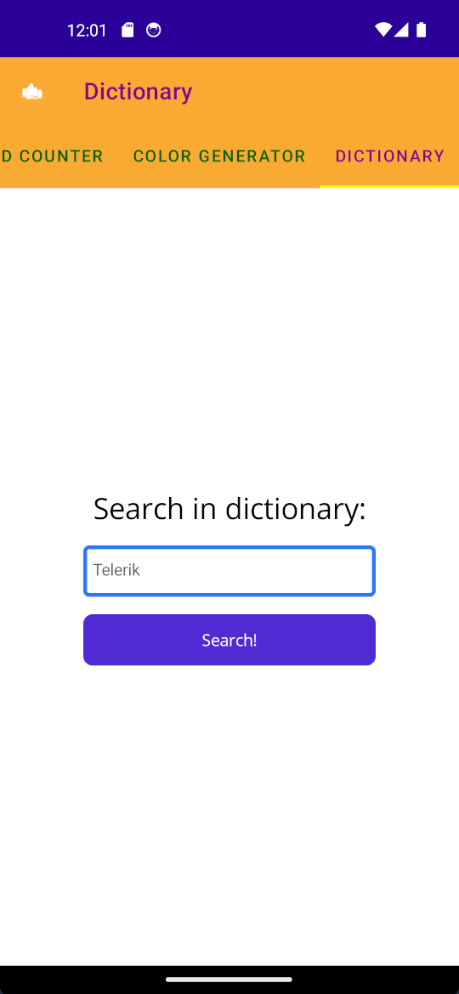
Now, let’s see how to navigate to the results page.
Navigating to the Word Definition Page
Once we can navigate in the interface to the Dictionary tool, the next step is to be able to navigate to the DictionaryDefinition.xaml page that is not part of the Shell. To achieve this, we must register the pages that are not part of the initial Shell hierarchy, but that we do want to use for navigation actions. We will do this through the RegisterRoute method.
The registration process must be done before the Shell is displayed to the user, so an ideal place is in App.xaml.cs as follows:
public partial class App : Application
{
    public App()
    {
        InitializeComponent();

        RegisterRoutes();

        MainPage = new MyShell();
    }

    private void RegisterRoutes()
    {
        Routing.RegisterRoute("dictionarydefinition", typeof(DictionaryDefinition));
    }
}
In the code above, you can see that RegisterRoute receives an identifier for the route with which we will reach the page (it can be any name you want) and the type of the page. Thanks to this code, it will be possible to navigate to the details page.
In our example, we will achieve this by going to the Dictionary.xaml.cs file and creating a method called Search to execute the navigation through the following code:
public partial class Dictionary : ContentPage
{
    public Dictionary()
    {
        InitializeComponent();
    }

    private void RadEntry_Completed(object sender, EventArgs e)
    {
        Search();
    }

    private void Search_Clicked(object sender, EventArgs e)
    {
        Search();
    }

    private async void Search()
    {
        if (!string.IsNullOrEmpty(searchTerm.Text))
        {
            await Shell.Current.GoToAsync($"dictionarydefinition");
        }
    }
}
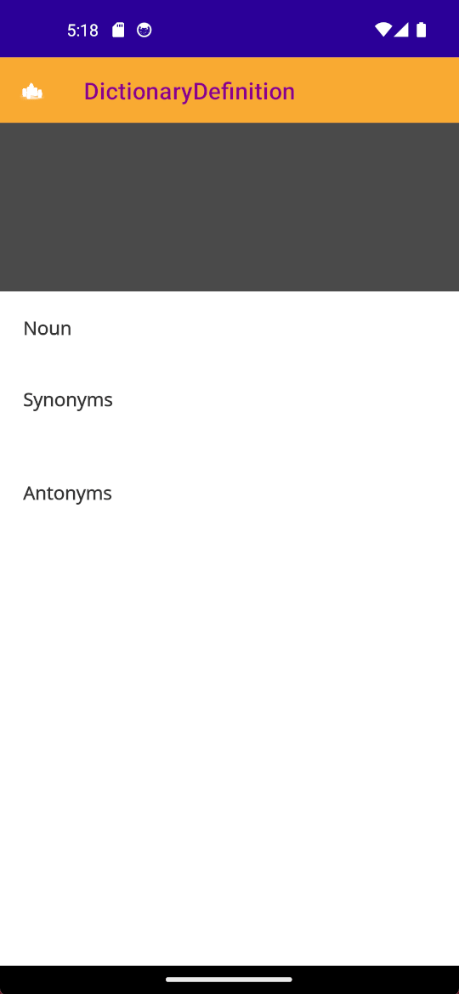
When you run the application, you’ll see that if you enter a word in the search box and press the Search button, you’ll navigate to the details page. The details page is empty at this moment because we need to pass the information of the searched word, which is what we’ll do next.
Passing Information to Detail Pages
A requirement in most mobile applications is to be able to send information from one page to another. Usually, this will happen when you want to pass data from a page that is part of the Shell hierarchy to a details page.
In .NET MAUI, there are several ways to pass information, which we will analyze below.
Sending a Single Piece of Data to the Details Page Using QueryProperty
To continue with our demonstration, we need information to pass between pages. That’s why I’m going to modify the Search method we’ve seen earlier, to query a free service that allows us to obtain the data of a word in a dictionary, as follows:
private async void Search()
{
    if (string.IsNullOrEmpty(searchTerm.Text))
    {
        return;
    }

    using (var client = new HttpClient())
    {
        string url = $"https://api.dictionaryapi.dev/api/v2/entries/en/{searchTerm.Text}";
        try
        {
            var response = await client.GetAsync(url);
            response.EnsureSuccessStatusCode();

            var content = await response.Content.ReadAsStringAsync();
            var definitions = JsonSerializer.Deserialize<List<DictionaryRecord>>(content);

            var firstDefinition = definitions?.FirstOrDefault();
            if (firstDefinition != null)
            {
                var word = firstDefinition.word;
                await Shell.Current.GoToAsync($"dictionarydefinition?word={word}");
            }
        }
        catch (Exception ex)
        {
            Debug.WriteLine($"Error fetching definition: {ex.Message}");
        }
    }
}
You can see that the code above makes a call to the service using HttpClient, performing a deserialization and obtaining the first returned record. Once this first record is obtained, the word property that represents the searched word is obtained and sent as a parameter to the page registered as dictionarydefinition.
On the other hand, the page that will receive the information (in our example DictionaryDefinition.xaml.cs) must be prepared to receive the data we have sent. This is easy to achieve, as it only requires a property where the value will be stored, as well as the addition of the QueryProperty attribute, which receives the name of the destination property, as well as the name of the parameter specified in the query from where the navigation was performed (in our example word). In our example, the code is as follows:
[QueryProperty(nameof(Word), "word")]
public partial class DictionaryDefinition : ContentPage
{
    private string word;

    public string Word
    {
        get => word;
        set
        {
            word = value;
            OnPropertyChanged(nameof(Word));
        }
    }
    public DictionaryDefinition()
	{
		InitializeComponent();
        BindingContext = this;
	}
}
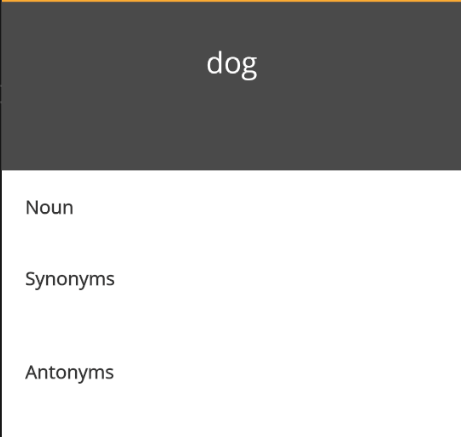
When we run the application again, we’ll see the searched word correctly on the details page:
Passing Objects to the Details Page Using IQueryAttributable
There may be cases where you want to send more than just one piece of data to the details page. In this situation, we should use the IQueryAttributable interface, which requires implementing the ApplyQueryAttributes method that has the following form:
public void ApplyQueryAttributes(IDictionary<string, object> query)
{
    throw new NotImplementedException();
}
You can see that the method receives a dictionary called query, where the key represents the name of the parameter received from the previous page, while the value corresponds to the sent object. For our example, our class would look like this:
public partial class DictionaryDefinition : ContentPage, IQueryAttributable
{
    private string word;
    private string phonetic;
    private string definitions;
    private string synonyms;
    private string antonyms;

    public string Word
    {
        get => word;
        set
        {
            word = value;
            OnPropertyChanged(nameof(Word));
        }
    }

    public string Phonetic
    {
        get => phonetic;
        set
        {
            phonetic = value;
            OnPropertyChanged(nameof(Phonetic));
        }
    }

    public string Definitions
    {
        get => definitions;
        set
        {
            definitions = value;
            OnPropertyChanged(nameof(Definitions));
        }
    }
    public string Synonyms
    {
        get => synonyms;
        set
        {
            synonyms = value;
            OnPropertyChanged(nameof(Synonyms));
        }
    }
    public string Antonyms
    {
        get => antonyms;
        set
        {
            antonyms = value;
            OnPropertyChanged(nameof(Antonyms));
        }
    }

    public DictionaryDefinition()
    {
        InitializeComponent();
        BindingContext = this;
    }

    public void ApplyQueryAttributes(IDictionary<string, object> query)
    {
        var dictionaryRecord = query["definition"] as DictionaryRecord;
        Word = dictionaryRecord.word;
        Phonetic = dictionaryRecord.phonetics.FirstOrDefault().text;

        Definitions = string.Join("\n\n", dictionaryRecord.meanings.FirstOrDefault().definitions.Select(d => d.definition));

        Synonyms = string.Join("\n\n", dictionaryRecord.meanings.FirstOrDefault().synonyms);

        Antonyms = string.Join("\n\n", dictionaryRecord.meanings.FirstOrDefault().antonyms);
    }
}
On the other hand, we’ll replace the Search method in the Dictionary.xaml.cs file as follows:
private async void Search()
{
    if (string.IsNullOrEmpty(searchTerm.Text))
    {
        return;
    }

    using (var client = new HttpClient())
    {
        string url = $"https://api.dictionaryapi.dev/api/v2/entries/en/{searchTerm.Text}";

        try
        {
            var response = await client.GetAsync(url);
            response.EnsureSuccessStatusCode();

            var content = await response.Content.ReadAsStringAsync();
            var definitions = JsonSerializer.Deserialize<List<DictionaryRecord>>(content);

            var firstDefinition = definitions?.FirstOrDefault();
            if (firstDefinition != null)
            {
                var parameters = new Dictionary<string, object>
                {
                    { "definition", firstDefinition }
                };
                await Shell.Current.GoToAsync($"dictionarydefinition", parameters);
            }
        }
        catch (Exception ex)
        {
            Debug.WriteLine($"Error fetching definition: {ex.Message}");
        }
    }
}
In the code above, you can see that we create a variable of type Dictionary called parameters, which has the same signature as the parameter expected by the ApplyQueryAttributes method, and that we have initialized with the key definition and the value of firstDefinition.
Also, in the GoToAsync method we have replaced the parameter in the string with a method parameter. With this, when running the application we will be able to see the information of the searched word:
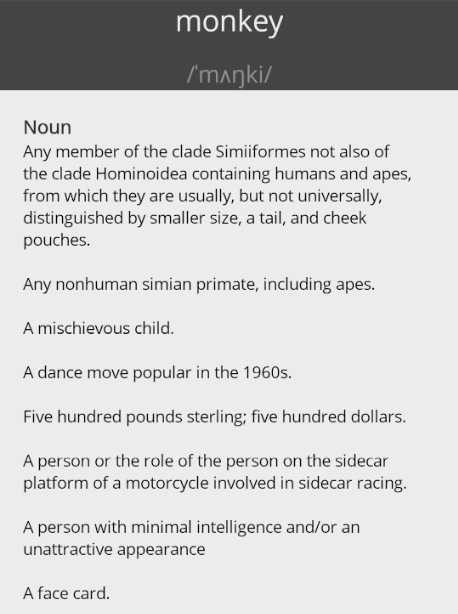
In the image above, you can see the result of searching for a word.
Adding a Search Function with .NET MAUI Shell
.NET MAUI Shell includes a search function that we can add to perform information searches. To enable it, we must create a class that inherits from SearchHandler, as in the following example:
public class DataSearchHandler : SearchHandler
{
    public DataSearchHandler()
    {
        ItemsSource = new List<string>
        {
            "Apple",
            "Banana",
            "Cherry",
            "Date",
            "Grape",
            "Lemon",
            "Mango",
            "Orange",
            "Pineapple",
            "Strawberry",
            "Watermelon"
        };
    }
}
The most important point to highlight is that once we inherit from SearchHandler, we have the ItemsSource property, which will contain the information of the elements we want to include in the search.
Once we have a SearchHandler, we can add it to any page. For example purposes, I have created a new page called SearchPage.xaml with the SearchHandler as content:
<Shell.SearchHandler>
    <search:DataSearchHandler Placeholder="Search Item" ShowsResults="True" />
</Shell.SearchHandler>
After adding this page to the Shell structure, we can see that the search appears on the new page:
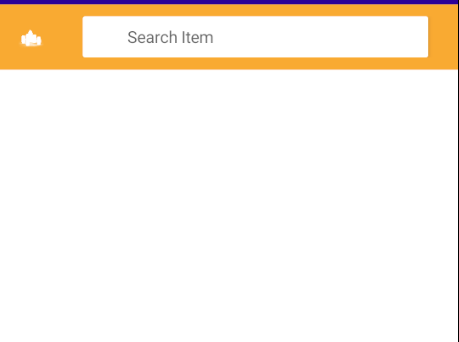
In case we want to process the search information, there are two methods that will be very useful to us, as we see below:
protected override void OnQueryChanged(string oldValue, string newValue)
{
    var items = OriginalList;

    if (string.IsNullOrWhiteSpace(newValue))
    {
        ItemsSource = items;
    }
    else
    {
        ItemsSource = items.Where(fruit => fruit.ToLower().Contains(newValue.ToLower())).ToList();
    }

}

protected override void OnItemSelected(object item)
{
    var fruit = item as string;
    Shell.Current.GoToAsync($"fruitdetails?name={fruit}");
}
The first method called OnQueryChanged will be executed as soon as a change is made in the search term. On the other hand, the OnItemSelected method will allow us to retrieve the selected value and process it according to our needs. In our example, I have put a navigation to a details page, sending the parameter.
Conclusion of the Series
With this, we have reached the end of the Mastering .NET MAUI Shell series. Now you know what .NET MAUI Shell is and how to use it combined with Progress Telerik for .NET MAUI controls to your advantage to build applications more quickly.
If you have not yet tried Telerik UI for .NET MAUI for yourself, it does come with a free trial!

Héctor Pérez
Héctor Pérez is a Microsoft MVP with more than 10 years of experience in software development. He is an independent consultant, working with business and government clients to achieve their goals. Additionally, he is an author of books and an instructor at El Camino Dev and Devs School.

