
How to Create Custom Cross-Form Control Validator in Angular

Summarize with AI:
See step-by-step how to create a custom validator in a reactive Angular form with a login screen that requires a confirmation password to match the original password.
In Angular, you can create a form in two ways:
- Reactive forms
- Template-driven forms
This post will teach you to implement custom cross-control validator in a reactive form. One example of cross-validation could be password-confirm password validation, which we will implement.
Let us start with creating a login form. To do that:
- Inject FormBuilder service using the inject function.
- In the component constructor, create a FormGroup using the FormBuilders group method.
- Add three controls with required validation.
fb  =  inject(FormBuilder);
loginForm:  FormGroup;

constructor() {
  this.loginForm  =  this.fb.group({
    email: [null, [Validators.required]],
    password: [null, [Validators.required]],
    confirmPassword: []
  })
}
On the template, map the loginForm to the HTML Form element and FormControls to the input elements.
<form  (ngSubmit)="login()"  [formGroup]="loginForm"  novalidate>
<input  type="text"  formControlName="email"  placeholder="Enter email"  />
<br/>
<input  type="password"  formControlName="password"  placeholder="Enter Password"/>
<br/>
<input  type="text"  formControlName="confirmPassword"  placeholder="Confirm Password"/>
<br/>
<button>Login</button>
</form>
We call the login() function at the click of the button, and inside that we print the form’s value and status.
login(){
  console.log(this.loginForm.value);
  console.log(this.loginForm.valid);
}
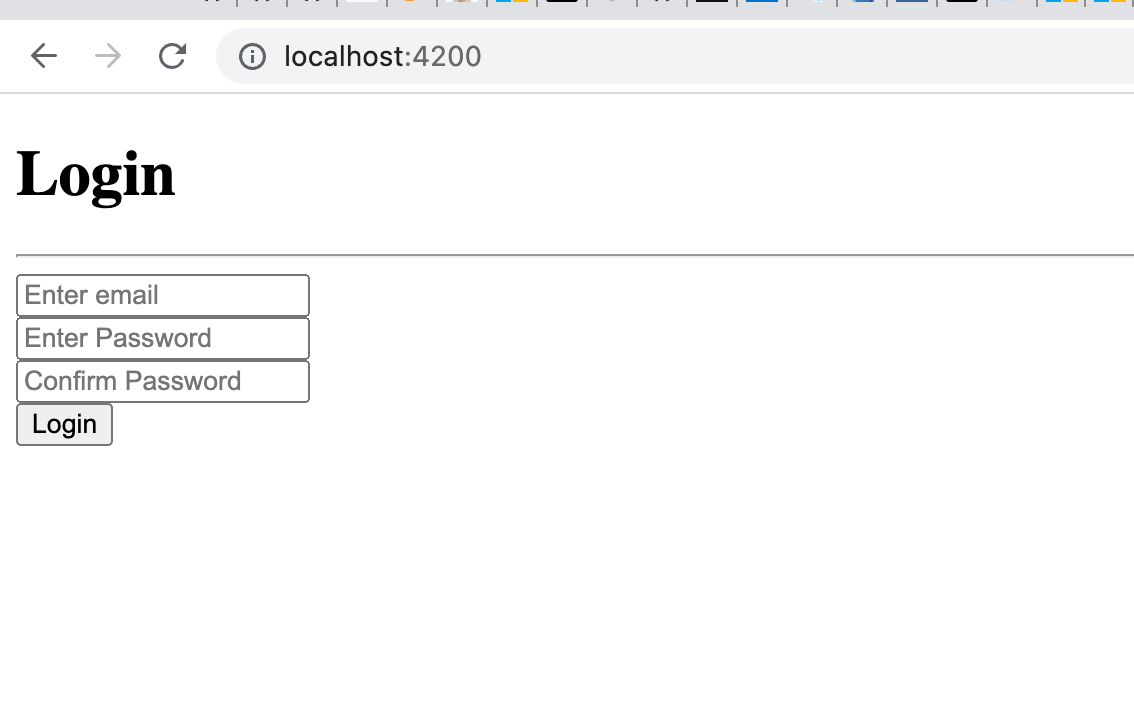
So far, we have created the login form, which should look like the image below.
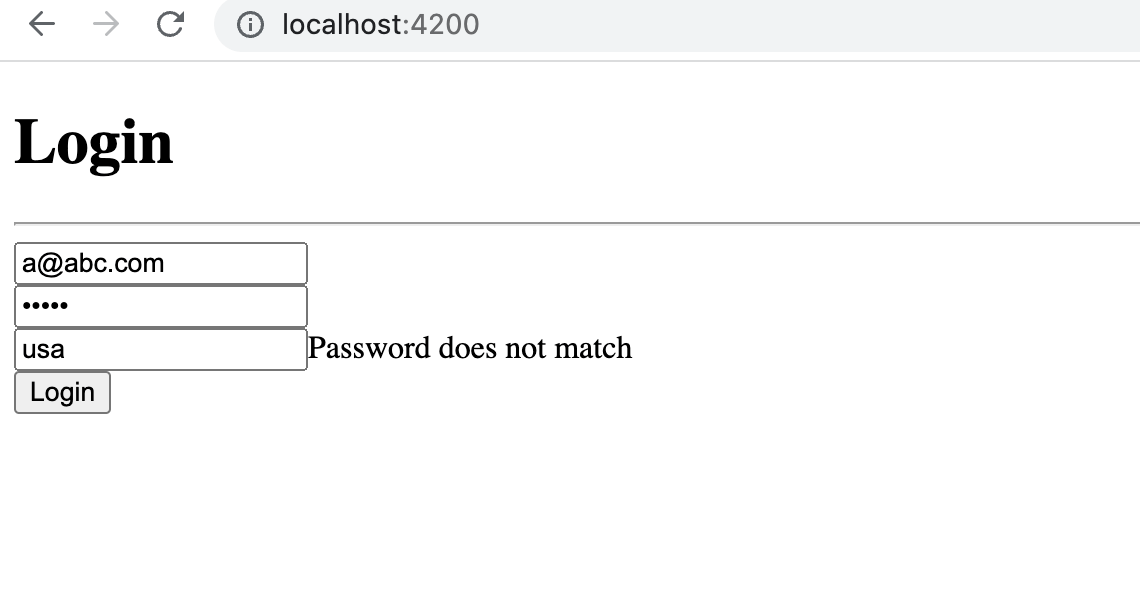
After entering the values, when you click on the Login button, you see that values of the Password and Confirm Password fields are different, but the form’s status is valid.

Add a file to create a custom validator for the Password and Confirm Password fields.
We are going to put the validator function in this file. A custom validator function follows a fixed syntax.
- Its type is ValidatorFn.
- It takes control of type AbstractControl as only one input parameter.
- It returns either ValidatonErrors or null.
import { AbstractControl, ValidationErrors, ValidatorFn } from  "@angular/forms"

export  const  PasswordValidator:  ValidatorFn  = (control:AbstractControl):  ValidationErrors|  null  =>{
  return  null;
}
The type of custom validator function is ValidatorFn, which is defined below.
* @publicApi
*/

export  declare  interface  ValidatorFn {
  (control:  AbstractControl):  ValidationErrors  |  null;
}
Next, in the PasswordValidator function, write the logic for the custom validator.
import { AbstractControl, ValidationErrors, ValidatorFn } from  "@angular/forms"

export  const  PasswordValidator:  ValidatorFn  = (control:AbstractControl):  ValidationErrors|  null  =>{
  const  password  =  control.get('password');
  const  confirmpassword  =  control.get('confirmPassword');
  if(password  &&  confirmpassword  &&  password.value  !=  confirmpassword.value){
    return {
      passwordmatcherror :  true
    }
  }
  return  null;
}
As you see, we have very straightforward logic for the validator.
- Read password and confirmPassword controls.
- Check whether their values are the same or not.
- If values are the same, return null from the function.
- If values are different, return the ValidationErrors.
Now to use the custom validator function PasswordValidator in the loginForm, pass it to the Validators property of AbstractControlOptions.
this.loginForm  =  this.fb.group({
    email: [null, [Validators.required]],
    password: [null, [Validators.required]],
    confirmPassword: []
  },
  {validators:PasswordValidator} as  AbstractControlOptions
)
The FormBuilder’s group method takes two objects’ input parameters:
- Group, which is an array of controls
- Options, of type AbstractControlOptions
As we have passed above, you can pass Form Group level validators in the options. Next on the template, you can display an error message on the failed validation, as shown in the next code block:
<input  type="text"  formControlName="confirmPassword"  placeholder="Confirm Password"/>
<span  *ngIf="loginForm?.errors?.['passwordmatcherror']">Password does not match</span>
Angular complains about it when the password and confirm password fields do not match.
In this way, you can create a cross-control custom validator in Angular.
In Summary
- Create a function.
- Make sure to put the return type of function to ValidatorFn.
- Pass precisely one parameter of type AbstractControl.
- Return either null or ValidationErrors from the function.
I hope you liked this article. Thanks for reading.

Dhananjay Kumar
Dhananjay Kumar is the founder of nomadcoder, an AI-driven developer community and training platform in India. Through nomadcoder, he organizes leading tech conferences such as ng-India and AI-India. He partners with startups to rapidly build MVPs and ship production-ready applications. His expertise spans Angular, modern web architecture and AI agents, and he is available for training, consulting or product acceleration from Angular to API to agents.
Related Posts
Comments
All articles
Topics
Web MobileMobile
Desktop
Design
Productivity
People
