Exploring Preferences in .NET MAUI

Summarize with AI:
Preferences let us save basic information on our .NET MAUI apps, like a username, to accelerate interactions. Let’s see!
Storing simple information on our devices, such as remembering an email or username, can facilitate and speed up user interactions in an app. Imagine having a login that remembers the user’s name, saving the user time, which directly impacts their experience with our product.
Consider another scenario where every time a user logs in from a new device, you must show them an onboarding screen. The information about whether they have already had onboarding on this device can also be saved. All of this is possible in .NET MAUI using Preferences.
Preferences are used to save such information on our device, providing an easy-to-access alternative to simple data, without the need for a database.
Let’s Start!
To utilize Preferences, we must use the IPreferences interface. All accessible properties can be accessed using Preferences.Default, which is housed in the Microsoft.Maui.Storage namespace.
Preferences’ Structure
Preferences consist of two crucial components:

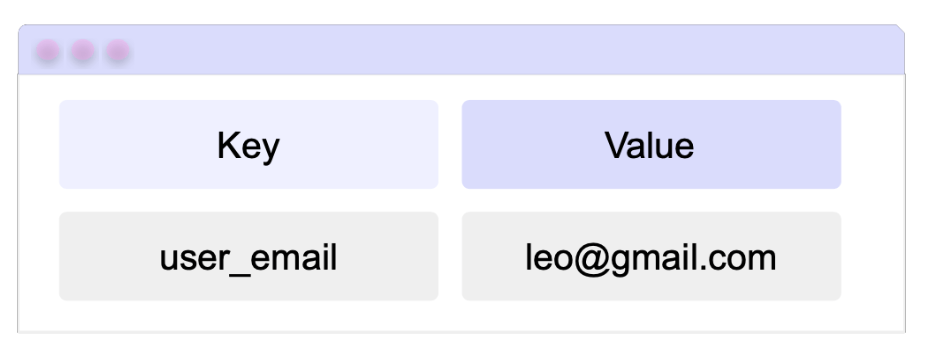
🔹 The key: This is the unique identifier of the preference. Essentially, it’s the name we’ll use to refer to the saved value in that Preference. It requires a string as a value. For example: user_email.
🔹The value: This is the value that you wish to save in association with the key. For example, the image indicates that the value leo@gmail.com is stored in the Preference user_email. We can use this key to retrieve and modify it as needed. In the following section, we will discuss the types of data we accept.
Accepted Storage Types
For storing a value in a Preference, you must remember that only a limited set of data types can be used. They are as follows:

Values stored as DateTime are saved in a 64-bit binary (long integer) format using two methods defined by the DateTime class:
🔹 ToBinary, which encodes the DateTime value
🔹 FromBinary, which decodes the value
Review the documentation of these methods to understand how to handle any special cases that may arise using DateTime.
Manipulating Preferences
With the necessary background context already established, let’s explore saving preferences.
Setting the Preference
To set a preference value, use the Set method. It requires the preference key and its value as parameters, as previously discussed.
In code, it would look like this:
Preferences.Default.Set("user_name", "Leo");

Preferences.Default.Set("user_has_email",true);

Preferences.Default.Set("user_email", "leo@gmail.com");
Getting the Preference
To retrieve the value of a key, we use the Get method. This one requires two parameters:
- The name of the key you want to retrieve
- A default value to be returned if the key does not exist.
The line of code should look like this:
string userName = Preferences.Default.Get("user_name", "Unknown");

bool hasEmail = Preferences.Default.Get("user_has_email", true);

bool userEmail = Preferences.Default.Get("user_email", "Unknown");
Checking if a Preference Exists
You can also check if a key exists by using the ContainsKey method. Just pass the name of the key you want to verify. This method returns a boolean value.
bool hasEmail = Preferences.Default.ContainsKey("user_has_email");
Removing the Keys
There are two ways to remove keys:
🔹 Remove a specific key: Use the Remove method and enter the name of the key you want to delete.
Preferences.Default.Remove("user_name");
🔹 Remove all existing keys: Simply use the Clear method.
Preferences.Default.Clear();
Sharing the Keys
Initially, the preferences you save are only visible within the application where they are created. However, if needed, you can create shared preferences for use by other extensions or applications.
The Set, Get, Remove and Clear methods have an optional parameter called sharedName (null by default) for specifying the container where the preference is stored.
Here’s an example of how to do this:
Preferences.Default.Set("user_email", "[leo@gmail.com](mailto:leo@gmail.com)", "shared_user_email"),
⚠️ It’s crucial to understand the specific implementation details of the each platforms, as shared preferences have implementations with specific behaviors.
Platform Differences
 Android: All preferences are saved in Shared Preferences. If a specific name is not specified, the default Shared Preferences are used.
 iOS/Mac Catalyst: NSUserDefaults is used to store values on iOS devices. If no sharedName is specified, the StandardUserDefaults are utilized. If a name is given, it’s used to create a new NSUserDefaults instance, with the name being used for the NSUserDefaultsType.SuiteName.
 Windows: ApplicationDataContainer is utilized to store values on a device, defaulting to LocalSettings if no share name is specified.
LocalSettings limits preference key names to a maximum of 255 characters. Each preference value can be up to 8 KB in size, while each composite configuration can reach up to 64 KB.
✍️ To Keep in Mind
Preferences are removed when you uninstall the app. However, this does not occur on Android 6.0 (API level 23) or later versions if the automatic backup feature is in use. This feature is enabled by default.
🚫 Limitations
Preferences should be used for small or simple values. If used for large volumes of data, performance may be affected. If you need storage for larger amounts, I personally recommend using databases.
References
This article was based on the official documentation:

Leomaris Reyes
Leomaris Reyes is a Software Engineer from the Dominican Republic, with more than 5 years of experience. A Xamarin Certified Mobile Developer, she is also the founder of Stemelle, an entity that works with software developers, training and mentoring with a main goal of including women in Tech. Leomaris really loves learning new things! 💚💕 You can follow her: Twitter, LinkedIn , AskXammy and Medium.

