Building a CRM with Xamarin.Forms and Azure, Part 1

Summarize with AI:
In this tutorial, we'll build a CRM client app for iOS, Android and Windows 10 using Telerik UI for Xamarin and Xamarin.Forms backed by Azure App Service and Azure Bot Framework.
This is the first post in a 3-part tutorial, where I take you from “File > New Project” to fully functional cross-platform CRM application for a fictional Art Gallery company.
Curious about what's ahead? You can jump to Part Two of the series, where we'll build the UI with Telerik UI for Xamarin, or to Part Three of the series, where we train a LUIS AI model using Telerik UI for Xamarin's Conversational UI.
The journey will take us through building the ASP.NET backend hosted using Azure App Services with SQL Server for the database, using Azure Bot Framework and a custom LUIS (Language Understanding) for the in-app help service and finally developing the client apps using Xamarin.Forms with Telerik UI for Xamarin for a beautiful and feature-rich client experience.
Let’s get started!
Part One—Azure App Service Walkthrough
First, we’ll want to create the backend. Microsoft has a recently updated the Azure App Service with Xamarin.Forms tutorial, and it will walk you through initializing the App Service and creating the database the service will use. Before getting started there, let me take you though the choices I went with so you can follow along.
Configuration and Starter Projects
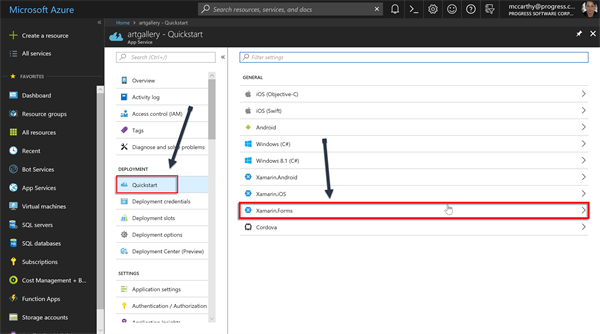
After creating the service and going to the QuickStart tab, you’ll be presented with a list of client application types. Select the Xamarin.Forms item.
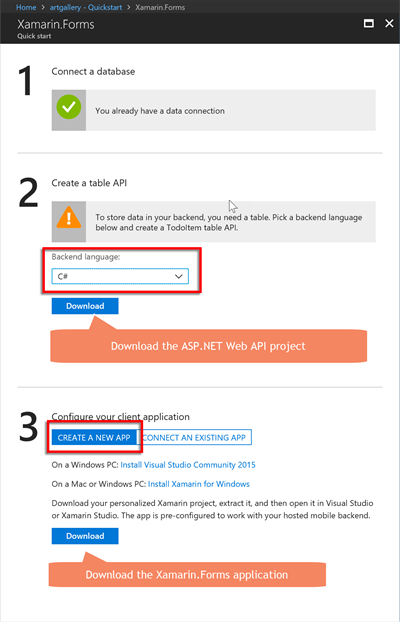
A new Azure blade will appear, and you’ll be shown two steps.
1 – Create the database
If you already have a SQLServer and/or SQL Database, you choose them for this. I chose to create new server and database.
Note: When creating the SQLServer, you will need to create admin credentials. You don’t need to remember them for the App Service because they’ll be stored in an environment variable, but it might be a good idea to store them in your preferred password manager or secure location.
After you make your selection for a C# backend, click the “Download” button. Azure will create an ASP.NET project for you, already set up with the right connection string to the database you’ve selected for step 1!
2 – Select Xamarin.Forms project
This step gives you two options: “create a new app” or “connect an existing app.” If you choose the latter, you’ll be given a few code snippets and instructions.
We’re going with the former option, “create a new app.” As with the backend, when you click the download button, you’ll get a new Xamarin.Forms application that already has the required code to connect to the app service.
Here’s a screenshot of the 'Xamarin.Forms Quick start' blade:
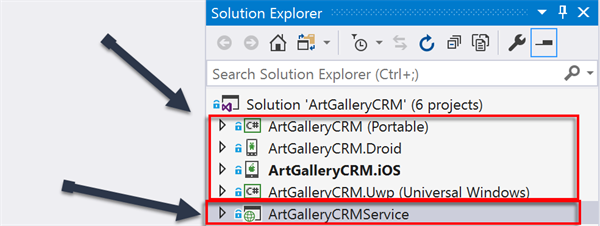
When done, you’ll now have two downloaded ZIP files containing two solutions: a XamarinForms solution and an ASP.NET MVC solution. These are your starter projects.
If you've already viewed the source code for this app, you'll notice that I decided to combine all the projects into a single folder and a created a combined solution. This is not necessary. I did it to keep all the projects for this tutorial in one place for simpler source control and to help make this this tutorial easier to follow along with.
Here’s what I ended up with. The arrows are pointing to the two different downloads combined in the same solution.
It's time to start digging into the code! Let's start with the ASP.NET service project because we want the backend ready before we start building the UI.
Entities
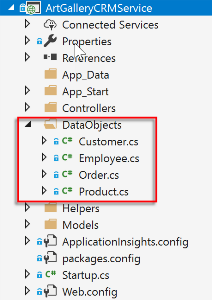
In the project you’ll see a DataObjects folder. This will contain a TodoItem.cs class. We need to replace it with the data models we need for the Art Gallery.
These are the entities we need:
- Employee
- Customer
- Product
- Order
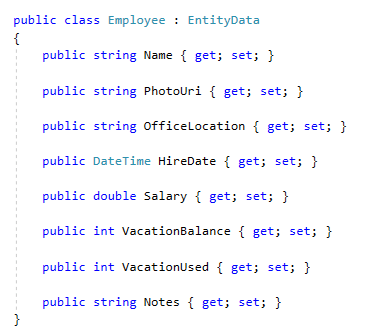
I created four classes to define the entity model and its properties.
Note: If you’re not familiar with Entity Framework, and code-first approach, you can use the existing TodoItem.cs class to help guide you before deleting it.
Each of the classes have properties related to the entity. These properties will be used to create the table fields. For example, an Employee would have OfficeLocation, while an Order may need properties like ProductId and Quantity.
It's important that you should try to finalize the properties now, because once you initialize the database Entity Framework will create the database fields using those properties. Any changes to the model will require a special operation called an Entity Framework Code First Migration (it can get complicated quickly).DBContext
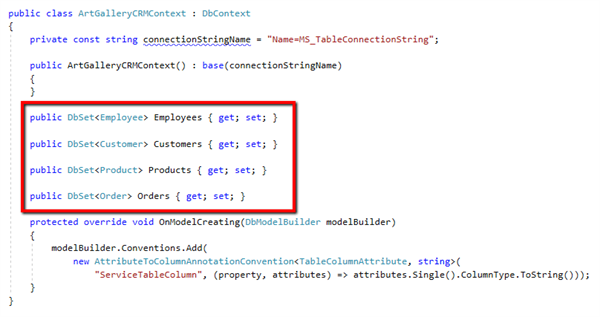
With the entities created, we now need to update the database context class used by Entity Framework to interact with the database. Go ahead and replace the TodoItem DBSet with the four new ones:
Database Initializer
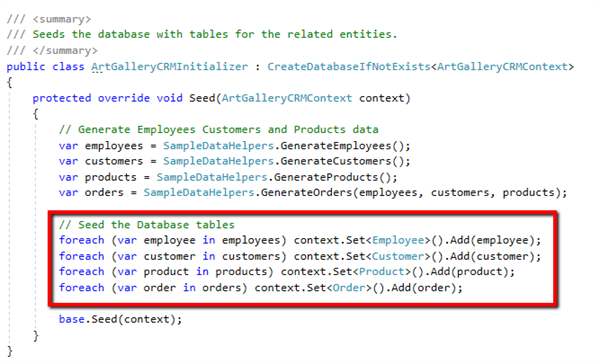
In the AppStart folder you’ll find that the auto-generated project nested a class that seeds the database with the tables and initial records. I moved that class into its own class and replaced the TodoItem seed data with records for each of the entities:
Table Controllers
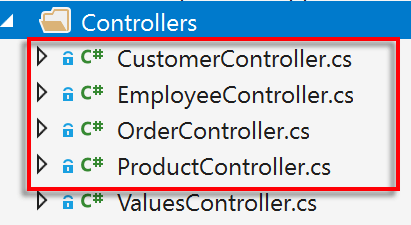
Finally, you’ll want a controller for each of the entities to interact with the database. This is the endpoint that the client apps will use to interact with the databases and each implements the Azure Mobile Server TableController<T> interface.
I created a controller for each of the entities:
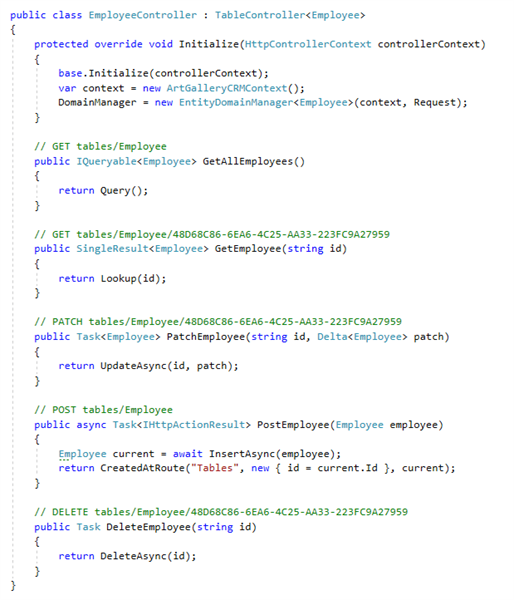
The content of each WebAPI controller follows the CRUD pattern you'd expect. Here's a screenshot of the EmployeeController's methods (all the controllers reuse this pattern).
As with previous steps, if you’re not familiar with ASP.NET or Web API, you can use the TodoController for guidance before deleting it.
Publish to Azure
Visual Studio 2017 has great Azure tools built-in. If you right click on the ASP.NET project, you’ll see a “Publish” option in the context menu:
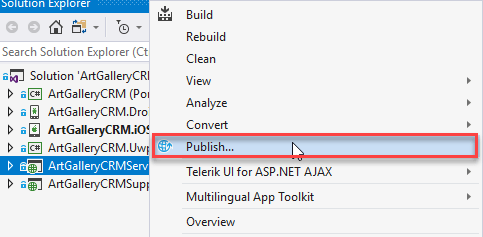
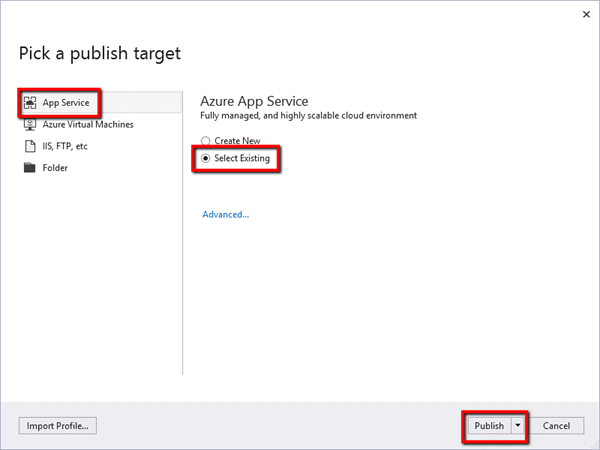
Selecting this will provide you with a list of options to choose from, you’ll want to select Azure App Service and then “Select Existing” because you’ve already set up the App Service.
In the next few steps you’ll be able to choose the Resource and App Service from the Azure Subscription.
Note: You will need to be signed into the same account that the Azure subscription uses. If you have multiple accounts, there is a dropdown at the top right to change accounts.
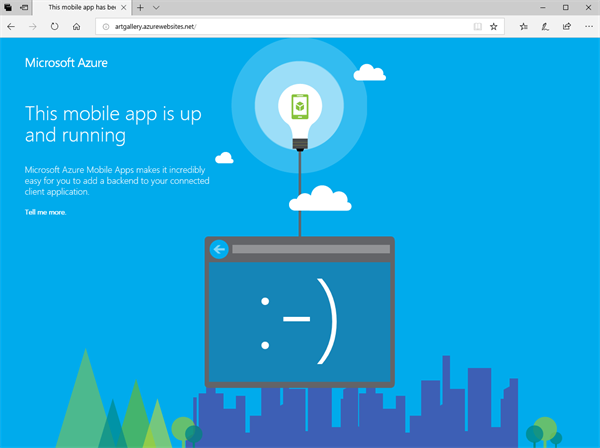
Once you’ve gone through the publishing steps, Visual Studio will start the publishing process and upload the application. When it’s done, a browser tab will open and present the landing page of the running app.
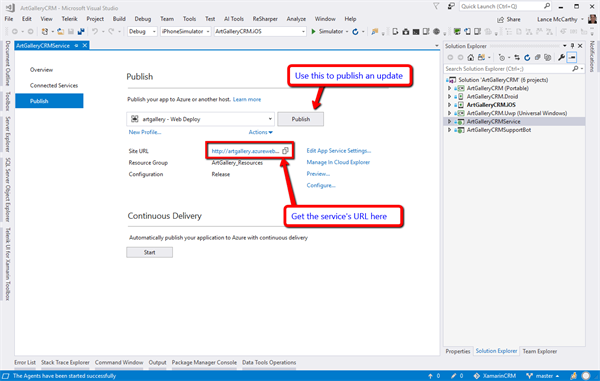
The next time you use the Publish menu option, you’ll see the existing publish profile details along with several other tools:
With the backend published and running, we can now move on to Part 2—Xamarin.Forms and Telerik UI for Xamarin.
Read Next
- Part Two of the series, where we'll build the UI with Telerik UI for Xamarin
- Part Three of the series, where we train a LUIS AI model using Telerik UI for Xamarin's Conversational UI

Lance McCarthy
Lance McCarthy is a Senior Manager Technical Support for DevTools & Sitefinity, responsible for the Americas with additional responsibilities in product security and AI tooling. He's also a multiple-awarded Microsoft MVP (.NET & Windows Dev) who enjoys working with the developer community, sharing knowledge, presenting at events, and loves hackathons.
Lance still provides technical support for DevTools customers, answering cases focusing on security, .NET (desktop, mobile, web components), and CI/CD. Say hi the next time he answers one of your support tickets!

