
Best Place to Edit Your Images—On the Maui Shoreline

Summarize with AI:
View, edit and save images without installing any third-party software or opening an external app. The .NET MAUI Image Editor is here and ready to find its place in your desktop and mobile applications.
The Telerik Desktop & Mobile R1 2023 release is a tiny bit behind our backs, but it was so strong that I have only just gotten to create a proper introduction to some of the hottest arrivals on the .NET MAUI shoreline.
Can you imagine the modern world we are living in without image editing tools? What would influencers do?! 🙊 I surely am not one myself but have one thing in common with them today—presenting you the new goodies on the market that are totally worth trying.
I bet the more sharp-eyed among you already know what I’m going to introduce you to in this blog—the .NET MAUI ImageEditor component. 🎉 Also known as the first .NET MAUI image editor tool on the market. So, let’s not waste another minute and explore its powerful abilities together.
Get a Brief Heads-up
I thought a quick walk-through would be helpful and will build up some proper expectations of the Telerik UI for .NET MAUI ImageEditor component.
In short, the image editor will give you and your end users the ability to easily:
- Visualize and modify images in different file formats
- Interact with images through zoom and pan, flip and rotate, resize and crop
- Keep history of all the above through undo and redo
A crucial part in this ease I am talking about plays the Image Editor Toolbar that comes hand in hand with the control. No worries—it will be examined in the next sections.
Oh, and of course, you can save the image at any time you feel the desired result is achieved.
Warm up the Image
For the ImageEditor component to appear under the spotlight we only need one line of XAML or C# code (up to your liking). Considering, of course, you have already rolled out the red carpet, or if we are being serious—having set up a fresh .NET MAUI app with the addition of the Telerik.UI.for.Maui NuGet.
Ready? Action:
<telerik:RadImageEditor Source="YOUR_SOURCE_HERE" />RadImageEditor imageEditor = new RadImageEditor () { Source = ImageSource.FromUri(new Uri("URI_TO_YOUR_SOURCE_HERE")) };Do not forget to register the required handlers inside your MauiProgram class before hitting F5. 😅
Also, beware that this is just the easiest (at least in my opinion) way to display images with the .NET MAUI ImageEditor component. You can load images from File, Uri, Stream or Resource. And the format of your images can vary, too—JPEG, PNG, GIF, BMP—both when importing and exporting them.
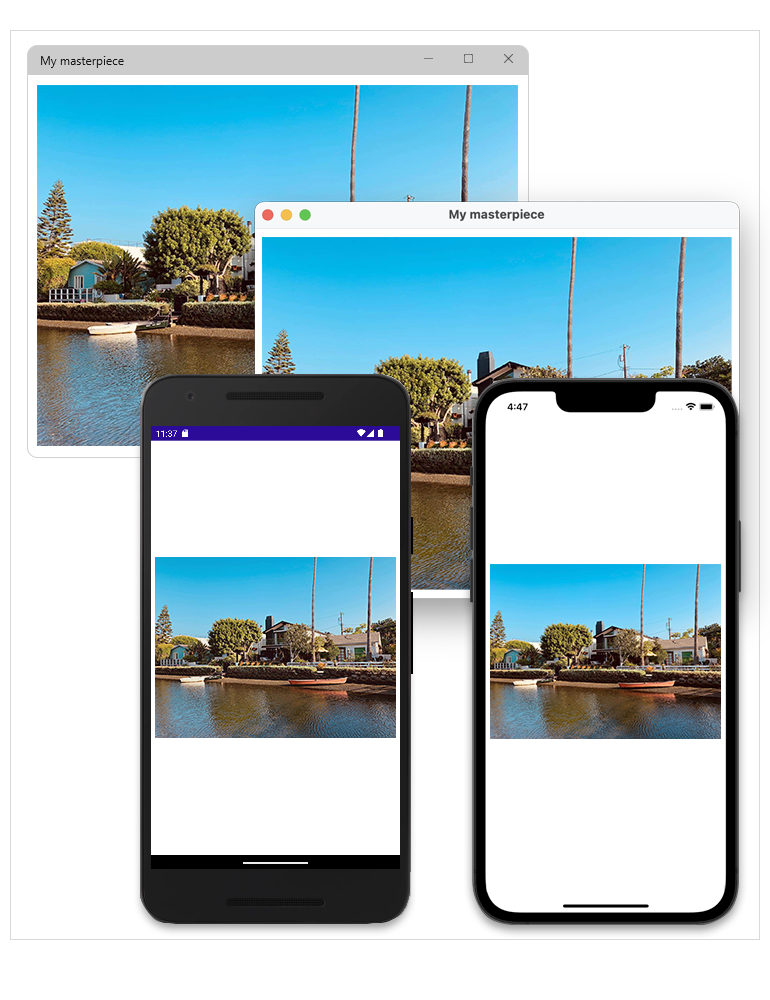
It may look a little incomplete or as if I am messing with you and have placed a regular image on a blank screen. So, I suggest we use some extra tools to make things achieve a more complete look. More about that in the next section.
Peek Inside the Box of Tools
It is high time I played my best card right at this moment.
The Image Editor offers a box of tools, and this box is sooo packed! In this section, I will do my best to sort them out for you.
Image Editor Toolbar
The ImageEditorToolbar is a ready-to-use toolbar pre-populated with all the items needed to manipulate images. What better sorting of the box of tools than this one, huh? 😎
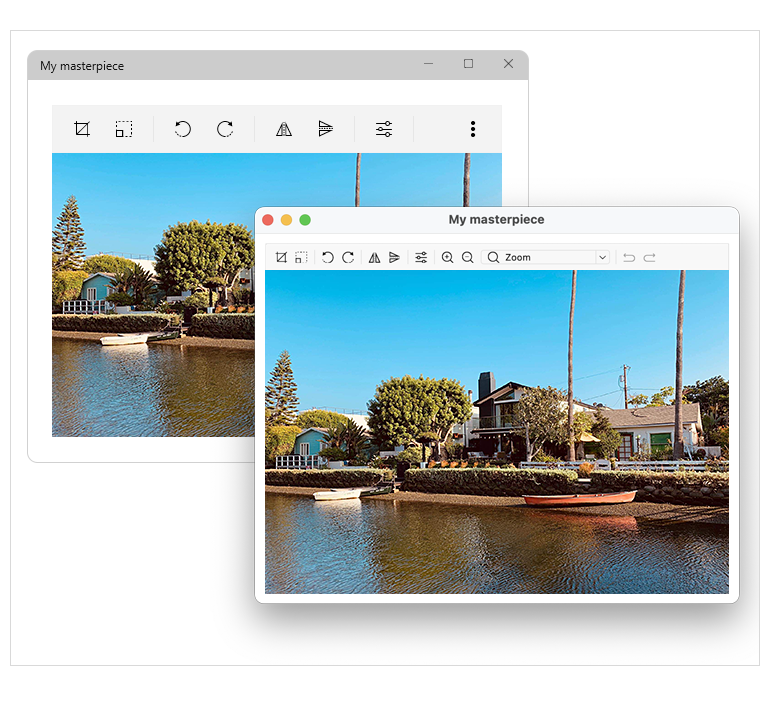
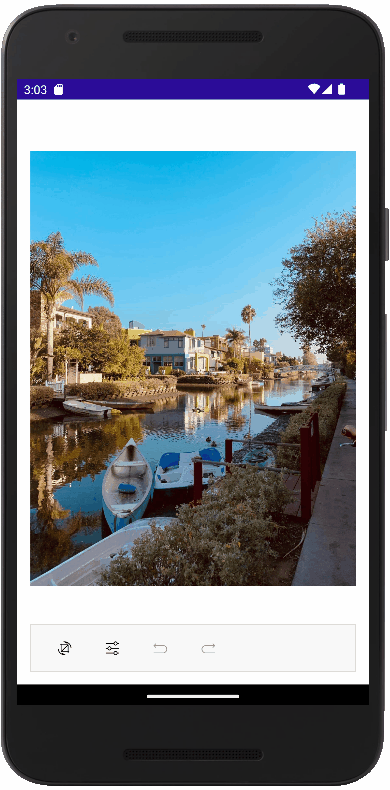
Why am I just revealing the desktop .NET MAUI Image Editor Toolbar? Because I want to place it under the image editor for mobile as this is the UI that I am more familiar and comfortable with. Oh, and I also wanted to fill more of this blank space that we saw when we first met the Image Editor by loading a portrait-oriented image this time. 😊

What is the ready-to-copy code snippet for the above beauties? Voilà:
<Grid ColumnDefinitions="*, Auto" RowDefinitions="Auto, *, Auto">
    <telerik:RadImageEditorToolbar x:Name="imageEditorToolbar" Grid.Row="{OnIdiom Default=0, Phone=2}" HorizontalOptions="Fill" ImageEditor="{x:Reference imageEditor}" OptionsPanel="{x:Reference optionsPanel}" />
    <Grid ColumnDefinitions="*, Auto" Grid.ColumnSpan="2" Grid.Row="1">
        <telerik:RadImageEditor x:Name="imageEditor" Source="{OnIdiom Default=landscape.jpg, Phone=portrait.jpg}" />
        <telerik:RadToolbarOptionsPanel x:Name="optionsPanel" Grid.Column="1"/>
    </Grid>
</Grid>
If I were to list all configuration capabilities of the Image Editor Toolbar and this blog was on a piece of real paper, written with real ink, I would have run out of both. That’s why it would be a better idea to examine them in the .NET MAUI ImageEditor Toolbar section of the online documentation.
As you will see there, the RadImageEditorToolbar inherits from the RadToolbar, which means that all properties for configuring and styling available for the RadToolbar are applicable to the RadImageEditorToolbar.
Three important things that you need to know about the image editor toolbar:
- Its items are automatically generated (can be changed through the AutoGenerateItems bool property).
- The auto-generated UI for mobile is adapted to optimise both the utilised screen space and the ease of use of the respective tools.
- It is fully customizable.
Following up on just one more thing regarding the platform-adapted UI I mentioned. Some of the instruments for desktop use a dedicated panels by default displayed on the right-hand side of the image editor. I will surely show them in the next sub-sections in which we’ll just benefit from the tiny yet so handy bar of tools to explore each tool quick and easy.
Resize, Crop and Zoom—Must-Haves
Well, if this isn’t a must-have trio for an image editor, I don’t know what it is. I believe they are self-explanatory so I’m just going to show them all in action.
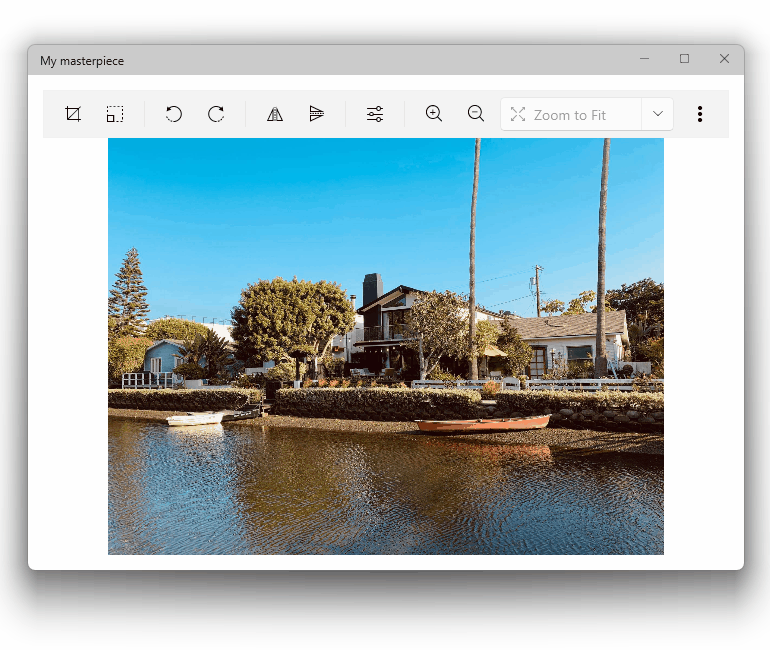
Did you notice the panels that I mentioned at the end of the previous section? 👀
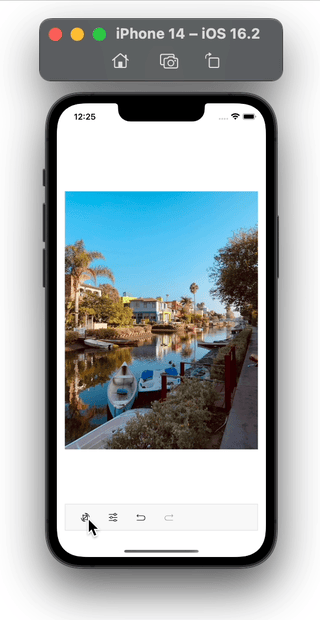
Flip and Rotate to Make Things Great
Next portion of tools includes the ability to flip the image both horizontally and vertically or rotate it clockwise and counterclockwise. Check them out:
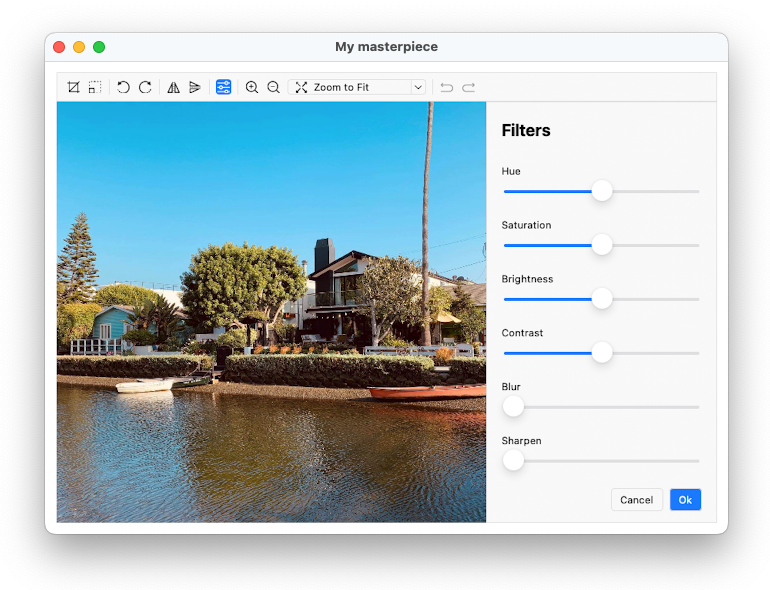
Now that we covered the image transformation capabilities of the .NET MAUI ImageEditor using its toolbar, I believe it is appropriate to mention its built-in filters as well. They include Hue, Saturation Brightness, Contrast, Blur and Sharpen. Here is a quick preview:
Just because I am fan of the things that make one’s life easier and more enjoyable like the image editor’s toolbar, does not mean that you must be, too. 🤓 The .NET MAUI ImageEditor provides commands for programmatically editing the image without using the ImageEditorToolbar. I checked it too, and it struck me that I had not mentioned the ability to undo, redo and reset the image at any time.
Made to Measure
For this section, I wanted to create something personalized, something light and cute. Did not want to scare you (and me) with too advanced customization. I got inspired from one of the Image Editor’s demos in the SDKBrowser Demo Application—be sure to check this app for many more awesome demos for all our .NET MAUI components. Now, let’s get straight to the code:
<Grid ColumnDefinitions="*, Auto" RowDefinitions="Auto, *, Auto"
    <telerik:RadImageEditorToolbar x:Name="imageEditorToolbar" Grid.Row="{OnIdiom Default=0, Phone=2}" HorizontalOptions="Fill" ImageEditor="{x:Reference imageEditor}" OptionsPanel="{x:Reference optionsPanel}" AutoGenerateItems="False">
        <telerik:ImageEditorCropToolbarItem>
            <telerik:ImageEditorCropToolbarItem.CropOperations>
                <telerik:CropOperation AspectRatio="Free" Text="Free"/>
                <telerik:CropOperation AspectRatio="Original" Text="Original"/>
                <telerik:CropOperation Text="Heart" Geometry="{x:Static telerik:Geometries.Heart}" />
            </telerik:ImageEditorCropToolbarItem.CropOperations>
        </telerik:ImageEditorCropToolbarItem>
    </telerik:RadImageEditorToolbar>
    <Grid ColumnDefinitions="*, Auto" Grid.ColumnSpan="2" Grid.Row="1">
        <telerik:RadImageEditor x:Name="imageEditor" Source="{OnIdiom Default=landscape.JPG, Phone=portrait.JPG}" />
        <telerik:RadToolbarOptionsPanel x:Name="optionsPanel" Grid.Column="1"/>
    </Grid>
</Grid>
In short, I turned off the automatic generation of the toolbar items and added only three for the purpose of my example—one for undo, one for redo and the most interesting one—the ImageEditorCropToolbarItem.
I plugged three crop operations into it—Free, Original and Heart—again, the last one is my most wanted but did not want to leave it alone. So glad that I did not have to compose the desired geometry myself but benefit from the Telerik’s Geometries class and its heart!
Want to see how the result turned out? Ready or not, here it goes:
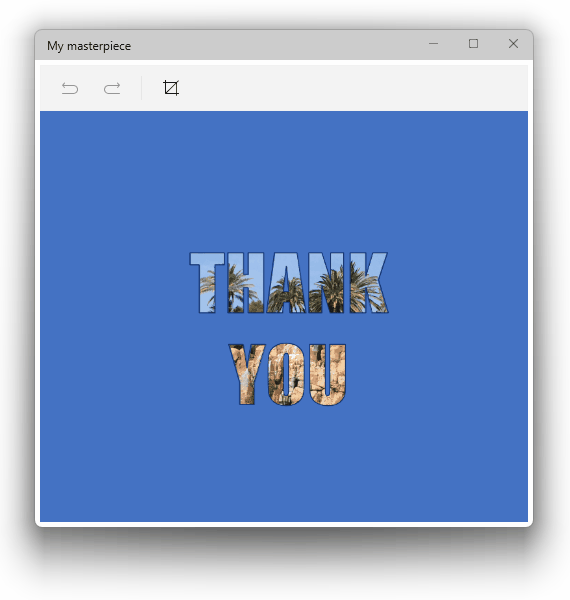
What am I thankful for? A lot of things, but in this moment—for your interest in Telerik UI for .NET MAUI and this blog, but mostly—for your time. And you?
Sign up for a Trial
Interested in trying out .NET MAUI? I know you are. Or you are already actively working with it. 🤔 The latest release of Telerik UI for .NET MAUI is available for download in your account. If you are by some chance a newbie to the family, you just need to sign up for our free 30-day trial, which gives you access to the components as well as our legendary technical support at zero cost.
Once you do get the latest bits, you will be empowered to create your next mobile and desktop masterpieces with the .NET MAUI ImageEditor component. 🎨 And when you do, do not forget to share your thoughts in the comments or the .NET MAUI’s Feedback Portal.
I told you I am not an influencer at the beginning and will not force you to hit any subscribe buttons but thank you for the time to read my blog. Do stay tuned for more awesome Telerik MAUI components, though. ✨

Viktoria Grozdancheva
Viktoria is a Senior Front-end Developer with 5+ years of experience designing and building modern UI for desktop and mobile platforms on Microsoft/Telerik technology stacks. Her spare time is dedicated to friends and family and discovering new pieces of the world. Find her on Twitter and LinkedIn.
Related Posts
Comments
All articles
Topics
Web MobileMobile
Desktop
Design
Productivity
People
