Angular Basics: Setting Up App Navigation Inside an Angular Component File

Summarize with AI:
Today we are building a simple navigation component to illustrate the concept of routing, learn more about router links and understand how to set up routing programmatically in the Angular component file.
In the other router posts, we looked at setting up routing inside the template. Today we are looking more into router links and how to set up navigation inside the component file.
Before We Start
This post is suited for all levels of frontend developers who use Angular, so being conversant with beginner concepts and installation processes is not assumed. Here are a few prerequisites you should have to be able to follow through this article’s demonstration:
- An integrated development environment like VS Code
- Node version 11.0 installed on your machine
- Node Package Manager version 6.7 (it usually ships with Node installation)
- Angular CLI version 8.0 or above
- A recent version of Angular (this post uses version 12)
Other nice-to-haves include:
- Working knowledge of the Angular framework at a beginner level
Routing in Angular
There are a few ways to set up routing in Angular. We have looked at how to do so in the template directly. Now how do you handle routing for things such as button clicks programmatically inside the component file?
It is a best practice to leave the presentation as clean as possible and have logic reside inside the component file, and we are going to see how we can achieve that in Angular.
What We Are Building
Today we are building a simple navigation component to illustrate the concept of routing, learn more about router links and understand how to set up routing programmatically in the component file.
Open your VS Code’s terminal in a folder of your choice and clone this template project from the previous post.
git clone [https://github.com/viclotana/ngRouter_Template](https://github.com/viclotana/ngRouter_Template)
cd ngRouter_template
Now navigate into the new folder:
cd ngRouter_template
Open the terminal and run the node module installation command:
npm install
Setting Up
Open the about component.html file and replace the content with the code block below.
<p>About us</p>
<div class="card">
    <img src="https://cdn.cnn.com/cnnnext/dam/assets/201030094143-stock-rhodesian-ridgeback-exlarge-169.jpg" alt="Avatar" style="width:100%">
    <div class="container">
      <h4><b>Uncle Joe!</b></h4>
      <p>Boxer Breed, United Kingdom</p>
      <p>Age: 4</p>
      <button type="button" class="btn btn-primary btn-lg">Contact Us</button>
    </div>
  </div>
In the component.css file, add these following rules too:
.card {
    box-shadow: 0 4px 8px 0 rgba(0,0,0,0.2);
    transition: 0.3s;
    width: max-content;
  }

  .card:hover {
    box-shadow: 0 8px 16px 0 rgba(0,0,0,0.2);
  }

  .container {
    padding: 2px 16px;
  }
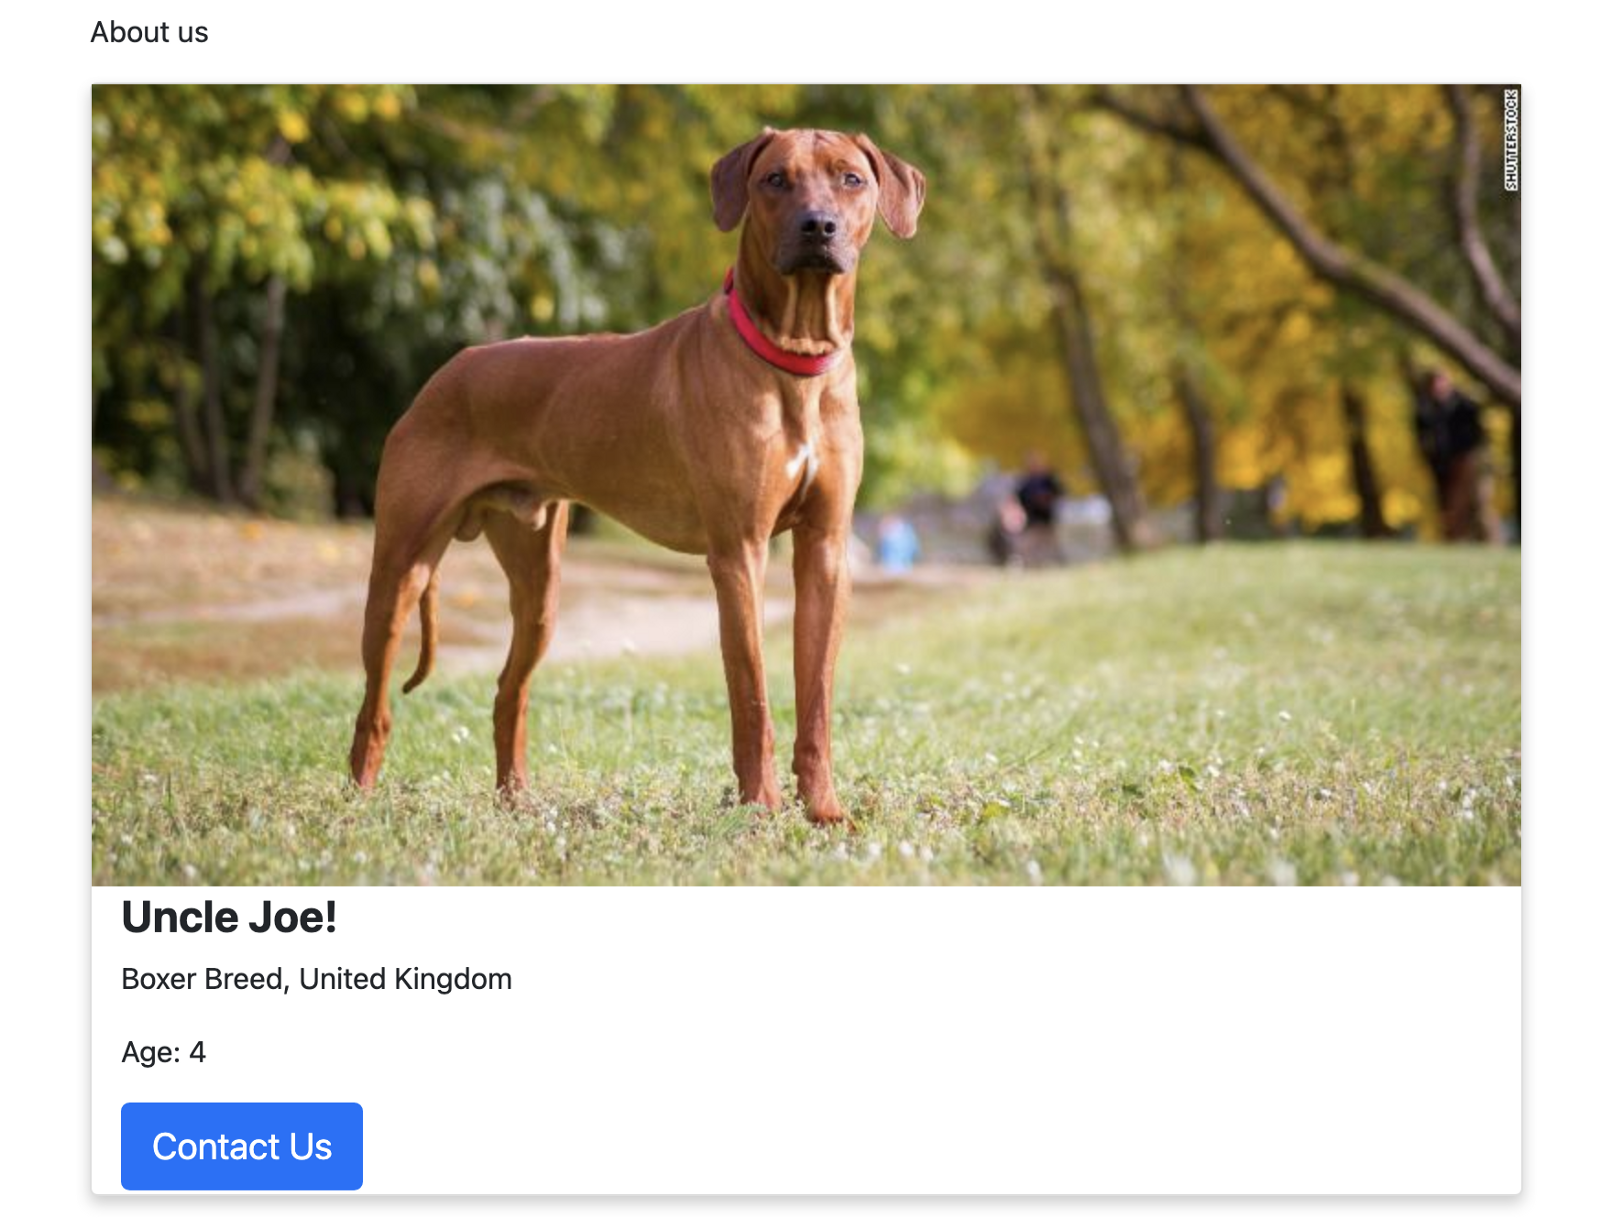
This makes the About page look like this:

Router Links
Router links help us ensure that the application and the routes are loaded in the most efficient way, avoiding reload of the entire application every time there is a new interaction. Your app component.html file looks like this:
<div class="container">
<ul class="nav justify-content-center">
  <li class="nav-item">
    <a class="nav-link active" aria-current="page" href="/">Home</a>
  </li>
  <li class="nav-item">
    <a class="nav-link" href="/about">About</a>
  </li>
  <li class="nav-item">
    <a class="nav-link" href="/contact">Contact</a>
  </li>
</ul>
<router-outlet></router-outlet>
</div>
For now, every click reloads the app and that is not great. To change this, we replace the href tag with the router link.
<div class="container">
<ul class="nav justify-content-center">
  <li class="nav-item">
    <a class="nav-link active" aria-current="page" href="/">Home</a>
  </li>
  <li class="nav-item">
    <a class="nav-link" routerLink="/about">About</a>
  </li>
  <li class="nav-item">
    <a class="nav-link" routerLink="/contact">Contact</a>
  </li>
</ul>
<router-outlet></router-outlet>
</div>
Now, this application is now considered a single-page application (SPA).
Routes in TypeScript
Now with this set up, let us go a step further to learn how to do so too in our component file by making the backlink we have in our About page navigate to the Contact page when clicked. The first thing to do is to set up an event handler on the button we already have.
<p>About us</p>
<div class="card">
    <img src="https://cdn.cnn.com/cnnnext/dam/assets/201030094143-stock-rhodesian-ridgeback-exlarge-169.jpg" alt="Avatar" style="width:100%">
    <div class="container">
      <h4><b>Uncle Joe!</b></h4>
      <p>Boxer Breed, United Kingdom</p>
      <p>Age: 4</p>
      <button type="button" class="btn btn-primary btn-lg"
      (click)='navigateFunction()'>Contact Us</button>
    </div>
</div>
The navigate function is the method we want to be called once anyone clicks on the button. Inside the about component file, this is how to set up the routing:
import { Component, OnInit } from '@angular/core';
import { Router } from '@angular/router';
@Component({
  selector: 'app-about',
  templateUrl: './about.component.html',
  styleUrls: ['./about.component.css']
})
export class AboutComponent implements OnInit {
constructor(private router: Router) { }
ngOnInit(): void {
  }
navigateFunction(){
    this.router.navigateByUrl('/contact');
  }
}
The first thing we did was to import the router and inject the router in the constructor. We used the navigate by URL approach. The router has another way we can do this too.
navigateFunction(){
    this.router.navigate(['/contact'])
  }
Both approaches achieve the same thing. With the array option you can add other parameters.
Router Link Styling
The router link has a few interesting options—one of them is called the routerLinkActive option. With that, you can assign a class to an active router link and Angular applies the corresponding styles to it. With our application, let us add the pink color and underline links so that users can easily identify what view they are currently in.
The first thing to do is the styling. Open the app component.css file and add these rules:
.active {
    text-decoration: underline;
    background-color: hotpink;
  }
The next thing is adding the router link active option to our routes so the desired outcome gets displayed.
<div class="container">
<ul class="nav justify-content-center">
  <li class="nav-item">
    <a class="nav-link " aria-current="page" href="/">Home</a>
  </li>
  <li class="nav-item">
    <a class="nav-link" routerLink="/about" routerLinkActive='active'>About</a>
  </li>
  <li class="nav-item">
    <a class="nav-link" routerLink="/contact"
    routerLinkActive='active'>Contact</a>
  </li>
</ul>
<router-outlet></router-outlet>
</div>
Save all the files inside VS Code and open up the terminal. Run this command below to run the application in the development server from Angular.
ng serve
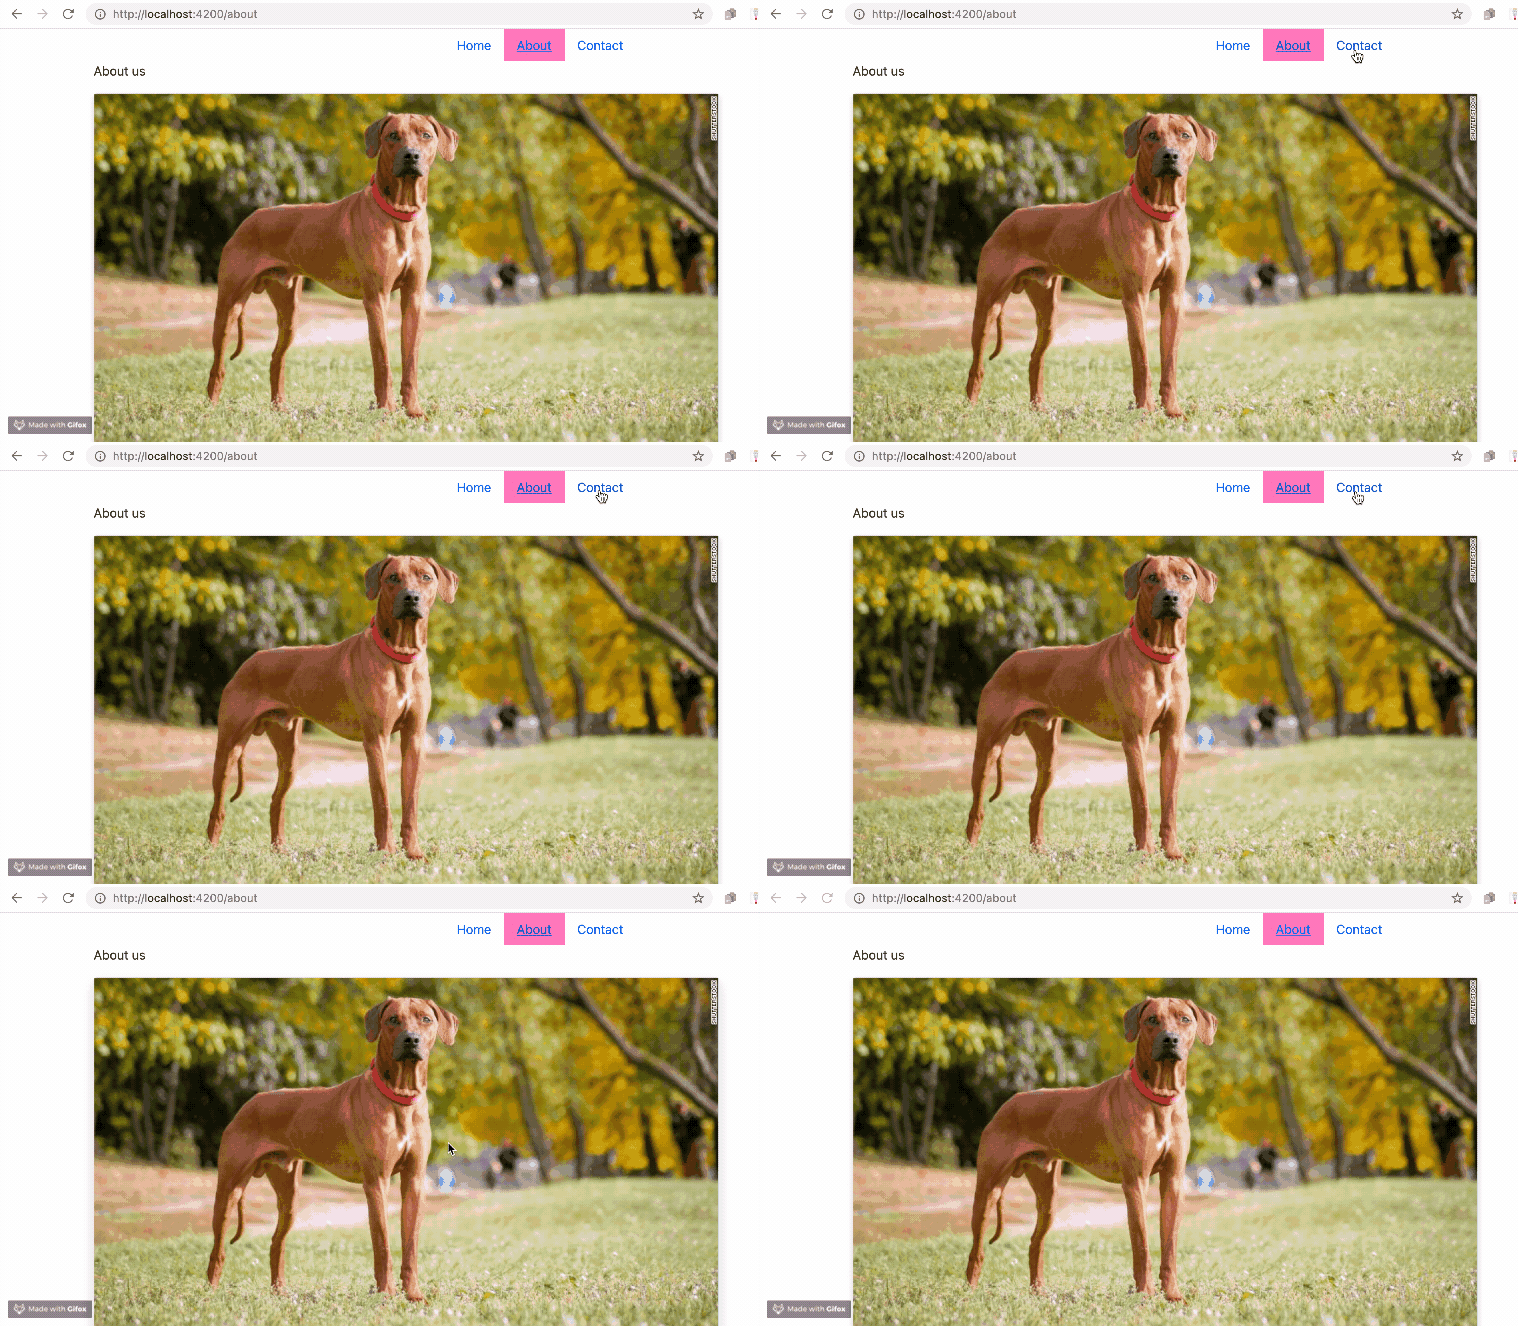
Now, your browser should look like this when you visit localhost:4200:

Conclusion
Today we looked at handling routing based on conditions we set in the component file programmatically. We saw how the injection is done so we can call the navigate option in our methods. We also saw other interesting router link options and how to use them. Happy hacking!

Nwose Lotanna Victor
Nwose Lotanna Victor is a web technology enthusiast who documents his learning process with technical articles and tutorials. He is a freelance frontend web developer based in Lagos, Nigeria. Passionate about inclusion, community-building and movies in Africa, he enjoys learning new things and traveling.
