AI Image Transformations in Modern Next.js Applications

Summarize with AI:
In this article, we’ll explore how to set up ImageKit in a modern Next.js application and how it simplifies image optimization and delivery.
Images are an important part of web applications, and the way they are delivered cannot be taken for granted. They are far from just being static assets. They are very important for user engagement, brand communication, performance optimization and a lot more. When images are not managed properly, they take a toll on the user experience and performance metrics like Core Web Vitals.
Traditionally, as developers, we often rely on manual image editing or some other tool to help us deliver the best image on the web. However, this approach isn’t scalable in the long run. This is where ImageKit comes in, bringing automation and adaptability to how images are handled and transformed, along with some AI image transformation capabilities.
In this article, we’ll explore how to set up ImageKit in a modern Next.js application and how it simplifies image optimization and delivery. We’ll also demo some of its basic AI image transformation capabilities.
Prerequisites
To follow along with this article, you need to have a basic knowledge of React.js or Next.js.
The Need for AI Image Transformation
Before we had tools like ImageKit, image transformations were mostly done manually or at build time using libraries like Sharp.
This approach has issues like:
- Scaling: Performance issues or inconsistencies when the number increases.
- Lack of context awareness: For example, in the case of image cropping, there is no proper key visual element identification. Therefore, what is important in an image can be cropped off in the process.
- Transformation bottlenecks: Manual processing slows down development and also introduces human errors.
Modern image transformations, with AI embedding, solve these problems for us by introducing a better workflow that is context-aware, bottleneck-free and effectively scalable. They use computer vision models to understand objects, faces, text or other points of interest in an image, which allows for smarter transformations such as background removal, smart cropping, object-aware zooming and much more.
Let’s take a look at example scenarios in our everyday applications where AI image transformation makes a great impact:
- Ecommerce: It processes product images with a proper crop, frame and uniform background.
- Social media platforms: It automatically crops avatars and image previews to center faces and remove the default backgrounds.
- News/blog sites: It dynamically generates featured images.
- Creative sites: It presents logos, icons and images in consistent aspect ratios.
Using ImageKit
So far, we have established the need for modern and advanced image transformation in web applications. Now, let’s briefly explore what ImageKit is and what it offers.
ImageKit is an all-in-one platform that optimizes, transforms, stores, manages and delivers visuals such as images and video in such a way that improves the development and user experience of an application. It provides powerful image and video APIs, as well as an AI-powered digital asset management.
Here are some of the benefits it provides:
Real-time Transformations via URL Parameters
Personally, this was what caught my attention. ImageKit allows us to apply transformations to an image using a simple, declarative syntax in the image URL. Imagine being able to apply 50+ real-time transformations from basic resizing and cropping to more advanced transformations like automated text or image overlays and other AI-powered effects, directly from the image’s URL.
AI-enabled Capabilities
ImageKit brings intelligence and automation to what was once a static and manual traditional process. It provides support for AI transformations, such as smart cropping, real-time background removal, overlays/watermarking and more.
Integration with Modern Frameworks
With developer experience in mind, ImageKit was built to enable integration with different kinds of applications, whether frontend, backend or mobile. It provides clear APIs, SDKs and developer support that improves development time and reduces stress.
Default Performance Optimization
Images served through ImageKit are automatically optimized, lazy-loaded, compressed, placed in the best format supported by the browser and delivered via a global CDN with built-in caching. This means better performance metrics and a more seamless experience for users.
Flexible Migration
ImageKit provides flexibility in terms of asset migration. It provides a way to work with images from external sources such as Amazon S3, Firebase, Unsplash and so on.
Built for Scale and Security
The ImageKit team boasts of delivering billions of assets daily and managing petabytes of data, which are all backed up with ISO 27001, GDPR compliance and reliable uptime.
Setting Up ImageKit in a Next.js Project
In this section, we’ll create a simple Next.js application for demo purposes and install the ImageKit Next.js SDK. To start with, open your preferred directory and run the following command:
npx create-next-app@latest
Enter a name for the demo project and select options for the other resulting prompts as shown below.

Run the following command to change into the newly created project folder:
cd image-kit-demo
Then, run the following to install the Next.js ImageKit SDK:
npm install @imagekit/next
The SDK is a wrapper that integrates ImageKit’s URL generation, image and video optimizations, and file upload capabilities with Next.js.
Run the following to start the development server:
npm run dev
Next, open your browser and visit ImageKit’s official website.
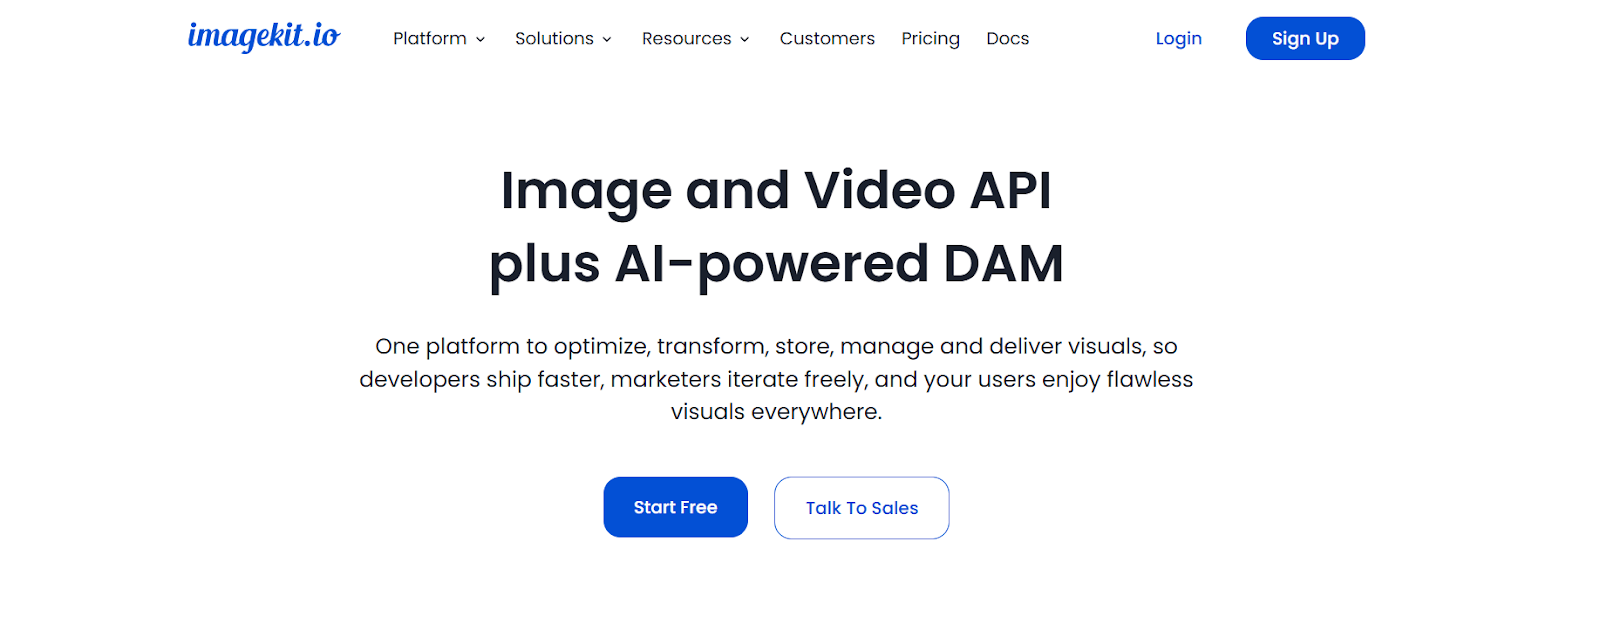
Click on Sign Up to get started or Login if you already have an account.
Go ahead and fill out the resulting form and complete the verification process. To complete the onboarding process after verification, select the options as shown below on the first step of the onboarding form:
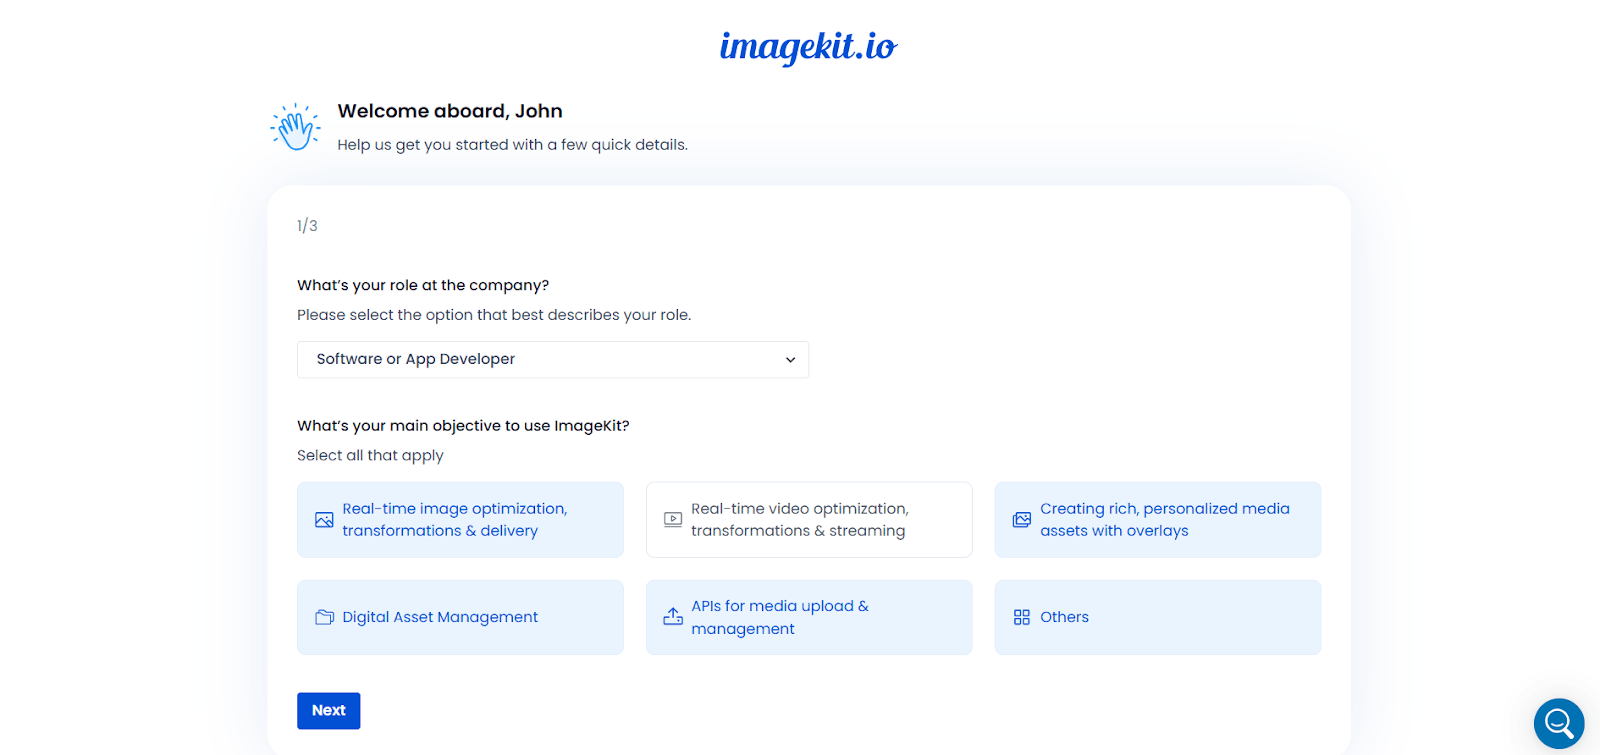
On the second step, enter an ID for your account and select a storage region:

Complete the last step and click on Submit.

Next, the page redirects to the dashboard.
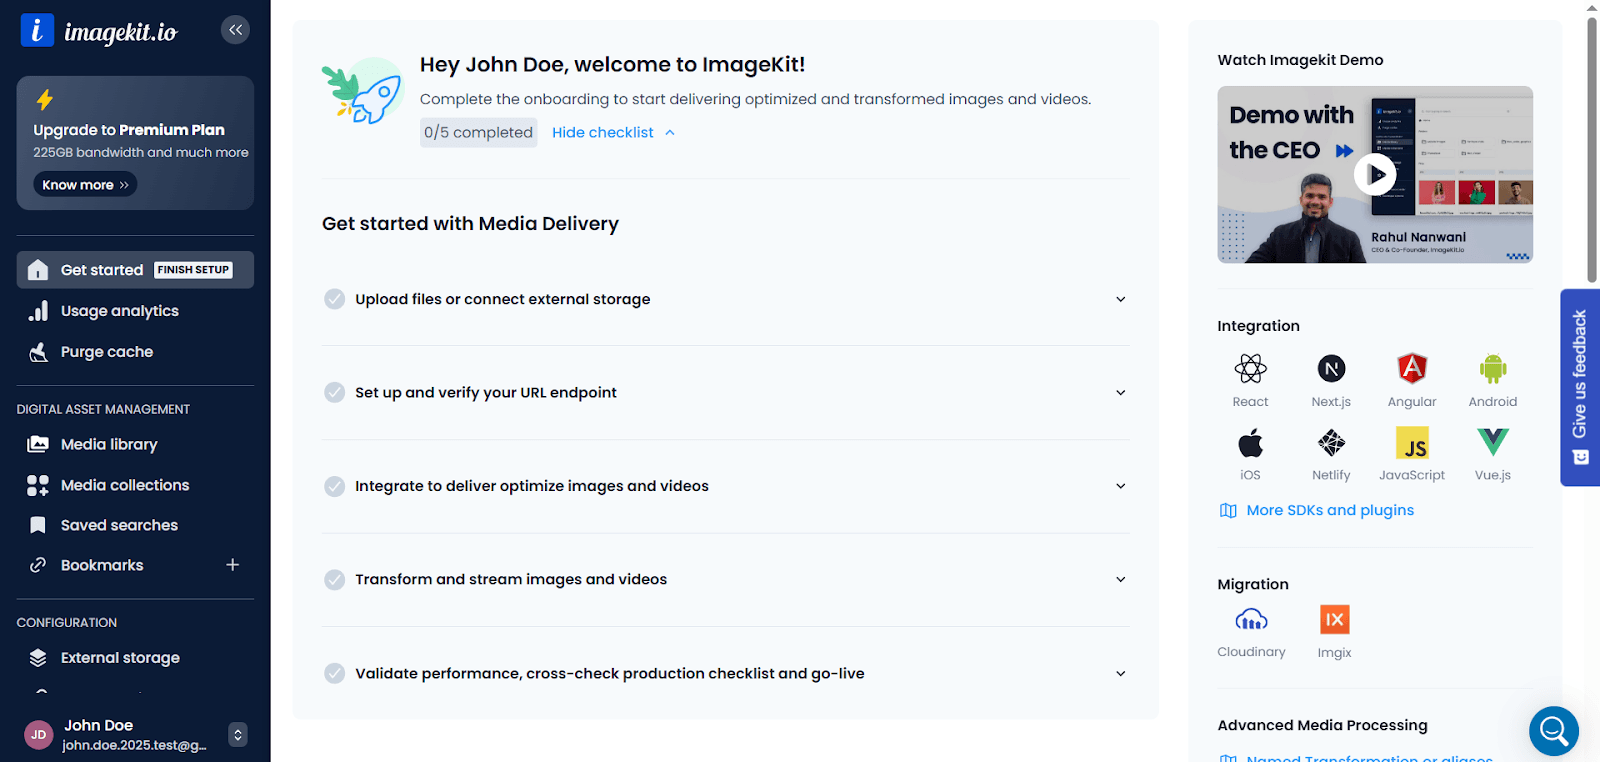
On the side menu, click on the Developer option to view the API keys.
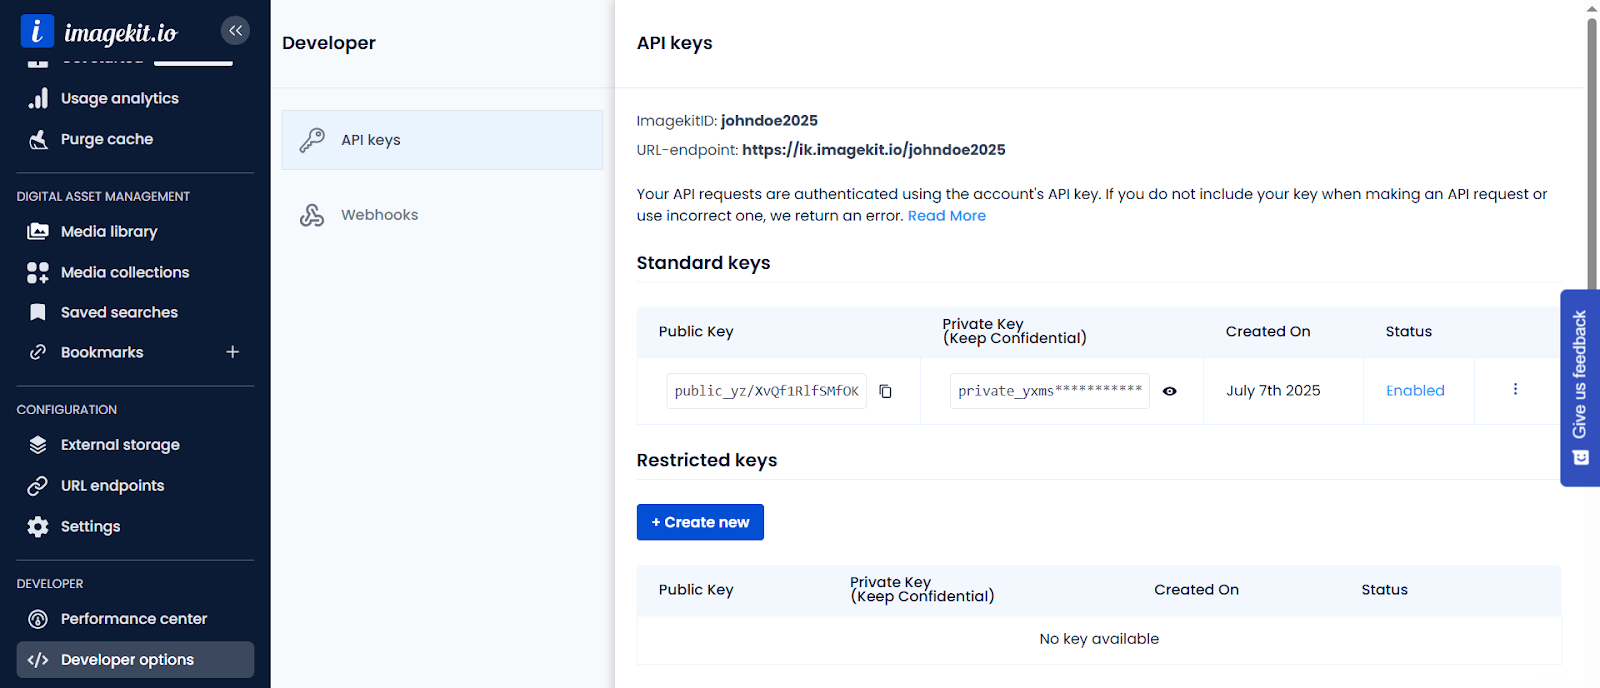
Create a file named .env.local at the root level of your application and define the API keys as shown below:
IMAGEKIT_PRIVATE_KEY = "YOUR PRIVATE KEY";
IMAGEKIT_PUBLIC_KEY = "YOUR PUBLIC KEY";
With all that done, let’s start working with ImageKit and demo some of its features for free.
Media Upload
Although we can upload media assets directly from the ImageKit dashboard, it is important to learn on how to programmatically upload these assets as well. We’ll look at that briefly in this section before focusing on transformations.
To upload media assets, the Next.js ImageKit SDK exports an upload utility function that integrates ImageKit’s Upload V1 API, accepting an options object and returning a promise that resolves with the upload response. The options object defines the upload parameters, which include a mandatory file, fileName, signature, token, publicKey and an expire parameter. It also accepts other optional parameters such as onProgress, abortSignal, folder and so on. Explore a full list of all parameters and what they do.
The file parameter is the actual file content to be uploaded. It can be binary data, a base64-encoded string or a URL. fileName is the name of the file, while signature, token, expire and publicKey are authentication parameters. ImageKit implements authentication for secure file uploads from the browser.
You don’t need to worry so much about the authentication parameters. The SDK also provides a getUploadAuthParams function that can be used in a Next.js API route to generate the required authentication parameters. The utility function takes in the ImageKit public and private API keys and returns the token, expire and signature authentication parameters.
Now, back to our demo application. Create a src/app/api/upload-auth/route.ts file and add the following to it:
import { getUploadAuthParams } from "@imagekit/next/server";

export async function GET() {
  const { token, expire, signature } = getUploadAuthParams({
    privateKey: process.env.IMAGEKIT_PRIVATE_KEY as string,
    publicKey: process.env.IMAGEKIT_PUBLIC_KEY as string,
  });

  return Response.json({
    token,
    expire,
    signature,
    publicKey: process.env.IMAGEKIT_PUBLIC_KEY,
  });
}
In the code above, the API route handler generates the authentication parameters and returns them as a response.
Let’s also create a helper function that will help trigger the API route handler. Create a src/util.ts file and add the following to it:
export const authenticator = async () => {
  try {
    const response = await fetch("/api/upload-auth");

    if (!response.ok) {
      const errorText = await response.text();
      throw new Error(
        `Request failed with status ${response.status}: ${errorText}`
      );
    }

    const data = await response.json();
    const { signature, expire, token, publicKey } = data;
    return { signature, expire, token, publicKey };
  } catch (error) {
    throw new Error("Authentication request failed");
  }
};
Here, we created an authenticator helper function that uses the traditional fetch API to hit our previously defined API route.
Now we can call this utility function to retrieve the authentication parameters before actually trying to upload a file. Open the src/app/page.tsx file and update the code as shown below:
import Main from "@/components/Main";

export default function Home() {
  return <Main />;
}
Here, we removed the template code and returned a Main component, which will house our demo code.
To create the Main component, create a src/components/Main.tsx file and add the following to it:
"use client";

import { authenticator } from "@/util";
import { upload } from "@imagekit/next";
import Image from "next/image";
import React, { useState } from "react";

export default function Main() {
  const [selectedFile, setSelectedFile] = useState<File | null>(null);
  const [previewUrl, setPreviewUrl] = useState<string | undefined>(undefined);
  const [loading, setLoading] = useState<boolean>(false);

  const abortController = new AbortController();

  const handleFileChange = (e: React.ChangeEvent<HTMLInputElement>) => {
    const file = e.target.files?.[0];
    if (file) {
      setSelectedFile(file);
    }
  };
  const handleSubmit = async () => {
    if (!selectedFile) {
      return;
    }
    setLoading(true);

    let authParams;
    try {
      authParams = await authenticator();
    } catch (authError) {
      console.error("Failed to authenticate for upload:", authError);
      return;
    }

    const { signature, expire, token, publicKey } = authParams;

    try {
      const uploadResponse = await upload({
        expire,
        token,
        signature,
        publicKey,
        file: selectedFile,
        fileName: selectedFile.name,
        abortSignal: abortController.signal,
      });
      setPreviewUrl(uploadResponse.url);
    } catch (error) {
      console.error(error);
    } finally {
      setLoading(false);
    }
  };

  return (
    <div className="max-w-4xl mx-auto p-6 text-center">
      <h1 className="text-2xl font-bold mb-4">AI Image Transformation Demo</h1>
      <input
        type="file"
        accept="image/*"
        onChange={handleFileChange}
        className="mb-4 block"
      />
      <button
        onClick={handleSubmit}
        className="bg-blue-600 text-white px-4 py-2 rounded hover:bg-blue-700"
      >
        Upload
      </button>
      <div className="w-full flex gap-6 my-8">
        <div className="flex-1">
          {selectedFile && (
            <div>
              <Image
                src={URL.createObjectURL(selectedFile as File)}
                alt="Selected Preview"
                width={800}
                height={800}
                className="w-full max-h-96 object-contain border"
              />
            </div>
          )}
        </div>
        <div className="flex-1">
          {loading && <p>Loading...</p>}
          {previewUrl && (
            <div>
              <Image
                src={previewUrl}
                alt="Selected Preview"
                width={800}
                height={800}
                className="w-full max-h-96 object-contain border"
              />
            </div>
          )}
        </div>
      </div>
    </div>
  );
}
The code above defines a file input element to select an image, retrieves the authentication parameters from the authenticator helper function created previously, uploads the selected image when the Upload button is clicked, and renders both the selected image and its uploaded equivalent.
Remember, we are working with Next.js here, so we need to update our application’s configuration to accept files from ImageKit. Open the next.config.ts file and update it as shown below:
import type { NextConfig } from "next";

const nextConfig: NextConfig = {
  /* config options here */
  images: {
    remotePatterns: [
      {
        protocol: "https",
        hostname: "ik.imagekit.io",
      },
    ],
  },
};

export default nextConfig;
Now, save the changes and preview the application in your browser.

Basic Image Transformation with ImageKit
Now that we’ve seen how to upload an image using ImageKit, let’s explore how we can begin transforming it using their SDK. The ImageKit Next.js SDK exports an Image component, which is equivalent to the default Next.js Image component, but with a few changes and additional capabilities to automatically handle URL generation and transformation logic. This makes it easy to work with ImageKit in Next.js applications.
There are two ways we can apply transformations using ImageKit:
- By modifying the image URL directly, using transformation parameters as query strings
- By using the
transformationprop passed to theImagecomponent from the SDK
To use the Image component from the ImageKit Next.js SDK, we need to specify a urlEndpoint prop that follows this structure:
urlEndpoint = "https://ik.imagekit.io/your_imagekit_id";
The urlEndpoint is the base URL endpoint from your ImageKit dashboard. The src prop is the relative or absolute path to the image. For relative paths, it is appended to the urlEndpoint, while for an absolute path, it is used directly with the urlEndpoint prop ignored.
Every other prop that can be applied to the default Next.js Image component can also be applied to that of the SDK as well. For transformations, the SDK’s Image component accepts a transformation prop, which is an array of transformation objects. Each object can include properties like width, height, rotation, overlays, as well as other advanced effects. View the list of possible props here.
This is what the typical syntax looks like:
<Image
  urlEndpoint="https://ik.imagekit.io/your_imagekit_id"
  src="/profile.png"
  width={500}
  height={500}
  alt="alt-text"
  transformation={[{ width: 500, height: 500 }]}
/>
Now, let’s update our code and apply some of these basic transformations to an uploaded image.
Open the src/components/Main.tsx file and update the code by first importing the Image component from the ImageKit Next.js SDK:
import { upload, Image as IKImage } from "@imagekit/next";
Since we still need the default Next.js component in this file to show the selected image before transformation, the Image component from the SDK is renamed to IKImage.
Next, we can replace the part of the code where we want to show the transformed image, as shown below:
<div className="flex-1">
  {loading && <p>Loading...</p>}

  {previewUrl && (
    <div>
      <IKImage
        urlEndpoint="https://ik.imagekit.io/johndoe2025"
        src={previewUrl}
        alt="Selected Preview"
        width={800}
        height={800}
        className="w-full max-h-96 object-contain border"
        transformation={[{ width: 400, height: 300 }, { rotation: 45 }]}
      />
    </div>
  )}
</div>
Here, we transformed the uploaded image to have a different width and height and also added some rotation to the image.

AI-Powered Image Transformations
Now that we have seen how the Image component from the SDK operates and how we can apply basic transformations. Let’s take a look at some AI-powered transformations.
Background Removal
One of the most powerful AI-driven features offered by ImageKit is real-time background removal. By specifying the aiRemoveBackground: true transformation on an uploaded image, we can instantly remove its background without any preprocessing or backend logic.
To demo this, update the IKImage component in the src/components/Main.tsx file as shown below:
{
  previewUrl && (
    <div>
      <IKImage
        urlEndpoint="https://ik.imagekit.io/johndoe2025"
        src={previewUrl}
        alt="Selected Preview"
        width={800}
        height={800}
        className="w-full max-h-96 object-contain border"
        transformation={[{ aiRemoveBackground: true }]}
      />
    </div>
  );
}
When you test the application in the browser, you should see that the background has been removed.
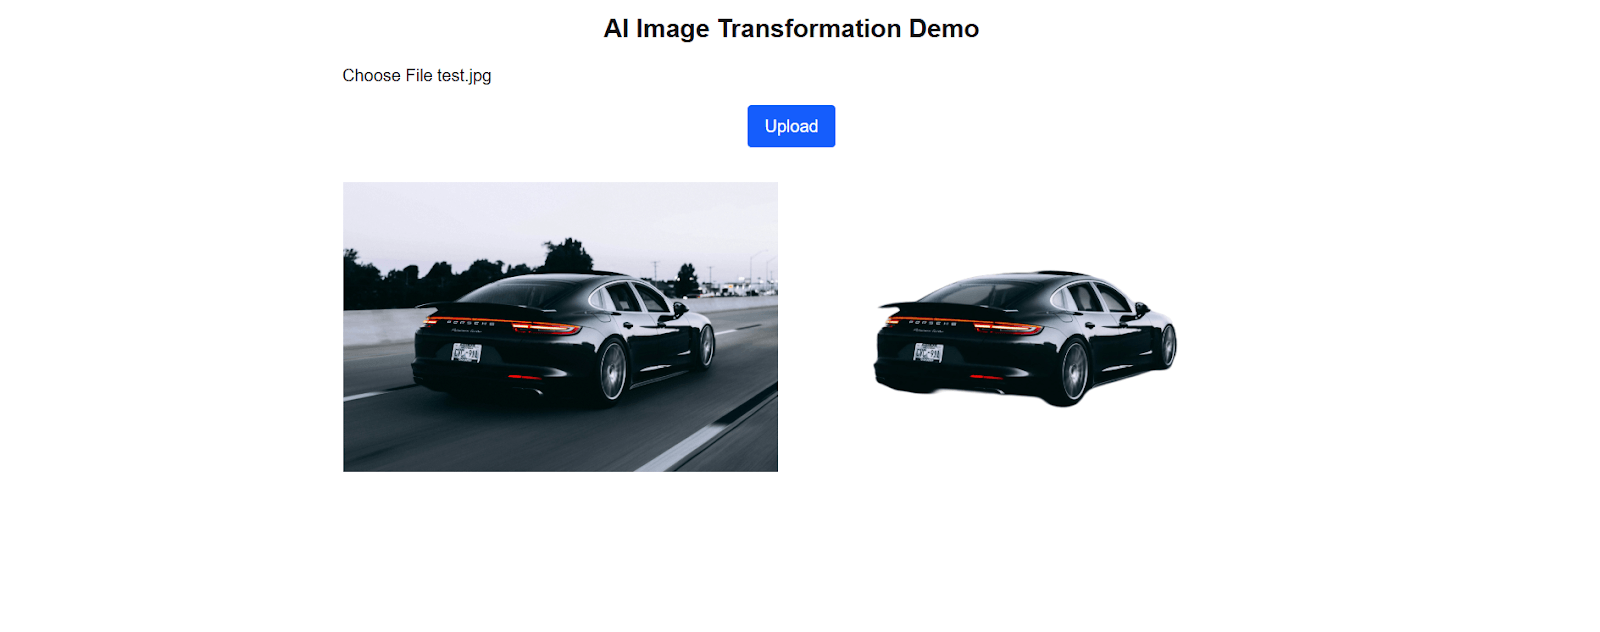
In addition to aiRemoveBackground: true, there is also the option of aiRemoveBackgroundExternal: true, which is a more advanced alternative for background removal with ImageKit. The latter relies on external aid; however, it is advised to use the aiRemoveBackground: true because it is more cost-effective than the other.
Drop Shadow
We can also apply some form of drop shadow around an image in real-time using the aiDropShadow: true transformation option. However, to use this feature, the image must have a transparent background.
To work around this, we can use the background removal feature to remove the background before adding the drop shadow with chained transformations.
Open the src/components/Main.tsx file and update the IKImage component as shown below:
{
  previewUrl && (
    <div>
      <IKImage
        urlEndpoint="https://ik.imagekit.io/johndoe2025"
        src={previewUrl}
        alt="Selected Preview"
        width={800}
        height={800}
        className="w-full max-h-96 object-contain border"
        transformation={[{ aiRemoveBackground: true }, { aiDropShadow: true }]}
      />
    </div>
  );
}
Here, we set both the aiRemoveBackground and aiDropShadow to true to remove the background and apply a drop shadow, respectively.
This is what the result looks like:

Background Change
In addition to removing the background of an image, we can also use ImageKit’s AI transformation features to change its background on the fly. However, instead of defining this effect in the transformation prop, we will be defining it directly in the uploaded image’s URL.
We can change the background of an image by adding a descriptive text of the preferred target background as a query parameter to the image’s URL in the src prop that follows the syntax:
{
  previewUrl && (
    <div>
      <IKImage
        urlEndpoint="https://ik.imagekit.io/johndoe2025"
        src={previewUrl + "?tr=e-changebg-prompt-beach ground"}
        alt="Selected Preview"
        width={800}
        height={800}
        className="w-full max-h-96 object-contain border"
      />
    </div>
  );
}
In the code above, we appended the transformation (tr) property as a query parameter to the uploaded image’s URL and then defined the prompt to change the background to a new one that has a “beach ground.”
This is what it looks like in the browser.

Image Edit
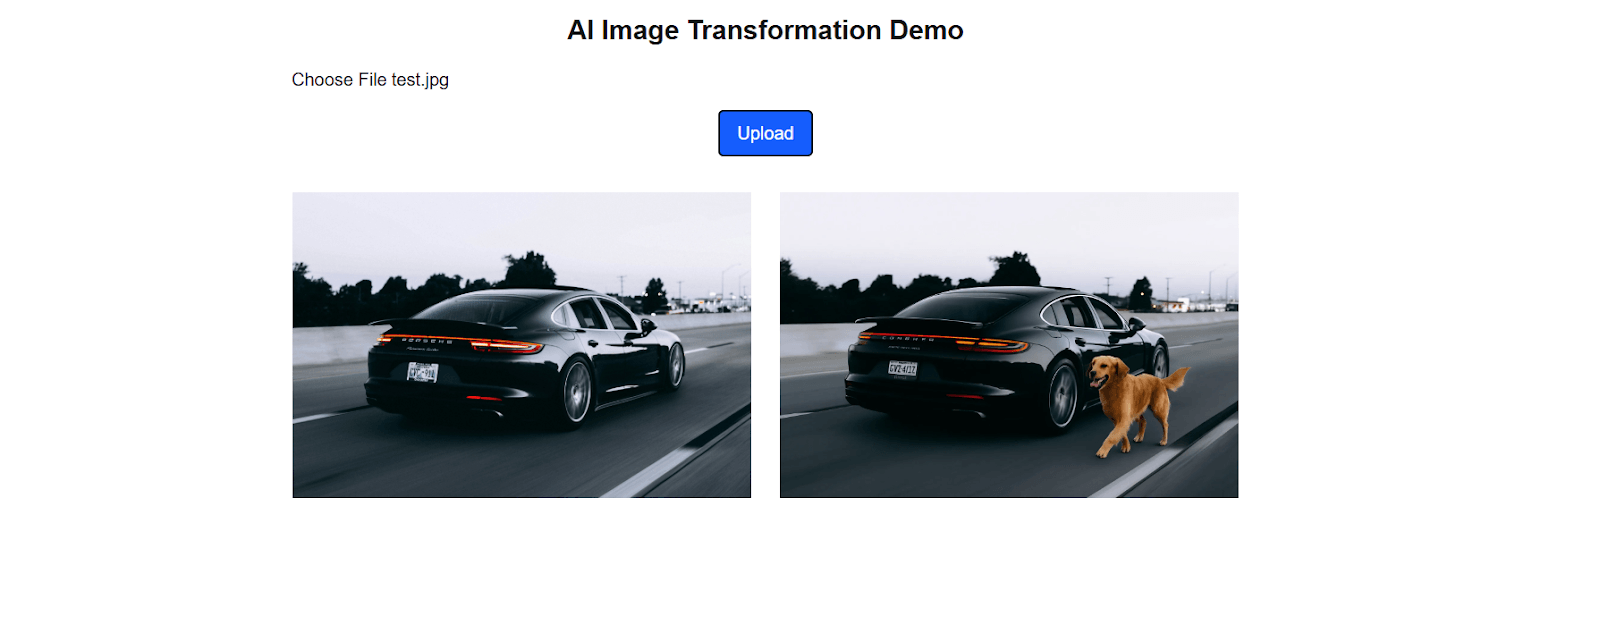
Just like how the background change feature works, we can also change the contents of an image using the e-edit transformation property and passing it a descriptive text prompt.
Here’s what the syntax looks like:
?tr=e-edit-prompt-YOUR-PROMPT-HERE
To demo it in our application, update the src/components/Main.tsx file as shown below:
{
  previewUrl && (
    <div>
      <IKImage
        urlEndpoint="https://ik.imagekit.io/johndoe2025"
        src={previewUrl + "?tr=e-edit-prompt-add a dog somewhere in the image"}
        alt="Selected Preview"
        width={800}
        height={800}
        className="w-full max-h-96 object-contain border"
      />
    </div>
  );
}
Here’s what it looks like in the browser.
Conclusion
In this article, we looked at the need for AI image transformation and explored the core concepts of ImageKit. Then we looked at how to set up ImageKit in a modern Next.js application and also demonstrated some of the AI-powered transformations.
It is important to note that this article is like a quick guide to integrating ImageKit in a modern Next.js application. There is still much more to ImageKit not covered in this article. You can visit the official documentation to learn more.

Christian Nwamba
Chris Nwamba is a Senior Developer Advocate at AWS focusing on AWS Amplify. He is also a teacher with years of experience building products and communities.

