Getting Started with WPF ImageEditor
This tutorial will walk you through the creation of a sample application that contains RadImageEditor.
Adding Telerik Assemblies Using NuGet
To use RadImageEditor when working with NuGet packages, install the Telerik.Windows.Controls.ImageEditor.for.Wpf.Xaml package. The package name may vary slightly based on the Telerik dlls set - Xaml or NoXaml
Read more about NuGet installation in the Installing UI for WPF from NuGet Package article.
With the 2025 Q1 release, the Telerik UI for WPF has a new licensing mechanism. You can learn more about it here.
Adding Assembly References Manually
If you are not using NuGet packages, you can add a reference to the following assemblies:
- Telerik.Licensing.Runtime
- Telerik.Windows.Controls
- Telerik.Windows.Controls.ImageEditor
- Telerik.Windows.Controls.Input
Adding RadImageEditor to the Project
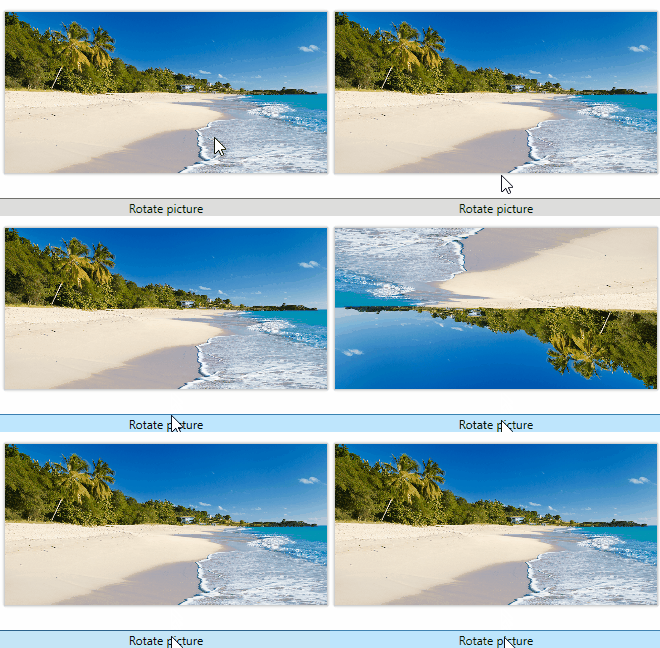
The next few code examples will demonstrate how to add a RadImageEditor in XAML, load a sample picture and execute a command on that picture. Example 1 showcases a RadImageEditor and a Button defined in XAML.
Example 1: Defining a RadImageEditor in xaml
<Grid>
    <Grid.RowDefinitions>
        <RowDefinition />
        <RowDefinition Height="Auto" />
    </Grid.RowDefinitions>
    <telerik:RadImageEditor x:Name="ImageEditor"/>
    <Button Click="Button_Click" Content="Rotate picture" Grid.Row="1" />
</Grid>
Example 2 shows the telerik namespace used in Example 1:
Example 2: Telerik Namespace declaration
xmlns:telerik="http://schemas.telerik.com/2008/xaml/presentation" In order to show a picture, you can set the Image property of the RadImageEditor. It is of type RadBitmap. Example 3 demonstrates how you can use the ImageExampleHelper class in order to load an Image. It assumes that there is a folder named "SampleImages" with an image named "RadImageEditor.png" inside the project.
Example 3: Load image in RadImageEditor
public void LoadSampleImage()
{
    ImageExampleHelper.LoadSampleImage(this.ImageEditor, "RadImageEditor.png");
}

private void Button_Click(object sender, RoutedEventArgs e)
{
    this.ImageEditor.Commands.Rotate180.Execute(this.ImageEditor);
}
  Partial Public Class MainWindow
  Inherits Window

Public Sub New()
	InitializeComponent()

	ImageExampleHelper.LoadSampleImage(Me.ImageEditor, "RadImageEditor.png")
End Sub

Private Sub Button_Click(ByVal sender As Object, ByVal e As RoutedEventArgs)
	Me.ImageEditor.Commands.Rotate180.Execute(Me.ImageEditor)
End Sub
  End Class
Example 4: ImageExampleHelper used in Example 3
public class ImageExampleHelper
{
    private static string SampleImageFolder = "SampleImages/";

    public static void LoadSampleImage(RadImageEditor imageEditor, string image)
    {
        using (Stream stream = Application.GetResourceStream(GetResourceUri(SampleImageFolder + image)).Stream)
        {
            imageEditor.Image = new Telerik.Windows.Media.Imaging.RadBitmap(stream);
            imageEditor.ApplyTemplate();
            imageEditor.ScaleFactor = 0;
        }
    }

    public static Uri GetResourceUri(string resource)
    {
        AssemblyName assemblyName = new AssemblyName(typeof(ImageExampleHelper).Assembly.FullName);
        string resourcePath = "/" + assemblyName.Name + ";component/" + resource;
        Uri resourceUri = new Uri(resourcePath, UriKind.Relative);

        return resourceUri;
    }
} Public Class ImageExampleHelper
Private Shared SampleImageFolder As String = "SampleImages/"
Public Shared Sub LoadSampleImage(ByVal imageEditor As RadImageEditor, ByVal image As String)
Using stream As Stream = Application.GetResourceStream(GetResourceUri(SampleImageFolder & image)).Stream
imageEditor.Image = New Telerik.Windows.Media.Imaging.RadBitmap(stream)
imageEditor.ApplyTemplate()
imageEditor.ScaleFactor = 0
End Using
End Sub
Public Shared Function GetResourceUri(ByVal resource As String) As Uri
Dim assemblyName As New AssemblyName(GetType(ImageExampleHelper).Assembly.FullName)
Dim resourcePath As String = "/" & assemblyName.Name & ";component/" & resource
Dim resourceUri As New Uri(resourcePath, UriKind.Relative)
Return resourceUri
End Function
End ClassFigure 1: Result from the above examples
Commands and Tools
Example 3 demonstrates the usage of a single command over the loaded image. However, the RadImageEditor provides many more Commands and Tools, which can be executed both in code-behind or XAML.
RadImageEditorUI
RadImageEditor is easy to integrate with all kinds of UI thanks to the commanding mechanism that it employs. It has a good-to-go UI that comes out of the box. That is RadImageEditorUI, which is quite easily wired to work with the commands and tools that RadImageEditor exposes. As both controls follow closely the command pattern, they can be set up to work with little to no code-behind. However, you can implement and wire custom UI, too.
Setting a Theme
The controls from our suite support different themes. You can see how to apply a theme different than the default one in the Setting a Theme help article.
Changing the theme using implicit styles will affect all controls that have styles defined in the merged resource dictionaries. This is applicable only for the controls in the scope in which the resources are merged.
To change the theme, you can follow the steps below:
-
Choose between the themes and add reference to the corresponding theme assembly (ex: Telerik.Windows.Themes.Windows8.dll). You can see the different themes applied in the Theming examples from our WPF Controls Examples application.
-
Merge the ResourceDictionaries with the namespace required for the controls that you are using from the theme assembly. For the RadImageEditor, you will need to merge the following resources:
- Telerik.Windows.Controls
- Telerik.Windows.Controls.Input
- Telerik.Windows.Controls.ImageEditor
Example 4 demonstrates how to merge the ResourceDictionaries so that they are applied globally for the entire application.
Example 4: Merge the ResourceDictionaries
<Application.Resources>
    <ResourceDictionary>
        <ResourceDictionary.MergedDictionaries>
            <ResourceDictionary Source="/Telerik.Windows.Themes.Windows8;component/Themes/System.Windows.xaml"/>
            <ResourceDictionary Source="/Telerik.Windows.Themes.Windows8;component/Themes/Telerik.Windows.Controls.xaml"/>
            <ResourceDictionary Source="/Telerik.Windows.Themes.Windows8;component/Themes/Telerik.Windows.Controls.Input.xaml"/>
            <ResourceDictionary Source="/Telerik.Windows.Themes.Windows8;component/Themes/Telerik.Windows.Controls.ImageEditor.xaml"/>
        </ResourceDictionary.MergedDictionaries>
    </ResourceDictionary>
</Application.Resources>
Alternatively, you can use the theme of the control via the StyleManager.
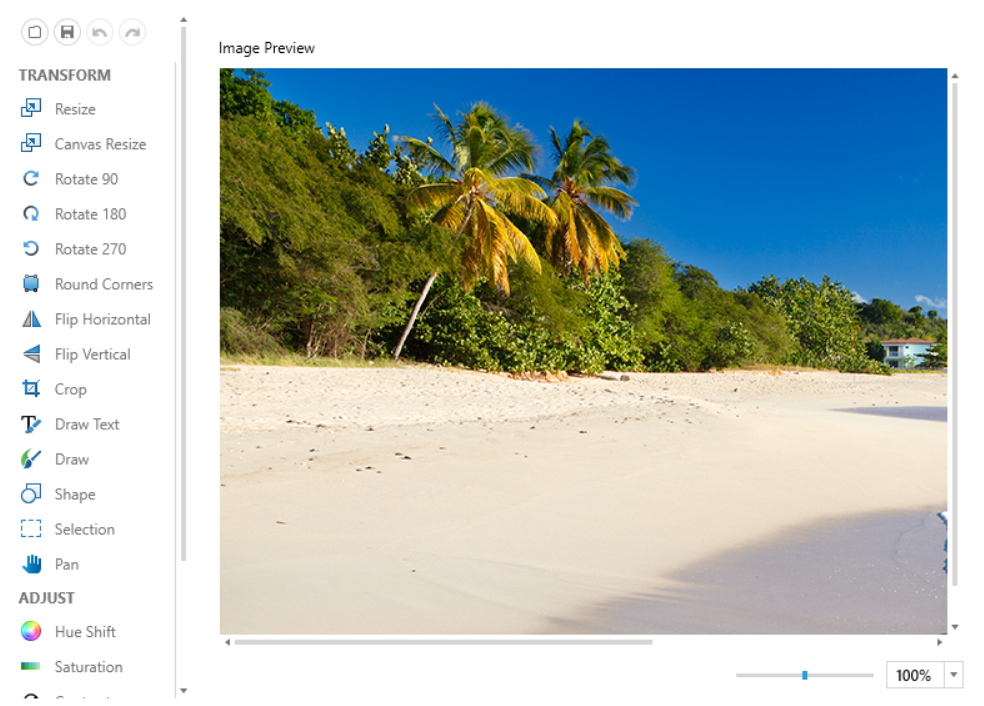
Figure 2 shows a RadImageEditor with the Windows8 theme applied.
Figure 2: RadImageEditor with the Windows8 theme
Telerik UI for WPF Learning Resources
- Telerik UI for WPF ImageEditor Component
- Getting Started with Telerik UI for WPF Components
- Telerik UI for WPF Installation
- Telerik UI for WPF and WinForms Integration
- Telerik UI for WPF Visual Studio Templates
- Setting a Theme with Telerik UI for WPF
- Telerik UI for WPF Virtual Classroom (Training Courses for Registered Users)
- Telerik UI for WPF License Agreement