Adding Templates at Designtime
This examples below show how to use the Template Design Surface to add a RadControl to an expandable/collapsible PanelItem by using either a ContentTemplate or an ItemTemplate.
Content Template
In this example, a RadCalendar control and a Label are added in the ContentTemplate of a root PanelItem.
-
Drag a RadPanelbar from the toolbox onto your Web page.
-
Create one root item with text "Calendar".
-
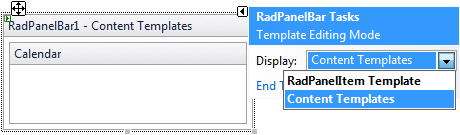
From the Smart Tag that appears when you drop the RadPanelbar, choose Edit Templates.
-
The Template Design Surface appears, set for editing the ContentTemplate. The template design surface of the only Item will appear:
-
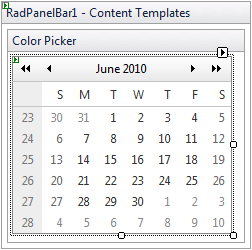
Drag a RadCalendar control from the toolbox onto the Template Design Surface:
-
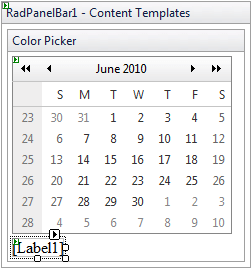
Drag a Label control from the toolbox onto the Template Design surface under the calendar:
-
Right click on the Label control, choose Properties from its context menu, and set the Text property to "Select Date".
-
Right click on the RadCalendar control, choose Properties from its context menu, set the AutoPostBack property to true and the EnableMultiSelect property to false.
-
Give the RadCalendar control a SelectionChanged event handler:
C#protected void RadCalendar_SelectionChanged(object sender, SelectedDatesEventArgs e) { Label1.Text = RadCalendar1.SelectedDate.ToShortDateString(); }The code in the event handler directly accesses from inside the Content Template both the Calendar and the Label by their IDs. This is a feature of Content Templates.
-
Use the Smart Tag anchor to display the Edit Templates pop-up, and choose End Template Editing to close the Template Design Surface.
-
In the Smart Tag for the RadPanelBar control, click on Add RadAjaxManager.
-
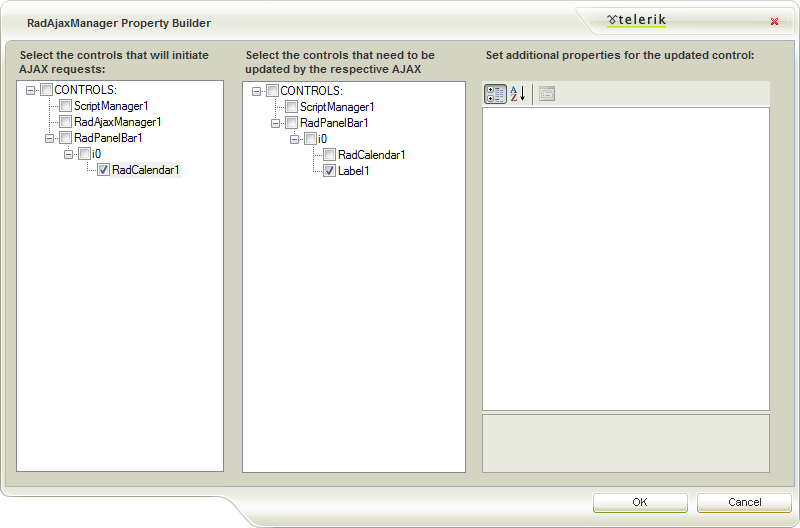
In the RadAjaxManager Property Builder, select the calendar as a control that initiates AJAX requests. In the controls that need to be updated, select the label:
-
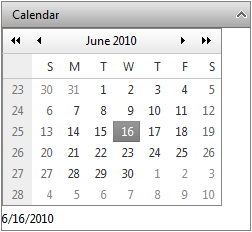
Run the application. When you click on the root item, the calendar is displayed. When you select a date from the calendar, the "Example" label reflects the selected date:
Item Template
This example shows how to use the Template Design Surface to add a RadColorPicker control to an expandable/collapsible PanelItem by using the ItemTemplate.
-
Drag a RadPanelbar from the toolbox onto your Web page.
-
Create one root item with text "Color Picker" and add a child item to it with no text.
-
From the Smart Tag that appears when you drop the RadPanelbar, choose Edit Templates.
-
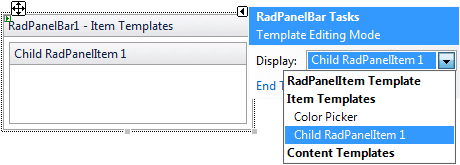
The Template Design Surface appears, set for editing the ItemTemplate.
-
Select the child item to display its template designsurface
-
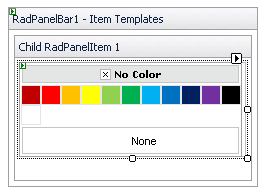
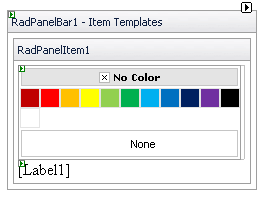
Drag a RadColorPicker control from the toolbox onto the Template Design Surface:
-
Drag a Label control from the toolbox onto the Template Design surface under the color picker:
-
Right click on the Label control, choose Properties from its context menu, and set the Text property to "Example".
-
Right click on the RadColorPicker control, choose Properties from its context menu, and set the AutoPostBack property to true.
-
Give the RadColorPicker control a ColorChanged event handler:
C#protected void RadColorPicker1_ColorChanged(object sender, EventArgs e) { RadColorPicker picker = sender as RadColorPicker; Label label = picker.Parent.FindControl("Label1") as Label; label.ForeColor = picker.SelectedColor; }The event handler finds the label in the panel item's template and sets its font color to the color that was selected in the color picker.
-
Use the Smart Tag anchor to display the Edit Templates pop-up, and choose End Template Editing to close the Template Design Surface.
-
In the Smart Tag for the RadPanelBar control, click on Add RadAjaxManager.
-
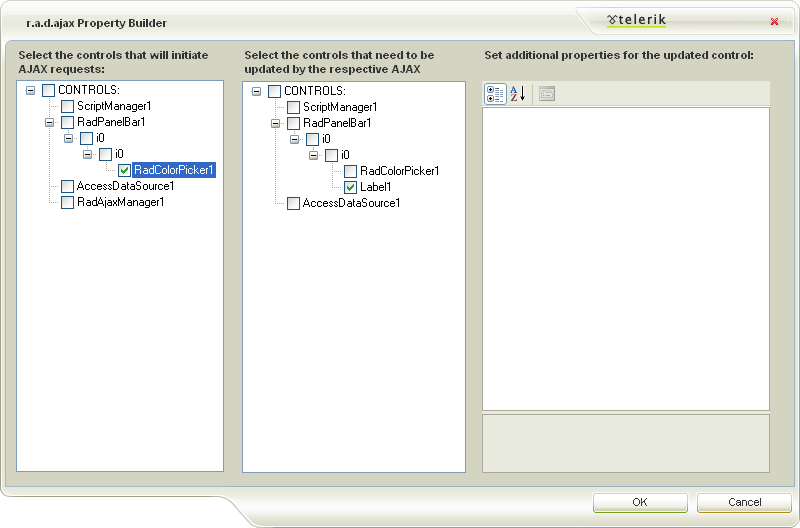
In the r.a.d.ajax Property Builder, select the color picker as a control that initiates AJAX requests. In the controls that need to be updated, select the label:
-
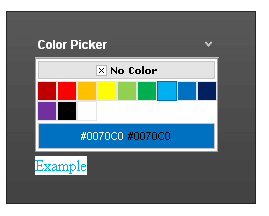
Run the application. When you click on the root item, the color picker is displayed. When you select a color from the color picker, the "Example" label reflects the selected color: