Xamarin.Forms: Recurring Appointments and Built-in Scheduling Dialogs in Calendar

Summarize with AI:
With the recent R1 2019 release of the Telerik UI for Xamarin suite we have added a couple of much-requested functionalities to the Xamarin Calendar control – recurring appointments and built-in scheduling pages.
This blog post will give you a brief overview of the features and the control’s new awesome capabilities which can help you integrate a great scheduling experience within your Xamarin based mobile app in a matter of minutes.
Recurring Appointments
First, lets have a look at the newly introduced recurrence support for the calendar’s appointments. In order to take advantage of the recurring engine, we have introduced a new Appointment class which we recommend you use instead of creating a custom appointment that implements the IАppointment interface (which was the approach we suggested prior to this release). The RadCalendar control will still work with the old setup, however, scheduling and recurrence will not be supported in such a case.
So, what does this Appointment class provide beyond the interface? It exposes an additional property – RecurrenceRule which is of type IRecurrenceRule. At this point, you might be wondering, “you want me to change my current setup to use the Appointment class just for one additional property?”, but do not let this small difference mislead you. Beneath the fragile shell of just another POCO property lies a powerful scheduling mechanism which you can twist around in order to achieve even the most complex rules for a recurring event. Simply review the RecurrencePattern capabilities and come up with a mix of settings which suit your needs. Let’s briefly look at the options you have to control the recurrence:
- Frequency – Lets you decide the period on which the appointment will appear, can be daily, weekly, monthly, yearly.
- Interval – the interval on which the appointment will appear – e.g. every 2 days, every 3 months, etc.
- DaysOfWeekMask – a flag enum where you can explicitly point out the days on which the event will occur – e.g on Tuesday, on Wednesday and Friday, on every weekend day.
- DaysOfMonth – a collection of all days in the month on which the appointment should occur.
- DayOrdinal – lets you specify the day ordinal – e.g the first Sunday, the second Monday.
- MonthOfYear – the particular month within the year when the event will happen.
You can also control the number of appearances or the date until which the event will appear by setting the MaxOccurrences (exact number of occurrences) or RepeatsUntil (a specific date) properties.
Here is how easy it is to add a recurring appointment to your calendar:
Create a collection of Appointments (you can inherit from the Appointment class as well) and set it as the AppointmentsSource of your RadCalendar instance:
DateTime time = DateTime.Parse("1:00");
this.Source = new ObservableCollection<Appointment>()
{
    new Appointment()
    {
        StartDate = time,
        EndDate = time.AddHours(1),
        Color = Color.Orange,
        RecurrenceRule = rule,
        Title = "Recurring",
        IsAllDay = false
    }
};
Where the RecurrenceRule is defined as follows:
RecurrenceRule rule = new RecurrenceRule(new RecurrencePattern()
{
    Frequency = RecurrenceFrequency.Daily,
    Interval = 2,
    MaxOccurrences = 5
});
Make sure the calendar’s AppointmentsSource is bound to the collection from your ViewModel or class that is used as a binding context, and run the application on any platform:
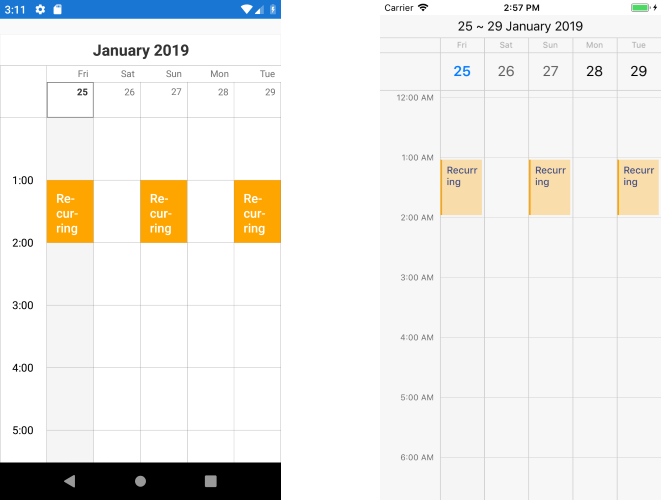
Scrolling the Multi-day view to the next page shows that the appointment is limited to five occurrences only:
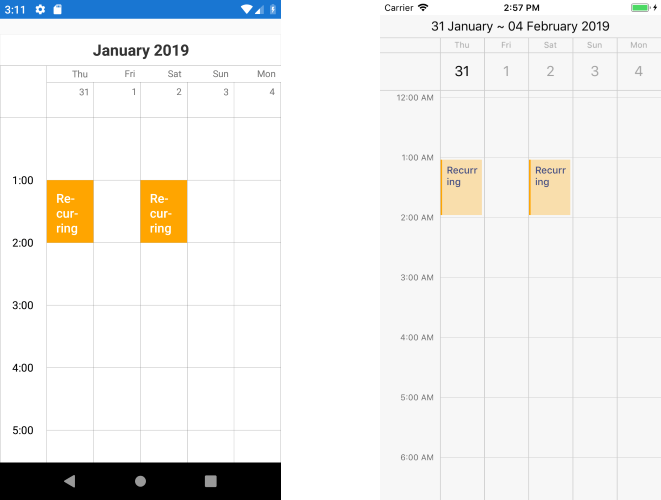
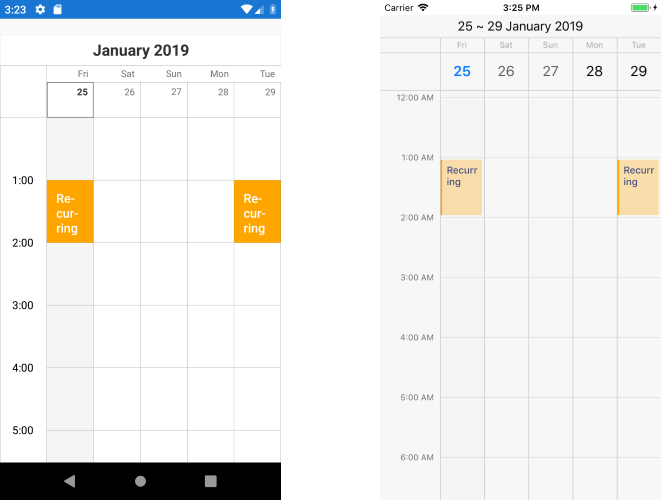
The RecurrenceRule class also supports adding exceptions to the rules, which is useful for a single appointment whose properties differ from those of the series or when you want to remove the appointment for a specific date. The latter is achieved by adding a single exception to the already created rule:
RecurrenceRule rule = new RecurrenceRule(new RecurrencePattern()
{
    Frequency = RecurrenceFrequency.Daily,
    Interval = 2,
    MaxOccurrences = 5
});
rule.Exceptions.Add(new ExceptionOccurrence() { ExceptionDate = time.AddDays(2) });
Here is the modified appearance:
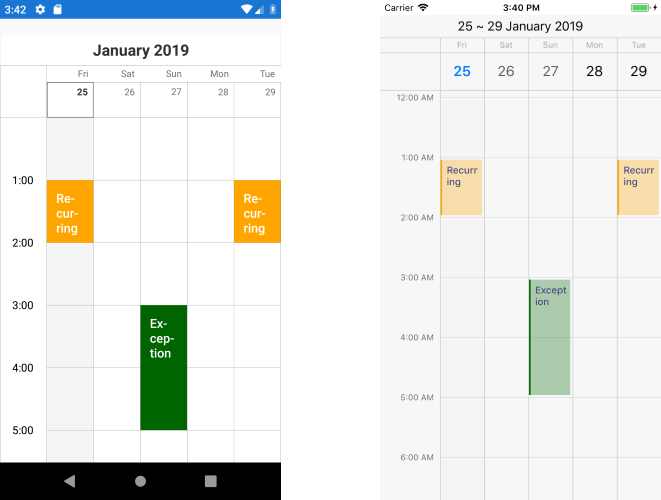
Adding a specific appointment as exception is also straightforward. You just specify the date and add a new Appointment which will substitute for the default one:
RecurrenceRule rule = new RecurrenceRule(new RecurrencePattern()
{
    Frequency = RecurrenceFrequency.Daily,
    Interval = 2,
    MaxOccurrences = 5
});

var exceptionDate = time.AddDays(2);
rule.Exceptions.Add(new ExceptionOccurrence() { ExceptionDate = exceptionDate, Appointment = new Appointment() {
    StartDate = exceptionDate.AddHours(2),
    EndDate = exceptionDate.AddHours(4),
    Color = Color.DarkGreen,
    Title = "Exception",
    IsAllDay = false
} });
Here is the result:
Built-in Scheduling
The second major feature that we shipped with R1 2019 is directly related to the scheduling capabilities of the Xamarin Calendar that we discussed in the previous paragraph. We have introduced built-in scheduling pages for creating appointments and modifying their properties, including their recurrence rule. Just setting the SchedulingUIEnabled property of the RadCalendar to "true" enables the functionality for your users. They can add new appointments and edit or delete already existing ones.
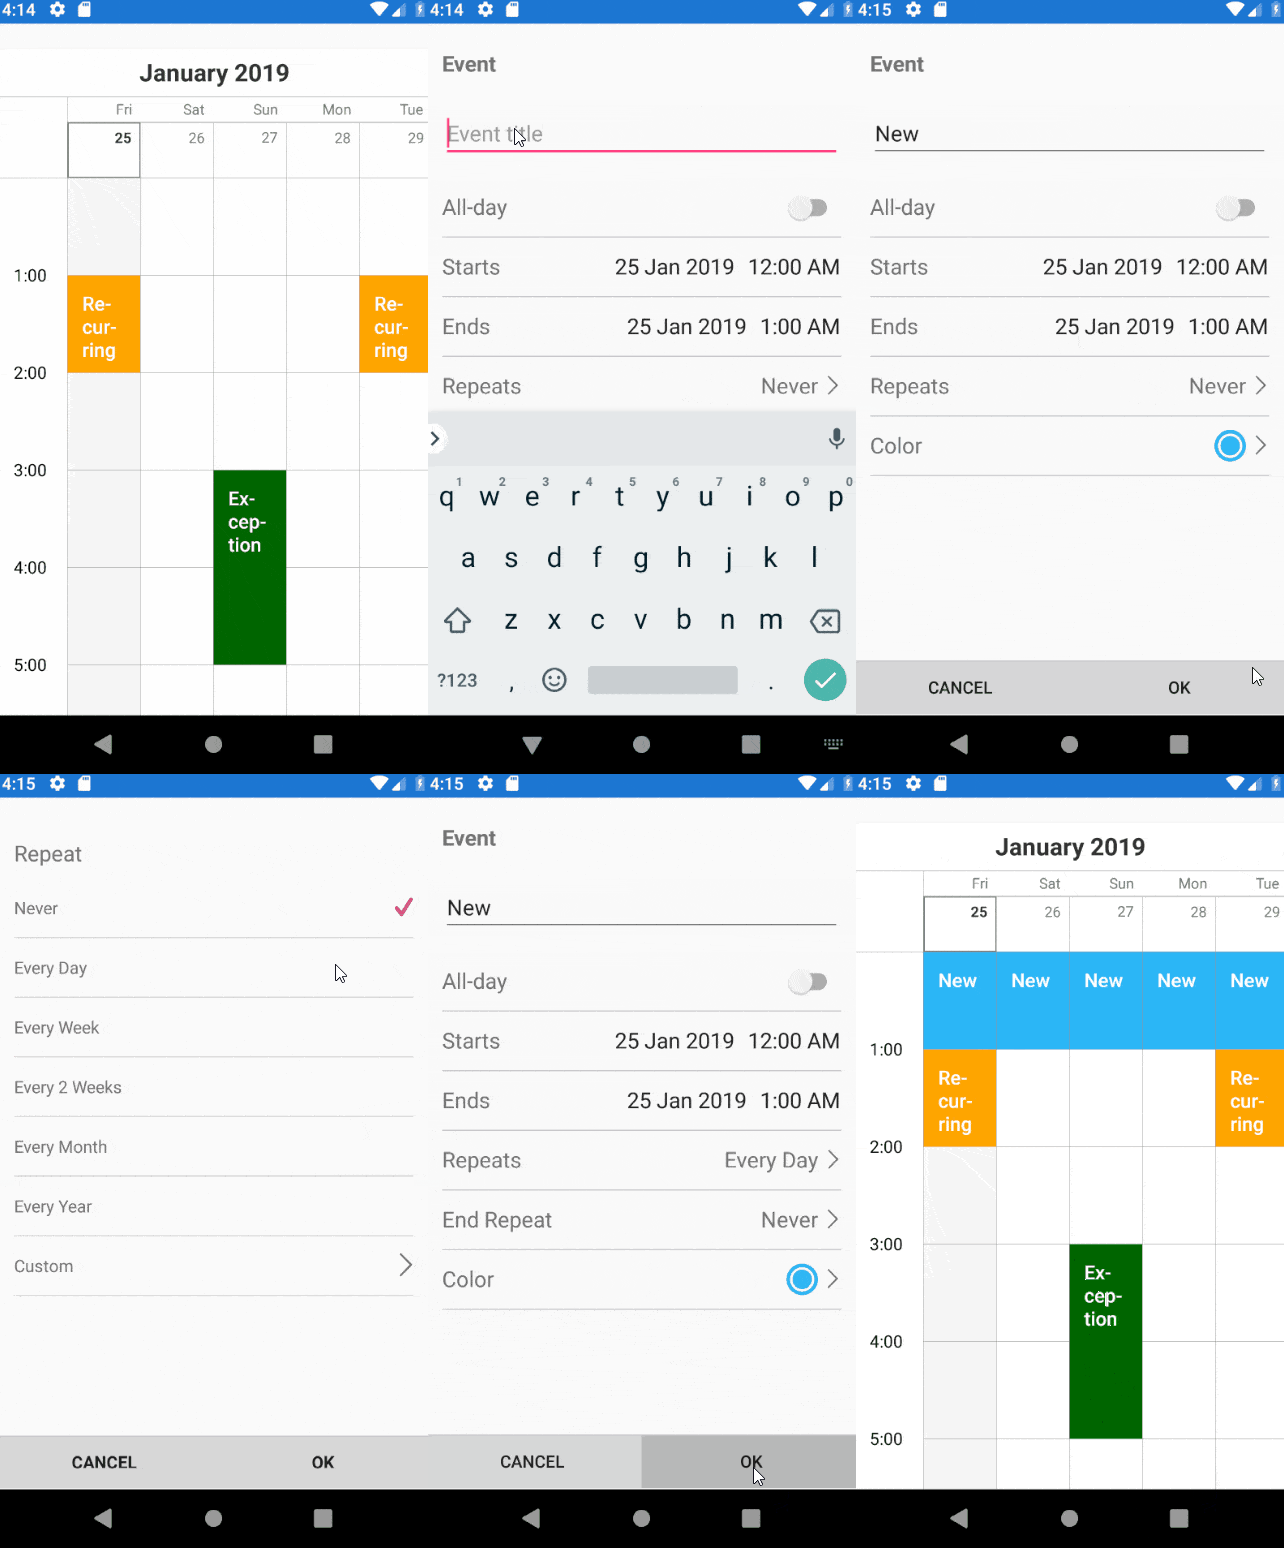
You can control whether to show the windows for specific time slots or Appointments that were tapped by subscribing to the TimeSlotTapped/AppointmentTapped events and setting their e.Handled arguments. This is particularly useful in case you would like to disable the feature according to specific criteria or would like to show custom add/edit windows.
Try it Out and Share Your Feedback
You can have a more detailed look and test the experience with the default scheduling views by checking the available calendar/scheduling demos in our QSF and SDK Samples applications or by directly downloading the demo apps from the different platform stores – iOS, Android or Microsoft.
As you can see, there are a lot of useful properties to control the scheduling of the RadCalendar element and the different combinations provide you with numerous possibilities to fulfill your users’ demands. Still, if you are having difficulties achieving a specific scenario – do not hesitate to reach out to us either by raising a ticket or writing in the Telerik UI for Xamarin official forum.
In the upcoming releases we will keep working on improving the features and performance of the Calendar control, so any feedback from your side is highly appreciated - just let us know what features you would like to see on our Progress Telerik UI for Xamarin Feedback Portal. Lastly, if you haven't gotten a chance to try the latest version of the suite, you can do so by downloading a fresh trial from the Telerik UI for Xamarin Product Page.

Stefan Nenchev
Stefan was a Technical Support Engineer on the Telerik UI for Xamarin team.
