
Native Platform Library Embedding in .NET MAUI

Summarize with AI:
Learn how to use native embedding in your .NET MAUI app—within native Android, Windows and iOS projects.
In this post, you’ll learn what native embedding is and how you can use it to embed components created in a .NET MAUI project, whether using native controls or third-party ones like Progress Telerik UI for .NET MAUI, within native Android, Windows and iOS projects. Let’s get started!
What Is Native Embedding?
Native embedding refers to the ability to make graphical components created with .NET MAUI controls consumable in .NET projects for iOS, .NET for Android, .NET for Mac Catalyst and WinUI. These components must be created with controls that derive from the Element type.
You might wonder why it would be useful to use controls created in .NET MAUI within native applications, so here are some use cases:
- Code reuse: You might have a new project that will only target one platform and want to reuse graphical components from a previously created .NET MAUI application with certain corporate identity.
- Advanced UI customization: You might know how to get the most out of native controls by giving them features that you might not find in NuGet packages, combining them with controls that have been previously tested in .NET MAUI projects.
- Projects with native SDKs: If there’s an integration with a native hardware component, like a printer, you might want to develop the controls in .NET MAUI and use them in the native project that will communicate with the native SDK.
Let’s see how to prepare the .NET MAUI project for use from native platforms.
Preparing Components in the .NET MAUI Project
The first thing we need to do to enable native embedding is to prepare our .NET MAUI project so it can be consumed externally. Suppose that in your project you have created a component like the one we’ve seen in the post Bindable Properties and ControlTemplates in .NET MAUI, which you want to reuse in a native project.
I recommend first making a copy of the .NET MAUI project, as it will be modified to contain only the graphical components and the logic behind them. Also make sure that the component is defined in a ContentView and not in a ContentPage—otherwise, you’ll have exceptions when trying to run the native project. The steps to follow are:
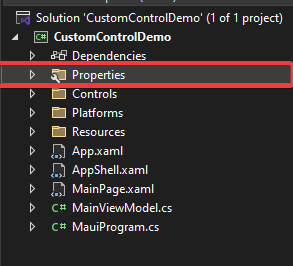
- Delete the
Propertiesfolder from the project:
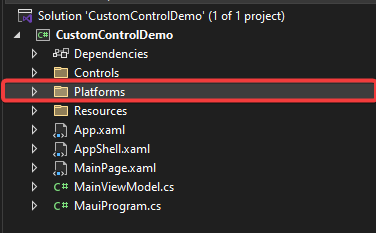
- Delete the
Platformsfolder from the project:
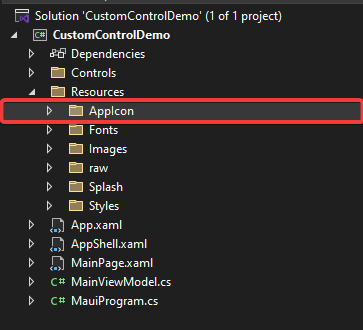
- Delete the
Resources/AppIconfolder from the project:
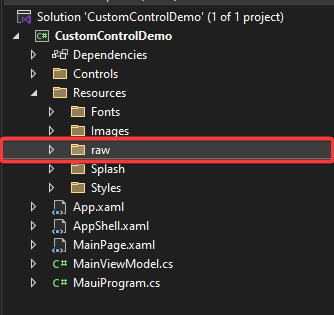
- The
Resources/rawfolder must also be deleted from the project:
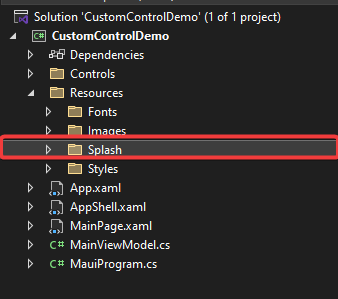
- Delete the
Resources/Splashfolder from the .NET MAUI project:
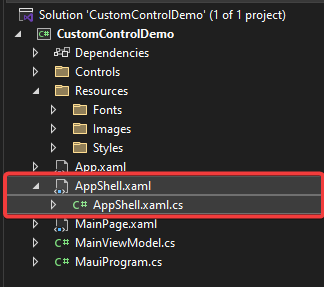
- You must also delete the
AppShell.xamlfile and its respectiveAppShell.xaml.csfile from the project:
- Go to the
App.xaml.csfile and make sure thatMainPagehas no assigned value, and that theCreateWindowmethod is not overridden. The resulting file should contain code similar to the following:
public partial class App : Application
{
    public App()
    {
        InitializeComponent();
    }
}
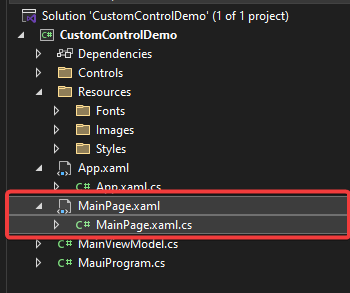
- Delete any
ContentPagethat is part of the project. In my case, I have to get rid ofMainPage.xamlwith its respectiveMainPage.xaml.csfile:
- The next step is to double click on the project name (not the solution), which will open the configuration file. You’ll see a first
PropertyGroupsection like this:
<PropertyGroup>
    <TargetFrameworks>net9.0-android;net9.0-ios;net9.0-maccatalyst</TargetFrameworks>
    <TargetFrameworks Condition="$([MSBuild]::IsOSPlatform('windows'))">$(TargetFrameworks);net9.0-windows10.0.19041.0</TargetFrameworks>
    <!-- Uncomment to also build the tizen app. You will need to install tizen by following this: https://github.com/Samsung/Tizen.NET -->
    <!-- <TargetFrameworks>$(TargetFrameworks);net9.0-tizen</TargetFrameworks> -->

    <!-- Note for MacCatalyst:
    The default runtime is maccatalyst-x64, except in Release config, in which case the default is maccatalyst-x64;maccatalyst-arm64.
    When specifying both architectures, use the plural <RuntimeIdentifiers> instead of the singular <RuntimeIdentifier>.
    The Mac App Store will NOT accept apps with ONLY maccatalyst-arm64 indicated;
    either BOTH runtimes must be indicated or ONLY macatalyst-x64. -->
    <!-- For example: <RuntimeIdentifiers>maccatalyst-x64;maccatalyst-arm64</RuntimeIdentifiers> -->

    <OutputType>Exe</OutputType>
    <RootNamespace>CustomControlDemo</RootNamespace>
    <UseMaui>true</UseMaui>
    <SingleProject>true</SingleProject>
    <ImplicitUsings>enable</ImplicitUsings>
    <Nullable>enable</Nullable>
    ...
</PropertyGroup>
We need to modify this section by removing <OutputType>Exe</OutputType> and adding the line <TargetFramework>net9.0</TargetFramework>. Additionally, in my experience, I’ve had to comment out the lines containing the TargetFrameworks tag for the net9.0 folder and its content to be created, ending up like this:
<PropertyGroup>
    <!--<TargetFrameworks>net9.0-android;net9.0-ios;net9.0-maccatalyst</TargetFrameworks>-->
    <!--<TargetFrameworks Condition="$([MSBuild]::IsOSPlatform('windows'))">$(TargetFrameworks);net9.0-windows10.0.19041.0</TargetFrameworks>-->
    ...

    <TargetFramework>net9.0</TargetFramework>
    <RootNamespace>CustomControlDemo</RootNamespace>
    <UseMaui>true</UseMaui>
    <SingleProject>true</SingleProject>
    <ImplicitUsings>enable</ImplicitUsings>
    <Nullable>enable</Nullable>
    ...
</PropertyGroup>
- Once the project file has been modified, go to the
MauiProgram.csfile where you need to change the constructor signature from this:
public static MauiApp CreateMauiApp()
to this:
public static MauiApp CreateMauiApp<TApp>(Action<MauiAppBuilder>? additional = null) where TApp : App
Similarly, you need to make sure to change the use of the UseMauiApp method:
.UseMauiApp<App>()
to UseMauiEmbeddedApp with a generic TApp:
.UseMauiEmbeddedApp<TApp>()
Finally, an overload of the constructor that accepts an Action<MauiAppBuilder> argument must be added:
public static class MauiProgram
{
    ...
    public static MauiApp CreateMauiApp(Action<MauiAppBuilder>? additional = null) =>
        CreateMauiApp<App>(additional);
    ...
}
The final class should look similar to the following class:
public static class MauiProgram
{
    public static MauiApp CreateMauiApp(Action<MauiAppBuilder>? additional = null) =>
        CreateMauiApp<App>(additional);

    public static MauiApp CreateMauiApp<TApp>(Action<MauiAppBuilder>? additional = null) where TApp : App
    {
        var builder = MauiApp.CreateBuilder();
        builder
            .UseMauiEmbeddedApp<TApp>()
            .UseTelerik()
            .ConfigureFonts(fonts =>
            {
                fonts.AddFont("OpenSans-Regular.ttf", "OpenSansRegular");
                fonts.AddFont("OpenSans-Semibold.ttf", "OpenSansSemibold");
            });

#if DEBUG
        builder.Logging.AddDebug();
#endif

        return builder.Build();
    }
}
Once the above modifications are made, make sure to perform a build to verify that the project is configured correctly.
Integrating the .NET MAUI Control in Native Platforms
Next, we’ll see the steps required to use the components from the .NET MAUI project in native platforms.
Creating the Projects
The first thing you need to do is add the native projects to the solution that contains the .NET MAUI project with the created controls. You can do this by attaching a previously created native project, or by creating a new project. For my example, I’m going to create these projects from scratch.
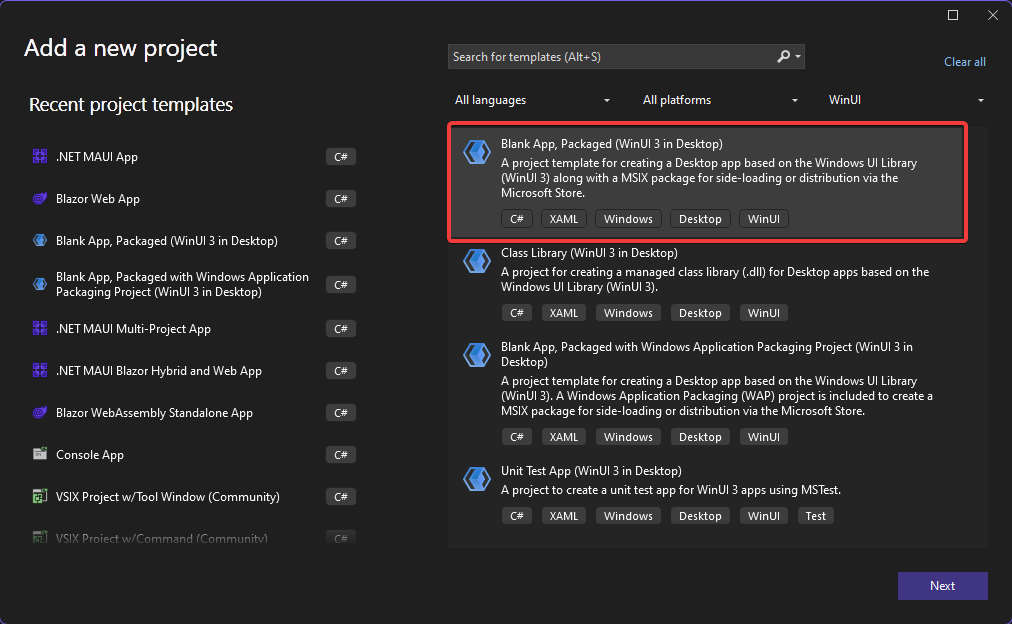
I’ll start by adding the WinUI project, which I achieve by right-clicking on the .NET MAUI project and selecting the Add New Project option. In the templates window, you should select the Blank App, Packaged (WinUI 3 in Desktop) template and create the project with whatever name you want (I’ve called it WinUIProject):
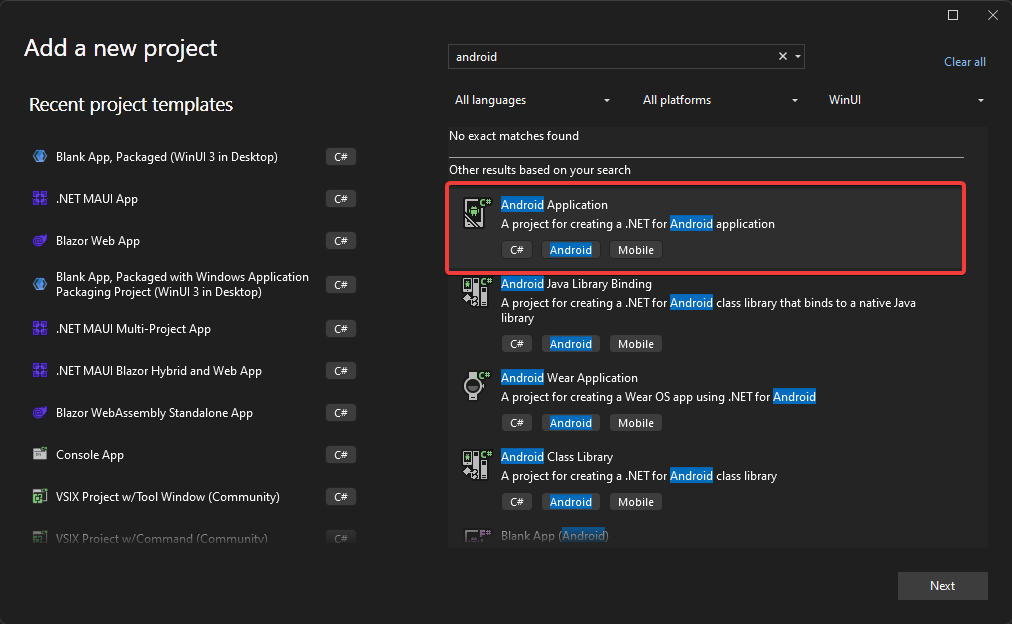
Similarly, I add the Android project following the same steps as above, but selecting the Android Application template (I’ve called this one AndroidProject):
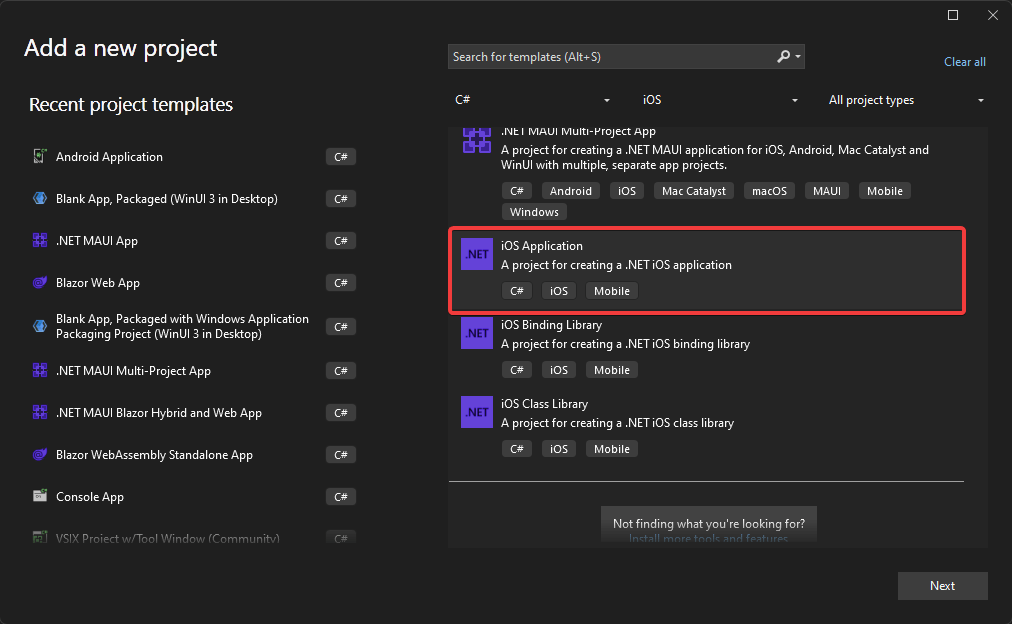
Finally, I add the iOS project, selecting this time the iOS Application template (You can call it iOSProject):
Preparing Native Projects to Enable .NET Support
Once you have created the native projects, you must double-click on the configuration file of each project, with the purpose of adding these two compilation properties in the first PropertyGroup section:
<PropertyGroup>
    ...
    <UseMaui>true</UseMaui>
    <MauiEnablePlatformUsings>true</MauiEnablePlatformUsings>
</PropertyGroup>
Similarly, you must add a new ItemGroup to add the Microsoft.Maui.Controls NuGet package to the project:
<ItemGroup>
    <PackageReference Include="Microsoft.Maui.Controls" Version="$(MauiVersion)" />
</ItemGroup>
Remember to do this for each of the projects. Additionally, for the WinUI platform, you need to add one last line in the first PropertyGroup section to avoid compilation errors:
<PropertyGroup>
    ...
    <UseMaui>true</UseMaui>
    <MauiEnablePlatformUsings>true</MauiEnablePlatformUsings>
    <EnableDefaultXamlItems>false</EnableDefaultXamlItems>
</PropertyGroup>
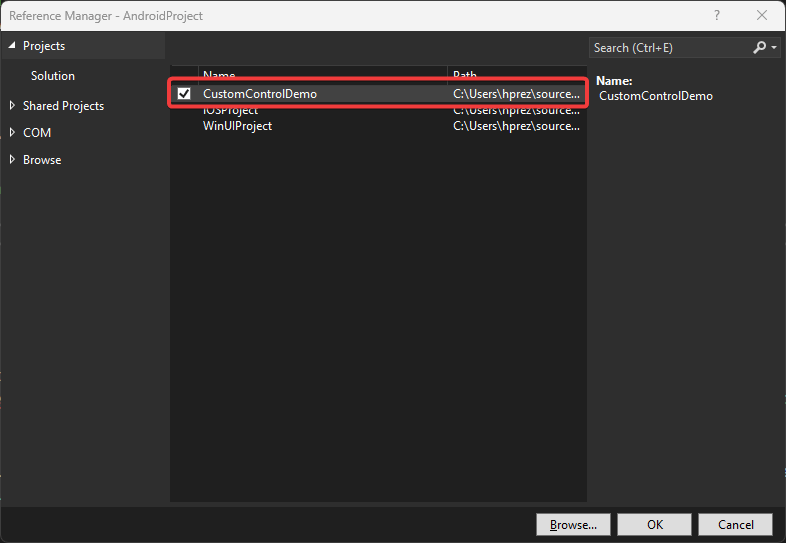
Finally, you need to add a reference to the .NET MAUI project from each of the native projects by right-clicking on the solution name | Add | Reference, as shown below:
Initializing .NET MAUI in Native Projects
The native embedding feature can be done in two contexts:
- App context: Useful for scenarios where simple .NET MAUI UI interface embedding is required, without access to all framework features such as Hot Reload.
- Window context: The recommended option, as it has access to all framework features, allowing the greatest compatibility in a window context.
In either case, it is recommended to create a shared and static instance of MauiApp, which will allow faster loading when trying to display .NET MAUI components, avoiding the delay this could cause:
public static class MyEmbeddedMauiApp
{
    static MauiApp? _shared;
    public static MauiApp Shared => _shared ??= MauiProgram.CreateMauiApp();
}
Let’s see a practical example of native embedding below.
Practical Example with AppContext: Embedding .NET MAUI Component in UWP Project
Let’s do a practical example to see how to embed a .NET MAUI component in a native UWP project using AppContext. Let’s open the WinUIProject | MainWindow.xaml file, adding a name to the StackLayout container to be able to reference it from the code behind, plus the Loaded event to perform the .NET MAUI control creation operations from the event handler:
<StackPanel
    x:Name="Container"
    HorizontalAlignment="Center"
    VerticalAlignment="Center"
    Loaded="Container_Loaded"
    Orientation="Horizontal">
    <Button x:Name="myButton" Click="myButton_Click">Click Me</Button>
</StackPanel>
Next, let’s go to the code behind, that is, the MainWindow.xaml.cs file to add the shared instance to MauiApp as follows:
public sealed partial class MainWindow : Window
{
    public static class MyEmbeddedMauiApp
    {
        static MauiApp? _shared;

        public static MauiApp Shared =>
            _shared ??= MauiProgram.CreateMauiApp();
    }
    ...
}
The next step is to create a MauiContext from the previously created MauiApp object. This object will help us get the native view of the .NET MAUI control:
private void Container_Loaded(object sender, RoutedEventArgs e)
{
    var mauiApp = MyEmbeddedMauiApp.Shared;
    var context = new MauiContext(mauiApp.Services);
}
Once this is done, we must create a new instance of the .NET MAUI control. Next, we’ll use the ToPlatformEmbedded() method of the .NET MAUI control we’ve created, storing its result in a native platform type, in WinUI it will be FrameworkElement, while in Android the type will be Android.Views.View and in iOS it will be UIViewController. Finally, we’ll add the obtained native control in a native container, in our case, we’ll use a StackPanel:
private void Container_Loaded(object sender, RoutedEventArgs e)
{
    var mauiApp = MyEmbeddedMauiApp.Shared;
    var context = new MauiContext(mauiApp.Services);

    var downloader = new Downloader();
    FrameworkElement nativeView = downloader.ToPlatformEmbedded(context);
    Container.Children.Add(nativeView);
}
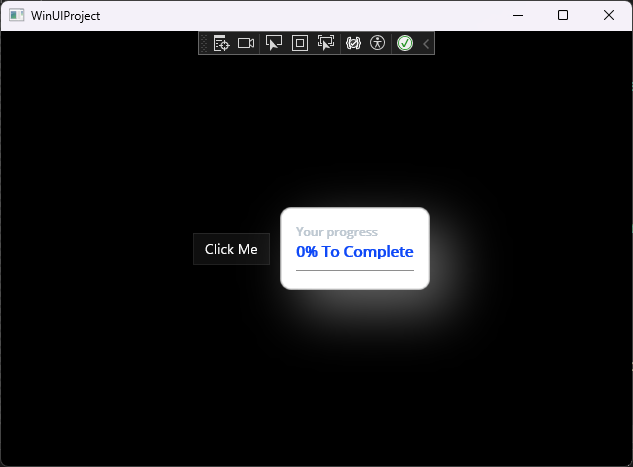
If we run the application at this point, you’ll see that the .NET MAUI component is deployed correctly:
Practical Example with Window Context: Embedding .NET MAUI Component in Android Project
Let’s now do an example with a Window context. We’re going to modify the AndroidProject | Resources | layout | activity_main.xml file as follows:
<?xml version="1.0" encoding="utf-8"?>
<RelativeLayout xmlns:android="http://schemas.android.com/apk/res/android"
    xmlns:app="http://schemas.android.com/apk/res-auto"
    xmlns:tools="http://schemas.android.com/tools"
    android:layout_width="match_parent"
    android:layout_height="match_parent">
    <LinearLayout
            android:layout_width="wrap_content"
            android:layout_height="wrap_content"
            android:layout_marginTop="16dp"
            app:layout_constraintBottom_toBottomOf="parent"
            app:layout_constraintEnd_toEndOf="parent"
            app:layout_constraintStart_toStartOf="parent"
            android:orientation="vertical"
            android:id="@+id/layout_first"
            android:padding="8dp">

            <Button
                android:id="@+id/button_animate"
                android:layout_width="match_parent"
                android:layout_height="wrap_content"
                android:text="Android button above .NET MAUI controls" />

            <!-- .NET MAUI content will go here. -->

        </LinearLayout>
</RelativeLayout>
Next, let’s go to the MainActivity.cs file where we’ll add the static class to create the MauiApp instance, just as we did in the AppContext scenario:
[Activity(Label = "@string/app_name", MainLauncher = true)]
public class MainActivity : Activity
{
    public static class MyEmbeddedMauiApp
    {
        static MauiApp? _shared;
        public static MauiApp Shared => _shared ??= MauiProgram.CreateMauiApp();
    }

    protected override void OnCreate(Bundle? savedInstanceState)
    {
        base.OnCreate(savedInstanceState);

        // Set our view from the "main" layout resource
        SetContentView(Resource.Layout.activity_main);
    }
}
In this scenario, the context must be created through the execution of the CreateEmbeddedWindowContext method of MauiApp, which can be defined as follows:
public class MainActivity : Activity
{
    public static class MyEmbeddedMauiApp
    {
        static MauiApp? _shared;
        public static MauiApp Shared => _shared ??= MauiProgram.CreateMauiApp();
    }

    Activity? _window;
    IMauiContext? _windowContext;

    public IMauiContext WindowContext =>
        _windowContext ??= MyEmbeddedMauiApp.Shared.CreateEmbeddedWindowContext(_window ?? throw new InvalidOperationException());


    protected override void OnCreate(Bundle? savedInstanceState)
    ...
In the above code, the _window reference is declared linked to the current Android activity, and similarly, a _windowContext reference is declared that will be used to obtain the native view of the .NET MAUI component.
Finally, we’ll follow very similar steps to those performed with the UWP project—that is, create an instance of the native .NET MAUI control, use the ToPlatformEmbedded method that will return the native platform view and attach it to the native UI, in this case, through a LinearLayout:
protected override void OnCreate(Bundle? savedInstanceState)
{
    base.OnCreate(savedInstanceState);

    // Set our view from the "main" layout resource
    SetContentView(Resource.Layout.activity_main);

    _window ??= this;

    var context = WindowContext;

    var mauiView = new Downloader();
    Android.Views.View nativeView = mauiView.ToPlatformEmbedded(context);

    var rootLayout = FindViewById<LinearLayout>(Resource.Id.layout_first)!;
    rootLayout.AddView(nativeView, new LinearLayout.LayoutParams(ViewGroup.LayoutParams.MatchParent, ViewGroup.LayoutParams.WrapContent));
}
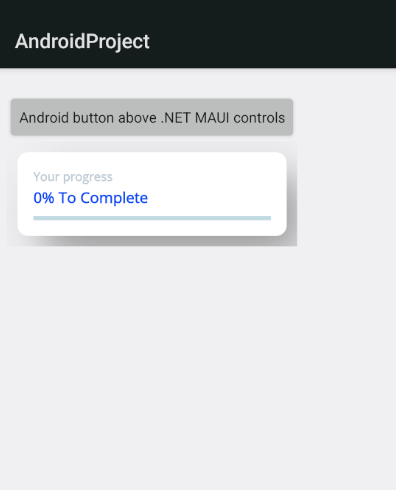
When running the above code, you’ll see the native .NET MAUI control being rendered in an Android project:
Conclusion
Throughout this article, you’ve learned what native embedding is and how it can help you embed .NET MAUI components that include .NET MAUI controls or Progress Telerik controls for reuse in native platforms. Likewise, you’ve seen practical cases for embedding components created with .NET MAUI in native platforms, with which it’s your turn to try this fantastic feature.
Ready to try out Telerik UI for .NET MAUI? It comes with a free 30-day trial!

Héctor Pérez
Héctor Pérez is a Microsoft MVP with more than 10 years of experience in software development. He is an independent consultant, working with business and government clients to achieve their goals. Additionally, he is an author of books and an instructor at El Camino Dev and Devs School.
Related Posts
Comments
All articles
Topics
Web MobileMobile
Desktop
Design
Productivity
People
