
Generating Barcodes with KendoReact

Summarize with AI:
See how to create and customize barcodes for your React app with the KendoReact component library.
Barcodes are one-dimensional visual representations of data easily scanned and decoded by barcode readers or mobile devices. They are widely used in retail, logistics and healthcare industries to encode product IDs, shipment information or other essential details in a machine-readable format. Whether scanning items at the grocery store checkout or spotting them on product packaging, barcodes are a familiar and integral part of everyday life.
In this article, we’ll explore how to create, customize and implement barcodes in React applications using the KendoReact library.
For a deep dive into how to implement QR codes (a type of 2D barcode) in your React applications, check out our previous article, Creating QR Codes with KendoReact.
The KendoReact Barcode Component
The KendoReact Barcode component, part of the KendoReact Barcodes library, simplifies the process of generating industry-standard barcodes. It supports various barcode symbologies (encoding schemes) and offers customization options for size, colors and text display.
The KendoReact <Barcode /> component is distributed through the @progress/kendo-react-barcodes npm package and can be imported directly:
import { Barcode } from "@progress/kendo-react-barcodes";
Here’s a basic example of how to use the React Barcode component:
import * as React from "react";
import { Barcode } from "@progress/kendo-react-barcodes";
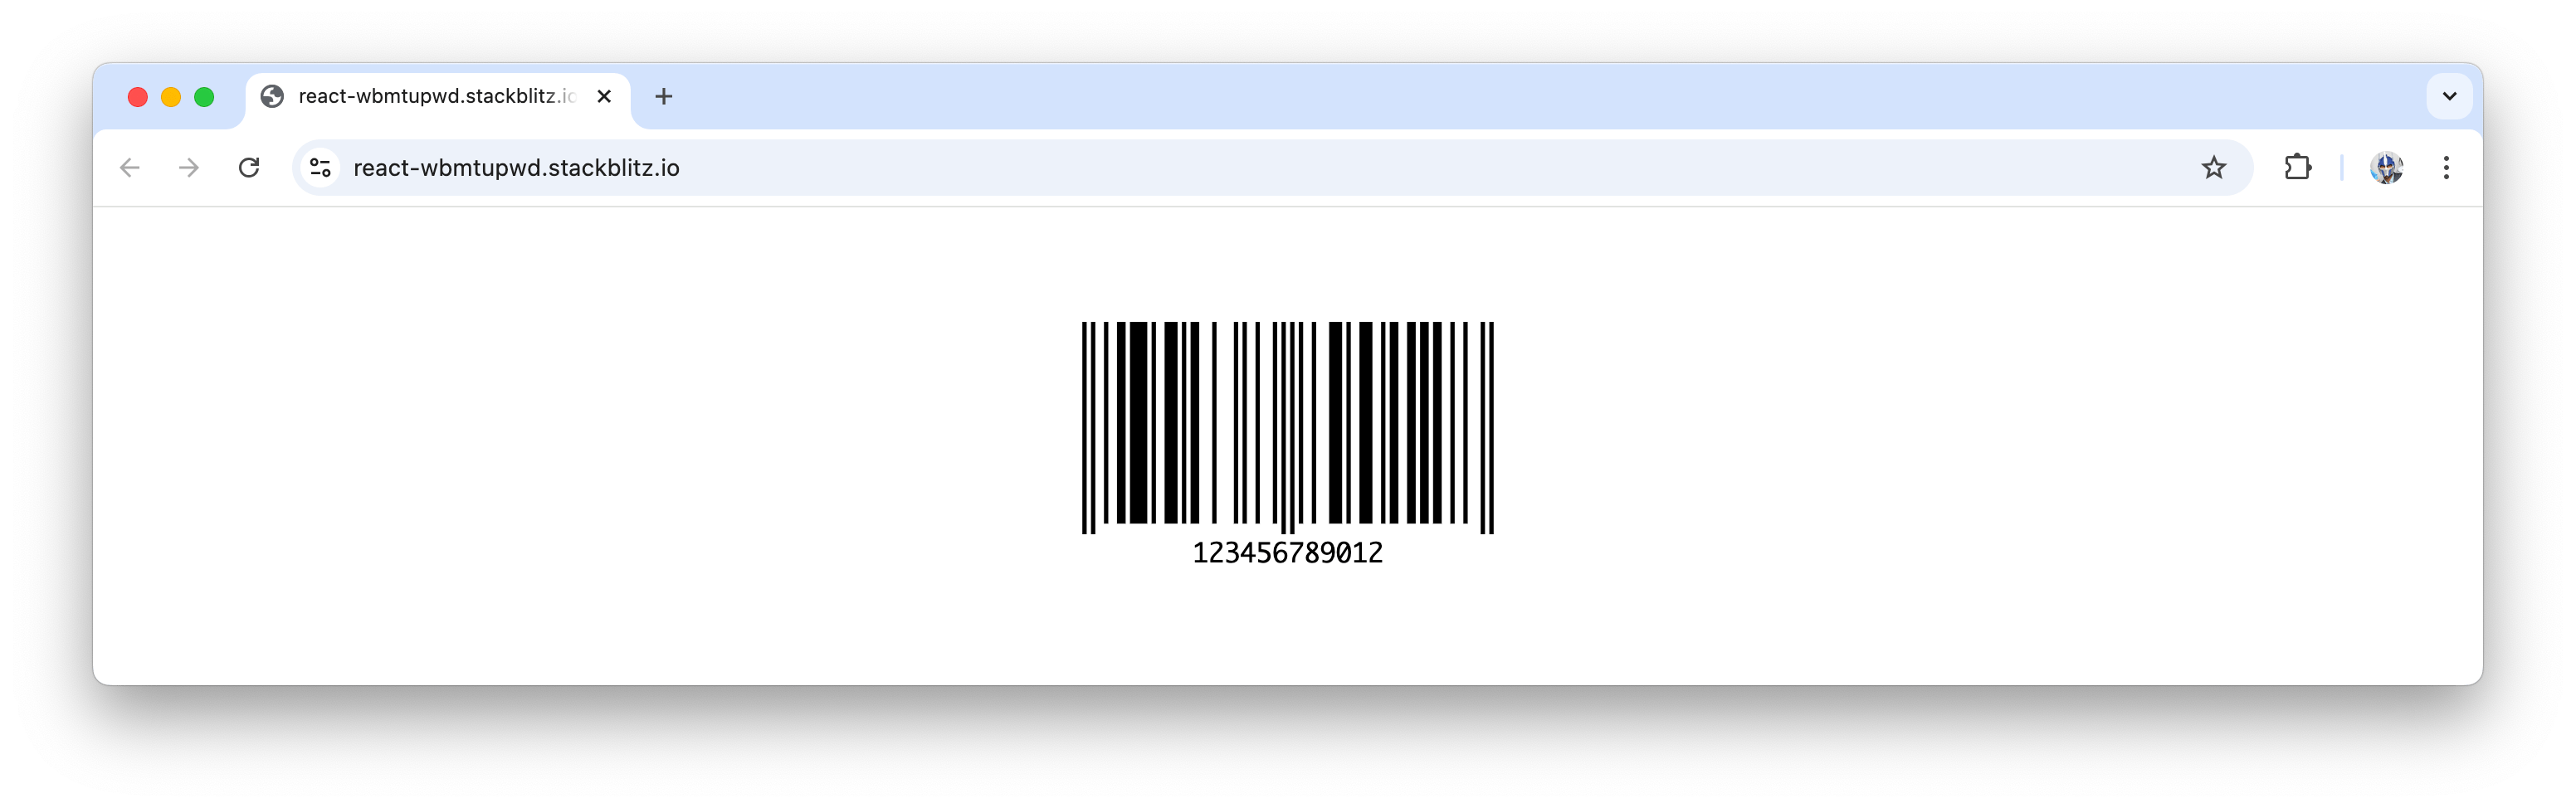
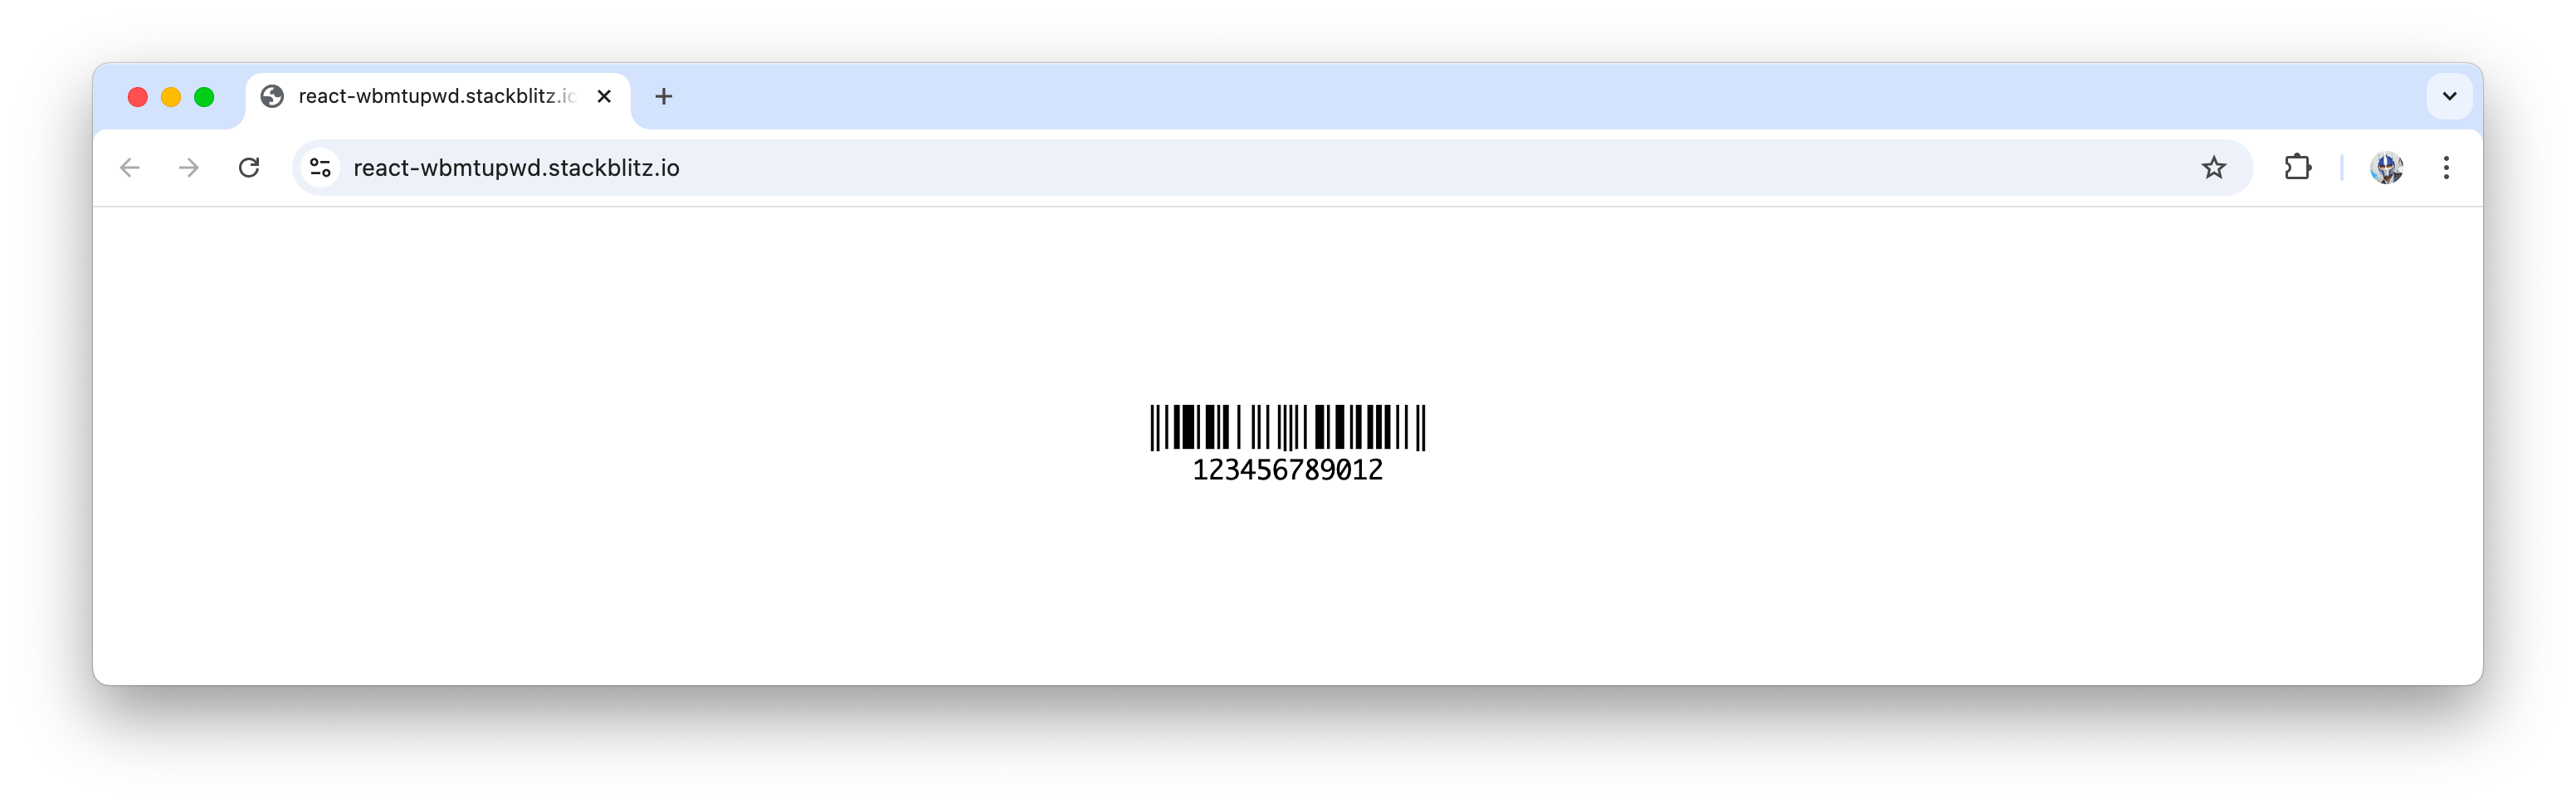
const App = () => <Barcode value="123456789012" type="EAN13" />;
export default App;
This example generates a simple EAN-13 barcode encoding the value 123456789012. By default, the component automatically calculates checksum digits (where applicable) and adapts the barcode rendering to match the selected symbology.
Scanning this barcode with a compatible reader will return the encoded value.
Barcode Types
Barcodes come in various formats or symbologies, each designed for specific use cases in the industry. The KendoReact Barcode component supports a variety of 1D industry barcode types, including:
- EAN-13: Used internationally for retail product identification.
- UPC-A: Commonly used in North America for retail packaging.
- Code 39: Encodes alphanumeric characters, often used in logistics and healthcare.
- Code 128: A highly efficient symbology for encoding alphanumeric and special characters.
- MSI: Frequently used for inventory management and warehouse applications.
To specify a barcode type in our component, we can use the type prop:
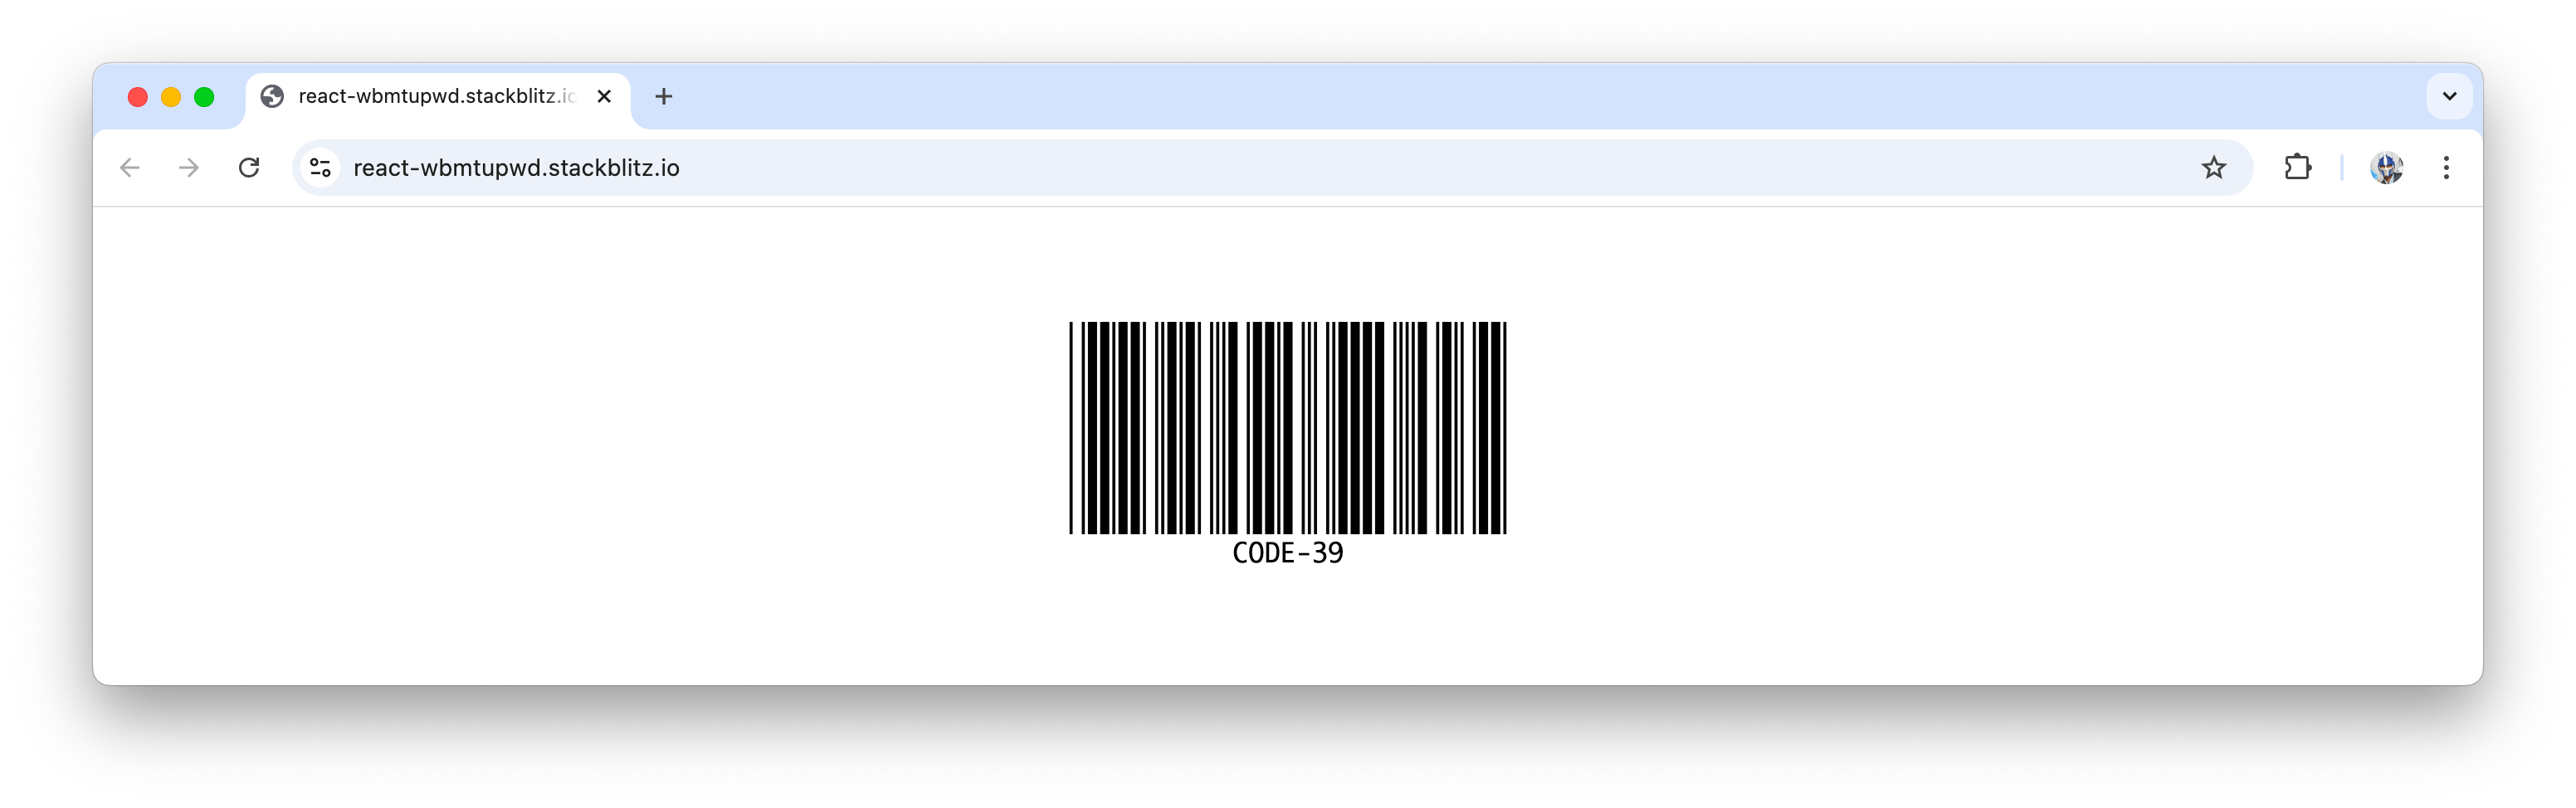
<Barcode value="CODE-39" type="Code39" />
When specifying a certain barcode type, we should check that the barcode value conforms to the symbology’s rules to avoid rendering errors. For instance, EAN-13 requires 12 digits, while Code 39 supports a variable-length alphanumeric string.
Configuration Options
The KendoReact barcode component provides configuration options to customize its appearance and functionality. In the following section, we’ll explore some of these options.
Size
We can control the barcode size by setting the width and height props. This ensures the barcode fits seamlessly into our application layout.
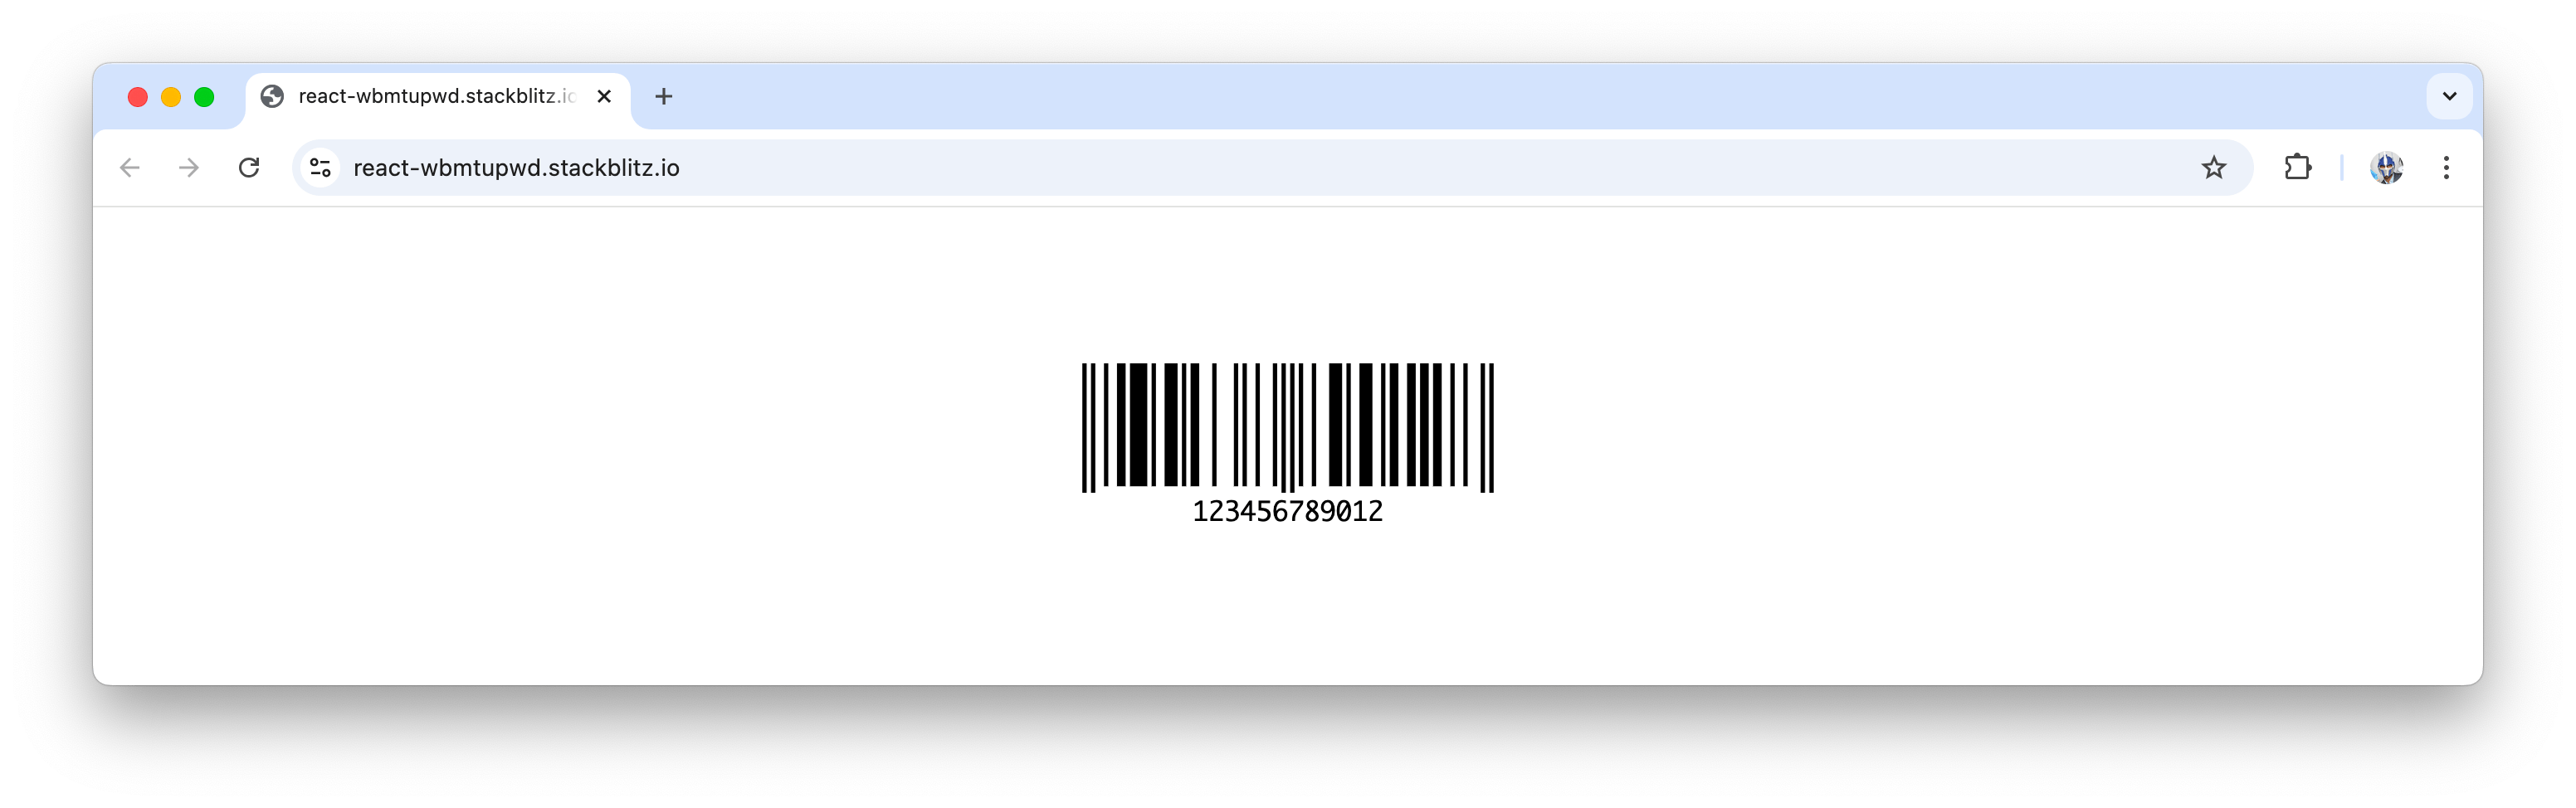
<Barcode value="123456789012" type="EAN13" width={300} height={100} />
The example above renders a barcode with a width of 300 pixels and a height of 100 pixels.
Color and Background
The color and background props allow us to set the barcode’s foreground and background colors, providing better visual contrast or matching our application’s design theme.
<Barcode
  value="123456789012"
  type="EAN13"
  color="#0055ff"
  background="#f5f5f5"
/>
This example creates a barcode with a blue foreground and a light gray background.

Border
Using the border prop, we can add a border to the barcode. This is useful for highlighting the barcode or integrating it into printed labels.
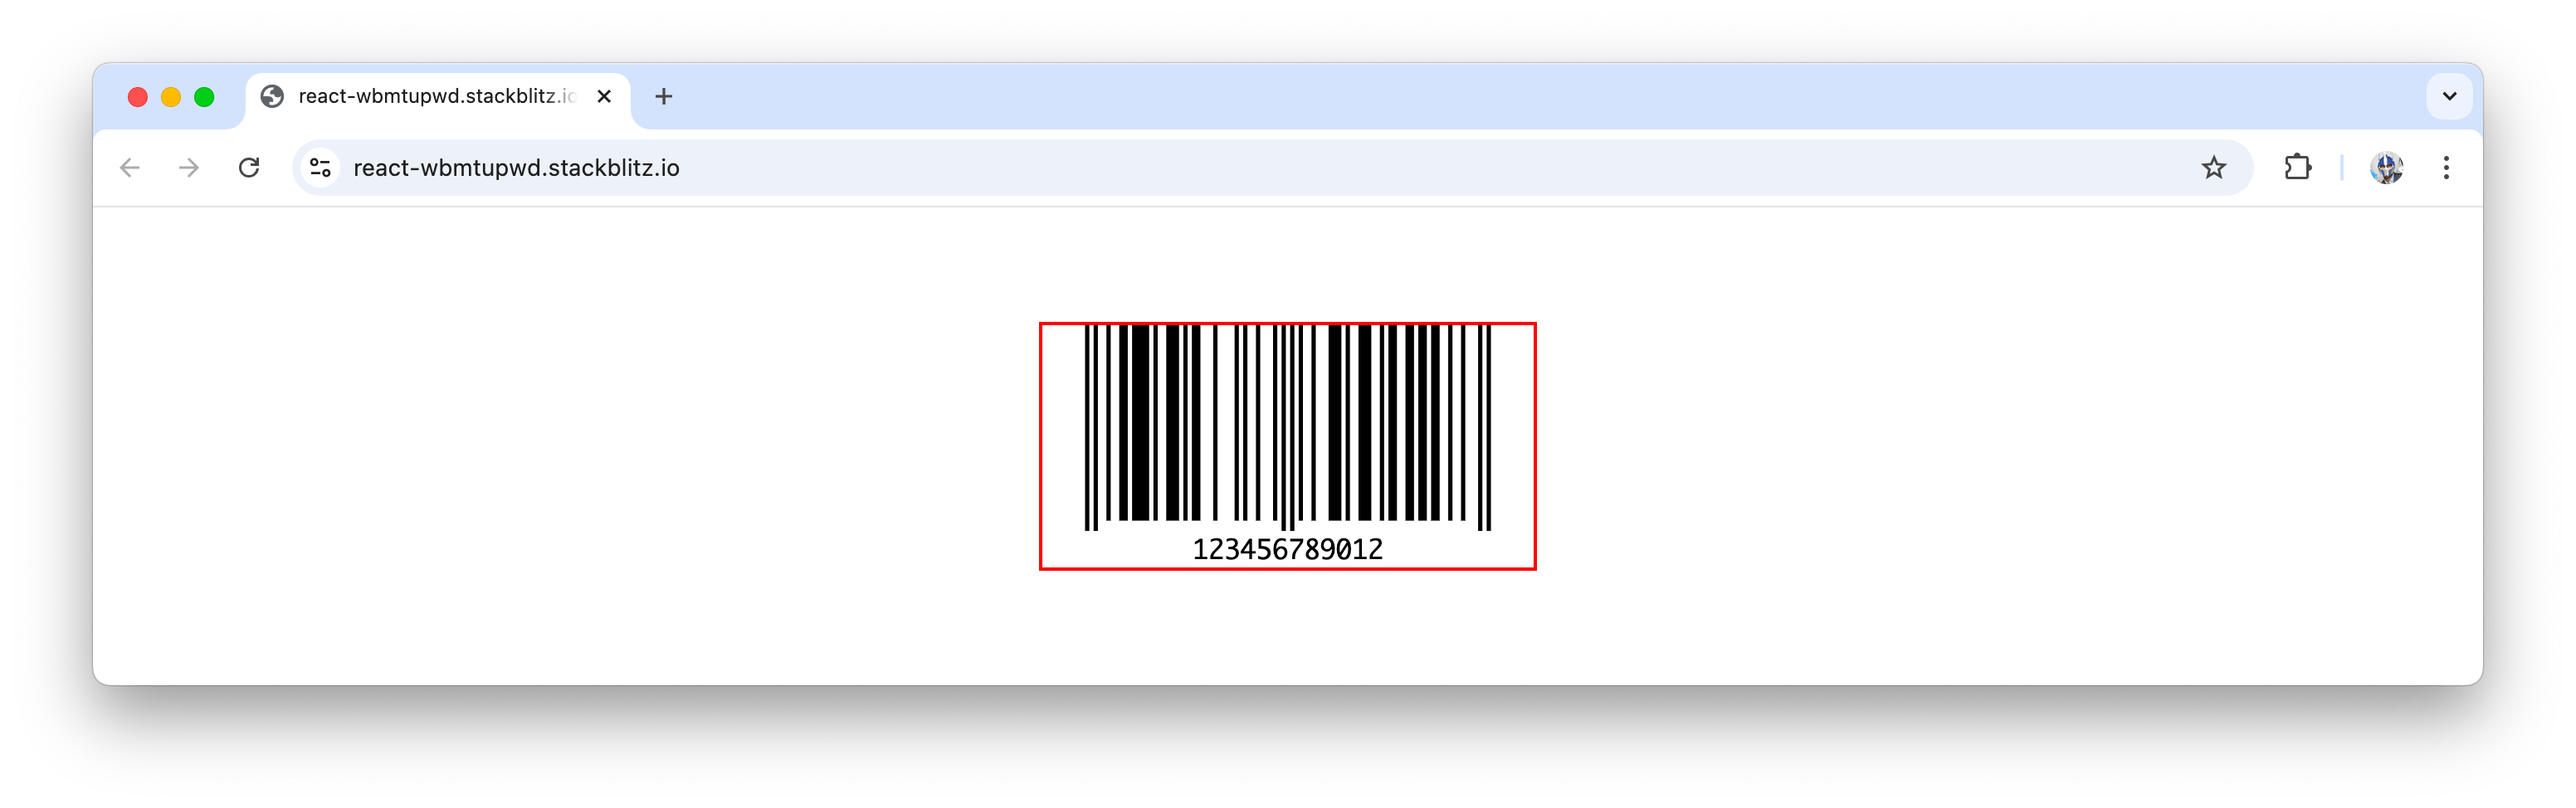
<Barcode
  value="123456789012"
  type="EAN13"
  border={{ width: 2, color: "#ff0000" }}
/>
This example adds a 2-pixel-wide red border around the barcode.
Padding
The padding prop allows us to add space around the barcode, enhancing its readability and scannability in certain cases.
<Barcode value="123456789012" type="EAN13" padding={50} />
This example renders the barcode with 50 pixels of padding on all sides.
Configuring the Text Label
The barcode component supports customizing the text label displayed below the barcode. We can adjust its appearance using the text prop, which accepts configurations like font size, color and style configuration. We can also enable checksum display using the checksum prop for symbologies that support it.
import { Barcode } from "@progress/kendo-react-barcodes";
const textConfig = {
color: "#0055ff",
font: "20px Arial",
};
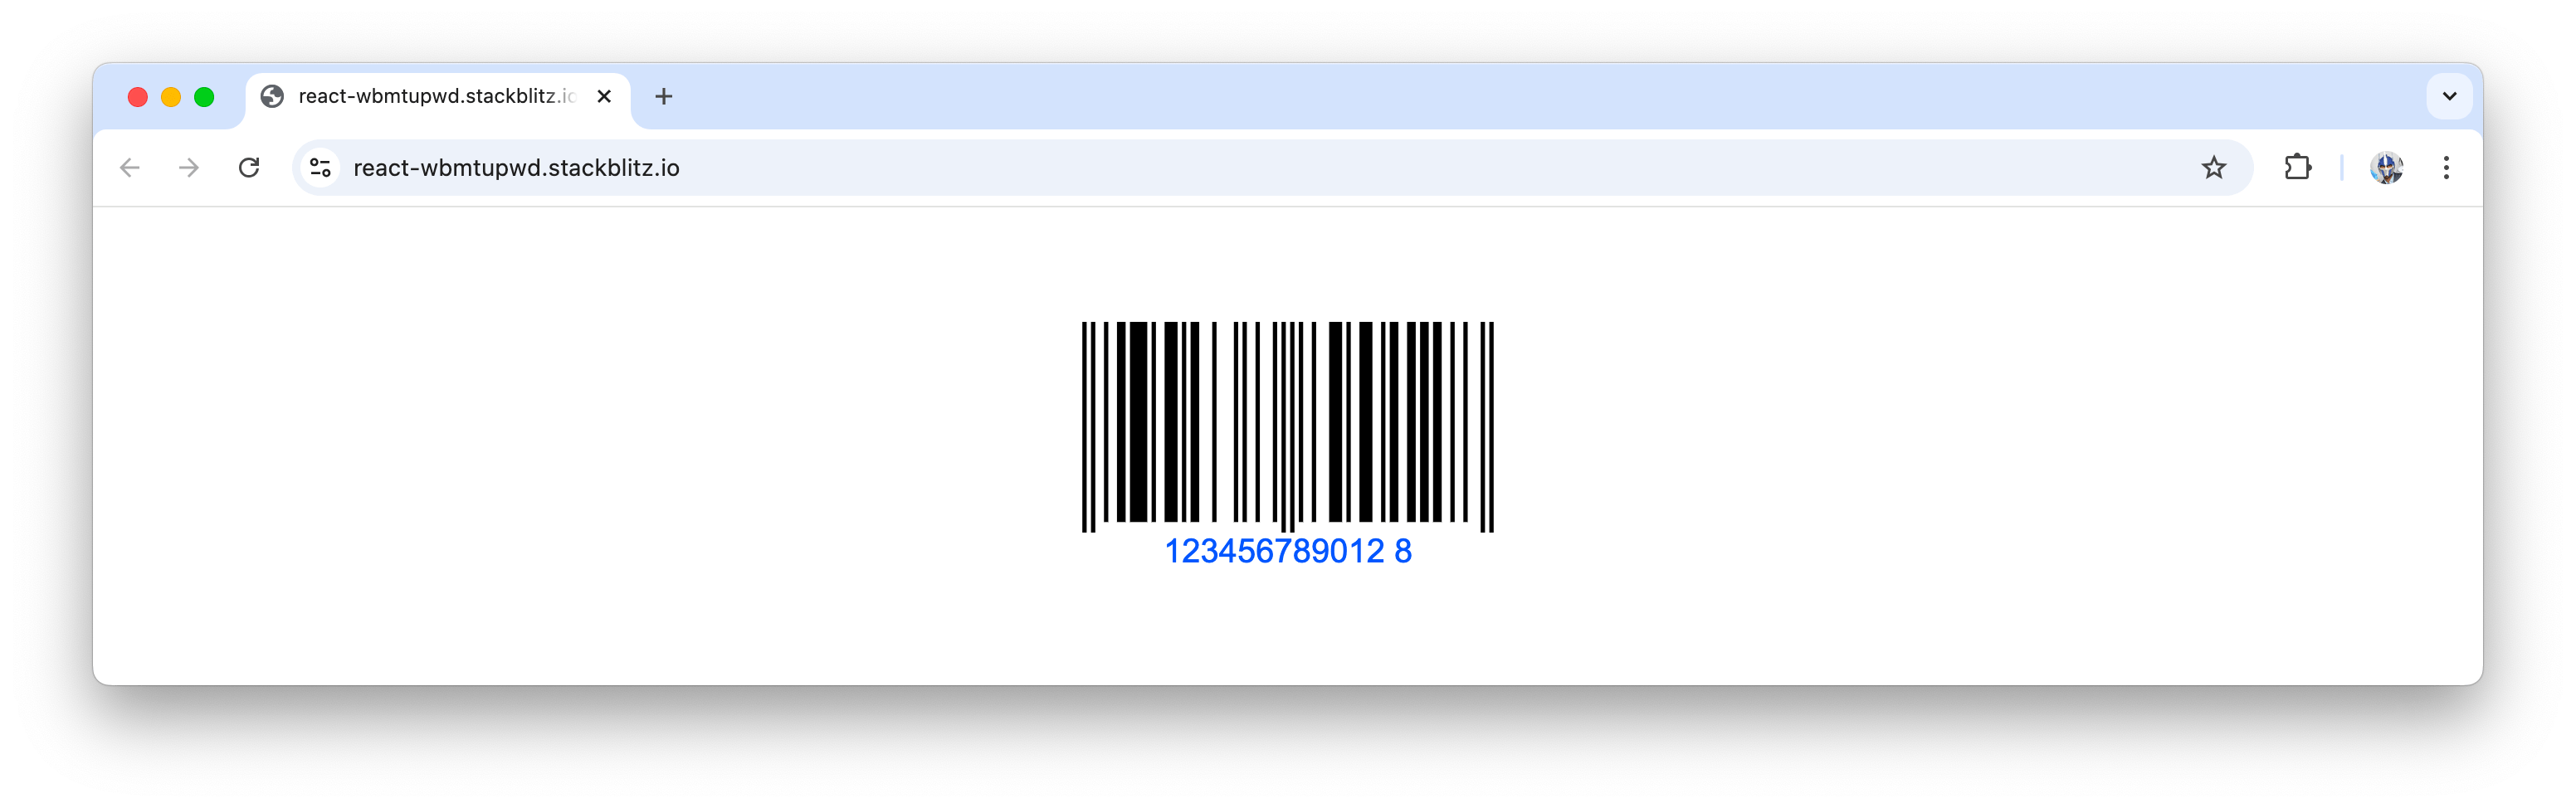
<Barcode value="123456789012" type="EAN13" text={textConfig} checksum={true} />;
This example styles the label with a blue color and sets the font size to 20 pixels.
A Practical Example—A Product Inventory System
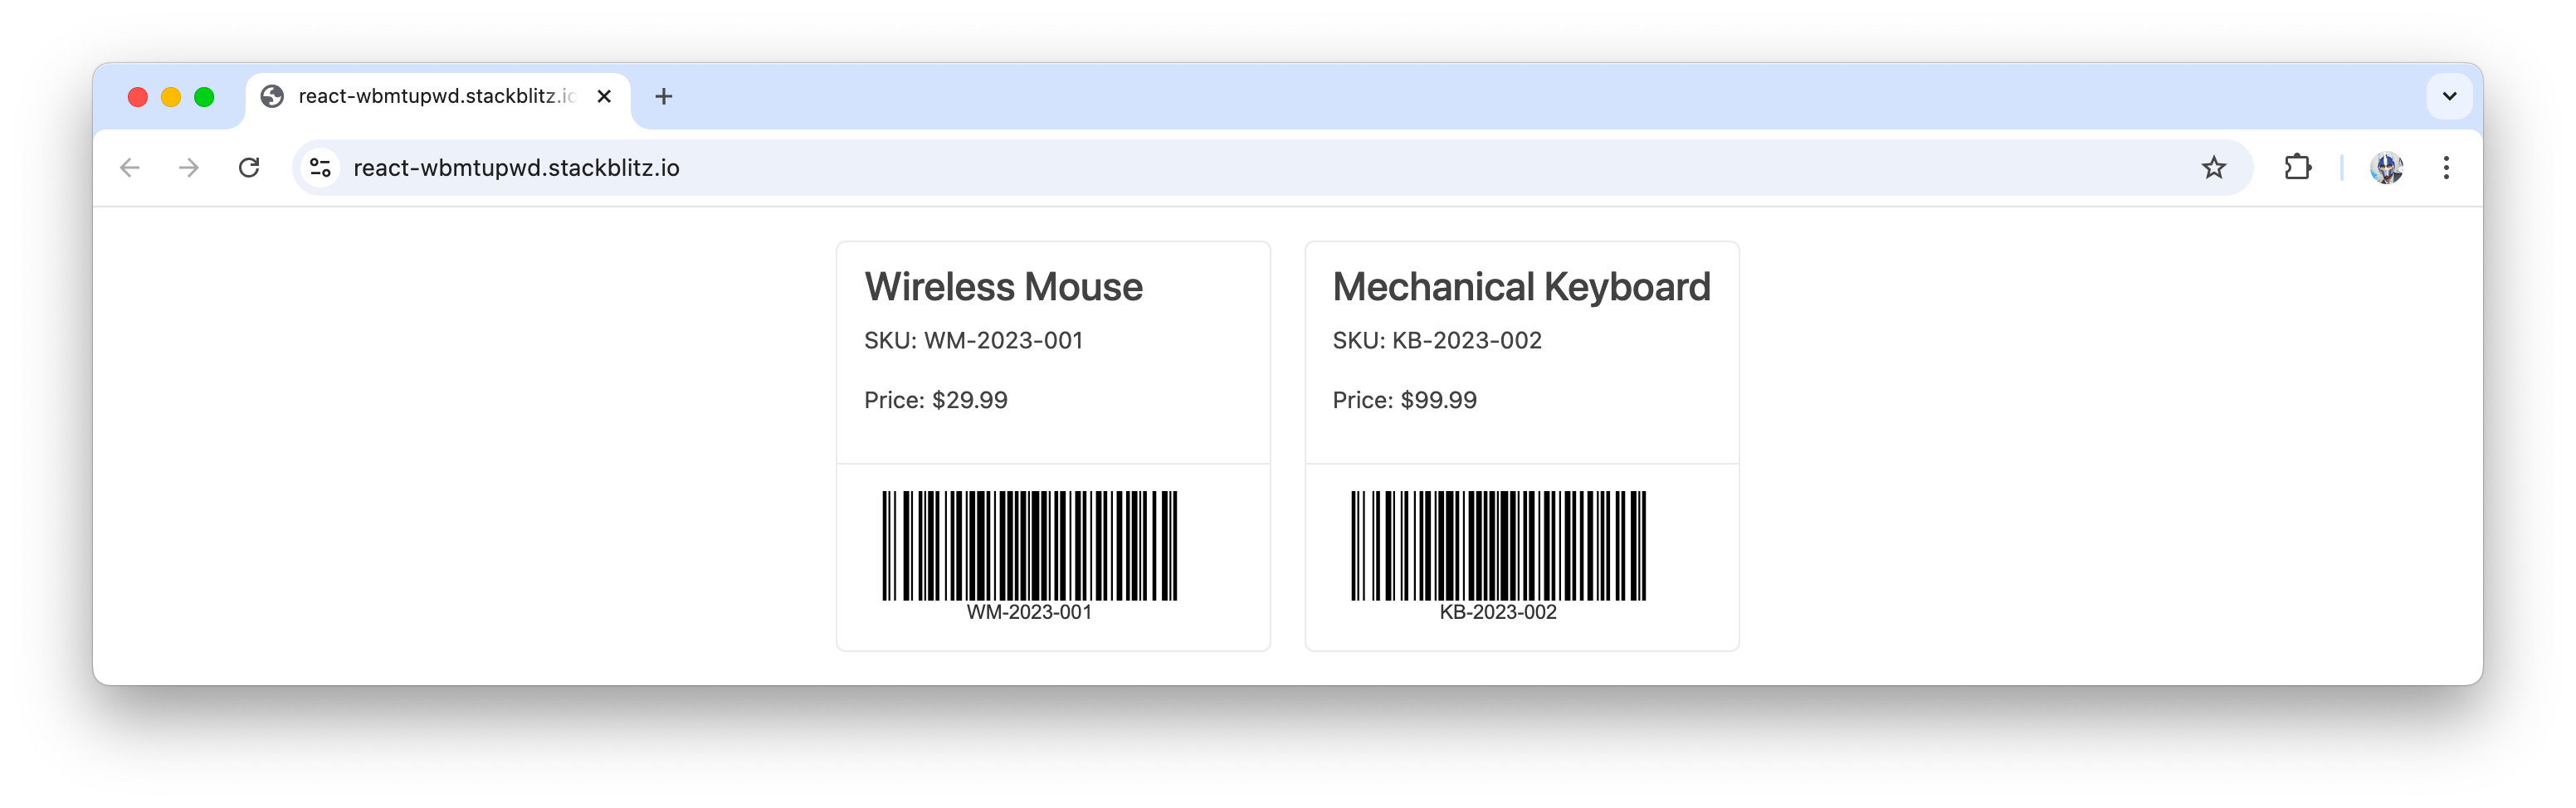
One of the most practical applications of barcodes is in a product inventory system, where each product is assigned a unique barcode for identification, tracking and management. Using the KendoReact Barcode component, we can dynamically generate barcodes for products in our inventory, so each item is easily scannable and traceable.
In real-world applications, product data such as names, prices and SKUs would typically come from a server or API, allowing the system to handle large and dynamically updated inventories. Once this data is available on the client, here’s a simple example of rendering and displaying barcodes for each product in a React application.
import * as React from "react";
import { Barcode } from "@progress/kendo-react-barcodes";

const InventoryItem = ({ id, name, price, sku }) => {
  return (
    <div className="k-card">
      <div className="k-card-header">
        <h4>{name}</h4>
        <p>SKU: {sku}</p>
        <p>Price: ${price}</p>
      </div>
      <div className="k-card-body">
        <Barcode
          type="Code128"
          value={sku}
          width={200}
          height={80}
          text={{
            font: "12px Arial",
            color: "#333",
          }}
        />
      </div>
    </div>
  );
};

const App = () => {
  const products = [
    {
      id: "1",
      name: "Wireless Mouse",
      price: 29.99,
      sku: "WM-2023-001",
    },
    {
      id: "2",
      name: "Mechanical Keyboard",
      price: 99.99,
      sku: "KB-2023-002",
    },
  ];

  return (
    <div
      style={{ display: "grid", gridTemplateColumns: "1fr 1fr", gap: "20px" }}
    >
      {products.map((product) => (
        <InventoryItem key={product.id} {...product} />
      ))}
    </div>
  );
};

export default App;
The above example illustrates a basic inventory system where each product is represented as a card containing product details and a dynamically generated barcode. The barcode uses the Code 128 symbology, an encoding standard suitable for alphanumeric data like SKUs. The sku property of each product is passed to the Barcode component as the value to encode.
Wrap-up
The KendoReact barcode component makes connecting physical and digital systems easy by adding barcode functionality to our React apps. Whether we’re managing product inventory, generating event tickets or handling shipping labels, the component simplifies the creation of barcodes and gives us plenty of ways to customize.
Try it for yourself: KendoReact comes with a free 30-day trial.

Hassan Djirdeh
Hassan is a senior frontend engineer and has helped build large production applications at-scale at organizations like Doordash, Instacart and Shopify. Hassan is also a published author and course instructor where he’s helped thousands of students learn in-depth frontend engineering skills like React, Vue, TypeScript, and GraphQL.
Related Posts
Comments
All articles
Topics
Web MobileMobile
Desktop
Design
Productivity
People
