Emoji Suggestions in a Chat Application Using Kendo UI, Vue and Sentiment Analysis

Summarize with AI:
Kendo UI’s Chat component is robust and easy to integrate. We’ll see how we can render suggestive actions in real-time using sentiment analysis and Socket.io.
Sentiment analysis involves the process of identifying and categorizing opinions expressed in a piece of text to determine if the writer’s attitude toward a particular topic or product is positive, negative, or neutral. Using sentiment analysis, we can suggest emojis as replies to messages based on the context of the received message.
Vue is a popular web development framework for creating a range of applications on multiple platforms; it has a vast ecosystem and dedicated following. Alongside its simple integration, detailed documentation and flexibility, Vue lets you extend the template language with your components.
Prerequisites
To follow this tutorial, a basic understanding of Vue and Node.js is required. Please ensure that you have Node and npm installed before you begin.
We’ll be using these tools to build out our application:
We’ll be building a real-time chat application using Socket.io, Angular and the sentiment library for emoji suggestions based on the context of messages received.
Using our application, users can get emoji suggestions as replies to received messages while engaging in a chat with a third party.
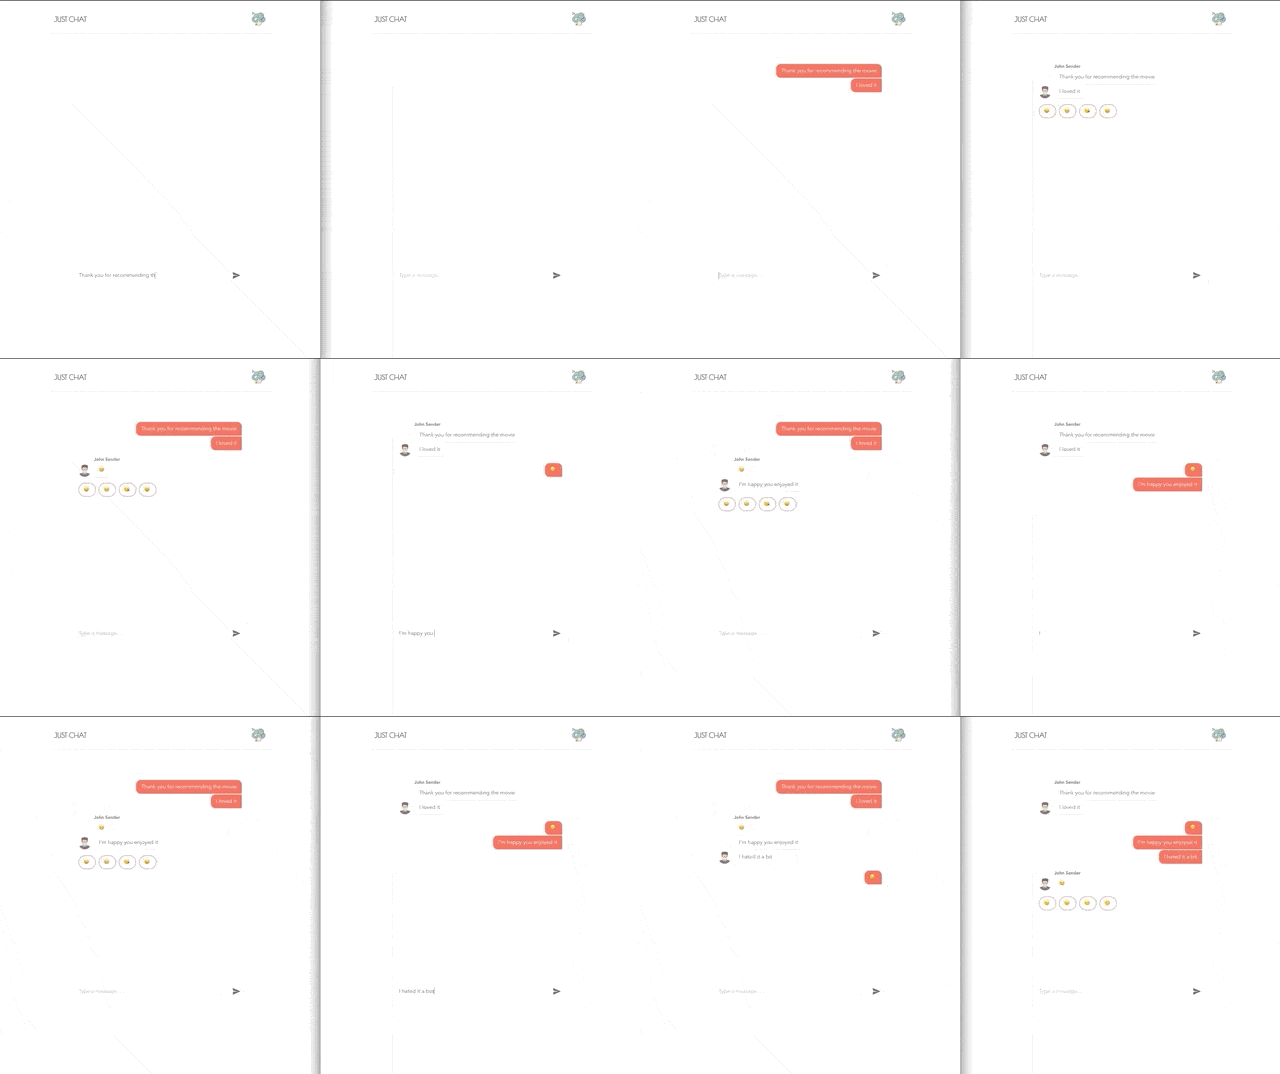
Here’s a demo of the final product:

Let’s build!
Setup and Folder Structure
To get started, we use the vue-cli to bootstrap our application. First, we’ll install the CLI by running npm install -g @vue/cli in a terminal. npm is a package manager used for installing packages. It is available on your PC if you have Node installed.
To create a Vue project using the CLI, we’ll run the following command:
vue create vue-chat
Open the newly created folder vue-chat, your folder structure should look something like this:
vue-chat/
  public/
    index.html
    favicon.co
  node_modules/
  src/
    assets/
    components/
      ...
    App.vue
    ...
Next, run the following commands in the root folder of the project to install dependencies.
// install dependencies required to build the server
npm install express socket.io uuid sentiment

// front-end dependencies
npm install @progress/kendo-chat-vue-wrapper @progress/kendo-theme-default @progress/kendo-ui vue-socket.io node-sass sass-loader
Start the app dev server by running npm run serve in a terminal in the root folder of your project.
A browser tab should open on http://localhost:8080. The screenshot below should be similar to what you see in your browser:

Building Our Server
Now that we have our Vue application running, let’s build out our server using Express. Express is a fast, unopinionated, minimalist web framework for Node.js. We’ll use this to listen for events from the front-end application and to emit events.
Create a file called server.js in the root of the project and update it with the code snippet below.
// server.js

const express = require("express");
const app = express();
const Sentiment = require("sentiment");
const http = require("http").createServer(app);
const io = require("socket.io")(http);
const port = process.env.PORT || 4000;
const sentiment = new Sentiment();

io.on("connection", async socket => {
  console.log('connected')
})

http.listen(port, () => {
  console.log(`Server started on port ${port}`);
});
The setup here is pretty standard for Express applications using Socket.io. There’s no problem if you have no prior knowledge of Socket.io as we’ll only be making use of two methods: emit for dispatching events and io.on for listening for events. You can always go through the official tutorial here.
Next, we’ll set up a listener for a chat event. The client application sends message payloads through this channel; on receipt on the chat event, we analyze the message and emit a response.
Sending Messages
To enable users to send and receive messages, we’ll set up a listener to handle incoming payloads. Update your server.js file with the code below.
// server.js
const express = require("express");
const app = express();
const Sentiment = require("sentiment");
const http = require("http").createServer(app);
const io = require("socket.io")(http);
const port = process.env.PORT || 4000;
const sentiment = new Sentiment();

io.on("connection", async socket => {
  socket.on("chat", data => {
    io.emit("message", data);
  });
})

http.listen(port, () => {
  console.log(`Server started on port ${port}`);
});
In the snippet above, we set up a listener for the chat event, and within the event callback, we emit an event containing the payload sent from the chat event. Next, we’ll perform sentiment analysis on the textual content of the event payload.
Sentiment Analysis
Like we said in the article introduction, sentiment analysis involves the process of identifying and categorizing opinions expressed in a message to determine the writer’s attitude toward a particular topic.
You can learn more about sentiment analysis using the following links:
Using sentiment analysis, we’ll analyze the messages sent to determine the attitude of the sender. With the data returned from the analysis, we’ll determine the emojis to suggest to the user.
The Sentiment JavaScript library is excellent for analysis. To get started, we’ll update the callback function to include the analysis of messages being sent in. Update your server.js with the code below.
// server.js
const express = require('express');
...

io.on("connection", async socket => {
  socket.on("chat", data => {
    const { text, id, sender } = data;
    const result = sentiment.analyze(text);
    const comparative = result.comparative;
    const tone =
      comparative >= 0
        ? comparative >= 1
          ? "positive"
          : "neutral"
        : "negative";
    const response = {
      text,
      id,
      timeStamp: new Date(),
      sentiment: {
        tone,
        score: result.score
      },
      sender
    };
    io.emit("message", response);
  });
})

http.listen(port, () => {
  console.log(`Server started on port ${port}`);
});
...
In the snippet above, we’ve made a few updates to the chat event callback. Let’s go through each change:
- First, we used object destructuring to get the
textandidof the payload sent by the user. result: here, we analyze the message sent in by the user to determine the context of the message.comparative: this is the comparative score gotten after analyzing the message. This score is used to determine if a message ispositive,negativeorneutral.tone: thetonevariable is the context of the message gotten after analysis. The tone isnegativeif the comparative score is below0,neutralif the score is above0but below1. The tone ispositiveif the comparative score is1and above.- Add an object(
sentiment) property to the response data containing the messages’ tone and score.
Chat View
Let’s begin to build out our chat interface. We’ll create a chat component to hold the chat interface. The chat interface is a component provided by Kendo UI. This component provides an interface for engaging in conversations with other users or a bot. The component can be configured to render suggestions and rich media cards, and it provides a toolbar to render interactive buttons with which users can interact.
Create a file Chat.vue in the src/components folder. Open the file and update it by following the steps below.
First, we’ll add the template section to render Kendo UI’s chat interface:
<! -- src/components/Chat.vue -->

<template>
  <div class="main">
    <kendo-chat @post="sendMessage" ref="chat"/>
  </div>
</template>
In the template above, we attached an event listener for the post event; this event triggers when you post a message in the chat interface. We also get the ref (reference) of the Chat component.
Next, we’ll add some styles to the component. Update the src/components/Chat.vue and add a style section:
<!-- src/components/Chat.vue -->

<template>
  ...
</template>

<style lang="scss">
  .main {
    display: flex;
    justify-content: center;
    align-items: center;
    min-height: 90vh;
  }
  .k-widget {
    margin-top: 0;
    width: 80%;
  }
</style>
Next, we’ll add the script section that’ll hold the variables and methods referenced in the template section.
<!-- src/components/Chat.vue -->

<template>
  ...
</template>

<style lang="scss">
  ...
</style>

<script>
import { Chat } from "@progress/kendo-chat-vue-wrapper";
import { v4 } from "uuid";
export default {
  name: "Chat",
  components: {
    Chat
  },
  data() {
   return {
      emojiList: {
        positive: ["😀", "😁", "😘", "😄"],
        neutral: ["😐", "😑", "😶", "🤔"],
        negative: ["😟", "🙁", "😢", "😞"]
      },
      users: {
        sender: {
          id: "sender",
          iconUrl:
            "https://image.flaticon.com/icons/svg/167/167750.svg",
          name: "John Sender"
        },
        receiver: {
          id: "receiver",
          iconUrl:
            "https://image.flaticon.com/icons/svg/145/145862.svg",
          name: "Mary Receiver"
        }
      },
      lastMessageId: "",
    };
  },
  methods: {
    async sendMessage(message) {
      this.lastMessageId = v4();
      const data = {
        id: this.lastMessageId,
        text: message.text,
        sender: message.sender.user
      };
    },
  },
  mounted() {
    const chat = this.$refs.chat.kendoWidget();
    chat.user = this.users.sender
  }
};
</script>
In the script snippet we have defined some variables and methods. We’ll go through each one, starting with the emojiList:
emojiList: this is an object containing a list of emoji characters. There’s a list for each message tone.
users: this object contains mock data about the users of the application, the sender and receiver.
The sendMessage method is an event handler for the post event emitted from the Chat component. Within this method, we create a random id for the message using the uuid library, assign the random id to the lastMessageId data property. Finally, we create an object that holds the message text, the message sender and the generated id.
Within the mounted component lifecycle, we get the chat component reference and assign a value to the chat’s user property.
Next, we’ll install the Kendo UI Chat component as a plugin within our application. Open the src/main.js file and install the plugin:
// src/main.js
import Vue from "vue";
import { ChatInstaller } from "@progress/kendo-chat-vue-wrapper";
import "@progress/kendo-ui";
import "@progress/kendo-theme-default/dist/all.css";

import App from "./App.vue";

Vue.use(ChatInstaller);
Vue.config.productionTip = false;

new Vue({
  render: h => h(App)
}).$mount("#app");
In the snippet above, we added Kendo UI’s base library and also the base CSS file for the library. The plugin ChatInstaller is imported from the chat wrapper library and installed in the project.
Now, we’ll render the Chat component in the App.vue file. Open the App.vue file and update it to render the Chat component in the template section; we’ll also update the component’s styles:
<template>
  <div id="app">
    <Chat/>
  </div>
</template>

<script>
import Chat from "./components/Chat";

export default {
  name: "app",
  components: {
    Chat,
  }
};
</script>

<style>
#app {
  font-family: "Avenir", Helvetica, Arial, sans-serif;
  -webkit-font-smoothing: antialiased;
  -moz-osx-font-smoothing: grayscale;
  color: #2c3e50;
  width: 70%;
  margin: auto;
}
</style>
Next, we’ll work on sending the messages in real time and rendering suggestions on receipt of a new message and creating a header component for the application.
Header Component
The home page also features a header for the sake of presentation. The first step is creating a component to display the header. Open the src/components folder and create a file called Header.vue, open the file and update it with the snippet below:
<!-- src/components/Header.vue -->
<template>
  <header>
    <div class="brand">
      <h5>Just Chat</h5>
      <img src="../assets/logo.svg" alt="Logo">
    </div>
  </header>
</template>

<script>
export default {
  name: 'Header',
}
</script>

<style scoped>
header {
  padding: 8px 10px;
  border-bottom: 1px solid rgba(0, 0, 0, 0.2);
  font-family: poiret-one, sans-serif;
  font-weight: 400;
  font-style: normal;
  margin-bottom: 60px;
}
header .brand {
  display: flex;
  justify-content: space-between;
  align-items: center;
}
header .brand h5{
  text-transform: uppercase;
  font-size: 18px;
  line-height: 2px;
}
header img{
  width: 40px;
  height: 40px;
}
</style>
NB: Image assets are from https://flaticon.com.
Just a couple of styles to beautify the header. Finally, we’ll render the component in the App.vue file. Open the file, import the Header component, add it to the components object and render it in the template.
<!-- src/App.vue -->
<template>
  <div id="app">
    <Header/>
    <Chat/>
  </div>
</template>

<script>
import Chat from "./components/Chat";
import Header from "./components/Header";

export default {
  name: "app",
  components: {
    Chat,
    Header
  }
};
</script>

<style>
  ...
</style>
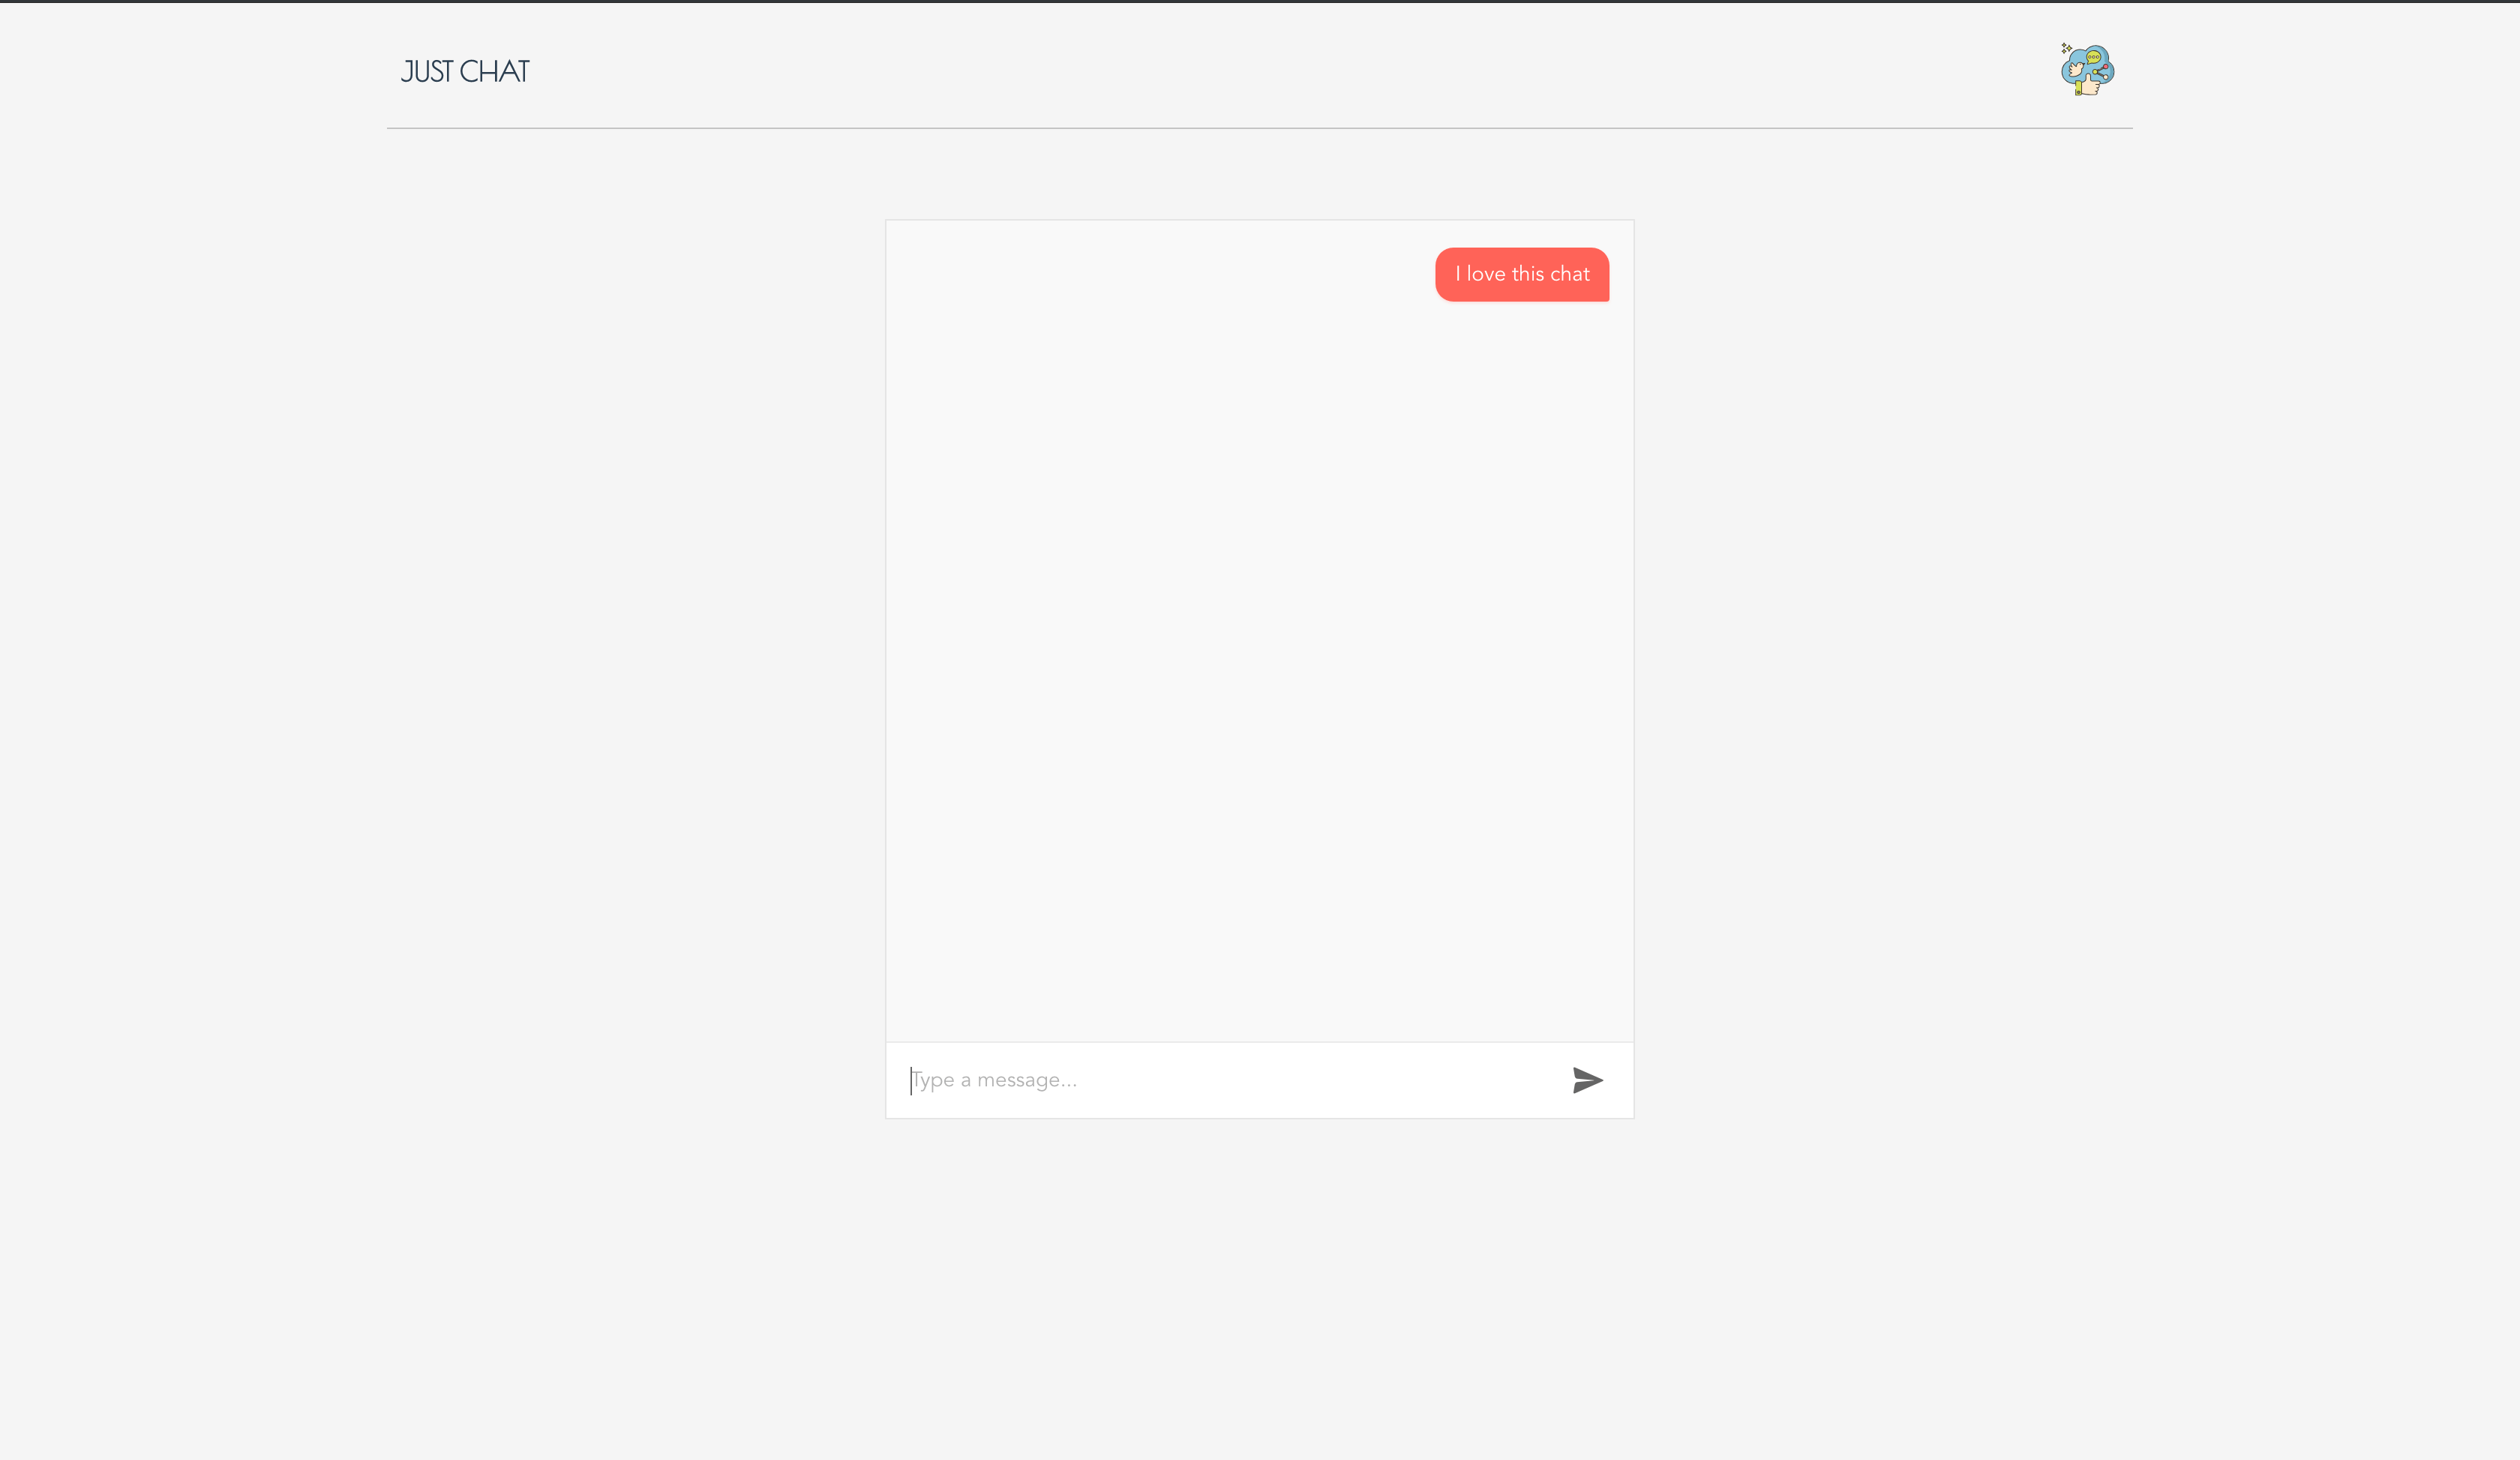
If you navigate to http://localhost:8080, you should see the Chat and Header components visible on the page.

Currently, real-time functionality and emoji suggestions aren’t available. In the next section, we’ll install the vue-socket.io library as a plugin to enable our application to emit events to the server.
Adding Socket.io and Emoji Suggestions
So far, we have an application that allows users to send messages, but the message delivery isn’t in real-time. To solve this problem, we’ll include vue-socket.io library; also we listen for events from the server, and we render emoji suggestions in the chat interface based on the server response.
Before using the features of the vue-socket.io library in our application, we’ll need to install it as a plugin. Open the src/main.js file, import the library and register it as a plugin:
// src/main.js
import Vue from "vue";
// ... rest of the imports

import VSocket from "vue-socket.io";

Vue.use(ChatInstaller);
Vue.use(
  new VSocket({
    debug: true,
    connection: "http://localhost:4000"
  })
);

// ... rest of the configuration
The configuration above makes the library available to the whole application, which means we can listen for events and emit them. The connection property within the object is the URI of our server, and we enabled the debug mode for development.
Next, we’ll update the Chat.vue component by adding a sockets object. The sockets object lets us set up listeners for events using the object keys. The vue-socket.io plugin also adds a $socket object for emitting events.
<!-- src/components/Chat.vue -->
<template>
  ...
</template>

<script>
import { Chat } from "@progress/kendo-chat-vue-wrapper";
import { v4 } from "uuid";
export default {
  name: "Chat",
  components: {
    Chat
 },
  data() {
    return {
      ...
    };
  },
  sockets: {
    message(data) {
      const { sentiment: result, text, id, sender } = data;
      const chat = this.$refs.chat.kendoWidget();
      const emojiList = this.emojiList[result.tone].map(emoji => ({
        title: emoji,
        value: emoji
      }));

      if (this.lastMessageId !== id) {
        chat.renderMessage(
          { type: "text", text, timestamp: new Date() },
          this.users.receiver
        );
        chat.renderSuggestedActions(emojiList);
      }
    }
  },
  methods: {
    async sendMessage(message) {
      ...
      this.$socket.emit("chat", data);
    },
  },
  mounted() {
    ...
  }
};
</script>

<style lang="scss">
  ...
</style>
In the snippet above, we made a couple of changes. We updated the sendMessage method to emit the posted message using the $socket.emit method. We also updated the component by adding the sockets object; within the object, we created an event listener method for the message event.
Within the message method, we used object destructuring to get the text, sentiment, id and sender properties from the event payload.
To display emoji suggestions during a chat session, we’ll make use of the sentiment param sent from the server as a response for each message request. The data sent from the server should be similar to the snippet below.
{
  id: '83d3dd57-6cf0-42dc-aa5b-2d997a562b7c',
  text: 'i love pusher',
  timeStamp: '2018-04-27T15:04:24.574Z'
  sentiment: {
    tone: 'positive',
    score: 3
  }
}
We then get the emojiList that matches the message tone (obtained after performing sentiment analysis on the message), and we map through the list to create an object array matching the format used for creating chat suggestions.
After this, we check if the id of the message sender isn’t the same as the receiver. You can avoid this check by using the socket broadcast method in the server. If the two ids don’t match, we render the message using the renderMessage method and the emoji suggestions using the renderSuggestedActions method.
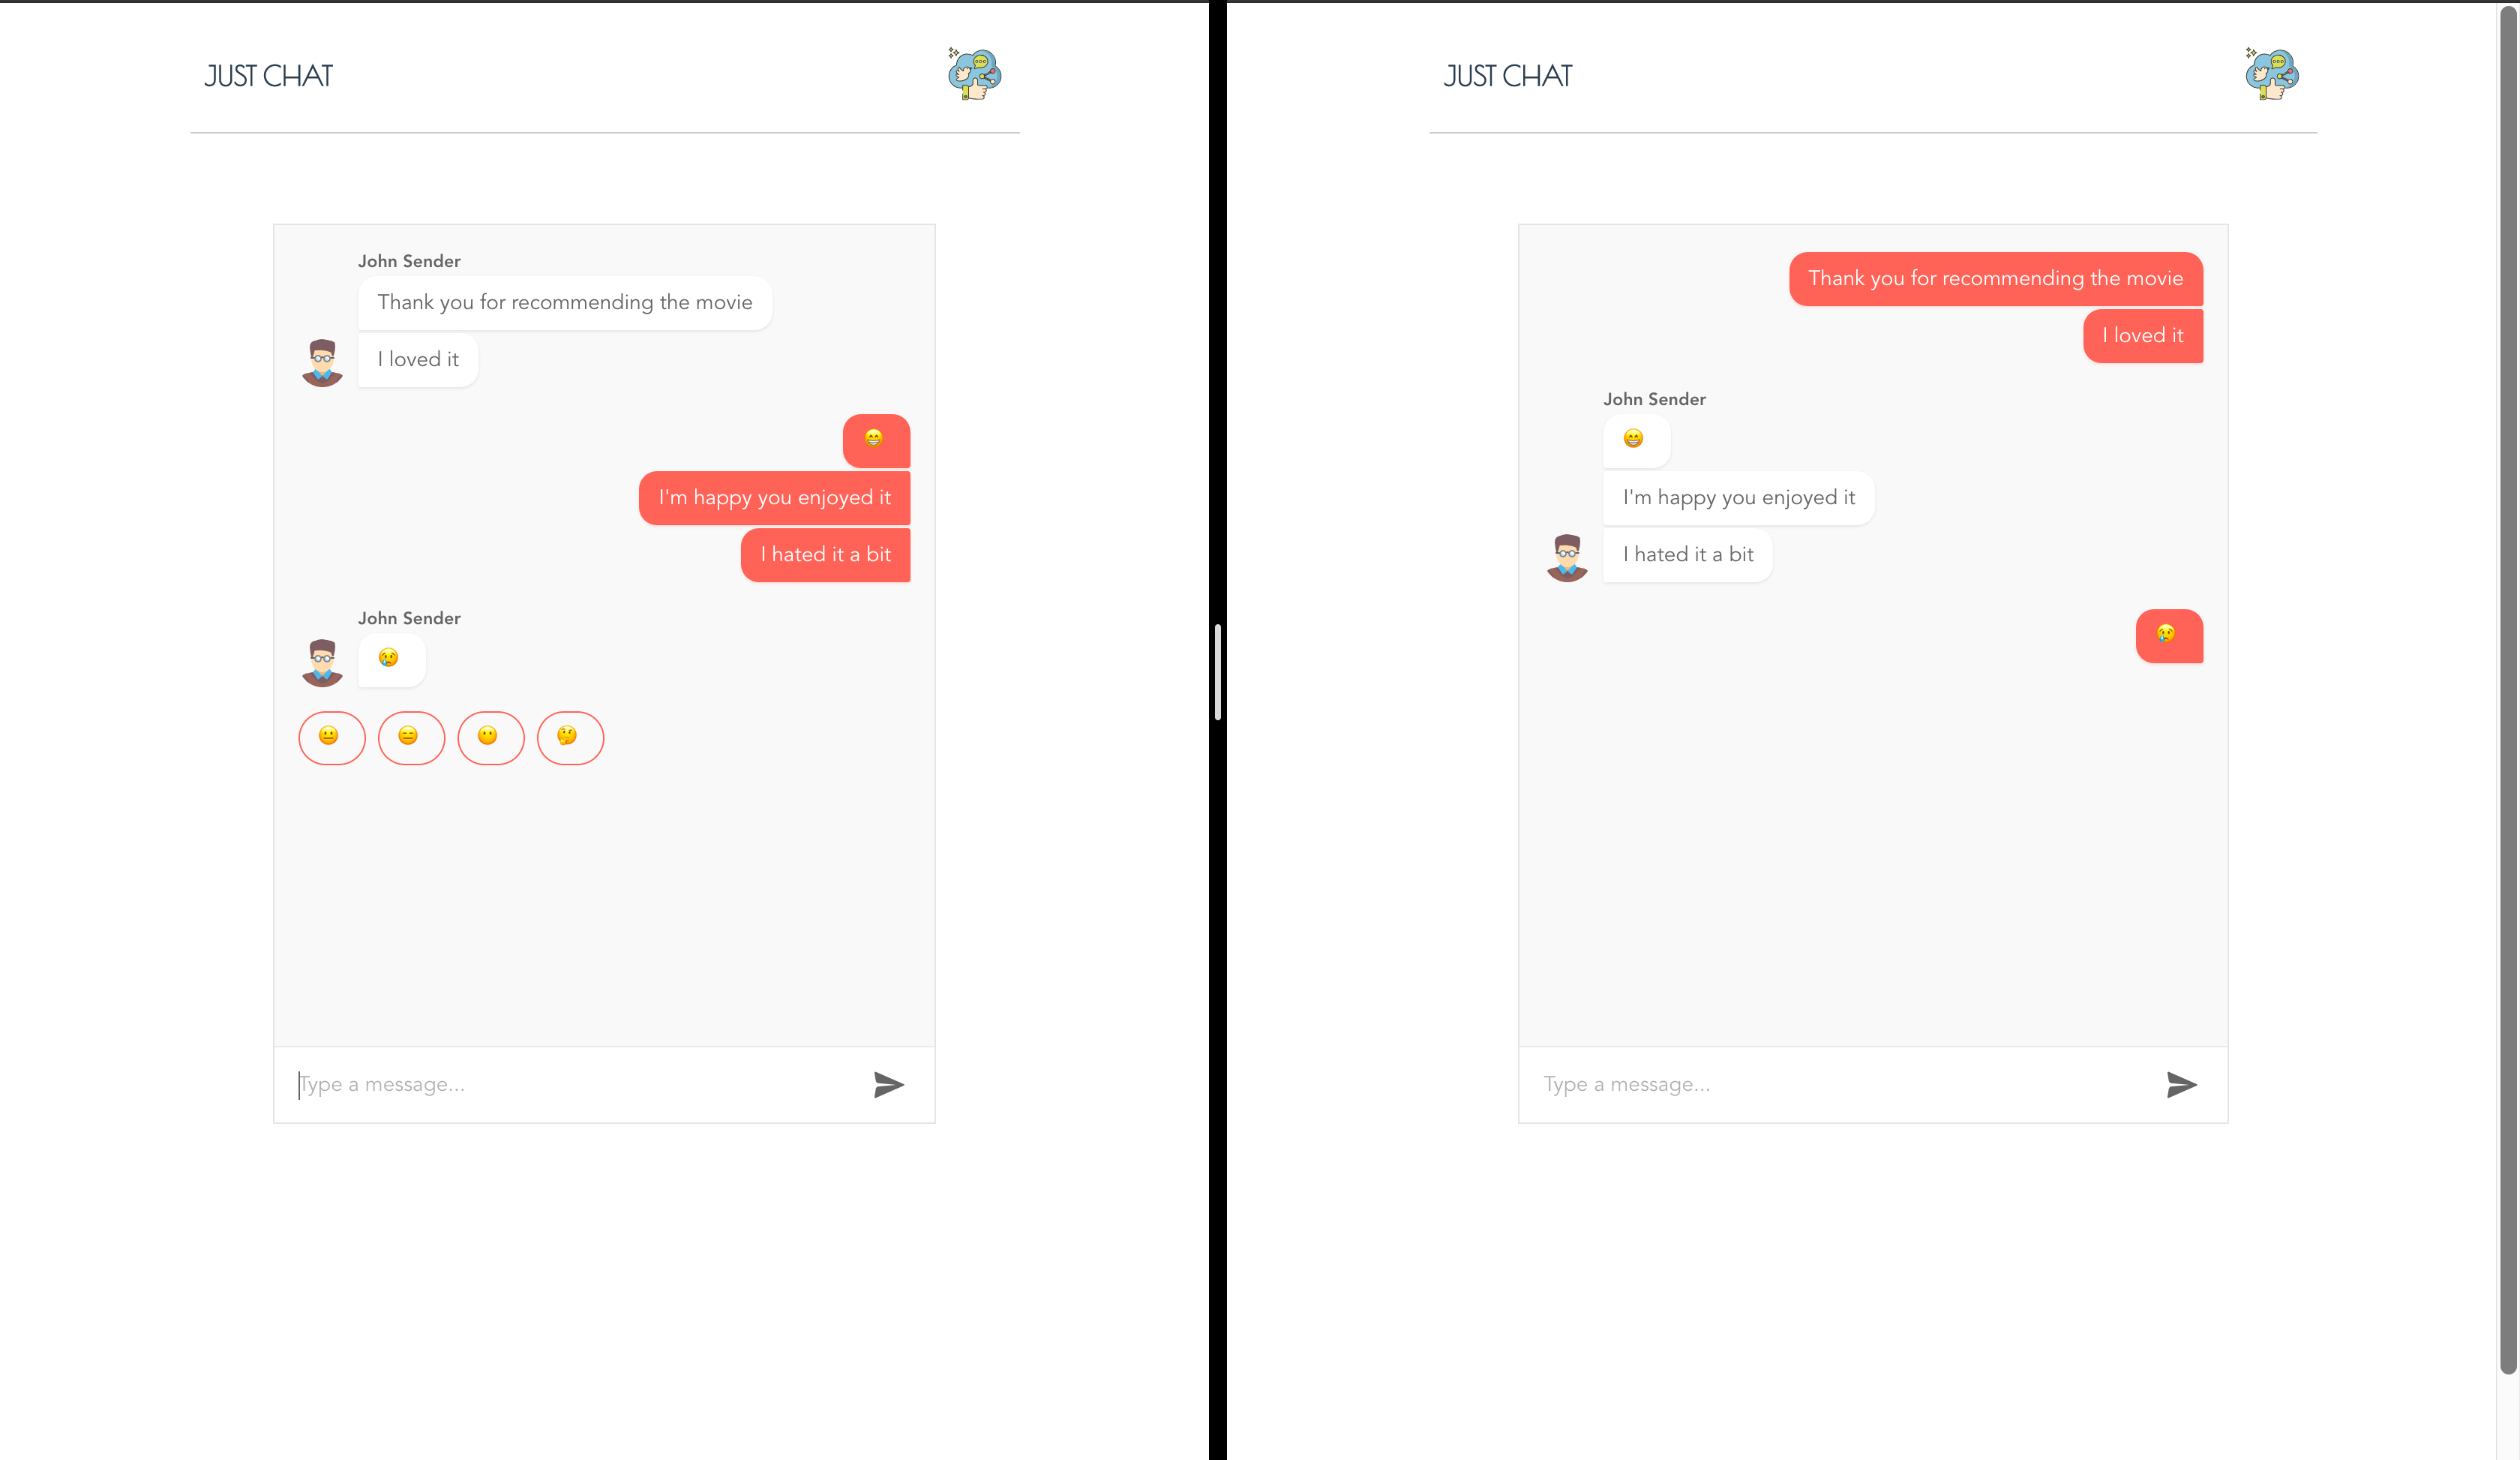
With these changes, we should receive messages in real time and emoji suggestions matching the tone of the message received. Navigate to http://localhost:8080 and open two browser tabs side by side to test the real-time functionality:

Conclusion
With the help of Kendo UI’s Chat component, we’ve successfully created a messaging application without doing much. The Chat component is robust and well-built, it can display rich media cards and suggested actions. Including Socket.io in the application provided real-time updates for our application, ensuring it rubs shoulders with the best messaging applications out there (we wish). You can read more on the Chat component here, and you can find the source code for this demo here. Happy coding.

Christian Nwamba
Chris Nwamba is a Senior Developer Advocate at AWS focusing on AWS Amplify. He is also a teacher with years of experience building products and communities.
