Discover the World of Features of RadMap for WinUI

Summarize with AI:
RadMap is a component packed with features that will help your application deliver rich data and map visualizations with ease while keeping development time to a minimum.
A mapping component is essential to any technology in this day and age. We felt it was about time a powerful, feature-rich, native map component entered the WinUI stage, and the result of this intent is RadMap—a component packed with features that will help your application deliver rich data and map visualizations with ease while keeping development time to a minimum.
RadMap for WinUI comes as a part of our Telerik for WinUI 0.5.0 release—you can see what else comes with it in this blog post. Now, I am glad I get the chance to show you an overview of RadMap’s capabilities.
Let us dive in!
Every Trip Starts With a Plan and Some Preparation
The saying goes that if “you fail to plan, you plan to fail.” To get our trip off on the right foot, here is what parts of RadMap we will visit.
First, we will have a look at providers and their specifics. Second, we will look at single- and multi-layer setups. Third, we will declutter our visualizations by clustering items. Fourth, we will take the reins and familiarize ourselves with the built-in controls. Fifth, we will venture into unknown routes. Finally, we will look at how the map can still help us navigate a foreign location without showing an actual geographical map.
First Stop on Our Trip Is “Providers”
To keep this blog post at a manageable length, I will show you the Bing Maps and Open Street Maps providers. You can find the full list in our documentation.
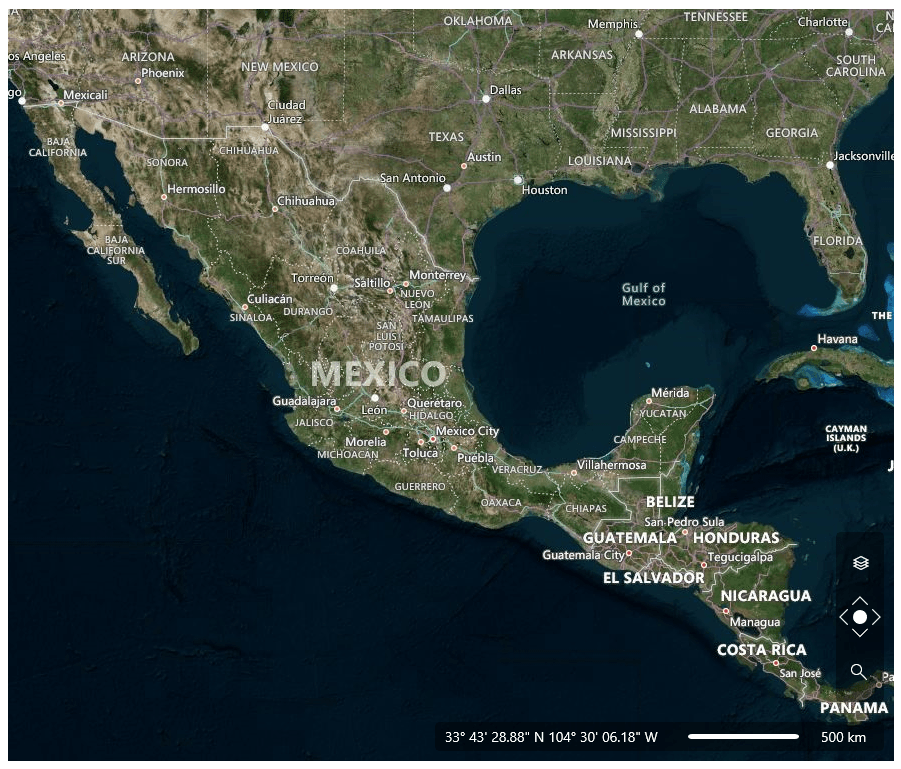
Now let us look at Bing Maps. The setup on RadMap’s side is a few lines. What you may notice there is the “Bing Map Key” value. To get this provider running, you must get your own key from the Bing Maps developer portal. Once you are past that step, replace it in your windows’ XAML and you will be up and running.
<dataVisualization:RadMap x:Name="radMap">
  <dataVisualization:RadMap.Provider>
    <telerikMap:BingRestMapProvider ApplicationId="Bing_Map_Key" Mode="Aerial" IsLabelVisible="True"/>
  </dataVisualization:RadMap.Provider>
</dataVisualization:RadMap>
Open Street Maps is even easier to set up. If you want to use the Transport and Cycle maps you can find information on getting a key here. Otherwise, you can jump right in.
<dataVisualization:RadMap x:Name="radMap">
  <dataVisualization:RadMap.Provider>
    <telerikMap:OpenStreetMapProvider APIKey="your-api-key" />
  </dataVisualization:RadMap.Provider>
</dataVisualization:RadMap>
If your needs are not fully met by any of the built-in providers, we got you covered. You can create custom providers based on existing ones or brand-new ones, that precisely cater to your customers’ needs.
Second Stop Is the Layering Mechanism
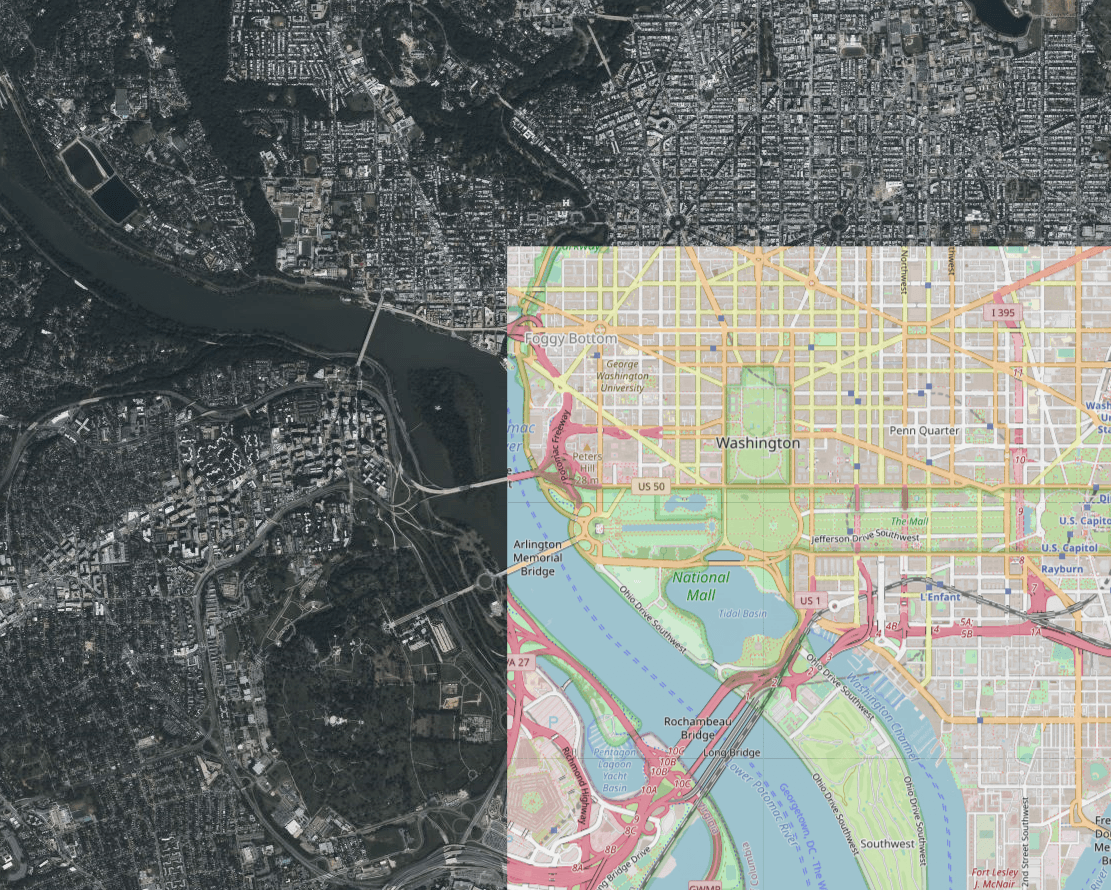
A single layer is what we did in the previous two examples. We have one layer of data and that is the image tiles coming from the service provider. With the layering system of RadMap, we can overlay information layers on top of each other and add more geographical data and/or elements that augment this geographical data like pins, routes, callouts, planes, boats and any form of geometry your application needs.
Here is a screenshot of a map of Washington D.C. showing a street view from Open Street Maps over aerial view from Bing Maps.
Third Stop: Getting a Clearer View
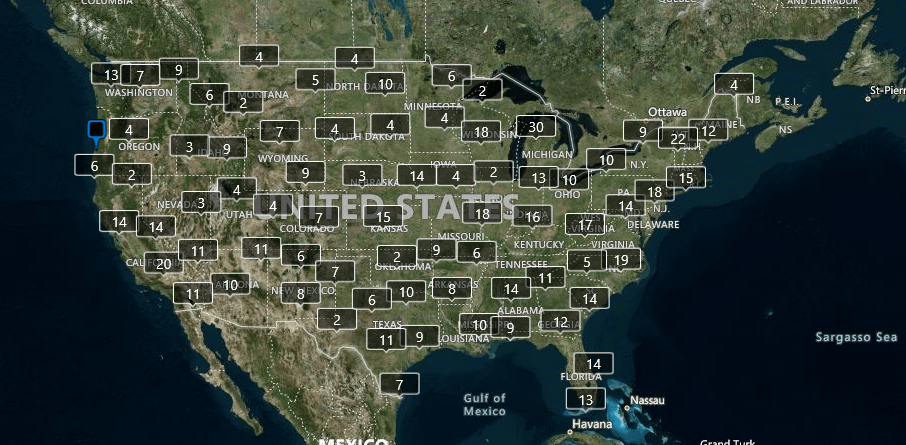
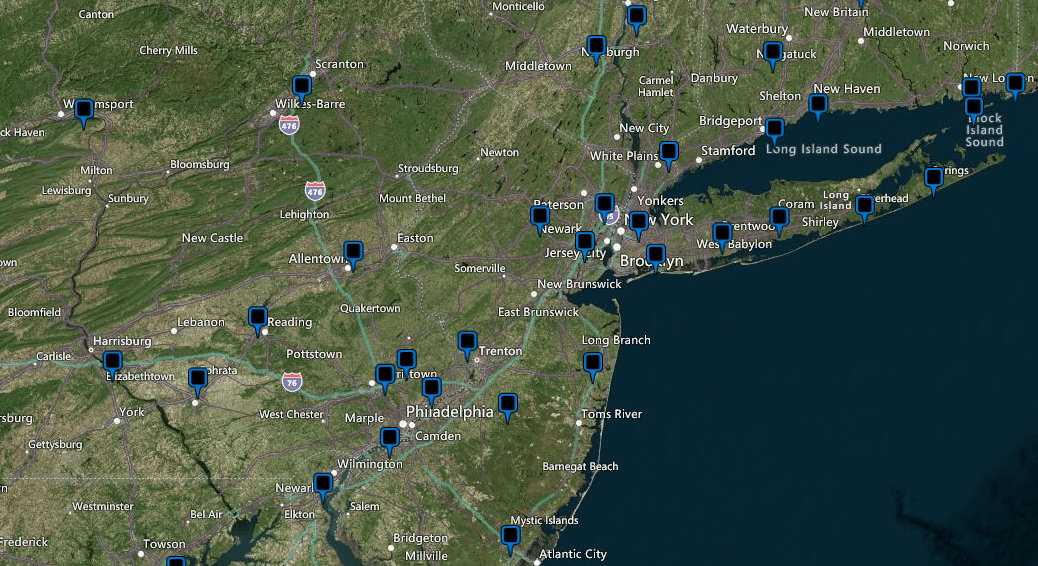
Did you know there are close to 20,000 public and private airports in the USA? That is a lot of pins to place on a map. Thankfully, we have not one, but two solutions that can work in synergy.
Number one is to group items in proximity to each other into clusters. Number two is UI virtualization, which allows the map to only show elements that are currently inside the viewport.
I couldn’t find a file with all the airports in the USA, so we will have to make do with “only” the international ones. Here is RadMap showing said airports on two zoom levels with no pins overlapping thanks to clusterization.
Fourth Stop Is the Built-in Controls of RadMap
They might appear tiny, but they pack a punch. They are there when you need them without getting in the way of the important items the map is visualizing. And when I say they pack a lot, here is what you can do with them: track the geolocation of the mouse pointer, get the scale at which the map is displayed, change the zoom level, pan in four directions, change the type of tiles the provider displays (if it offers more than one).
Fifth Stop Is Finding the Route Between Two Places
Maps have been used for navigation since ancient times. This is still the case today and it is easier than ever. Here is a screenshot showing how to get from New York to Boston. In red is the quickest route to take by car and in blue is the route to take if you are driving a semi-trailer truck, pulling explosive goods, and avoiding tolls. Oh, you get turn-by-turn instructions as well.
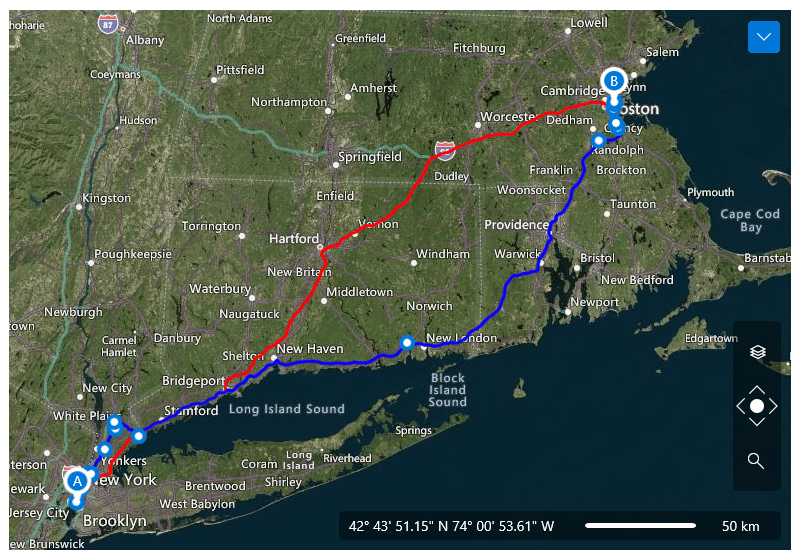
Routing and truck routing are part of the services available in the Bing Maps Provider of RadMap. And they are not alone there, keeping them company are search, geocoding and elevation. All these great services are consumable through a convenient API right from your C# code.
On their own, these services are useful and great, albeit only in text/JSON/xml form. To make them truly powerful and unlock their full potential, you need to “translate” them in the language of RadMap—graphical.
Enter the built-in shapes. Thanks to this set of shapes, you can visualize something, as complex as the routes in the screen shot above, in a language that is easily understood by the customer.
Final Stop Is Reading and Displaying Shapefiles
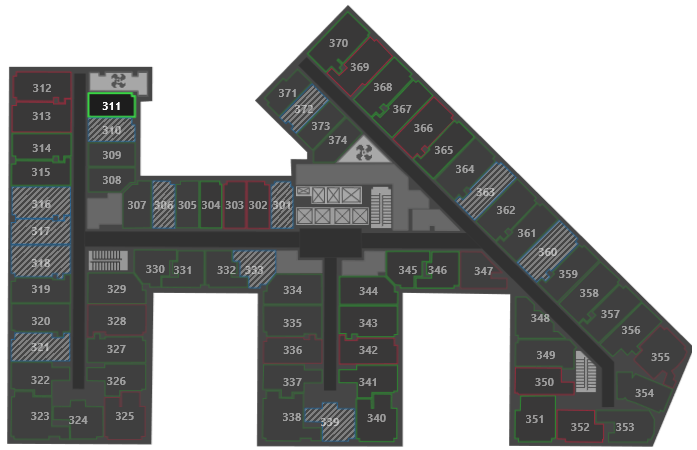
Geographical maps are helpful to get you to a certain destination, and when you get there RadMap can continue being useful. As an example, here is a hotel floor plan which can be of great use not only to find your way around but also when you choose your room. Sea view, mountain view, pool view, whatever your preference is, you can quickly satiate it.
These are some of the scenarios that utilize RadMap and its rich feature set. I am sure there are countless other use cases that I do not even realize exist. You can read the full documentation to get an idea of where RadMap can help you and start building. Go try RadMap, share your feedback, and show us how RadMap empowers your applications. Here are some channels to get in touch:
- Get in touch by email—drop us a line, for anything related to product or just to say hi at TelerikWinUI@progress.com.
- Feedback Portal—share any feature request (or bug reports) that you might have.
- Telerik Forums—if you need any technical assistance with our products, let us know and we will help.
Get the Bits
Don’t wait—try out the latest:

Ivan Petrov
Ivan Petrov was a Senior Software Developer working at the Telerik WinForms DevLabs.
