Crop and Save Images with Telerik UI for Xamarin Image Editor Control

Summarize with AI:
The official R3 2019 release of Telerik UI for Xamarin is here and it’s a perfect time to draw your attention to a couple of handy features added to the Image Editor control for Xamarin.
We love to listen: We have received a number of feature requests about providing different shapes for the ImageEditor Crop tool, as well as the ability to Save the edited image with a specific scale factor. And here we are! Those features are now part of the image editor features set.
In this blog post I will get you familiar with the new Cropping and Saving possibilities within the RadImageEditor control.

Let’s take a look at the listed features above.
Crop Feature
Circular, Square Geometry and Many More
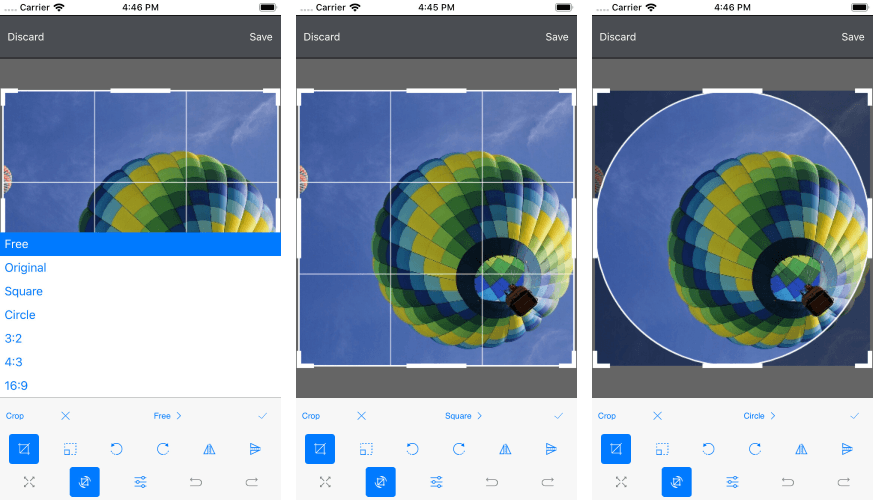
The image crop tool allows you to crop an image using predefined aspect-ratios and crop geometries, or you can create a custom one.
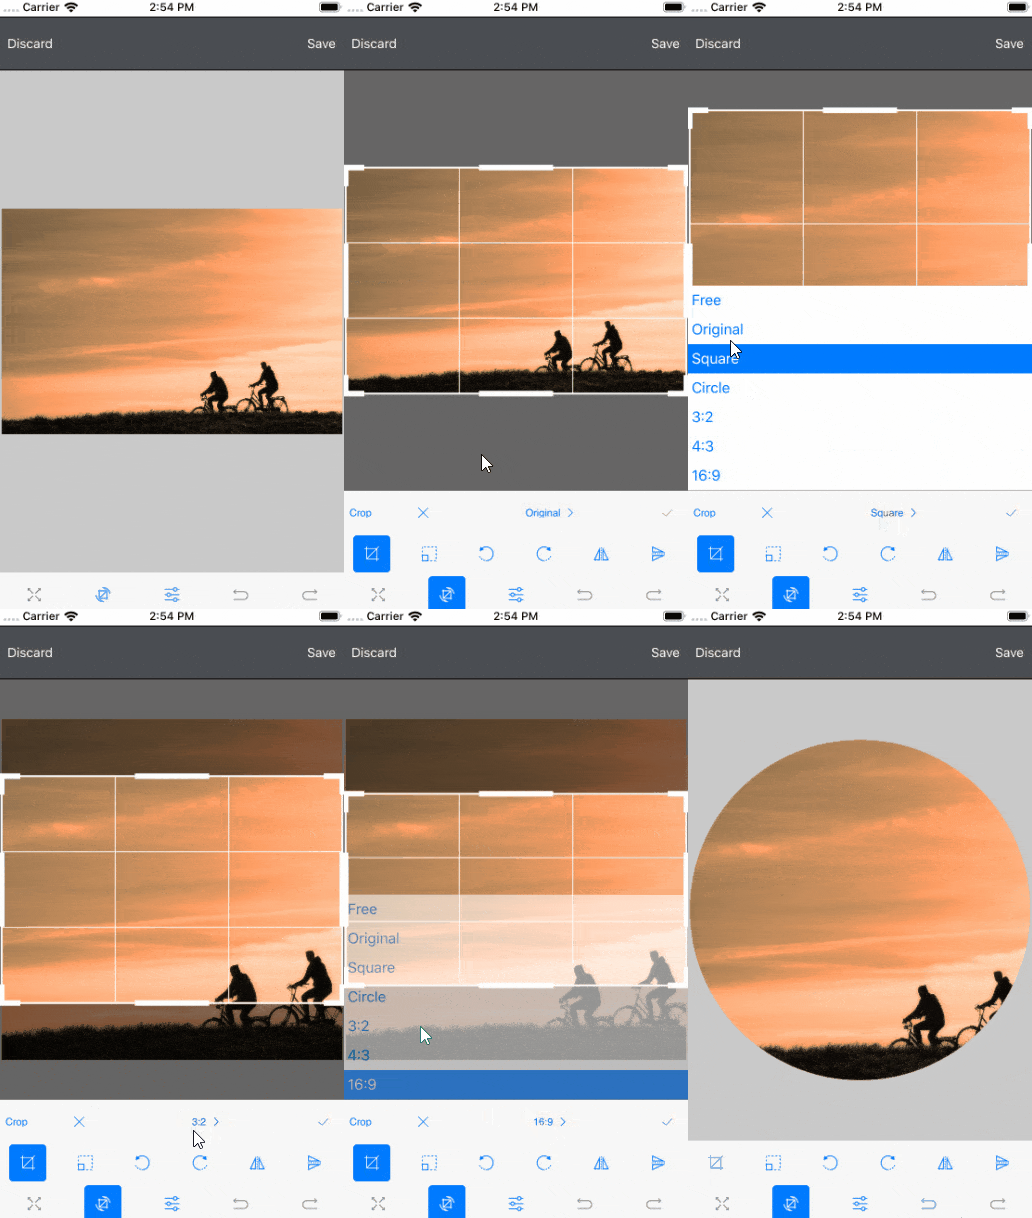
The Crop Toolbar Item has properties which help you specify the geometry of the crop selection and the desired aspect ratios. We have added circular and fixed-ratio crop, including some of the most popular crop rations like 3:2, 4:3, 16:9. More details can be found in our help article.
Here is how the Pre-Defined Crop Feature looks:

And the custom one:

In addition, the control also features a unique, easy-to-use, intelligent crop switch, depending on the touch location. Whenever the touch location defines a rectangle with swapped width/height ratio, the resize adorner will switch, so you automatically get the alternative crop rectangle, thus quickly and easily switching from landscape to portrait crop and vice-versa.
Save Images
With RadImageEditor you have the option to save the currently edited image. The new API which we have exposed allows you to save images with a specific scale factor or with a maximum size, and also allows you to handle large images and save them to a size which corresponds to your app needs.
These scenarios can be achieved through the SaveAsync method and its overloads.
You can find more information about Saving Images here.
Xamarin.Forms ImageEditor - Crop and Save Demo
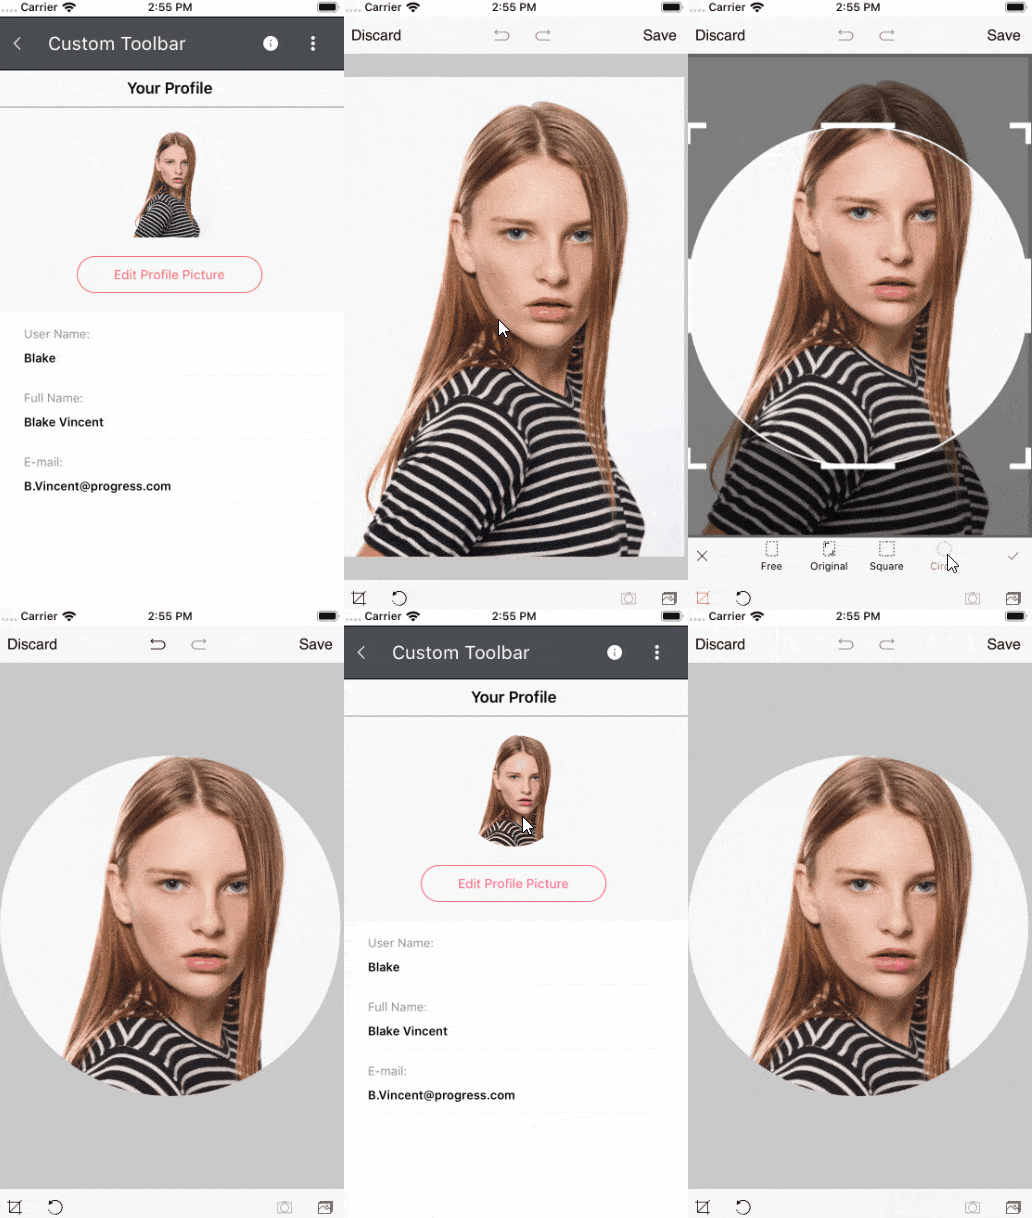
Let's create a sample demo using a circle as a crop geometry and save the edited image with high quality.
For the purpose of the demo the .jpg file is added to each application project. You could load images from File, Uri, Stream, Resources
Here is a sample definition of the RadImageEditor:
<Grid>
    <Grid.RowDefinitions>
        <RowDefinition />
    </Grid.RowDefinitions>
    <telerikImageEditor:RadImageEditor x:Name="imageEditor">
        <telerikImageEditor:RadImageEditor.Source>
            <OnPlatform x:TypeArguments="ImageSource" Default="image.jpg"/>
        </telerikImageEditor:RadImageEditor.Source>
    </telerikImageEditor:RadImageEditor>
</Grid>
As we want to crop our image in a circle shape then we should add RadImageEditorToolbar with the desired crop definition:
<Grid>
    <Grid.RowDefinitions>
        <RowDefinition />
        <RowDefinition Height="Auto"/>
    </Grid.RowDefinitions>

    <telerikImageEditor:RadImageEditor x:Name="imageEditor">
        <telerikImageEditor:RadImageEditor.Source>
            <OnPlatform x:TypeArguments="ImageSource" Default="image.jpg"/>
        </telerikImageEditor:RadImageEditor.Source>
    </telerikImageEditor:RadImageEditor>

    <telerikImageEditor:RadImageEditorToolbar ImageEditor="{x:Reference imageEditor}"
                                 AutoGenerateItems="False"
                                 Grid.Row="1">
        <telerikImageEditor:CropToolbarItem>
            <telerikImageEditor:CropToolbarItem.CropDefinitions>
                <telerikImageEditor:CropDefinition Text="Circle" AspectRatio="1:1">
                    <telerikImageEditor:CropDefinition.Geometry>
                        <telerikCommon:RadEllipseGeometry Center="0.5,0.5" Radius="0.5,0.5"/>
                    </telerikImageEditor:CropDefinition.Geometry>
                </telerikImageEditor:CropDefinition>
            </telerikImageEditor:CropToolbarItem.CropDefinitions>
        </telerikImageEditor:CropToolbarItem>
    </telerikImageEditor:RadImageEditorToolbar>
</Grid>
You can find more information about this here.
Now let's use the saving APIs: For example, we can use ImageEditorToolbar - CommandToolbarItem an on it to implement a saving option.
- Add the CommandToolbarItem to the ImageEditorToolbar:
<telerikImageEditor:CommandToolbarItemText="Save"Tapped="OnSaveTapped"/> - 2. Save the image inside the LocalApplicationData:
privateasyncvoidOnSaveTapped(objectsender, EventArgs e){var folderPath = Environment.GetFolderPath(Environment.SpecialFolder.LocalApplicationData);var filePath = Path.Combine(folderPath,"image.jpg");using(var fileStream = File.Create(filePath)){awaitthis.imageEditor.SaveAsync(fileStream, ImageFormat.Jpeg, 1);}await Application.Current.MainPage.DisplayAlert("","The Image is saved with original size","OK");}
Here is the final result:

Share Your Feedback
Feel free to drop us a comment below sharing your thoughts. We would love to hear what you think about the Xamarin Forms Image Editor control and its features. If you have any ideas for features to add, please do not hesitate to share this information with us on our Telerik UI for Xamarin Feedback portal.
Don’t forget to check out the various demos of the control in our SDK Sample Browser and the Telerik UI for Xamarin Demos application.
If you have not yet tried the Telerik UI for Xamarin suite, take it out for a spin with a 30-day free trial, offering all the functionalities and controls at your disposal at zero cost.
Allow your app to Edit and Save images with ImageEditor for Xamarin.Forms :)
Happy coding!

Dobrinka Yordanova
Dobrinka Yordanova is a Technical Support Engineer, part of the Progress Telerik UI for Xamarin & UWP team in Sofia, Bulgaria. She holds a master's degree in Computer Systems and Technologies. Her passion is traveling around the world and exploring multicultural environments. In her spare time she likes making sushi, playing console games and hanging out with friends.
