Creating Barcodes in Your Xamarin Mobile Applications

Summarize with AI:
The Barcode control (added to the Telerik UI for Xamarin toolkit with the R2 2018 release) enables you to quickly generate the most commonly used types of barcodes in your Android, iOS and UWP mobile applications. This blog post aims to familiarize you with the key features of the control and shows you how to easily include the element within your application in a matter of seconds.
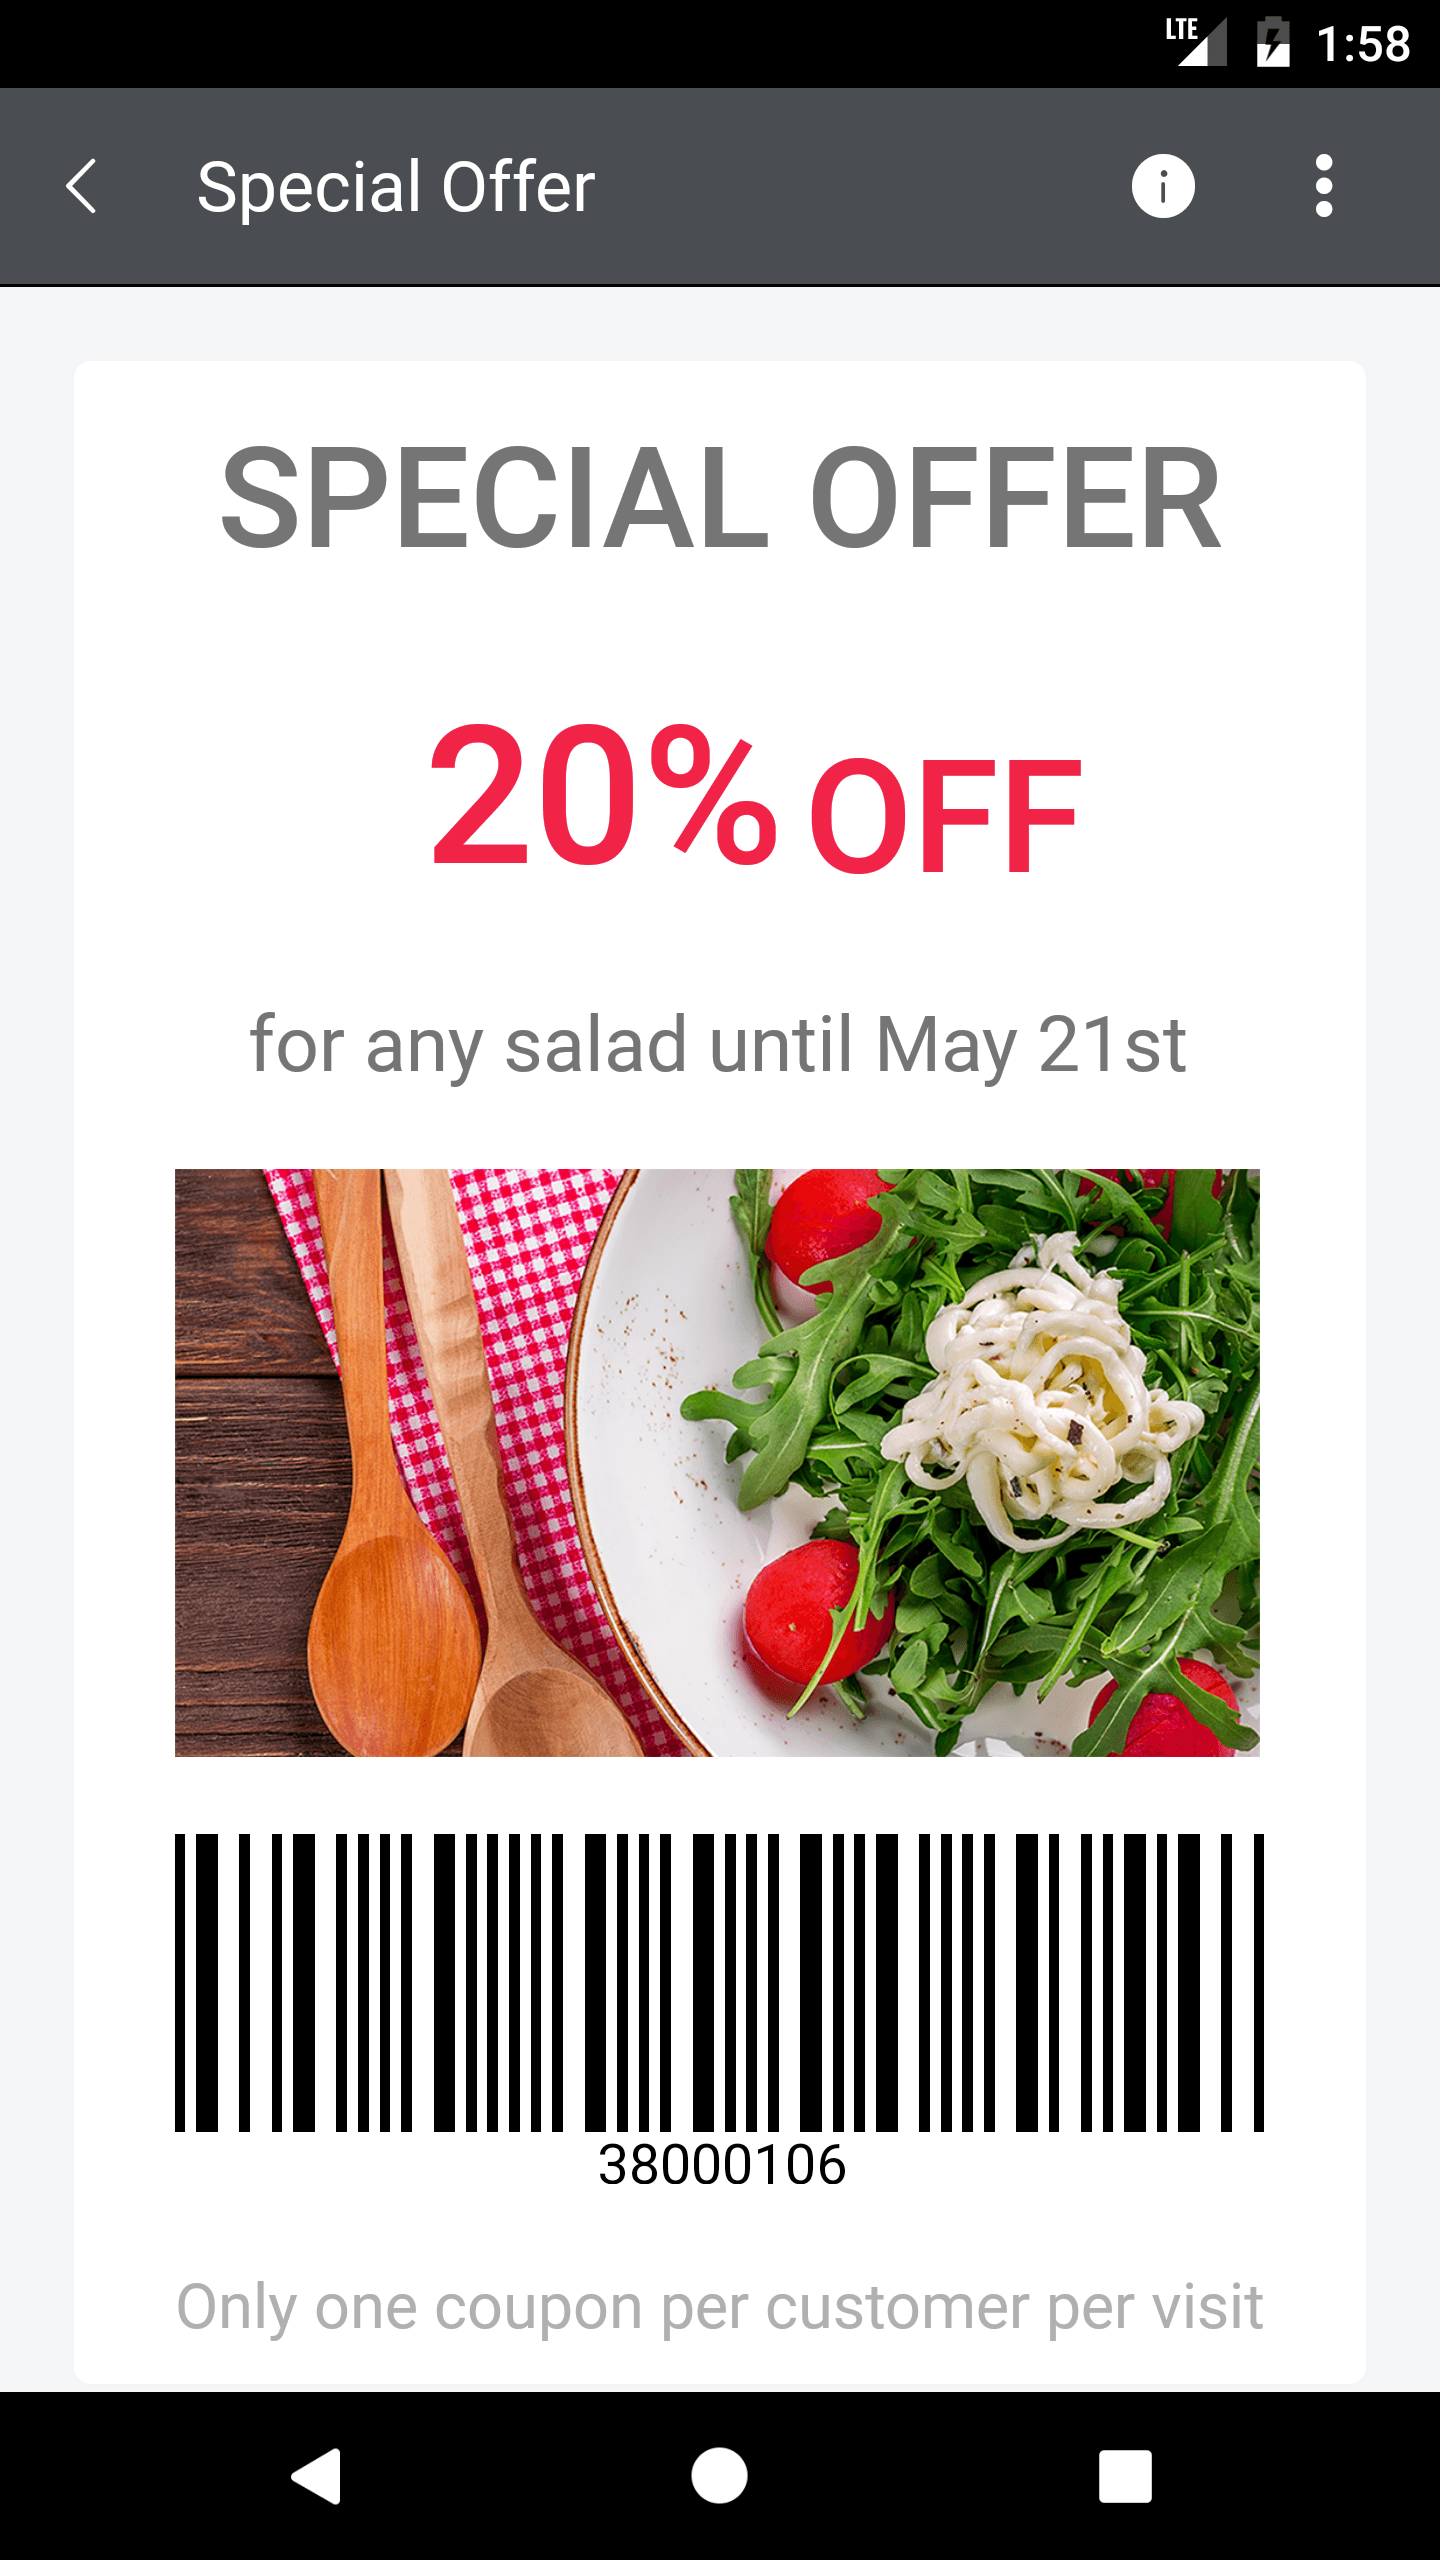
Let me start off by showing you an example of a generated barcode used within a custom view that we created for our Xamarin Sample Application:

This image is a snapshot of the SpecialOffer example, which is available in the QSF Sample Application. You can check the QSF application (located in the QSF folder within your local Telerik UI for Xamarin installation) for more examples that include different Barcode scenarios.
The Key Features of the Xamarin BarCode Control
First, let"s have a look at the key features the control provides:
- Support for one-dimensional barcodes: Codabar, Code 11, Code 25 Standard, Code 25 Interleaved, Code 39, Code 39 Extended, Code 93, Code 93 Extended, Code 128, Code 128 A, Code 128 B, Code 128 C, MSI, EAN 8, EAN 13, GS1-128, Postnet, UPC A, UPC E, UPC Supplement 2, UPC Supplement 5. Go to 1D barcodes section for more information about each barcode.
- Support for different two-dimensional barcodes: Such as the popular QR code and PDF417. Check out the 2D barcodes documentation.
- Three sizing modes:
RadBarcodeprovides three sizing modes that will help you fine-tune the rendering of your codes. - Styling capabilities:
RadBarcodeexposesForegroundColorandBackgroundColorproperties that can be used to customize its visual appearance.
Adding the Control to Your Application
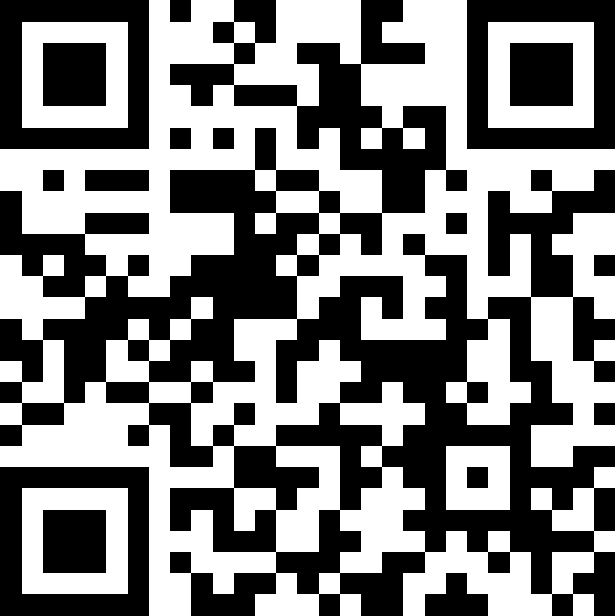
Visualizing a QR code requires only five XAML lines:
<barcode:RadBarcode Value=" http://www.telerik.com/">
  <barcode:RadBarcode.Symbology>
    <symbology:QRCode />
  </barcode:RadBarcode.Symbology>
</barcode:RadBarcode>
The result from adding the above code to your XAML is the following barcode:

To show your barcode with the perfect quality (no matter the screen density), you could use one of the three sizing modes:
- Manual: You could define the size of the smallest line or dot of the code through the Module property and the other lines and dots multiply to that size. The Module property is measured in device pixels.
- Snap: The barcode is stretched to the available size, while each line or dot is drawn with exact number of pixels so they look sharp.
- Stretch: The barcode is stretched in such a way to fit exactly the available size; each line or dot size is calculated so they snap to the device pixels. In order for the lines to stay sharp and stretch the barcode to the available size, some of them are slightly thicker than others.
As you can see, the API of the control is quite simple and it is very easy to include it in your application. We encourage you to give it a try and boost the effectiveness of your application with minimum effort from your side.
More information regarding the control’s capabilities can be found in the official documentation page of the Telerik UI for Xamarin suite—BarCode Overview. Don't forget to check the available examples in the QSF as well as the SDK Samples Browser applications.
As always, your feedback regarding the control would be greatly appreciated. Any suggestions are welcomed so we can make the process of integrating any type of barcodes within your Xamarin application as smooth and easy as possible.

