Creating an Angular 7 App with ASP.NET Core: A Step-by-Step Guide

Summarize with AI:
Angular 7 has just arrived. Neel Bhat provides a step-by-step guide to creating an Angular 7 app using ASP.NET Core SPA templates in Visual Studio 2017.
Finally, we have a new major version of Angular, which is version 7. The reason I use the word “finally” is not just because people were waiting for the latest major release of Angular, but also because there were quite a few rumors about the features Angular 7 would offer. Especially since the April Fool’s article published with the title "Top 4 Changes Coming In Angular 7.0."
The Angular team officially announced Angular 7 just a few days back, and Angular 7 has introduced some pretty awesome features, like improvements in Angular Material, Performance improvements, and CLI improvements to name a few.
In this article:
- We will see how to create Angular 7 applications with ASP.NET Core SPA template
- We will also see the features introduced with this major release
- I will demo some of the Angular Material features introduced with Angular 7
Angular 7 With SPA Template
Let’s first see how to create an Angular 7 application with ASP.NET Core SPA templates using Visual Studio 2017. There are more ways than one to create an Angular 7 application with .NET Core, but let’s look at this one.
Make sure you have installed Visual Studio 2017 and the latest .NET Core SDK, as well as the latest version of Node.
In this approach, we will use the Angular template with ASP .NET Core.
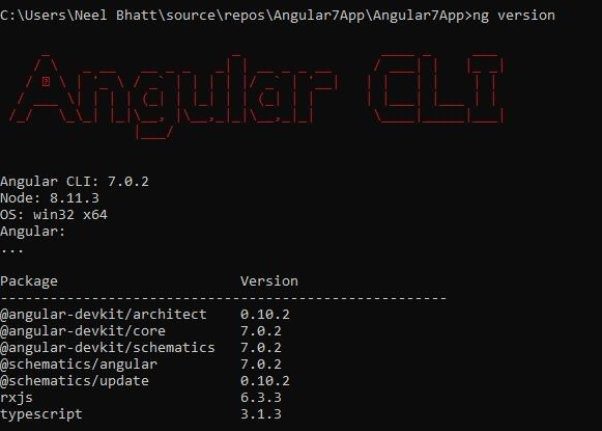
Before starting, let us first update our Angular CLI to version 7. For this, open command prompt and run the command:
npm i -g @angular/cli
Once done, your CLI will be updated to version 7:
Create the Angular Application Using .NET Core 2.1 Template in VS 2017
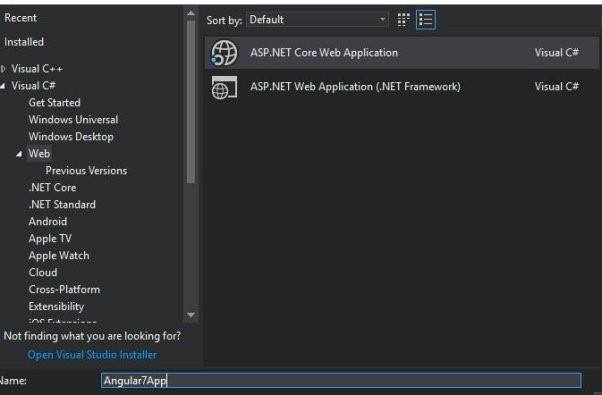
Once you have all these installed, open your Visual Studio 2017 -> Create New Project -> Select Core Web application:
Click on “Ok,” and, in the next window, select Angular as shown below:
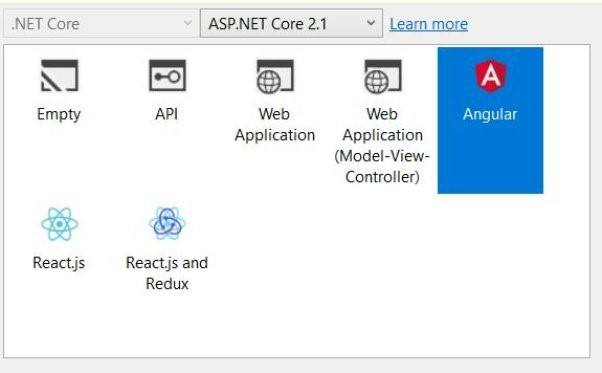
Visual Studio will create a well-structured application for you, which is currently in Angular 5.
Angular 7
If you open the package.json file in the ClientApp folder, you will notice the Angular version is 5.2, but we want to create an Angular 7 application.
So go to File Explorer and delete the ClientApp folder.
Once the folder is deleted, open the Command prompt and navigate to the project and run the command:
ng new ClientApp
This command will create a brand new Angular application with the latest version (7):
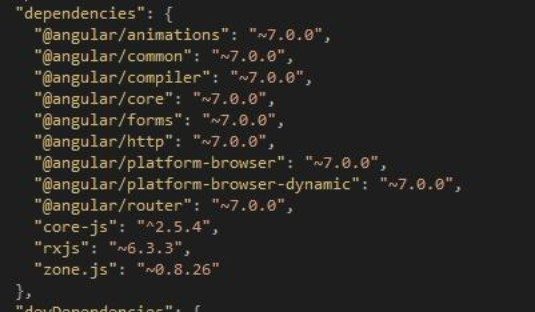
That’s it. We have just created an Angular 7 application.
Run the application using the command ng serve:
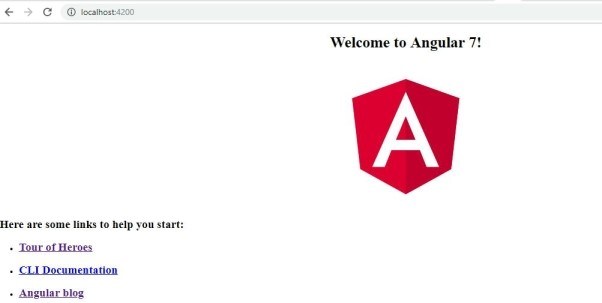
Angular 7 Major Features
Let’s examine some of the major features released with Angular 7.
The CLI is More Talkative
From Angular 7 onwards, the CLI will prompt users when we run the commands like ng new or ng add to help the user to choose features like routing, SCSS support, etc.:

As you can see above, you can reply either in yes/no or by selecting the option using up/down arrow keys.
Angular Material Improvements
The Component Dev Kit (CDK) has been improved, and now we can use functionalities like virtual scrolling and drag and drop. Let’s see how to do it using Angular 7.
Install Angular Material
Let us first install Angular Material using the below command:
npm install --save @angular/material @angular/cdk @angular/animationsOnce this is done, add the BrowserAnimationsModule in app.component.ts:import {BrowserAnimationsModule} from '@angular/platform-browser/animations';@NgModule({...imports: [BrowserAnimationsModule],...})That’s it – we are now ready to use Angular Material with Angular 7.
Drag and Drop Feature
I remember some StackOverflow questions about this, and, personally, I wished this would be part of Material. From Angular 7 onwards, we will be able to drag and drop using Material. We can now drag items horizontally, vertically, from one list to another list, reordering the list, opening draggable items, etc.
For this, we first need to add the DragDropModule into app.component.ts as below:
import { DragDropModule } from '@angular/cdk/drag-drop';@NgModule({...imports: [DragDropModule],...})Let’s create a horizontal drag and drop. For this, add below code in app.coponent.html:
<div cdkDropList cdkDropListOrientation="horizontal" class="example-list" (cdkDropListDropped)="drop($event)"><div class="example-box" *ngFor="let timePeriod of timePeriods" cdkDrag>{{timePeriod}}</div></div>Next, we will need the timePeriods. For this, add below code in app.component.ts:
timePeriods = ['Bronze age','Iron age','Middle ages','Early modern period','Long nineteenth century'];drop(event: CdkDragDrop<string[]>) {moveItemInArray(this.timePeriods, event.previousIndex, event.currentIndex);}We’re all set. Now, run the application using ng serve:

You can find more details here.
Virtual Scrolling
We can do virtual scrolling using Angular Material with version 7. With this, we can load and unload the DOM elements based on the display size. It will create a very fast experience for the user even if the scrolling list is huge.
For this, we first need to add the ScrollDispatchModule into app.component.ts as below:
import { ScrollDispatchModule } from '@angular/cdk/scrolling';@NgModule({...imports: [ScrollDispatchModule],...})Let’s add virtual scrolling in our Angular 7 app. For this, add the below code in app.coponent.html:
<cdk-virtual-scroll-viewport itemSize="50" class="example-viewport"><div *cdkVirtualFor="let item of items" class="example-item">{{item}}</div></cdk-virtual-scroll-viewport>Next, we will need the items. For this, add below code in app.component.ts:
items = Array.from({ length: 100000 }).map((_, i) => `Item #${i}`);That’s it. Now, run the application using ng serve:
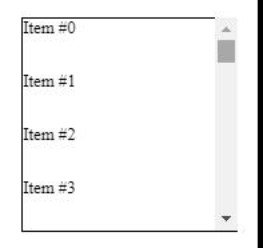
More details can be found here.
Ability to use Native Select in Angular Material
From Angular 7 onwards, Angular material will allow using native <select> inside a <mat-form-field>. We know that native select is powerful and, as it is a native element, native <select> has some performance, accessibility, and usability advantages over mat-select. So it would be nice to use native <select>.
Performance Improvement for Production
The Angular team noticed a common mistake where the developers were adding reflect-metadata polyfill in production, although it is only required in development.
So from Angular 7 onwards, this will be automatically removed from polyfills.ts. You can add it as a build step while running in development mode.
Bundle Budget Feature
With this, if your bundle is more than 2 MB -> you will be warned by the application, and if the bundle is more than 5 MB -> you will get an error by the application. But it is configurable, so you can change the settings from the angular.json file:
"budgets": [{"type": "initial","maximumWarning": "2mb","maximumError": "5mb"}]This way, we will get used to creating the applications with as low a bundle size as possible.
These are some of the major features of Angular 7. Let’s quickly mention a few more features that shipped with Angular 7 which Stephen Fluin mentions in his blog:
- Angular Console — A downloadable console for starting and running Angular projects on your local machine
- @angular/fire — AngularFire has a new home on npm, and has its first stable release for Angular
- NativeScript — It’s now possible to have a single project that builds for both web and installed mobile with NativeScript
- StackBlitz — StackBlitz 2.0 has been released and now includes the Angular Language Service, and more features like tabbed editing
Lastly, if you want to upgrade your existing Angular application to Angular 7, the Angular team has made this step easier. Just run below command:
ng update @angular/cli @angular/core
This is a really fast way to upgrade.
You can take a look here to check more details regarding upgrading if you have a big application:
You can find the source code of the application I created with Angular 7 here. Hope it helps!
Looking for more info on everything that's new in Angular 7? You can learn more about what's new in Angular 7 here, and if you're looking for beautiful UI components designed for Angular to speed up your development, don't forget to check out Kendo UI for Angular.

Neel Bhatt
Neel is a tech enthusiast, blogger, writer, speaker and solutions architect. He has more than 10 years of professional experience. Apart from being a developer, he is an award-winning tech blogger. He likes to stay up-to-date with the latest technology stack, and he likes to share his knowledge with the community. He is a DZone MVB and Top 3% overall on the Stack Overflow site. He is currently working on the Number 1 Dutch weather platform. You can find him at his site: https://neelbhatt.com
