
Check Out the DrawingView in .NET MAUI

Summarize with AI:
Learn how to implement DrawingView in your .NET MAUI app to quickly add signature capabilities or drawing features, with built-in settings for color, stroke width, etc.
In recent years, technology has evolved significantly, making our daily tasks easier and more efficient. Thanks to mobile applications, we can now complete various processes from anywhere—without the need for physical visits, like going to the bank. A great example of this advancement is digital signature applications. What once required a physical document can now be done effortlessly from a smartphone.
Beyond these conveniences, interactive applications also play a crucial role in education and creativity. Some apps, for instance, help children develop their drawing skills using just a computer or mobile device.
Would you like to be part of the developers creating these innovative experiences? Of course, you would! That’s why, in this article, you’ll learn how to integrate DrawingView into your .NET MAUI applications with just a few simple steps!
What Is DrawingView?
DrawingView provides a surface for drawing lines using either touch or mouse interaction and is part of the .NET MAUI Community Toolkit. The user’s drawing can be saved as an image, making it particularly useful for applications that require a signature box or interactive drawing features in educational settings.
Additionally, it allows customization of visual aspects, such as setting the line color, adjusting the stroke width and binding to a collection of drawn lines.
How to Implement DrawingView?
As mentioned, DrawingView is part of the .NET MAUI Community Toolkit. This toolkit is a collection of reusable components created by the community, including animations, converters and behaviors, designed to speed up app development with cross-platform compatibility for iOS, Android, macOS and WinUI. So to correctly implement the DrawingView, you’ll need to configure the .NET MAUI Community Toolkit in your app.
Initial Setup
Setup is straightforward, as outlined in the steps below:
1. Installation: First, make sure to install the toolkit by adding the Community.Toolkit.Maui NuGet package.

2. Setup in MauiProgram.cs: After adding the NuGet package, navigate to MauiProgram.cs. Right below UseMauiApp<App>(), append:
.UseMauiCommunityToolkit()
3. Namespace Addition: Include the toolkit namespace in the page where you’ll be integrating DrawingView.
xmlns:toolkit="http://schemas.microsoft.com/dotnet/2022/maui/toolkit"
We have two drawing modes: Single Line and Multiple Lines. Let’s explore each one of them.
Drawing a Single Line
To use DrawingView, simply reference the alias you assigned to the namespace in the previous step, “Toolkit”, followed by a colon (:) and “DrawingView”, then define its properties.
For this example, we’ll focus on the two key properties—LineColor and LineWidth.
✍️ We’ll explore these and other properties in more detail later.
<toolkit:DrawingView
    WidthRequest="300"
    HeightRequest="300"
    BackgroundColor="Pink"
    LineColor="Red"
    LineWidth="5" />
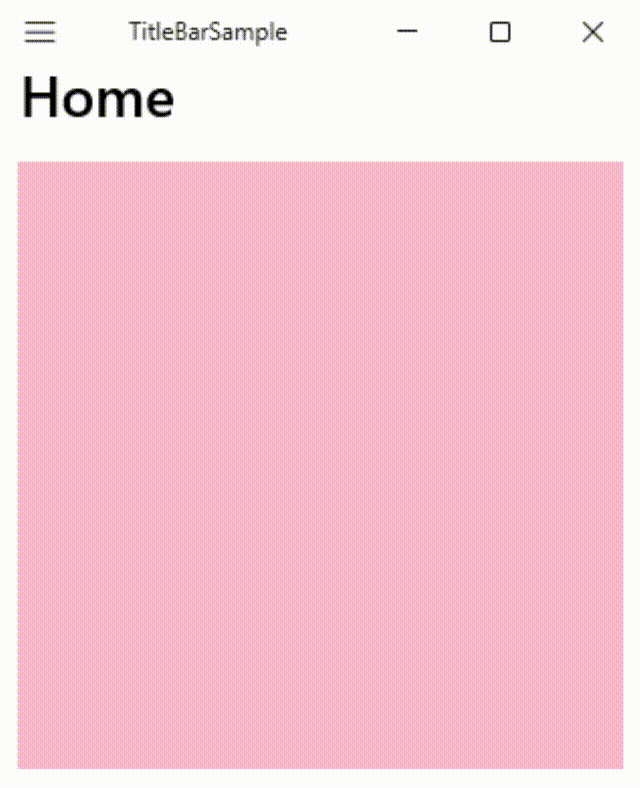
Your result should look like this:

Look at the example: Every time I release the stroke and start a new line, the previous drawing is erased, leaving only what I’m currently drawing.
Adding Multiple Lines
By default, DrawingView allows drawing a single line, meaning each new stroke replaces the previous one. However, you can easily enable the ability to draw multiple lines.
To do this, simply set the IsMultiLineModeEnabled property to true and ShouldClearOnFinish to false, as shown below:
<toolkit:DrawingView
    WidthRequest="300"
    HeightRequest="300"
    BackgroundColor="Pink"
    IsMultiLineModeEnabled="True"
    LineColor="Green"
    LineWidth="5" />
If you prefer to implement it in C# instead of XAML, the code would look like this:
using CommunityToolkit.Maui.Views;

var gestureImage = new Image();
var drawingView = new DrawingView
{
    Lines = new ObservableCollection<IDrawingLine>(),
    IsMultiLineModeEnabled = true,
    ShouldClearOnFinish = false,
};
Your result should look like this:
And in this example, unlike the previous one, I can draw different strokes, allowing me to form the word “Hello.”
DrawingView Properties to Know
- Lines: Accepts an
ObservableCollection<IDrawingLine>as a valid value, serving as a collection ofIdrawingLineelements. - ShouldClearOnFinish: Accepts a Boolean value. Determines whether the DrawingView is cleared after releasing the touch or clicking when a line is drawn. Be careful not to confuse it with the
IsMultiLineModeEnabledproperty, as enabling both may cause conflicts. - LineColor: Accepts a color value, allowing you to define the stroke color.
- LineWidth: Accepts a float value, allowing you to define the stroke width.
How Can I Save the Drawing? 🤔
The .NET MAUI Community Toolkit provides two ways to save a drawing as an image: directly from DrawingView or through DrawingViewService. Let’s explore each option in more detail.
Using DrawingView to Save the Drawing
To extract the image of your drawing from DrawingView, simply use the asynchronous GetImageStream method, providing the following parameters:
- desiredWidth: The desired width of the image to be saved.
- desiredHeight: The desired height of the image to be saved.
- imageOutputOption (optional): If not specified, the method will return an image containing only the drawn lines, which may not match the full surface visible to the user. To capture everything on the screen in the saved image, use DrawingViewOutputOption.FullCanvas.
Your code implementation should look like this:
await drawingView.GetImageStream(desiredWidth: 400, desiredHeight: 500, imageOutputOption: DrawingViewOutputOption.FullCanvas);
✍️ In this example, the saved image will capture the full canvas of your drawing, with a width of 400 and a height of 500.
Using DrawingViewService to Save the Drawing
For applications using the MVVM pattern, the Community Toolkit provides the DrawingViewService class, which not only enables image generation but also allows the creation of a sequence of images. It offers two options to save the images: ImageLineOptions.JustLines or ImageLineOptions.FullCanvas.
Exporting Just the Drawn Lines
If you want to export only the drawn lines, you can use ImageLineOptions.JustLines, which allows you to specify parameters such as image size and background color.
In the following example, we will export an image with a width of 500, a height of 600 and a red background.
await using var stream = await DrawingViewService.GetImageStream(

ImageLineOptions.JustLines(Lines, new Size(500, 600), Brush.Red));
Exporting the Complete Canvas
Or, if you want to export an image that includes everything the user sees on the drawing surface, you can use ImageLineOptions.FullCanvas.
await using var stream = await DrawingViewService.GetImageStream(

ImageLineOptions.FullCanvas(Lines, new Size(1920, 1080), Brush.Blue, new Size(CanvasWidth, CanvasHeight)));
✍️ In this example, an image of 500 × 666 pixels will be exported with a red background. Thanks to new Size(CanvasWidth, CanvasHeight), the image size will match the actual dimensions of the DrawingView.
How to Handle the Event Once the Line Has Been Drawn? 🤔
The DrawingView component enables us to subscribe to events such as OnDrawingLineCompleted, which allows us to identify when the line has been completed. Here’s how to implement it in XAML:
<views:DrawingView
    Lines="{Binding MyLines}"
    DrawingLineCompletedCommand="{Binding DrawingLineCompletedCommand}"
    OnDrawingLineCompleted="OnDrawingLineCompletedEvent" />
Alternatively, if you prefer to do it using C#, here’s a great example from the official documentation.
using CommunityToolkit.Maui.Views;

    var gestureImage = new Image();
    var drawingView = new DrawingView
    {

	    Lines = new ObservableCollection<IDrawingLine>(),
	    DrawingLineCompletedCommand = new Command<IDrawingLine>(async (line) =>
    {
	    var cts = new CancellationTokenSource(TimeSpan.FromSeconds(5));
	    var stream = await line.GetImageStream(gestureImage.Width, gestureImage.Height, Colors.Gray.AsPaint(), cts.Token);
	    gestureImage.Source = ImageSource.FromStream(() => stream);
    })
    };
    drawingView.OnDrawingLineCompleted += async (s, e) =>
    {
    var cts = new CancellationTokenSource(TimeSpan.FromSeconds(5));

    var stream = await e.LastDrawingLine.GetImageStream(gestureImage.Width, gestureImage.Height, Colors.Gray.AsPaint(), cts.Token);

    gestureImage.Source = ImageSource.FromStream(() => stream);
};
Improving Touch Interaction in ScrollView on iOS
Touch interactions with ScrollView can sometimes feel a bit awkward on iOS. To improve this, you can set the ShouldDelayContentTouches property to false, as shown below:
<ContentPage
xmlns:ios="clr-namespace:Microsoft.Maui.Controls.PlatformConfiguration.iOSSpecific;assembly=Microsoft.Maui.Controls">
    <ScrollView ios:ScrollView.ShouldDelayContentTouches="false">
	    <DrawingView />
    </ScrollView>
</ContentPage>
Conclusion
And that’s all! In just a few steps, you’ve learned how to integrate DrawingView into your .NET MAUI applications—quickly and effortlessly! So, whenever you need to create a signature or drawing application, remember to leverage DrawingView. 💚💕
Thanks for reading my articles—see you next time! 🙋♀️
References
This article and its code was based on the official documentation:
Looking for an even easier way to implement a signature element to your app? Check out the .NET MAUI SignaturePad component from Progress Telerik. With built-in customization and accessibility, this component is a snap to use. Try Telerik UI for .NET MAUI free for 30 days.

Leomaris Reyes
Leomaris Reyes is a software engineer from the Dominican Republic specializing in mobile development. She is a 7-time Microsoft MVP and actively builds mobile applications while sharing practical knowledge through technical articles and developer-focused content.
Through her work, she explains programming concepts, developer tools and real-world development practices to help developers grow in their careers.
You can follow her on Instagram and TikTok at @leomarisreyes.dev, read her articles on AskXammy, and connect with her on LinkedIn, where she shares tutorials, insights and resources for developers.
Related Posts
Comments
All articles
Topics
Web MobileMobile
Desktop
Design
Productivity
People
