Building a Food Store using Redux and Angular

Summarize with AI:
When applications get complex, it can be difficult to manage their data. In this tutorial, learn how to use the state management library Redux to build a food store that displays items and lets users add them to a shopping cart.
Managing an application where components around the application are required to communicate directly with each other is tasking, as Angular doesn’t have a built-in application-wide store. When applications are this complex, managing data throughout the application becomes difficult. This is where the importance of state management libraries like Redux, MobX and ngrx/store arises.
An important advantage of state management libraries in large scale applications, especially hierarchical ones, is the ability to abstract the state of the application from components into an application-wide state. This way, data can be passed around with ease and components can act independently of each other.
For Angular, a great state management library is Redux. Redux is a predictable state container for JavaScript applications. Redux provides a single application-wide store that is immutable and consistent with the state of the application. It uses a unidirectional data flow and uses actions to transition the state of the application in response to an event. It uses an API consisting of actions, reducers, etc.
We’ll be using a package that provides bindings for Redux in Angular applications. The @angular-redux/store library uses observables under the hood to enhance Redux’s features for Angular.
In this tutorial, we’ll be building a food store using Angular. In this store, a user will view the items displayed in the store and will be able to add and remove items from the cart. We’ll be setting up a minimal server using Express that will serve the products to the Angular application.
To follow this tutorial, a basic understanding of Angular and Node.js is required. Please ensure that you have Node and npm installed before you begin.
If you have no prior knowledge of Angular, kindly follow the tutorial here. Come back and finish the tutorial when you’re done.
We’ll be using these tools to build our application:
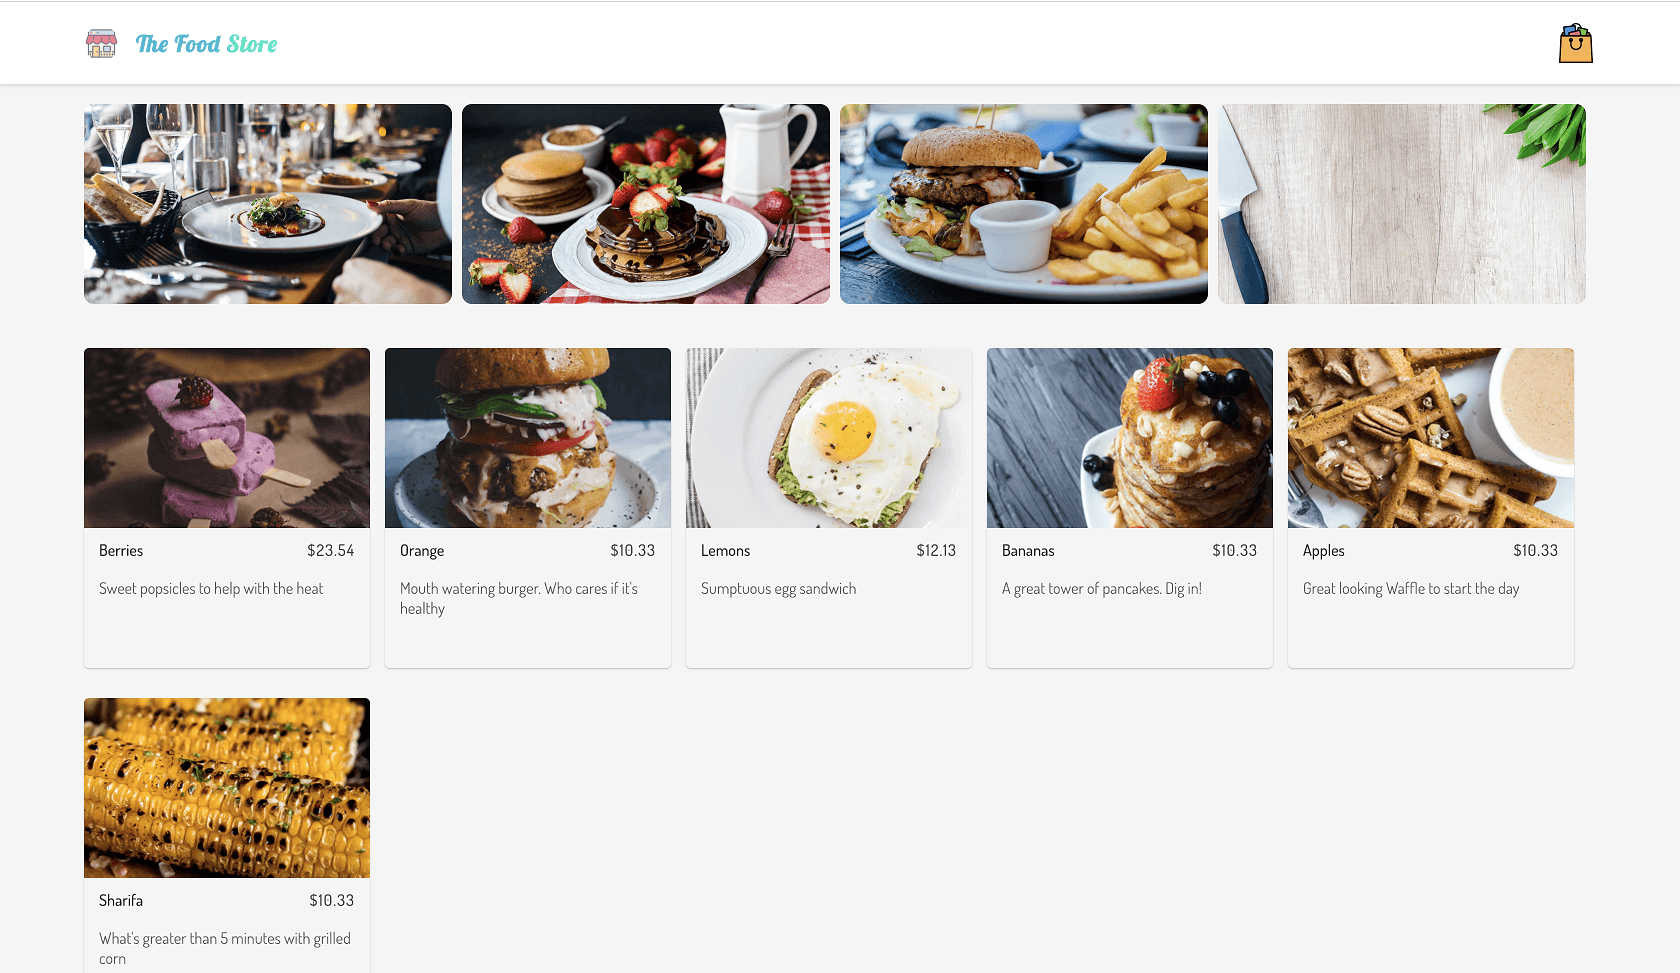
Here’s a screenshot of the final product:

Initializing Application and Installing Dependencies
To get started, we will use the CLI (command line interface) provided by the Angular team to initialize our project.
First, install the CLI by running npm install -g @angular/cli. npm is a package manager used for installing packages. It will be available on your PC if you have Node installed. If not, download Node here.
To create a new Angular project using the CLI, open a terminal and run:
ng new redux-store --style=scss
This command is used to initialize a new Angular project; the project will be using SCSS as the pre-processor.
Next, run the following command in the root folder of the project to install dependencies.
    // install depencies required to build the server
    npm install express body-parser

    // front-end dependencies
    npm install redux @angular-redux/store
Start the Angular development server by running ng serve in a terminal in the root folder of your project.
Building Our Server
We’ll build our server using Express. Express is a fast, unopinionated, minimalist web framework for Node.js.
Create a file called server.js in the root of the project and update it with the code snippet below:
    // server.js

    const express = require('express');
    const bodyParser = require('body-parser');

    const app = express();
    const port = process.env.PORT || 4000;
    const fruits = require('./fruits');

    app.use(bodyParser.json());
    app.use(bodyParser.urlencoded({ extended: false }));
    app.use((req, res, next) => {
      res.header('Access-Control-Allow-Origin', '*');
      res.header(
        'Access-Control-Allow-Headers',
        'Origin, X-Requested-With, Content-Type, Accept'
      );
      next();
    });

    app.get('/fruits', (req, res) => {
      res.json(fruits);
    });

    app.listen(port, () => {
      console.log(`Server started on port ${port}`);
    });
The calls to our endpoint will be coming in from a different origin. Therefore, we need to make sure we include the CORS headers (Access-Control-Allow-Origin). If you are unfamiliar with the concept of CORS headers, you can find more information here.
This is a standard Node application configuration, nothing specific to our app.
We’re creating a server to feed data to our application so we can see how Effects can be used to fetch external resources to populate the store.
Create a file named fruits.js that will hold the products for our store. Open the file and populate it with the code below:
    //fruits.js

    module.exports = [
      {
        "name": "Berries",
        "price": 23.54,
        "image": "https://images.unsplash.com/photo-1488900128323-21503983a07e?ixlib=rb-1.2.1&ixid=eyJhcHBfaWQiOjEyMDd9&auto=format&fit=crop&w=400&h=400&q=80",
        "description": "Sweet popsicles to help with the heat"
      },
      {
        "name": "Orange",
        "price": 10.33,
        "image": "https://images.unsplash.com/photo-1504185945330-7a3ca1380535?ixlib=rb-1.2.1&ixid=eyJhcHBfaWQiOjEyMDd9&auto=format&fit=crop&h=340&w=340&q=80",
        "description": "Mouth watering burger. Who cares if it's healthy"
      },
      {
        "name": "Lemons",
        "price": 12.13,
        "image": "https://images.unsplash.com/photo-1504382262782-5b4ece78642b?ixlib=rb-1.2.1&ixid=eyJhcHBfaWQiOjEyMDd9&auto=format&fit=crop&w=400&h=400&q=80",
        "description": "Sumptuous egg sandwich"
      },
      {
        "name": "Bananas",
        "price": 10.33,
        "image": "https://images.unsplash.com/photo-1478369402113-1fd53f17e8b4?ixlib=rb-1.2.1&ixid=eyJhcHBfaWQiOjEyMDd9&auto=format&fit=crop&w=400&h=400&q=80",
        "description": "A great tower of pancakes. Dig in!"
      },
      {
        "name": "Apples",
        "price": 10.33,
        "image": "https://images.unsplash.com/photo-1505253304499-671c55fb57fe?ixlib=rb-1.2.1&ixid=eyJhcHBfaWQiOjEyMDd9&auto=format&fit=crop&w=400&h=400&q=80",
        "description": "Great looking Waffle to start the day"
      },
      {
        "name": "Sharifa",
        "price": 10.33,
        "image": "https://images.unsplash.com/photo-1470119693884-47d3a1d1f180?ixlib=rb-1.2.1&auto=format&fit=crop&w=400&h=400&q=80",
        "description": "What's greater than 5 minutes with grilled corn"
      }
    ]
Image assets used were obtained from Unsplash
Start the server by running the following command in a terminal within the project folder:
node server.js
Home View
To get started, we’ll define the views for the application, starting from the home page. The home page will house the products grid and the header. Using the CLI, we’ll create a component named home within the src/app folder. Run the command below in the project folder to create the home component:
ng generate component home
Open the home.component.html file and replace it with the content below.
    <!-- /src/app/home/home.component.html -->
    <main>
      <section class="banners">
        <div *ngFor="let banner of banners">
          <img [src]="banner.src" [alt]="banner.alt" />
        </div>
      </section>
      <section class="product-area">
        <!-- product list component will come here -->
      </section>
    </main>
Image assets used were obtained from Unsplash
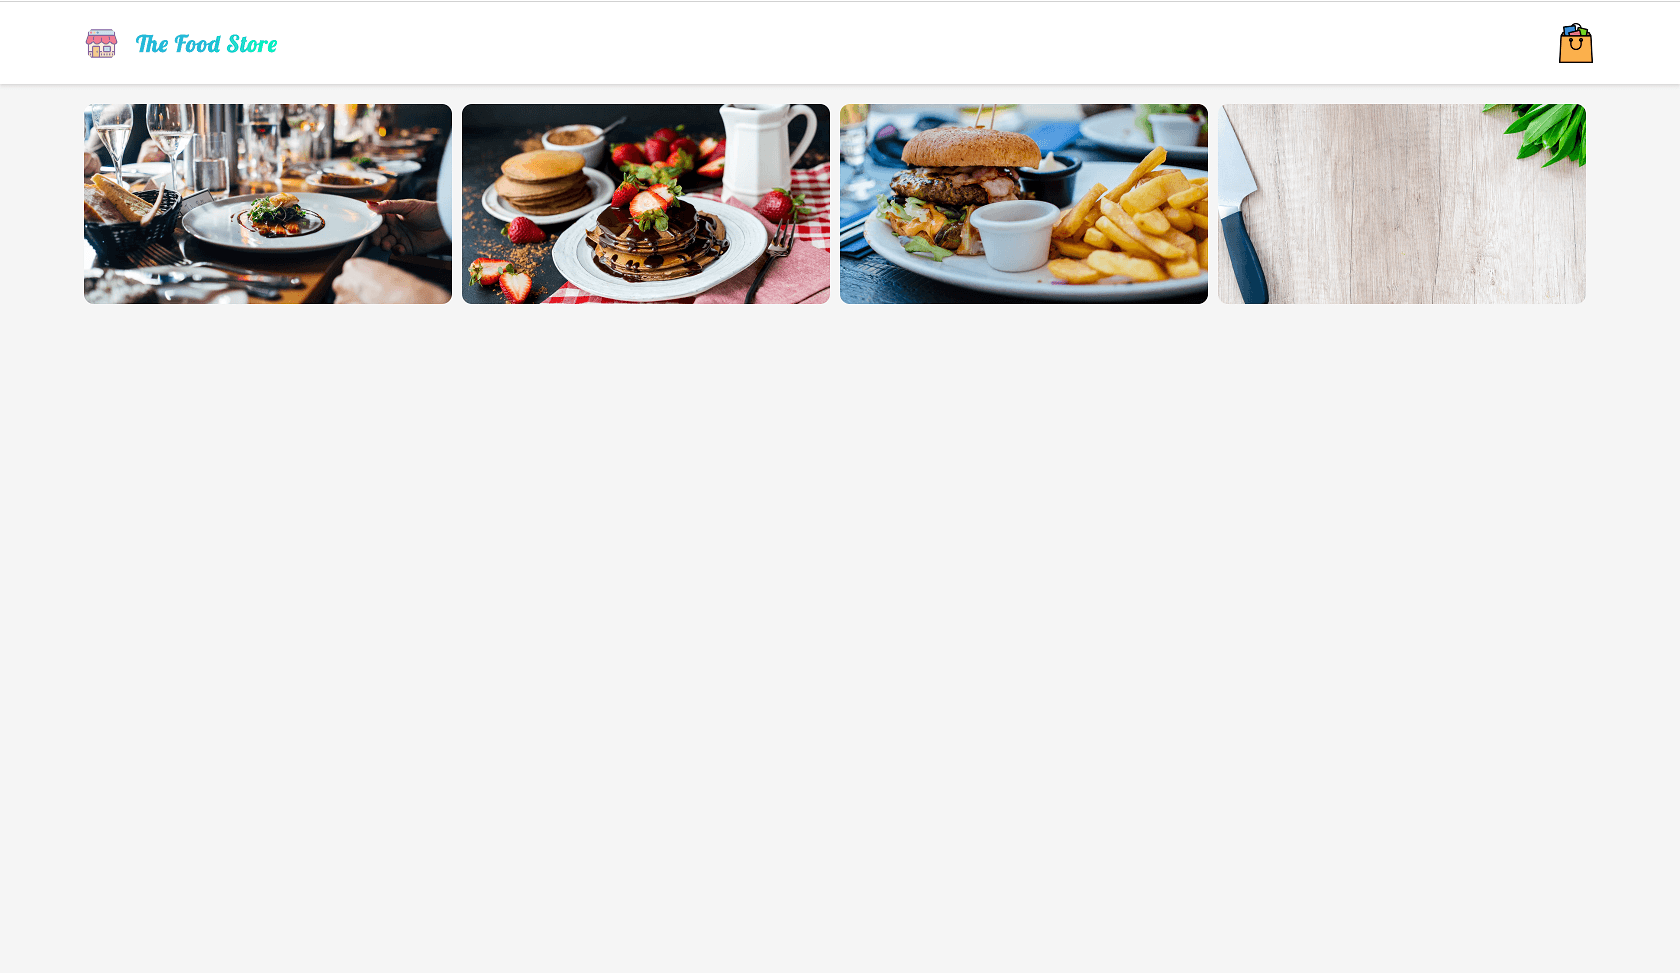
In the snippet above, we’ve defined an area for the banners and products list. The banner area will house four banner images. We’ll go about creating the product list component later in the tutorial.
Styling the Home Component
Next, we’ll go about styling the banner area of the home page. We’ll give the images a defined height and give the container a max width.
    // src/app/home/home.component.scss

    main{
      width: 90%;
      margin: auto;
      padding: 20px 15px;

      .banners{
        display: flex;
        align-items: center;
        justify-content: center;

        div{
          width: 26%;
          margin-right: 10px;
          img{
            height: 200px;
            width: 100%;
            max-width: 100%;
            border-radius: 10px;
            object-fit: cover;
          }
        }
      }
    }
Next we’ll create the banners property with an array of images. Open the home.component.ts file and update it to be similar to the snippet below:
    import { Component, OnInit } from '@angular/core';

    @Component({
      selector: 'app-home',
      templateUrl: './home.component.html',
      styleUrls: ['./home.component.scss']
    })
    export class HomeComponent implements OnInit {
      constructor() {}
      banners = [
        {
          src:
            'https://images.unsplash.com/photo-1414235077428-338989a2e8c0?ixlib=rb-1.2.1&ixid=eyJhcHBfaWQiOjEyMDd9&auto=format&fit=crop&w=850&q=80',
          alt: 'A tasty treat'
        },
        {
          src:
            'https://images.unsplash.com/photo-1504113888839-1c8eb50233d3?ixlib=rb-1.2.1&ixid=eyJhcHBfaWQiOjEyMDd9&auto=format&fit=crop&w=850&q=80',
          alt: 'Chocolate covered pancakes'
        },
        {
          src:
            'https://images.unsplash.com/photo-1460306855393-0410f61241c7?ixlib=rb-1.2.1&auto=format&fit=crop&w=850&q=80',
          alt: 'Burger and fries'
        },
        {
          src:
            'https://images.unsplash.com/photo-1495195134817-aeb325a55b65?ixlib=rb-1.2.1&ixid=eyJhcHBfaWQiOjEyMDd9&auto=format&fit=crop&w=850&q=80',
          alt: 'Get ready to slice'
        }
      ];
      ngOnInit() {
      }
    }
Since we’ll be using external fonts, we’ll update the src/index.html file with a link tag alongside the src/styles.scss file.
    <!-- index.html -->

    <!doctype html>
    <html lang="en">
    <head>
      <meta charset="utf-8">
      <title>MyStore</title>
      <base href="/">

      <meta name="viewport" content="width=device-width, initial-scale=1">
      <link href="https://fonts.googleapis.com/css?family=Dosis:400,500,700|Lobster" rel="stylesheet">
      <link rel="icon" type="image/x-icon" href="favicon.ico">
    </head>
    <body>
      <app-root></app-root>
    </body>
    </html>
Then we’ll select Dosis as our default font family. We’ll also negate the default padding and margin on the body and html elements. Open the styles.scss file and update it with the following content:
    // styles.scss

    /* You can add global styles to this file, and also import other style files */
    body, html{
      margin: 0;
      padding: 0;
      font-family: 'Dosis', sans-serif;
      background-color: whitesmoke;
    }
Header Component
The header component will display the application logo and the cart total. The component will be subscribed to the cart property of the store and will listen for changes. More light on this when the @angular-redux/store library is introduced later in the article.
Run the following command to create the header component:
ng generate component header
Next, open the src/app/header/header.component.html file and update it to look like the code below:
    <!-- src/app/header/header.component.html -->

    <header>
      <div class="brand">
        <img src="/assets/images/logo.png" alt="avatar" />
        <h5>The Food Store</h5>
      </div>
      <div class="nav">
        <ul>
          <li>
            <img src="/assets/images/shopping-bag.png" alt="cart" />
            <span class="badge" *ngIf="cart.length > 0">{{ cart.length }}</span>
          </li>
        </ul>
      </div>
    </header>
Next, we’ll style the header. Open the header.component.scss file and update it with the snippet below:
    //header.component.scss

    header {
      display: flex;
      background-color: white;
      margin: 0;
      padding: 5px 5%;
      color: whitesmoke;
      box-shadow: 0 2px 4px 0 rgba(0, 0, 0, 0.1);

      .brand {
        flex: 1;
        display: flex;
        align-items: center;

        img {
          height: 35px;
          border-radius: 50%;
          margin-right: 17px;
        }

        h5 {
          font-family: 'Lobster', cursive;
          font-size: 23px;
          margin: 0;
          letter-spacing: 1px;
          color: rgb(52, 186, 219);
          background: linear-gradient(
            90deg,
            rgba(52, 186, 219, 0.9878326330532213) 44%,
            rgba(0, 255, 190, 1) 100%
          );
          -webkit-background-clip: text;
          -webkit-text-fill-color: transparent;
        }
      }

      ul {
        list-style: none;
        padding-left: 0;
        display: flex;

        li {
          display: flex;
          align-items: center;
          position: relative;

          img {
            width: 40px;
          }

          .badge {
            height: 20px;
            width: 20px;
            font-size: 11px;
            color: white;
            background-color: #35badb;
            display: flex;
            justify-content: center;
            align-items: center;
            position: absolute;
            top: 0;
            right: -10px;
            border-radius: 50%;
          }
        }
      }
    }
Open up the header.component.ts file and declare the cart variable used in the html file.
    import { Component, OnInit, Input } from '@angular/core';

    @Component({
      selector: 'app-header',
      templateUrl: './header.component.html',
      styleUrls: ['./header.component.scss']
    })
    export class HeaderComponent implements OnInit {
      constructor() {
      }

      cart = [];
      ngOnInit() {}
    }
App Component
After creating the home and header components, the next step is to render the components in the root App component. Open the app.component.html file within the src/app/ directory. Update it to render both Header and Home components.
    <!-- app.component.html -->
    <div>
      <app-header></app-header>
      <app-home></app-home>
    </div>
Start the application server by running the following command: npm start or ng serve.
Then navigate to http://localhost:4200 on your browser. You should see the something similar to the screenshot below:

Introducing @angular-redux/store
The @angular-redux/store library uses a syntax similar to Redux to transform data. It uses Observables to select and transform data on its way from the store before updating the UI with the latest changes. This library is used alongside Redux to manage the flow of data throughout your application; when actions are dispatched, reducers act on them and mutate the store.
The first step is to create and assign actions. The action types will be mapped to constants using an enum. Create a folder named store within the src/app directory. This folder will hold everything relating to our application’s state management.
Within the store folder, create a file called actions.ts. Open the file and update it with the code below:
    // src/app/store/actions.ts

    export enum ActionTypes {
      Add = '[Product] Add to cart',
      Remove = '[Product] Remove from cart',
      LoadItems = '[Products] Load items from server',
      LoadSuccess = '[Products] Load success'
    }
    export const AddToCart = payload => {
      return {
        type: ActionTypes.Add,
        payload
      };
    };
    export const GetItems = () => ({
      type: ActionTypes.LoadItems
    });
    export const RemoveFromCart = payload => ({
      type: ActionTypes.Remove,
      payload
    });
    export const LoadItems = payload => ({
      type: ActionTypes.LoadSuccess,
      payload
    });
Actions are typically used to describe events in the application — when an event is triggered, a corresponding event is dispatched to handle the triggered events. An action is made up of a simple object containing a type property and an optional payload property. The type property is a unique identifier for the action.
An action type is commonly defined using the pattern: [Source] event — the source where the event originates, and the event description.
You can create actions using as a function that defines the action type and the payload being sent through.
After creating actions, the next step is to create a reducer that handles transitions of state from the initial to the next based on the action dispatched. Create a file named reducer.ts in the src/app/store directory. Open the file and update it with the code below:
    // src/app/store/reducer.ts
    import { ActionTypes } from './actions';
    import { Product } from '../product/product.component';

    export interface InitialState {
      items: Array<Product>;
      cart: Array<Product>;
    }
    export const initialState = {
      items: [],
      cart: []
    };

    export function ShopReducer(state = initialState, action) {
      switch (action.type) {
        case ActionTypes.LoadSuccess:
          return {
            ...state,
            items: [...action.payload]
          };
        case ActionTypes.Add:
          return {
            ...state,
            cart: [...state.cart, action.payload]
          };
        case ActionTypes.Remove:
          return {
            ...state,
            cart: [...state.cart.filter(item => item.name !== action.payload.name)]
          };

        default:
          return state;
      }
    }
A reducer is simple pure function that transitions your application’s state from one state to the next. A reducer doesn’t handle side effects — it is a pure function because it returns an expected output for a given input.
First, we have to define the initial state of the application. Our application will display a list of items and also allow a user to add and remove items from the cart. So the initialState of our application will feature an empty array of items and an empty cart array.
Next, we’ll define the reducer, which is a function featuring a switch statement that acts on the type of action dispatched.
- The first action type is the
LoadSuccessaction, which is called when products are successfully loaded from the server. When that happens, the items array is populated with that response. - The next action type is
Add. This action is dispatched when a user wishes to add an item to cart. The action features apayloadproperty containing details of the item. The reducer takes the item and appends it to the cart array and returns the state. - The final case is the
Removeaction. This is an event telling the reducer to remove an item from cart. The cart is filtered using thenameof the item dispatched, and the item is left out of the next state.
You’re probably thinking that the numbers don’t add up. We created four actions but we’re only acting on three of them. Well, actions can also be used for effects like network requests — in our case, fetching items from the server. We’ll look at creating a service to handle fetching the products from the server.
Registering the Reducer
After creating a reducer, it needs to registered in the application’sAppModule. Open the app.module.ts file and import the NgReduxModule from the @angular-redux/store library, as well as the ShopReducer we just created. Also, NgRedux will be imported and will be used to configure the store.
    //app.module.ts

    import { BrowserModule } from '@angular/platform-browser';
    import { NgModule } from '@angular/core';
    import { HttpClientModule } from '@angular/common/http';
    import { NgReduxModule, NgRedux } from '@angular-redux/store';

    import { AppComponent } from './app.component';
    import { HomeComponent } from './home/home.component';
    import { HeaderComponent } from './header/header.component';

    import { ShopReducer, InitialState, initialState } from './store/reducer';

    @NgModule({
      declarations: [
        AppComponent,
        HomeComponent,
        HeaderComponent,
      ],
      imports: [BrowserModule, HttpClientModule, NgReduxModule],
      providers: [],
      bootstrap: [AppComponent]
    })
    export class AppModule {
      constructor(ngRedux: NgRedux<InitialState>) {
        ngRedux.configureStore(ShopReducer, initialState);
      }
    }
After registering the NgReduxModule, we then initialize the application’s store using NgRedux. This provider is used to configure and initialize the store. The configureStore method takes two parameters, the reducer (ShopReducer) and the initialState.
Fetching Products from the Server
To handle fetching products from the server, we’ll make use of a provider that fetches the products and then dispatches an action to add the products to store.
First, we’ll create a service that will handle fetching items from the server. To create a service using the CLI, run the command below:
ng generate service food
Then open the file and update the content to be similar to the snippet below:
    // src/app/food.service.ts

    import { Injectable } from '@angular/core';
    import { HttpClient } from '@angular/common/http';
    // This interface will be declared later in the article
    import { Product } from './product/product.component';

    import { NgRedux } from '@angular-redux/store';
    import { InitialState } from './store/reducer';
    import { LoadItems } from './store/actions';

    @Injectable({
      providedIn: 'root'
    })
    export class FoodService {
      constructor(
        private http: HttpClient,
        private ngRedux: NgRedux<InitialState>
      ) {}
      getAll() {
        this.http
          .get('http://localhost:4000/fruits')
          .subscribe((products: Array<Product>) => {
            this.ngRedux.dispatch(LoadItems(products));
          });
      }
    }
Import the HttpClient, create a method called getAll, and return a call to the server to get products using the HttpClient. When the products are returned, we’ll dispatch an action to load the products in the store.
Now that we’ve created actions to handle events in our application and reducers to transition state, let’s populate the store with items from the server using the food service. Before we do that, let’s define views for the product and products list.
Products List View
Run the following commands to generate components for the product item and product list:
ng generate component product
And for the product list run:
ng generate component product-list
Open the product.component.html file in the src/app/product directory and update it with the code below:
    // src/app/product/product.component.html

    <div class="product">
      <div class="product-image-holder">
        <img [src]="product.image" [alt]="product.name" class="product-image" />
      </div>
      <div class="product-details">
        <p class="product-details__name">{{ product.name }}</p>
        <p class="product-details__price">${{ product.price }}</p>
      </div>
      <div class="product-description">
        <p>{{ product.description }}</p>
      </div>
      <div class="product-actions">
        <button
          class="product-actions__add"
          (click)="addToCart(product)"
          *ngIf="!inCart"
        >
          <img src="/assets/images/add-to-cart.png" alt="add to cart" />
        </button>
        <button
          class="product-actions__remove"
          (click)="removeFromCart(product)"
          *ngIf="inCart"
        >
          <img src="/assets/images/remove-from-cart.png" alt="remove from cart" />
        </button>
      </div>
    </div>
Here we have two buttons for adding to and removing an item from the cart. A flag inCart is used to determine which of the buttons to display.
Note: All image assets can be found in the GitHub repository here
Let’s style the component by updating the product.component.scss file with the styles below:
    // product.component.scss

    %button {
      border-radius: 50%;
      display: flex;
      justify-content: center;
      align-items: center;
      height: 32px;
      width: 32px;
      cursor: pointer;

      &:hover {
        transform: scale(1.1);
      }

      img {
        width: 16px;
        height: 16px;
      }
    }

    .product {
      box-shadow: 0 1px 1px 0 rgba(0, 0, 0, 0.2);
      border-radius: 5px;
      margin: 0 15px 30px 0;
      width: 286px;
      max-height: 400px;
      height: 320px;

      &:hover {
        transform: scale(1.05);
        border: 1px solid #35BADB;

        .product-actions {
          display: flex;
        }
      }

      &-image {
        max-width: 100%;
        width: 300px;
        border-top-right-radius: 5px;
        border-top-left-radius: 5px;
        height: 180px;
        object-fit: cover;
      }
      &-details {
        display: flex;
        justify-content: space-between;
        padding: 8px 15px;

        &__price {
          font-weight: 500;
          opacity: 0.7;
          letter-spacing: 1px;
          margin: 0;
        }

        &__name {
          opacity: 0.8;
          font-weight: 500;
          margin: 0;
        }
      }

      &-description {
        padding: 10px 15px;

        p {
          opacity: 0.6;
          margin: 0;
        }
      }

      &-actions {
        display: none;
        justify-content: flex-end;
        padding: 0 15px;

        &__add {
          @extend %button;
          border: 2px solid rgb(52, 186, 219);
        }

        &__remove {
          @extend %button;
          border: 2px solid indianred;
        }
      }
    }
Open the product.component.ts file and update it with the variables and methods used in the HTML file.
    // src/app/product/product.component.ts

    import { Component, Input, OnInit } from '@angular/core';
    import { AddToCart, RemoveFromCart } from '../store/actions';
    import { NgRedux } from '@angular-redux/store';
    import { InitialState } from '../store/reducer';

    export interface Product {
      name: string;
      price: number;
      description: string;
      image: string;
    }

    @Component({
      selector: 'app-product',
      templateUrl: './product.component.html',
      styleUrls: ['./product.component.scss']
    })

    export class ProductComponent implements OnInit {
      constructor(private ngRedux: NgRedux<InitialState>) {}
      inCart = false;
      @Input() product: Product;

      addToCart(item: Product) {
          this.ngRedux.dispatch(AddToCart(item));
          this.inCart = true;
      }

      removeFromCart(item: Product) {
        this.ngRedux.dispatch(RemoveFromCart(item));
        this.inCart = false;
      }
      ngOnInit() {}
    }
First we import the NgRedux observable from the @angular-redux/store library. The ngRedux property will be used to dispatch actions.
The addToCart method takes one parameter (item); the method dispatches an action to add an item to cart. After dispatching the action, the inCart property is set to true. This flag is for identifying which items are in cart.
Meanwhile, the removeFromCart method dispatches an action to remove an item from cart and updates the inCart property to false.
Next we’ll render the Product component in the product-list component. Open the product-list.component.html file and render the Product, similar to the snippet below:
    <!-- product-list.component.html -->
    <div class="product-list">
      <app-product *ngFor="let fruit of fruits | async" [product]="fruit"></app-product>
    </div>
We’ll add some styles to the component’s stylesheet. Open the product-list.component.scss file and add the styles below:
    .product-list {
      padding: 10px 0;
      margin-top: 30px;
      display: flex;
      flex-wrap: wrap;
    }
The product list component will receive an Input from the Home component, so let’s update the component to take an Input of an array of fruits. Update the product-list.component.ts file to be similar to the snippet below:
    import { Component, Input, OnInit } from '@angular/core';
    import { Product } from '../product/product.component';

    @Component({
      selector: 'app-product-list',
      templateUrl: './product-list.component.html',
      styleUrls: ['./product-list.component.scss']
    })
    export class ProductListComponent implements OnInit {
      constructor() {}
      @Input() fruits: Array<Product>;
      ngOnInit() {}
    }
After making this change, the final step is to render the product list component in the home.component.html file and dispatch an action to load the products from the server in the OnInit lifecycle of the component.
Open the home.component.html file and render the product list component within the element with the product-area class attribute:
    <main>
      <section class="banners">
        ...
      </section>
      <section class="product-area">
        <app-product-list [fruits]="items"></app-product-list>
      </section>
    </main>
Then update the home component and make it similar to the snippet below:
    import { Component, OnInit } from '@angular/core';
    import { GetItems } from '../store/actions';
    import { Product } from '../product/product.component';
    import { NgRedux, select } from '@angular-redux/store';
    import { InitialState } from '../store/reducer';
    import { FruitsService } from '../fruits.service';
    import { Observable } from 'rxjs';

    @Component({
      selector: 'app-home',
      templateUrl: './home.component.html',
      styleUrls: ['./home.component.scss']
    })
    export class HomeComponent implements OnInit {
      constructor(
        private ngRedux: NgRedux<InitialState>,
        private foodService: FoodService
      ) {}
      @select('items') items$: Observable<Array<Product>>;
      banners = [
        ...
      ];
      ngOnInit() {
        this.foodService.getAll();
      }
    }
First we fetch the products using the FoodService — the service will dispatch an action to populate the store. After dispatching the action, we use the NgRedux observable and the select operator to select the items property in the store and subscribe to the store we registered in the AppModule file.
When subscribed to the store, the data returned is the current state of our store. If you remember, the initial state of our store had two properties, both of which are arrays. In the home component, we need the array of items in the store.
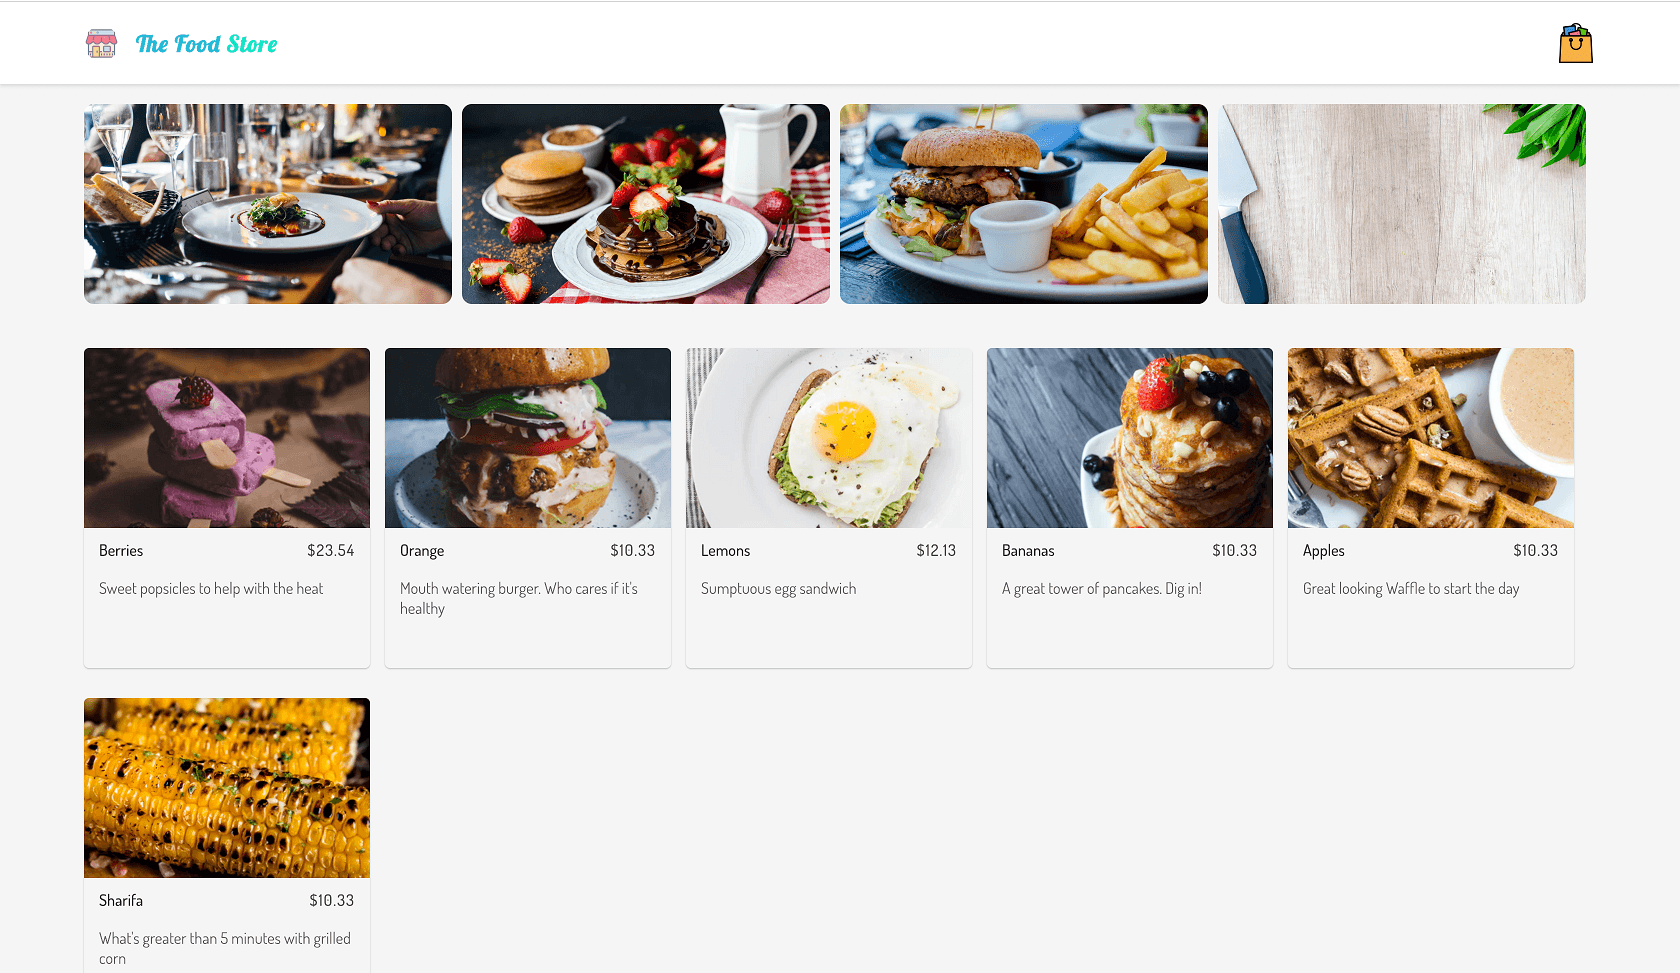
After this change, if you visit http://localhost:4200, you should see all the latest changes we’ve made, including the ability to add and remove an item from cart.

If you try adding an item to cart, you’ll notice it is successful, but our cart doesn’t update with the number of items in the cart. Well, this is because we’re not subscribed to the store, so we won’t get the latest updates on the cart.
To fix this, open the header.component.ts file and update the component to subscribe to the store in the component’s constructor.
    // src/app/header/header.component.ts

    import { Component, OnInit, Input } from '@angular/core';
    import { Product } from '../product/product.component';
    import { NgRedux } from '@angular-redux/store';
    import { InitialState } from '../store/reducer';

    @Component({
      selector: 'app-header',
      templateUrl: './header.component.html',
      styleUrls: ['./header.component.scss']
    })
    export class HeaderComponent implements OnInit {
      constructor(private ngRedux: NgRedux<InitialState>) {
        this.ngRedux
          .select<Array<Product>>('cart')
          .subscribe((items: Array<Product>) => {
            this.cart = items;
          });
      }
      cart: Array<Product>;
      ngOnInit() {}
    }
Similar to the Home component where we subscribed to the store and got the cart array from the state, here we’ll be subscribing to the cart property of the state.
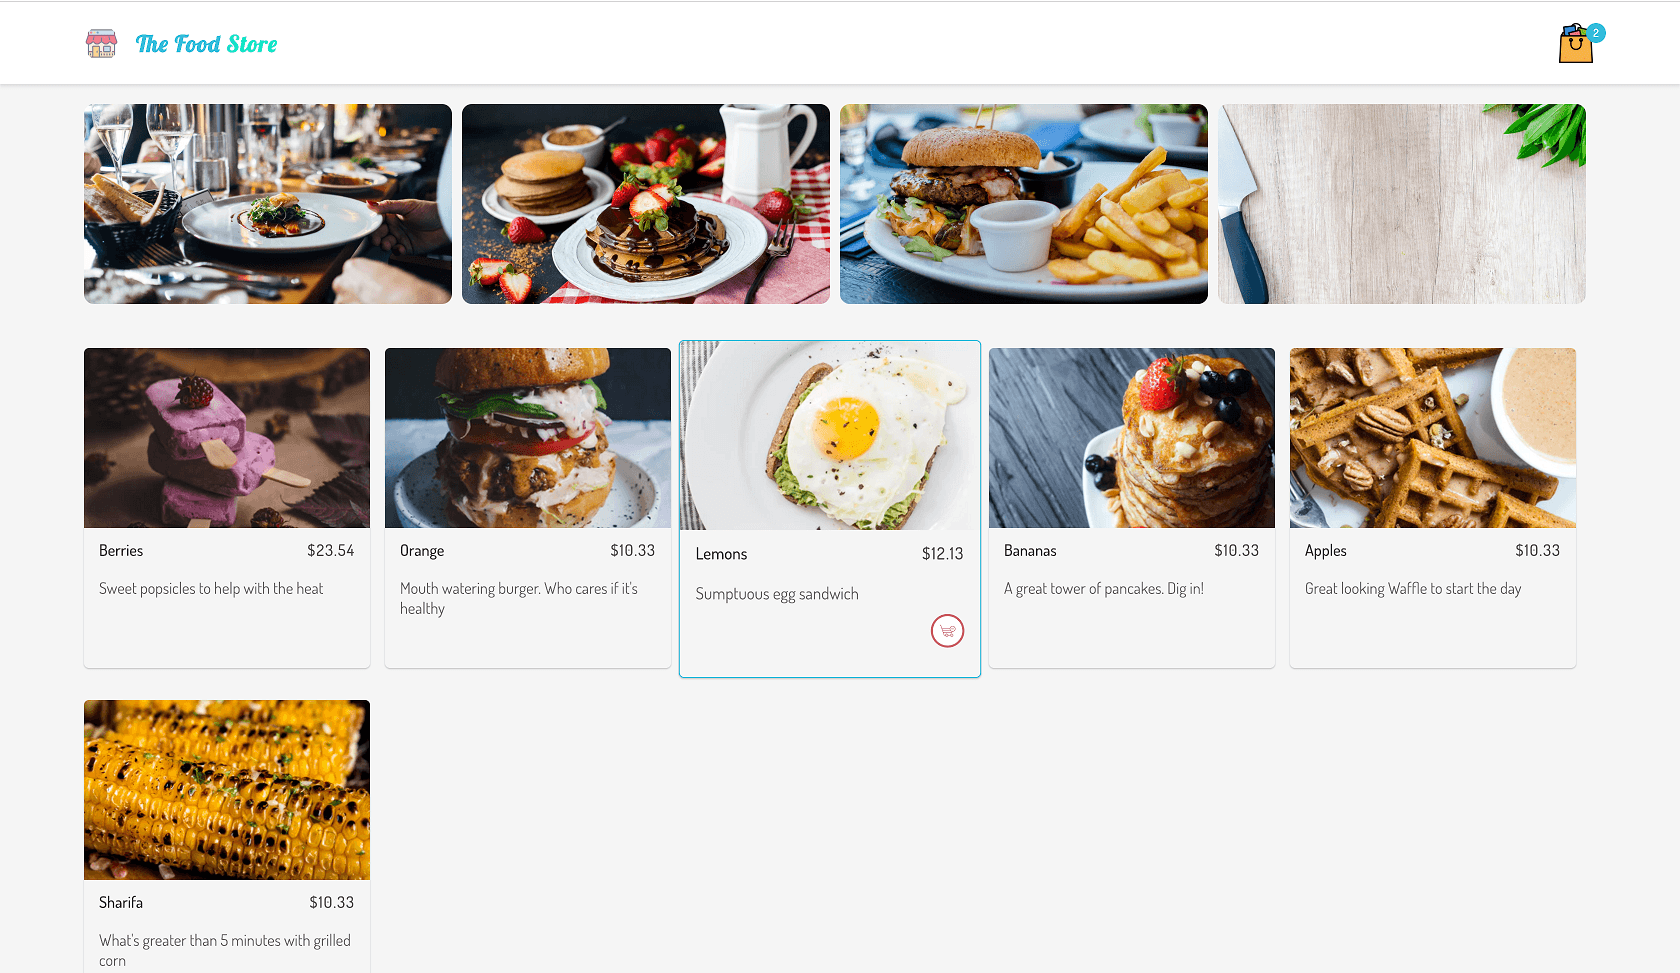
After this update, you should see the amount of items in cart when an item is added or removed from the cart.

Note: Ensure both the Angular dev server is running on port 4200 and the server is running on port 4000
Conclusion
In this tutorial, we’ve built a simple food store where items can be added and removed from cart. We’ve been able to manage the application’s state using the Angular/Redux library. As we’ve seen, it is easier to manage data flow in the application when side effects and data flow are abstracted from components. You can find the source code for this demo here.
For More on Building Apps with Angular
Check out our All Things Angular page, which has a wide range of info and pointers to Angular information—everything from hot topics and up-to-date info to how to get started and creating a compelling UI.

Christian Nwamba
Chris Nwamba is a Senior Developer Advocate at AWS focusing on AWS Amplify. He is also a teacher with years of experience building products and communities.
