7 Best Chrome Browser Extensions for Designers and Developers

Summarize with AI:
Wish you didn’t have so many browser tabs open while you work? Or that you could shave time off your most common tasks? There are likely browser extensions that can help you with all that (and more). In this post, we’ll take a look at how seven free Chrome extensions can improve your workflow.
Browser extensions can be useful when it comes to streamlining various tasks throughout your workday. From securely logging into apps to performing website audits, you’re bound to find a Chrome browser extension that can help.
In this post, we’ll look at eight of the best Chrome and chromium extensions for designers and developers. There are also some tips at the end to help you keep your extensions from becoming as burdensome as a browser jam-packed with open tabs.
7 Chrome Browser Extensions to Help You Work Better
Browser extensions can be a huge boon for your productivity. And more often than not, they provide you with free, convenient functionality that takes no more than a click or two to access.
Here are seven of the most worthwhile and free Chrome browser extensions to install:
Note: I’m giving you recommendations based on browser extensions I either use or trust. Feel free to use alternative extensions that serve the same purpose.
1. Toggl Track for Time Tracking
There are numerous reasons to track your time. One of the main ones is to figure out how long your tasks take and, consequently, your entire process. This data will help you determine accurate project timelines as well as to set rates that make you a profit.
Regardless of why you track your time, having quick access to it in your browser bar with an extension like Toggl Track is a good idea.
![]()
Rather than it becoming another tab that’s easy to lose track of and to forget you’re even tracking your time, it sits up there running until you’re ready to stop it.
As a bonus, this browser adds a “Start timer” function to over 100 popular web apps. When enabled, you’ll have the ability to start and stop timers right where you’re working. For instance, this is what the tool looks like inside of Google Docs for me:
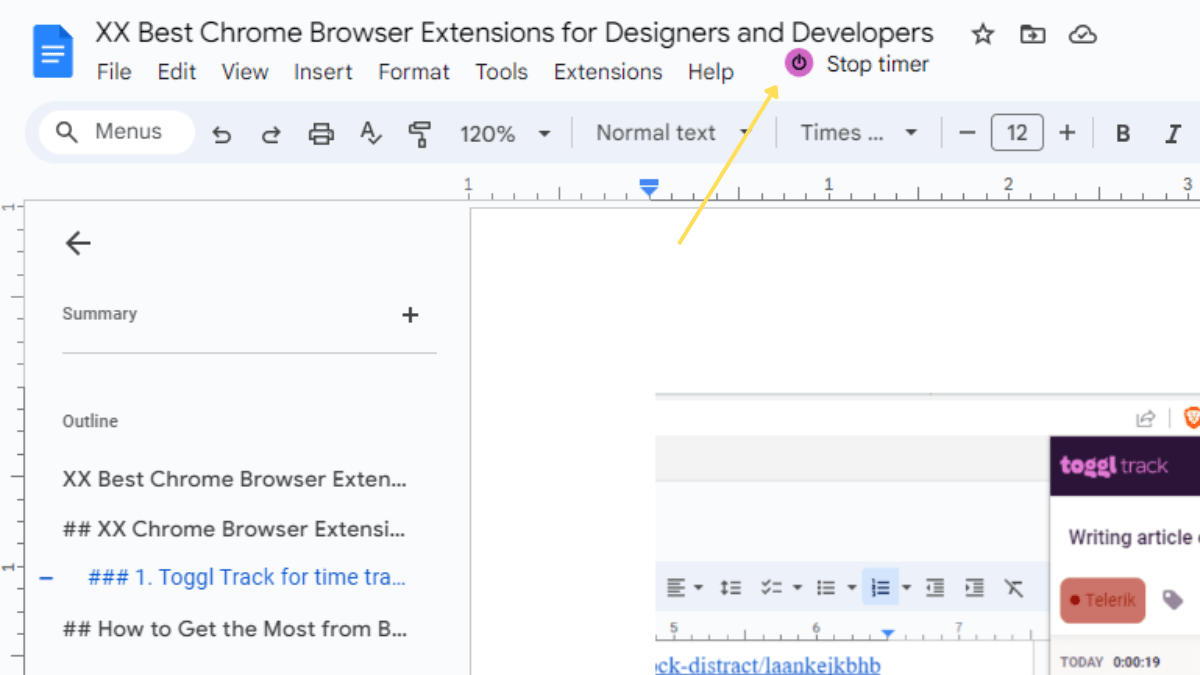
When clicked, it automatically generates a new task based on the name of whatever you’re working on. You can stop and start the timer from inside the app without ever having to open the browser extension.
2. Zoho Vault for Password Management
Long gone are the days when you can get away with using the same password for all of your logins. While it was never a best practice, it was easy to get away with it when you had no more than a few apps and programs you had to long into.
However, you’re now probably using a dozen different apps every day. At least. To keep things safe, each password should be unique and contain a strong combination of letters, numbers, cases and characters.
The only reasonable way to manage this is with a password manager tool and to install its companion browser extension. The one I recommend is Zoho Vault.
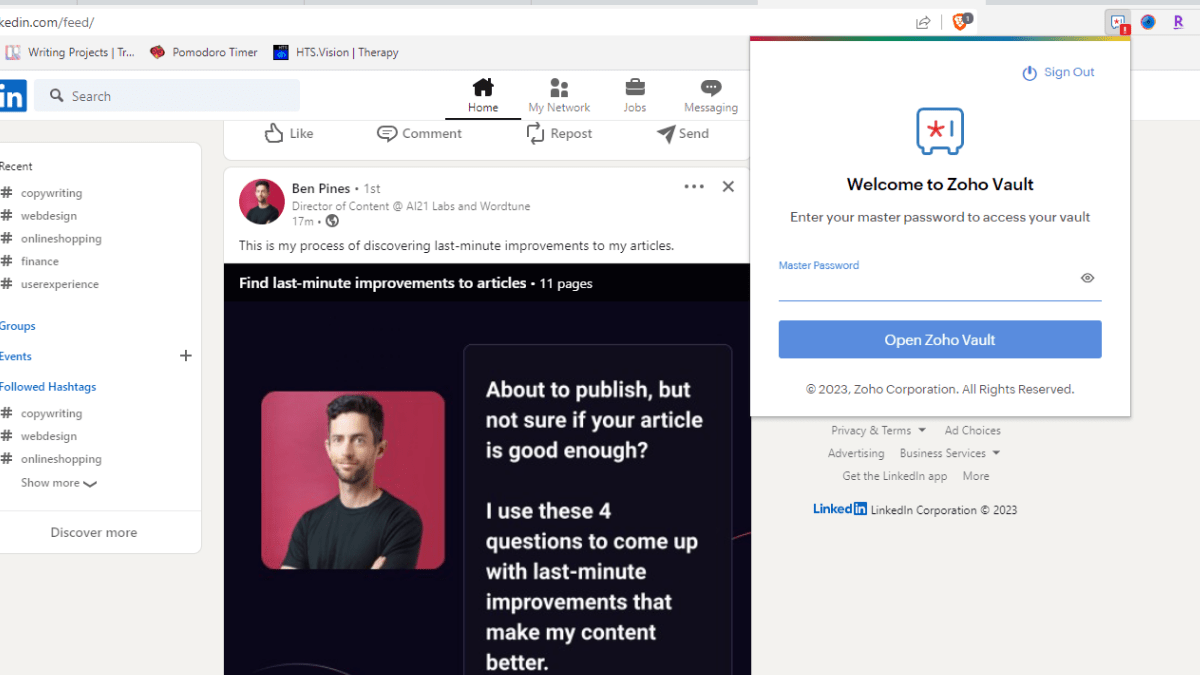
When installed, all you have to do is enter your master password to gain access to your secure vault.
Not only does this extension allow you to autofill your login credentials with a single click, but you can create and store new passwords with it too. What’s more, if you generate a password in a new app, for instance, the extension (if still activated) will prompt you to store it in your vault.
3. Scrnli for Screenshots and Screen Recording
Sometimes the best way to communicate what you’re seeing or experiencing in the browser or on your computer is to take a screenshot of it. You could use your device’s “print screen” functionality for that, but you’ll need another platform to edit your image or video.
The better option is to install a browser extension like Scrnli.
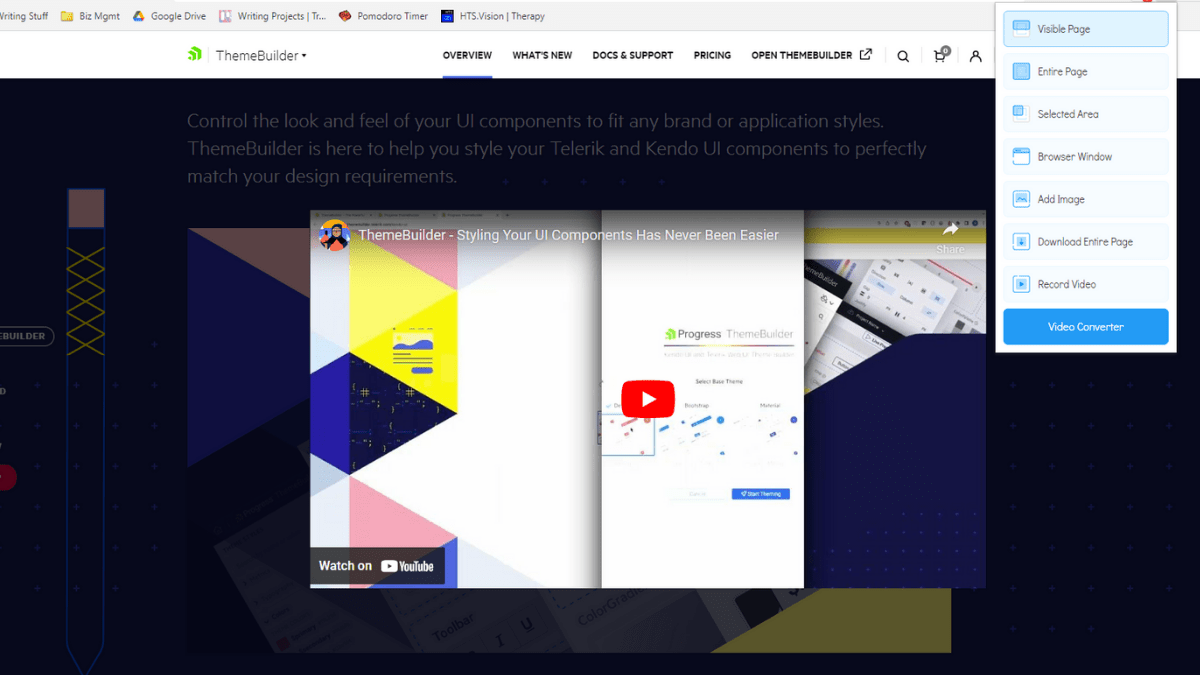
This browser extension gives you a variety of ways to capture what you’re seeing on your screen:
- Visible Page
- Entire Page
- Selected Area
- Browser Window
- Add Image
- Download Entire Page
- Record Video
And once you’ve taken your screenshot or recording, you’ll have additional editing tools at your disposal.

Before you save the file to your device, the screengrab appears in a new browser tab with a toolbar at the top. You can use it to do things like draw on it, add text, draw shapes, insert arrows, blur sections, crop the image and more.
4. CSS Peeper to Identify Styles on Other Sites
If you’re ever curious about the font, color or other CSS style used on a webpage, you could use the right-click “Inspect” function in your browser. However, it’s not always quick or easy to sift through all the data you find there.
CSS Peeper will give you a streamlined way to inspect any webpage.
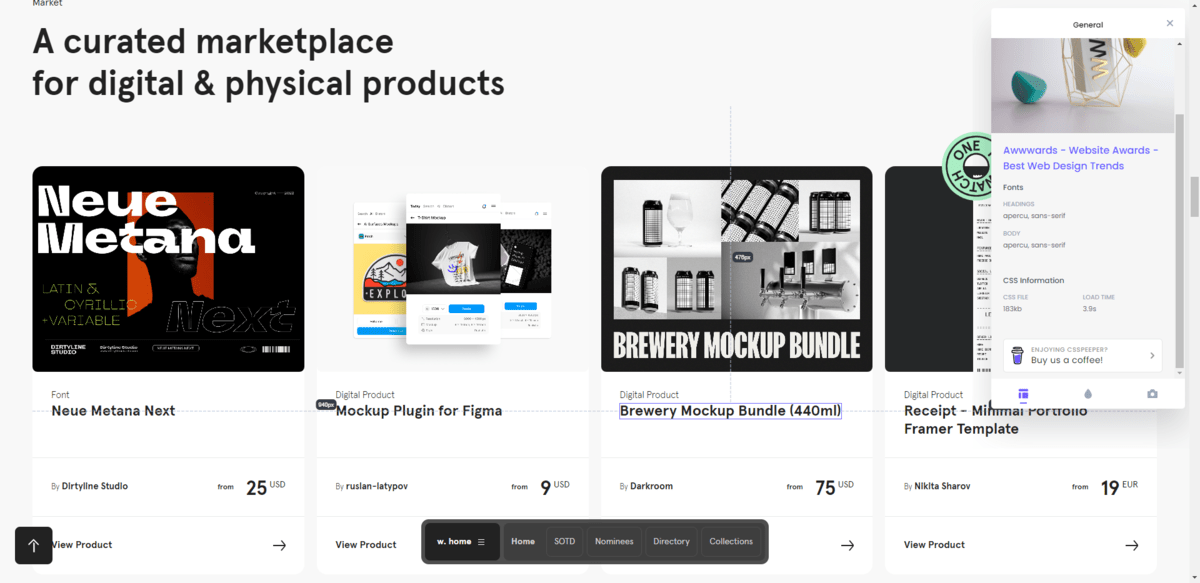
When you first open the browser extension, the first thing it’ll do is give you basic details about:
- Fonts for the heading and body
- Colors
- Assets/images
You also have the option to export these styles.
That’s not the only thing this extension does when enabled. Click any element on the page and a list of styles will appear in the pop-up.
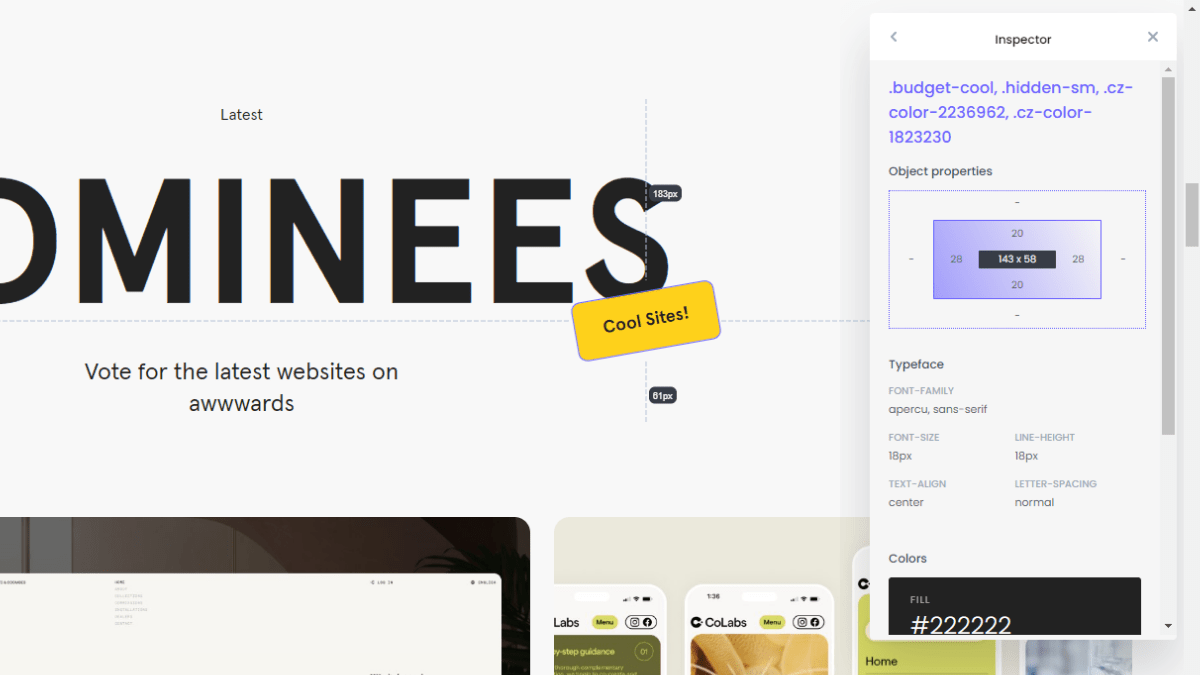
You’ll find information on things like:
- Dimensions
- Padding
- Border radius
- Fonts
- Colors
- Line height
- Letter spacing
- Alignment
- Box shadow
- Image name
This will come in handy when inspecting your own websites for errors or inconsistencies as well as digging into other websites for inspiration.
5. MozBar for On-Page SEO Analysis
Whenever I perform an on-page SEO analysis for a new or existing client, one of the tools I turn to each time is the MozBar browser extension.
In order to use it, you need a free Moz account and to be logged into it. When activated, you’ll see SEO details at the top of any website or app you visit in your browser.
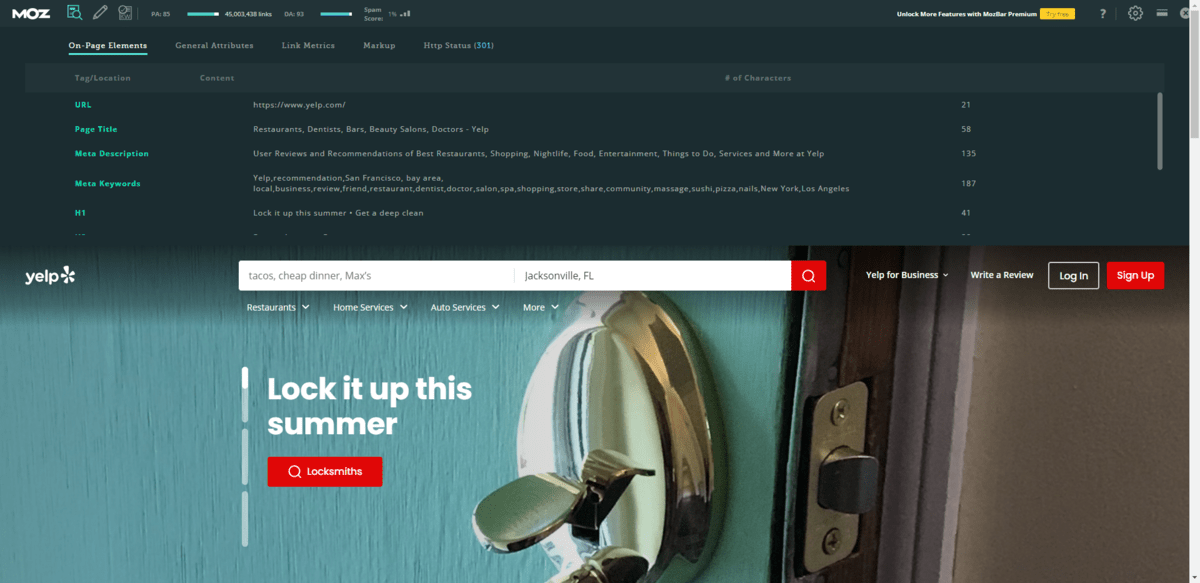
The first details you’ll find are the Page Authority (PA) score, Domain Authority (DA) score and the Spam Score. It’s when you open up the tools that you’ll find the really valuable stuff.
The On-Page Elements section, for instance, shows you all the metadata for the page—the SEO title, description, keywords and even alt text.
Under General Attributes, you’ll find the average loading time for the page. Link Metrics will tell you how popular the site is with others (i.e., how authoritative it is). And Markup will tell you if it has any structured data.
If you’re looking for a quick way to audit a website on your own or to show clients and prospects why their sites are underperforming, this browser extension is a must.
6. Mobile Simulator for Responsive Device Testing
Whether you’re testing a newly built site for responsiveness or troubleshooting a buggy experience for one of your users, you’ll need the help of a responsive checker. Even if your design software helps you perform cross-device tests, you may need another tool to help you out.
If you’re not using it already, the Mobile Simulator browser extension is invaluable in this regard.
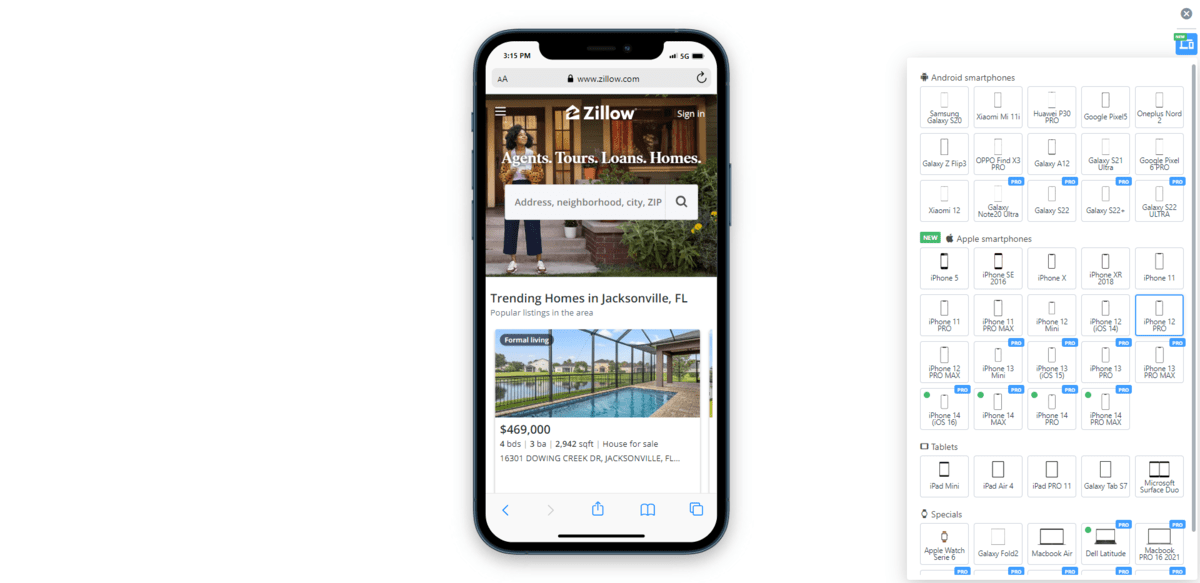
Once it’s installed, all you need to do is open the website you want to test and then click the browser extension. The page you’re looking at will disappear and this responsive testing screen will take its place. From here, you can:
- Choose the specific smartphone, tablet or smart device to preview it on.
- Rotate the orientation of the screen.
- Take a screenshot or screencast.
- Share what you’re seeing with others.
- Export any of the responsive mockups with a transparent background.
It’s also worth mentioning that this is an interactive mockup. So you’re not just seeing a static copy of the top-of-the-fold area. You can scroll through the page and interact with it as if it were on your smartphone or tablet.
7. LambdaTest for Cross-Browser Testing
Checking that your website is compatible across devices isn’t enough to make it responsive. You also need to ensure that it works on all major browsers. It would also be useful to have a tool that enables you to test and debug websites in different browsers without having to install them on your computer.
That’s what the LambdaTest browser extension will allow you to do.
After you’ve created a free account (which will give you a limited number of tests), grab the Access Key from your profile settings and enter it into the browser extension. Once it’s enabled, click the browser icon to open the tool.
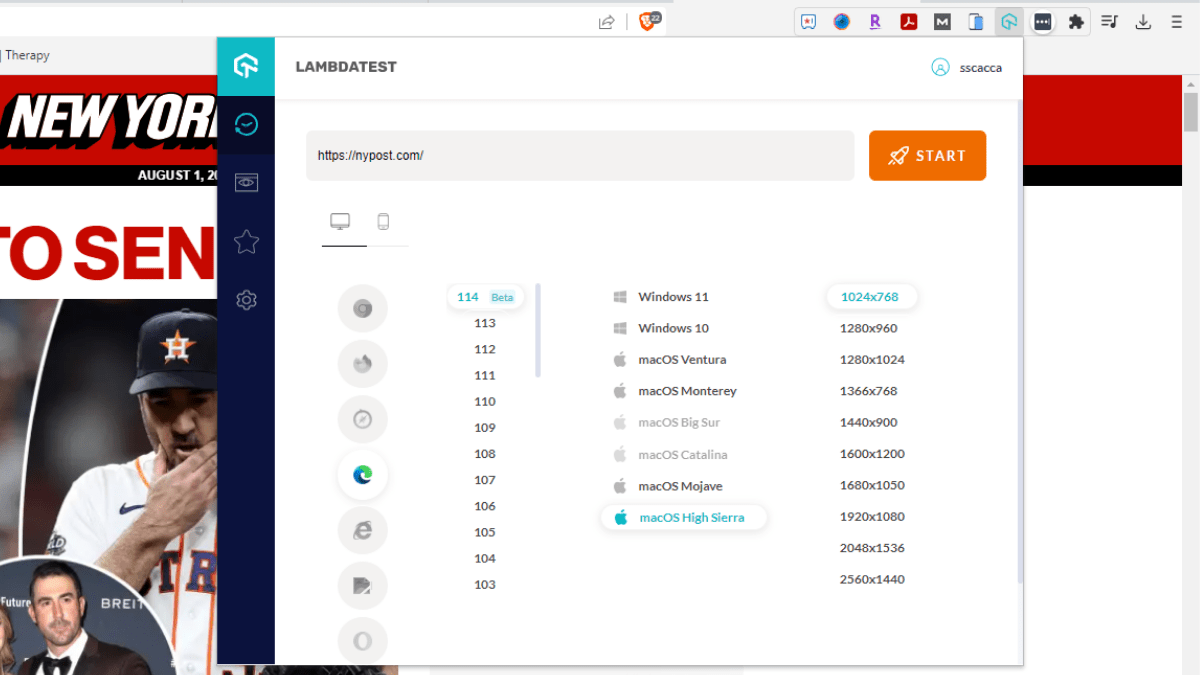
You’ll be able to get super specific about which browser you test. If you’ve ever had a client or user report a bug but you couldn’t reproduce it on your end, this should help you find it (so long as you can get that technical info from them).
From this dropdown, choose a desktop or mobile browser type, browser version, operating system, as well as screen resolution. When you hit “Start,” it will launch the testing tool in a new browser tab.
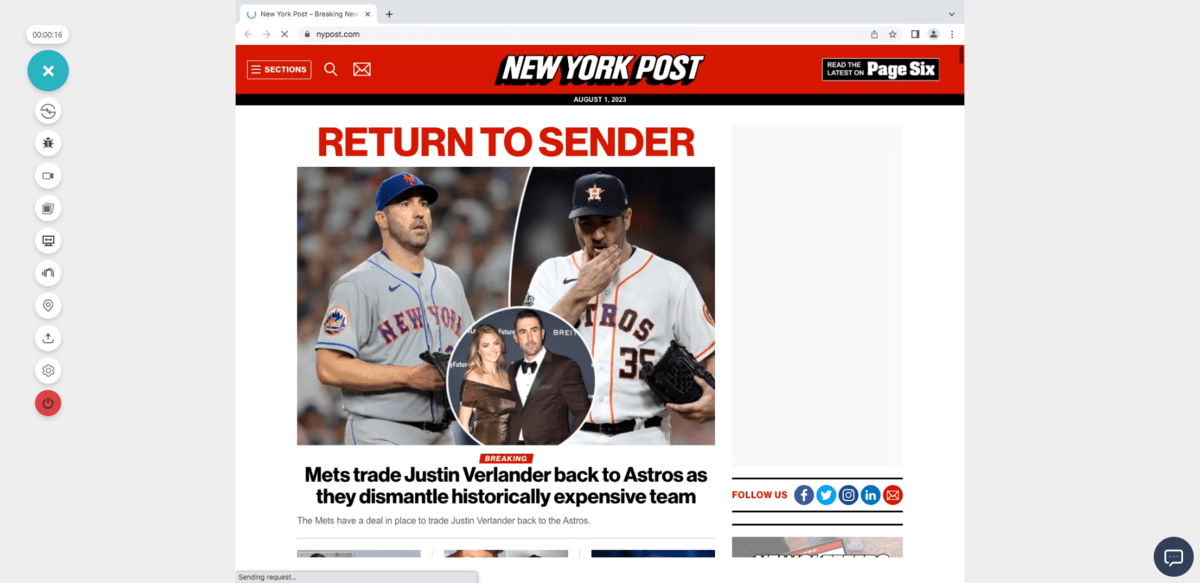
Use this tool to:
- Change which browser, version and resolution to view the webpage on.
- Mark up bugs.
- Record a video or take screenshots of what you or your users are seeing.
You also get access to the full website and app testing tool from here.
How to Get the Most from Browser Extensions
If you were to look around the Chrome extension store, you’d find hundreds of them to play with. However, just as you never want to load your digital products up with too many plugins, extensions or integrations, the same is true for your browser.
What I’d recommend you do is start adding new browser extensions one at a time. Use them a couple times and make sure each one improves how you work. Because some extensions conflict with one another and some, unfortunately, can cause issues with other desktop applications to open, you want to take your time with this.
Also, try to keep your active browser extensions to no more than 10. If you have some that you don’t need all the time, turn them off or hide them. That’s what I do with MozBar and Mobile Simulator, for instance. It declutters the extensions bar and also keeps that functionality from popping up when you don’t need it.
This post was prepared by Suzanne Scacca in their personal capacity. The opinions or representations expressed herein are the author’s own and do not necessarily reflect the views of Progress Software Corporation, or any of its affiliates or subsidiaries. All liability with respect to actions taken or not taken based on the contents of this post are hereby expressly disclaimed. The content on this posting is provided "as is" with no representations made that the content is error-free.

Suzanne Scacca
A former project manager and web design agency manager, Suzanne Scacca now writes about the changing landscape of design, development and software.

