Nested RadDocking Support
Even though the layout of RadDocking is very agile and could be used to easily achieve many different layouts sometimes a more complex one is desired. In such scenarios it is possible to use nested RadDocking instances which provide multiple DocumentHosts, multiple level of docking compass restriction and inner tabs inside RadPanes.
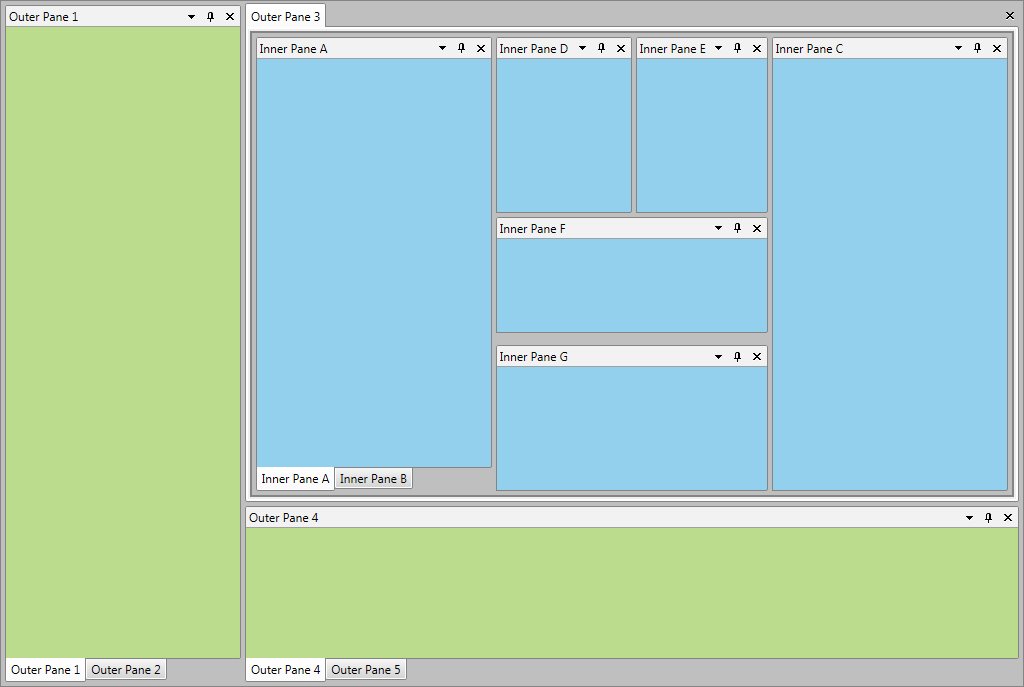
Overview
With the Q1 2014 release of UI for WPF RadDocking has been improved in order to support multiple nested RadDocking scenarios. Now you can easily implement more complex layouts by using all of the features of RadDocking inside of a single RadPane. For example you can place a new RadDocking instance with DocumentHost inside of the RadPane and easily achieve tabbed navigation using the RadPanes in the DocumentHost. Some of the possible to achieve scenarios will be shown in this section as well as a simple Getting Started example.
Getting Started
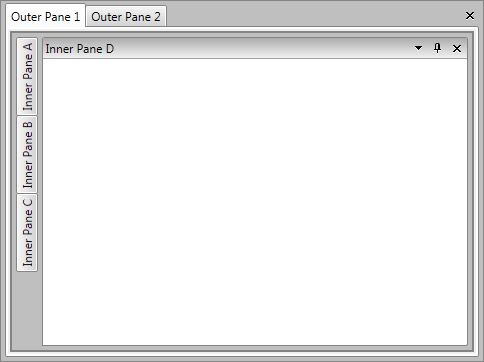
Implementing nested RadDockings is quite intuitive and straightforward. Let’s start from the scratch here and achieve the already mentioned RadPane with tabs inside. At the beginning you will need a RadDocking control, with DocumentHost and two RadPanes inside:
<telerik:RadDocking x:Name="OuterDocking">
    <telerik:RadDocking.DocumentHost>
        <telerik:RadSplitContainer>
            <telerik:RadPaneGroup>
                <telerik:RadPane Header="Outer Pane 1" />
                <telerik:RadPane Header="Outer Pane 2" />
            </telerik:RadPaneGroup>
        </telerik:RadSplitContainer>
    </telerik:RadDocking.DocumentHost>
</telerik:RadDocking>
Afterwards you will only have to add a new instance of RadDocking inside of the first RadPane as shown below:
<telerik:RadDocking>
    <telerik:RadPane Header="Outer Pane 1">
        <telerik:RadDocking x:Name="InnerDocking" CloseButtonPosition="InPane">
            <telerik:RadDocking.DocumentHost>
                <telerik:RadSplitContainer>
                    <telerik:RadPaneGroup>
                        <telerik:RadPane Header="Inner Pane A" />
                        <telerik:RadPane Header="Inner Pane B" />
                        <telerik:RadPane Header="Inner Pane C" />
                    </telerik:RadPaneGroup>
                </telerik:RadSplitContainer>
            </telerik:RadDocking.DocumentHost>
        </telerik:RadDocking>
    </telerik:RadPane>
</telerik:RadDocking>
This will be the final result:
Creating a Tab with a Vertical Split
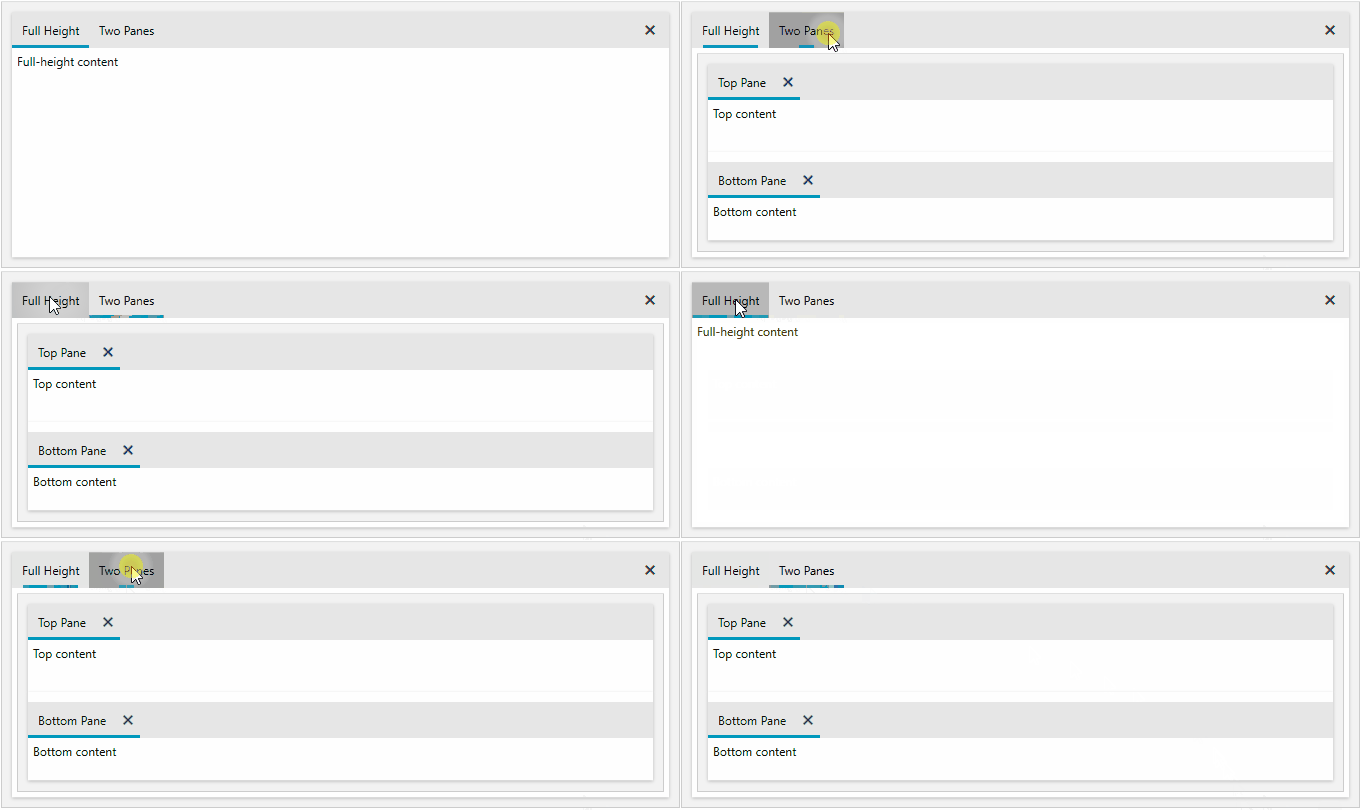
To create one full-height tab and another tab that contains two simultaneously visible vertically stacked panes, place the nested RadDocking inside the second outer RadPane. Use a separate RadPaneGroup for each inner pane. Adding both inner panes to the same RadPaneGroup would create tabs instead of a split layout.
	<telerik:RadDocking x:Name="OuterDocking">
	    <telerik:RadDocking.DocumentHost>
	        <telerik:RadSplitContainer>
	            <telerik:RadPaneGroup>
	                <telerik:RadPane Header="Full Height">
	                    <TextBlock Text="Full-height content" />
	                </telerik:RadPane>
	                <telerik:RadPane Header="Two Panes">
	                    <telerik:RadDocking x:Name="InnerDocking" CloseButtonPosition="InPane">
	                        <telerik:RadDocking.DocumentHost>
	                            <telerik:RadSplitContainer Orientation="Vertical">
	                                <telerik:RadPaneGroup>
	                                    <telerik:RadPane Header="Top Pane">
	                                        <TextBlock Text="Top content" />
	                                    </telerik:RadPane>
	                                </telerik:RadPaneGroup>
	                                <telerik:RadPaneGroup>
	                                    <telerik:RadPane Header="Bottom Pane">
	                                        <TextBlock Text="Bottom content" />
	                                    </telerik:RadPane>
	                                </telerik:RadPaneGroup>
	                            </telerik:RadSplitContainer>
	                        </telerik:RadDocking.DocumentHost>
	                    </telerik:RadDocking>
	                </telerik:RadPane>
	            </telerik:RadPaneGroup>
	        </telerik:RadSplitContainer>
	    </telerik:RadDocking.DocumentHost>
	</telerik:RadDocking>
The outer RadPaneGroup creates the two tabs. When the Two Panes tab is selected, the nested RadSplitContainer displays the Top Pane and Bottom Pane at the same time:
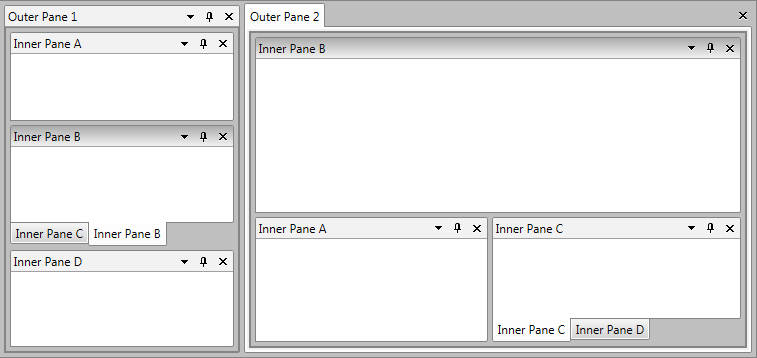
Specific User Case Scenarios
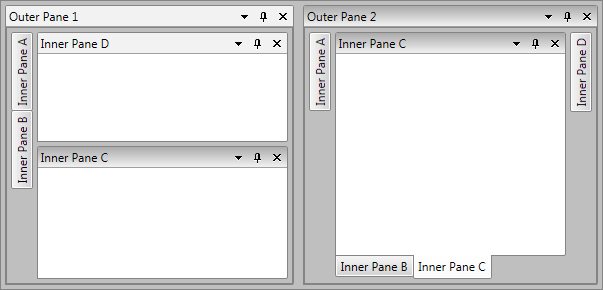
In this section you can see screenshots of few layouts achieved with nested RadDockings:

Save/Load Nested Docking Layout
The nested RadDocking layouts can be easily saved and loaded using the built-in Save/Load Layout functionality of the control. In order to achieve Save/Load Layout for nested scenarios you will simply need to save each RadDocking separately and load separately each of them afterwards. The direction of the loading operation should be from the inner RadDockings to the outer ones in order to avoid any issues when loading floating RadPanes/RadPaneGroups.
For more details you can check the Save/Load Layout article.
You can download a runnable sample project demonstrating Save/Load Nested Docking Layouts from the online SDK repository.
Not Supported Scenarios
The nested RadDockings have few unsupported scenarios:
-
Nested scenarios in the autohide areas – due to dragging issues when RadDocking is placed in an unpinned RadPane. In order to avoid that you could either disable the dragging within the inner RadDocking (you just need to set CanFloat=”False” to each RadPane) or the RadPane which holds it should be always pinned.
-
Deferred DragDropMode is not supported in the nested RadDockings.