Tool Window
ToolWindow is the container control that hosts all panes that are in a floating state. Every time you drag a pane and undock it, a new instance of the class Telerik.Windows.Controls.Docking.ToolWindow is created to host that pane for you.
The implementation of the
RadDockingnever requires you to work with ToolWindows directly, but with the Pane hosted inside it. For example, to make a ToolWindow not closable, just set the propertyCanUserCloseof the hosted RadPane to False.
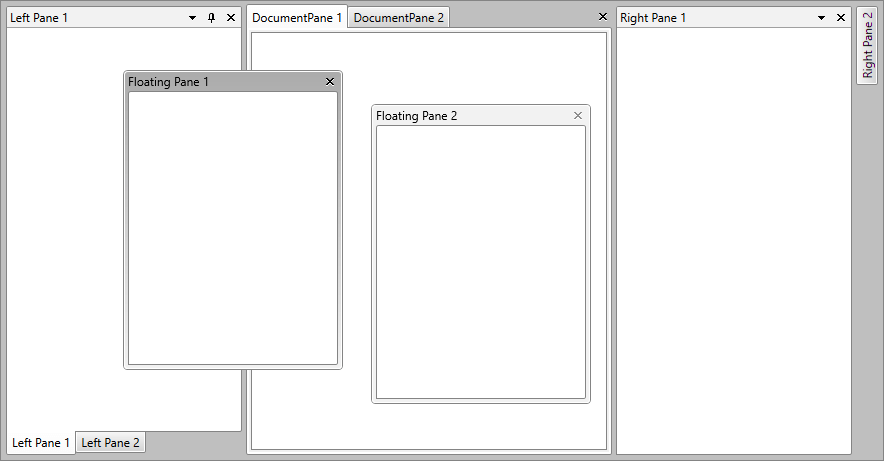
In the figure below you can see two ToolWindows with a floating pane inside of each one.
Setting FloatingSize and FloatingLocation
RadDocking provides the ability to easily set the initial floating size and location of the ToolWindows. To do that, use the RadDocking.FloatingSize and RadDocking.FloatingLocation attached properties, as shown in the following example:
Setting RadDocking.FloatingSize and RadDocking.FloatingLocation
	<telerik:RadDocking>
	    <telerik:RadSplitContainer InitialPosition="FloatingOnly">
	        <telerik:RadPaneGroup>
	            <telerik:RadPane telerik:RadDocking.FloatingSize="500, 500" telerik:RadDocking.FloatingLocation="400, 400"/>
	        </telerik:RadPaneGroup>
	    </telerik:RadSplitContainer>
	</telerik:RadDocking>
Setting the Draggable Area
The ToolWindow element allows you to change the threshold of its titlebar's draggable area. To do that, set the CaptionHeight property.
Setting the CaptionHeight property via a Style
	<!--Set BasedOn property if NoXaml assemblies are used: BasedOn="{StaticResource ToolWindowStyle}"-->
	<Style TargetType="telerik:ToolWindow">
	    <Setter Property="CaptionHeight" Value="50"/>
	</Style>
Changing the height of the titlebar will not automatically update the CaptionHeight property's value.
Styling ToolWindow
To learn how to style the tool windows of your applications, read the Styling the ToolWindow topic.