Customizing the Quick Access Toolbar
The Quick Access Toolbar is an area at the top of the Telerik RadRibbonBar, above the tabs.
Figure 1: Quick Access Toolbar
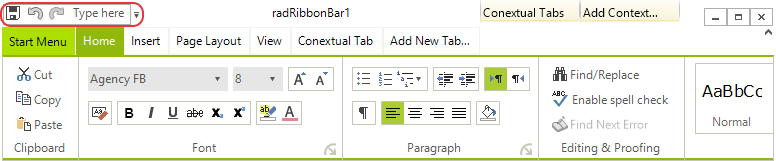
The Quick Access Toolbar can contain the same elements as the RadMenu:
-
Menu items, displayed as either images, text, or both
-
Combo boxes
-
Custom items
-
Separators
Adding Items to the Quick Access Toolbar
To add an item to the Quick Access Toolbar, follow these steps:
-
Select the RadRibbonBar control.
-
Open the Smart Tag menu.
-
Click the Edit QuickAccessToolbarItems task. Alternatively, you can click in the QuickAccessToolbarItems property, and then click the ellipsis button.
-
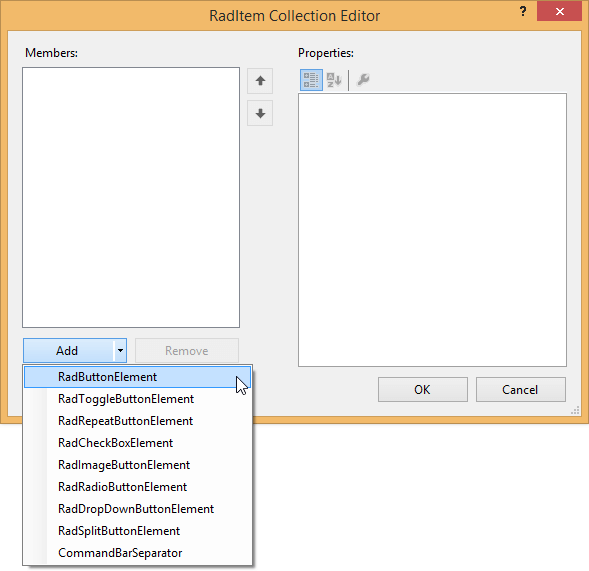
In the RadElement Collection Editor dialog box, click the drop-down arrow next to the Add button to select the type of element you wish to add to the Quick Access Toolbar.
-
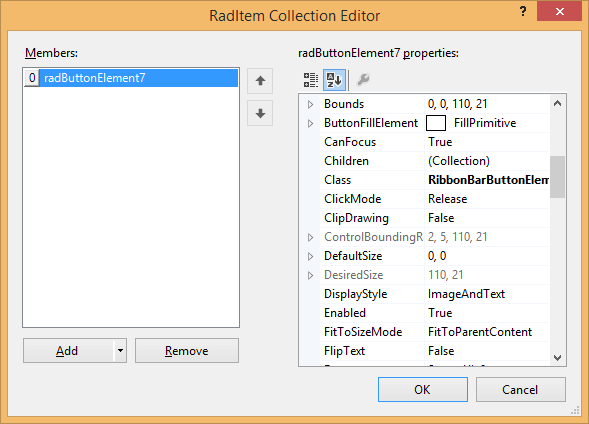
Use the Properties window in the RadElement Collection Editor dialog box to set the properties of the new Quick Access Toolbar item.
-
Repeat steps 3 and 4 to add additional Quick Access Toolbar items.
-
Click OK.
Removing Items from the Quick Access Toolbar
To remove an item from the Quick Access Toolbar, follow these steps:
-
Select the RadRibbonBar control.
-
Click in the QuickAccessToolbarItems property, and then click the ellipsis button.
-
In the RadElement Collection Editor dialog box, select the Quick Access Menu item that you wish to remove.
-
Click Remove.
-
Click OK.
To Handle Quick Access Toolbar Item Events
To handle events from a Quick Access Toolbar item, follow these steps:
-
Select the Quick Access Toolbar item in the selected control combo box at the top of the Visual Studio Properties window.
-
Click the events toolbar button.
-
Double-click the appropriate event to generate an event handler. Normally this event will be the Click event.