New to Telerik UI for WinForms? Start a free 30-day trial
Events and Customization
Updated on May 7, 2026
The print events in RadGridView allow the developer to customize the print output for each individual cell. There are two events namely PrintCellFormatting and PrintCellPaint.
PrintCellFormatting
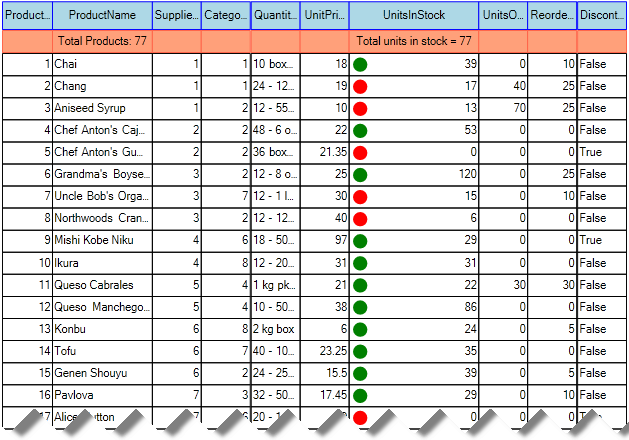
Just like the other formatting events of RadGridView, this event allows you to format the appearance of the cells in the printed document. Here is a very simple example, which demonstrates how to customize the appearance of the header and the summary rows:
C#
private void radGridView1_PrintCellFormatting(object sender, PrintCellFormattingEventArgs e)
{
    if (e.Row is GridViewTableHeaderRowInfo)
    {
        e.PrintCell.DrawFill = true;
        e.PrintCell.BackColor = Color.LightBlue;
        e.PrintCell.BorderColor = Color.Blue;
    }
    else if (e.Row is GridViewSummaryRowInfo)
    {
        e.PrintCell.DrawFill = true;
        e.PrintCell.BackColor = Color.LightSalmon;
        e.PrintCell.BorderColor = Color.Tomato;
    }
}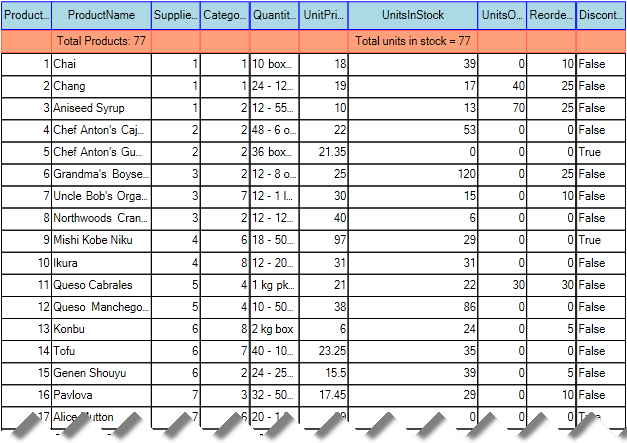
PrintCellPaint
This event allow you to access the cell and to paint in it whatever you need. Here is a sample, where we will paint a green dot when the product quantity is more than 20 and a red dot if it is less:
C#
private void radGridView1_PrintCellPaint(object sender, PrintCellPaintEventArgs e)
{
    if (e.Row is GridViewDataRowInfo & e.Column.Name == "UnitsInStock")
    {
        int side = e.CellRect.Height - 8;
        int x = e.CellRect.X + 4;
        int y = e.CellRect.Y + 4;

        Rectangle rect = new Rectangle(x, y, side, side);
        Brush brush = default(Brush);

        if (Convert.ToInt32(e.Row.Cells[e.Column.Name].Value) < 20)
        {
            brush = Brushes.Red;
        }
        else
        {
            brush = Brushes.Green;
        }

        e.Graphics.FillEllipse(brush, rect);
    }
}