Getting Started with WinForms DataLayout
This example demonstrates binding RadDataLayout to a single object or a collection of objects. For the purpose of the tutorial we will also use a RadBindingNavigator.
Adding Telerik Assemblies Using NuGet
To use RadDataLayout when working with NuGet packages, install the Telerik.UI.for.WinForms.AllControls package. The package target framework version may vary.
Read more about NuGet installation in the Install using NuGet Packages article.
With the 2025 Q1 release, the Telerik UI for WinForms has a new licensing mechanism. You can learn more about it here.
Adding Assembly References Manually
When dragging and dropping a control from the Visual Studio (VS) Toolbox onto the Form Designer, VS automatically adds the necessary assemblies. However, if you're adding the control programmatically, you'll need to manually reference the following assemblies:
- Telerik.Licensing.Runtime
- Telerik.WinControls
- Telerik.WinControls.UI
- TelerikCommon
The Telerik UI for WinForms assemblies can be install by using one of the available installation approaches.
Defining the RadDataLayout
Binding RadDataLayout to a single object
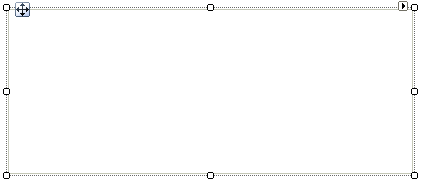
1. Place a RadDataLayout control on a form.
Figure 1: RadDataLayout Control
2. Let`s define the layout of our data control.
this.radDataLayout1.ItemDefaultHeight = 26;
this.radDataLayout1.ColumnCount = 2;
this.radDataLayout1.FlowDirection = FlowDirection.TopDown;
this.radDataLayout1.AutoSizeLabels = true;3. A sample Employee class exposing several properties is going to be our model.
public class Employee
{
    public string FirstName { get; set; }

    public string LastName { get; set; }

    public string Occupation { get; set; }

    public DateTime StartingDate { get; set; }

    public bool IsMarried { get; set; }
}4. Once the Employee class is defined, you may use it to create an object of this type and bind it to the RadDataLayout control:
this.radDataLayout1.DataSource = new Employee()
{
    FirstName = "Sarah",
    LastName = "Blake",
    Occupation = "Supplied Manager",
    StartingDate = new DateTime(2005, 04, 12),
    IsMarried = true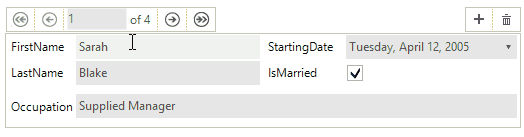
};5. Press F5 to run the project and you should see the following:
Figure 2: Bound to Single Object

Binding RadDataLayout to multiple objects
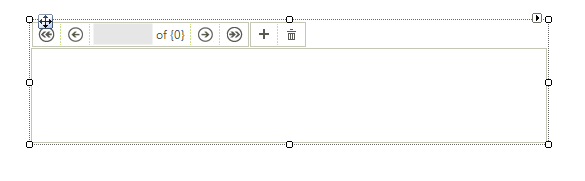
Besides a RadDataLayout we are also going to need a RadBindingNavigator on our form. In order to connect the two controls we are going to use a BindingSource component.
Figure 3: Added RadBindingNavigator
Compared to the previously shown example only the data binding is different. This time we are going to bind the RadDataLayout control to a list of our model objects. The same list will also provide data to the BindingSource component.
List<Employee> employees = new List<Employee>();
employees.Add(new Employee()
{
    FirstName = "Sarah",
    LastName = "Blake",
    Occupation = "Supplied Manager",
    StartingDate = new DateTime(2005, 04, 12),
    IsMarried = true
});
employees.Add(new Employee()
{
    FirstName = "Jane",
    LastName = "Simpson",
    Occupation = "Security",
    StartingDate = new DateTime(2008, 12, 03),
    IsMarried = true
});
employees.Add(new Employee()
{
    FirstName = "John",
    LastName = "Peterson",
    Occupation = "Consultant",
    StartingDate = new DateTime(2005, 04, 12),
    IsMarried = false
});
employees.Add(new Employee()
{
    FirstName = "Peter",
    LastName = "Bush",
    Occupation = "Cashier",
    StartingDate = new DateTime(2005, 04, 12),
    IsMarried = true
});

this.bindingSource1.DataSource = employees;
this.radDataLayout1.DataSource = this.bindingSource1;
this.radBindingNavigator1.BindingSource = this.bindingSource1;Press F5 to run the project and you should see the following:
Figure 4: Bound to Multiple Objects
See Also
- Structure
- Validation
- Properties, events and attributes
- Change the editor to RadDropDownList
- Customizing Appearance
- Eliminate the Last Item's stretching in DataLayout
Telerik UI for WinForms Learning Resources
- Telerik UI for WinForms DataLayout Component
- Getting Started with Telerik UI for WinForms Components
- Telerik UI for WinForms Setup
- Telerik UI for WinForms Converter
- Telerik UI for WinForms Visual Studio Templates
- Deploy Telerik UI for WinForms Applications
- Telerik UI for WinForms Virtual Classroom(Training Courses for Registered Users)
- Telerik UI for WinForms License Agreement)