Data Binding
Binding a RadDatePicker control to a data source is easy provided you use the DbSelectedDate property. It works almost like the SelectedDate one, but does not throw an exception when given a null value.
When embedding a RadDatePicker control inside a data-bound control, use a data-binding expression to bind the value of the input control to the data source of the parent control. Data-binding expressions are contained within <%# and %> delimiters and use the Eval and Bind functions. The Eval function is used to define one-way (read-only) binding. The Bind function is used for two-way (updatable) binding.
In addition to calling Eval and Bind methods to perform data binding in a data-binding expression, you can call any publicly scoped code within the <%# and %> delimiters to execute that code and return a value during page processing.

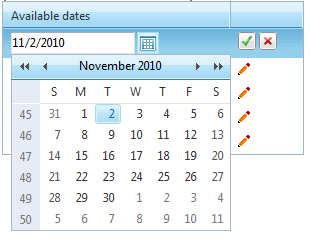
The following example demonstrates how to bind a RadDatePicker control inside a RadGrid, as shown above.
<telerik:RadGrid RenderMode="Lightweight" ID="RadGrid1" runat="server" AutoGenerateColumns="False" Width="300px"
OnNeedDataSource="RadGrid1_NeedDataSource" OnUpdateCommand="RadGrid1_UpdateCommand"
OnItemCreated="RadGrid1_ItemCreated">
<MasterTableView Width="100%" EditMode="InPlace">
<Columns>
<telerik:GridTemplateColumn HeaderText="Available dates" UniqueName="TemplateColumn">
<ItemTemplate>
<asp:Label runat="server" ID="date" Text='<%# Eval("Dates", "{0:D}") %>'>
</asp:Label>
</ItemTemplate>
<EditItemTemplate>
<telerik:RadDatePicker RenderMode="Lightweight" ID="picker1" MinDate="2006/1/1" runat="server" DbSelectedDate='<%# Bind("Dates") %>'>
</telerik:RadDatePicker>
</EditItemTemplate>
</telerik:GridTemplateColumn>
<telerik:GridEditCommandColumn ButtonType="ImageButton" />
</Columns>
</MasterTableView>
</telerik:RadGrid>To see the live example that the example above was taken from, see Data Binding.