Installing with NuGet in Visual Studio
To install the Telerik UI for .NET MAUI components, you can use NuGet packages from the public nuget.org registry (recommended) or from the authenticated Telerik NuGet server.
Installing from NuGet.org (Recommended)
The Telerik.UI.for.Maui package is available on the default nuget.org package source in Visual Studio. No additional configuration or authentication is required:
- Open or create a .NET MAUI project in Visual Studio.
- Right-click the solution in the Solution Explorer and select Manage NuGet Packages for Solution....
- Make sure the Package source is set to
nuget.org. - Click the Browse tab, search for
Telerik.UI.for.Maui, and select it. - Choose the target project, select the desired version, and click Install.
Installing from the Telerik NuGet Server
The Telerik NuGet server is a private authenticated feed that you can use as an alternative to nuget.org. This online source lets you download and install various versions of the .NET MAUI controls and enables quick updates with minimal manual intervention.
Before adding the Telerik NuGet server to Visual Studio, make sure you have:
- .NET MAUI installed on the machine. For more information on the required steps and system requirements, refer to the official Microsoft .NET MAUI documentation.
- A commercial or trial license for Telerik .NET MAUI. Note that the Telerik NuGet server requires authentication and checks if you have a valid license.
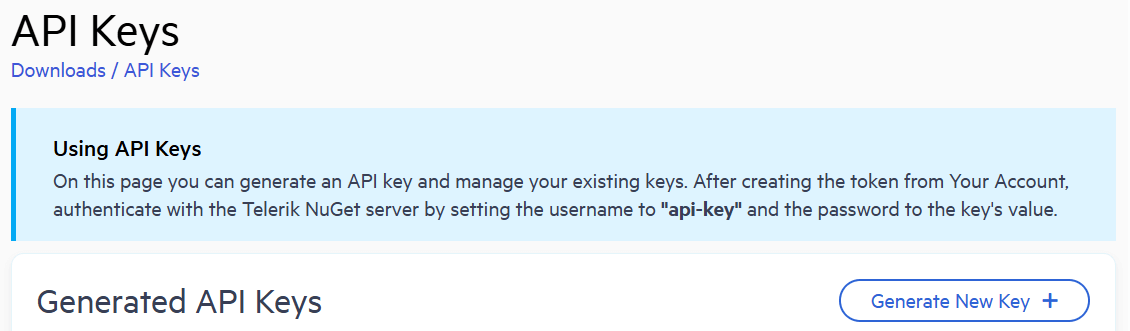
Step 1: Generate an API Key
As the Telerik NuGet server requires authentication, the first step is to obtain an API key that you will use instead of a password. Using an API key instead of a password is a more secure approach, especially when working with .NET CLI or the NuGet.Config file.
-
Go to the API Keys page in your Telerik account.
-
Click Generate New Key +.
-
In the Key Note field, add a note that describes the API key.
-
Click Generate Key.
-
Select Copy and Close. Once you close the window, you can no longer copy the generated key. For security reasons, the API Keys page displays only a portion of the key.
-
Store the generated NuGet API key as you will need it in the next steps. Whenever you need to authenticate your system with the Telerik NuGet server, use
api-keyas the username and your generated API key as the password.
API keys expire after two years. Telerik will send you an email when a key is about to expire, but we recommend that you set your own calendar reminder with information about where you used that key: file paths, project links, AzDO and GitHub Action variable names, and so on.
Step 2: Add the Telerik NuGet Package Source to Visual Studio
To configure the Telerik NuGet feed in Visual Studio:
- Open Visual Studio.
- Go to Tools > NuGet Package Manager > Package Manager Settings.
- Select Package Sources, and then click the + button.
- In the Source field, enter
https://nuget.telerik.com/v3/index.json. If you use a locally available NuGet package downloaded from your account, add the path to the local package instead of the URL. - Click Update and then OK.
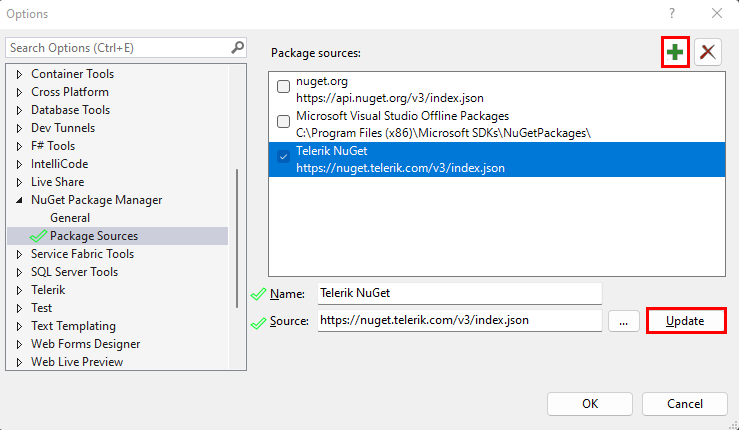
You have successfully added the Telerik NuGet feed as a Package source.
Reset Store Credentials
If you previously stored credentials for the Telerik NuGet server, you need to reset them to be able to authenticate with your new API key. Here are the steps you need to follow:
- Remove the saved credentials in the Windows Credential Manager. These credentials will appear as
nuget.telerik.comorVSCredentials_nuget.telerik.comentries. - Remove the Telerik NuGet package source from Visual Studio.
- If you have added the Telerik package source by using the .NET CLI, try to remove it by running the following commands:
- Check if you have any credentials stored in
%AppData%\NuGet\Nuget.Config. If so, remove them. - Try to reset the Visual Studio user data by forcing NuGet to ask for authentication.
- Restart Visual Studio.
- Add the Telerik NuGet package source again through Visual Studio or .NET CLI. If you are using the Telerik NuGet feed in a .NET Core application, use a NuGet API key in the NuGet.Config file.
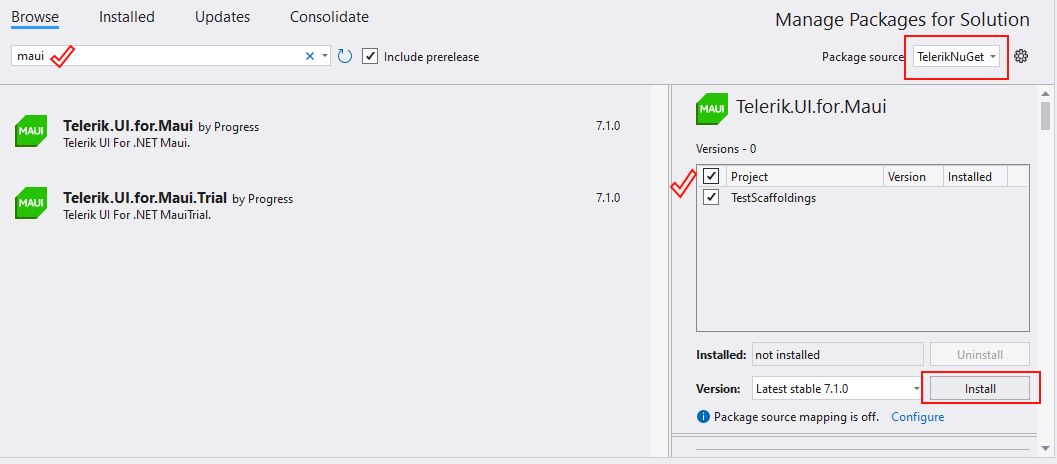
Step 3: Install the Telerik UI for .NET MAUI NuGet Package
The next steps describe how to authenticate your local NuGet instance and display the available packages:
-
Create a new .NET MAUI project or open an existing project.
-
Right-click the solution in the Solution Explorer window.
-
Select Manage NuGet Packages for Solution....
-
Select the Telerik NuGet Package source from the drop-down list.
-
Click the Browse tab to see the available packages.
-
In the authentication window, enter
api-keyin the User name field and the generated API key in the Password field.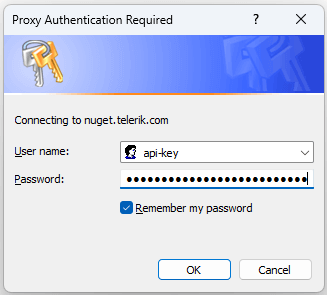
-
In the Visual Studio Package Manager, you will see all packages that are licensed to your user account.
-
Search for the
Telerik.UI.for.Mauipackage and select it. -
Choose the projects which require the package.
-
Select the desired version and click Install.
Step 4: Register the Required Handlers
To visualize the .NET MAUI controls, you have to register the required handlers by calling the Telerik.Maui.Controls.Compatibility.UseTelerik extension method inside the Configure method of the MauiProgram.cs file of your project.
- Add the needed
usingsettings inside theMauiProgram.csfile.
using Telerik.Maui.Controls.Compatibility;- Call the
UseTelerik()method inside theMauiProgram.csfile.
public static class MauiProgram
{
   public static MauiApp CreateMauiApp()
   {
   	var builder = MauiApp.CreateBuilder();
   	builder
   		.UseTelerik()
   		.UseMauiApp<App>()
   		.ConfigureFonts(fonts =>
   		{
   			fonts.AddFont("OpenSans-Regular.ttf", "OpenSansRegular");
   		});

   	return builder.Build();
   }
}