Editing Workflows
Use the Forge Desktop App workflow editor to configure a workflow and its states. You can edit the workflow name and description, subject, initial state, and individual state settings such as transitions and exit behavior. Review terminal-state groups and the ordered state list, where you can edit, move, or remove states.
Open the Workflow Editor
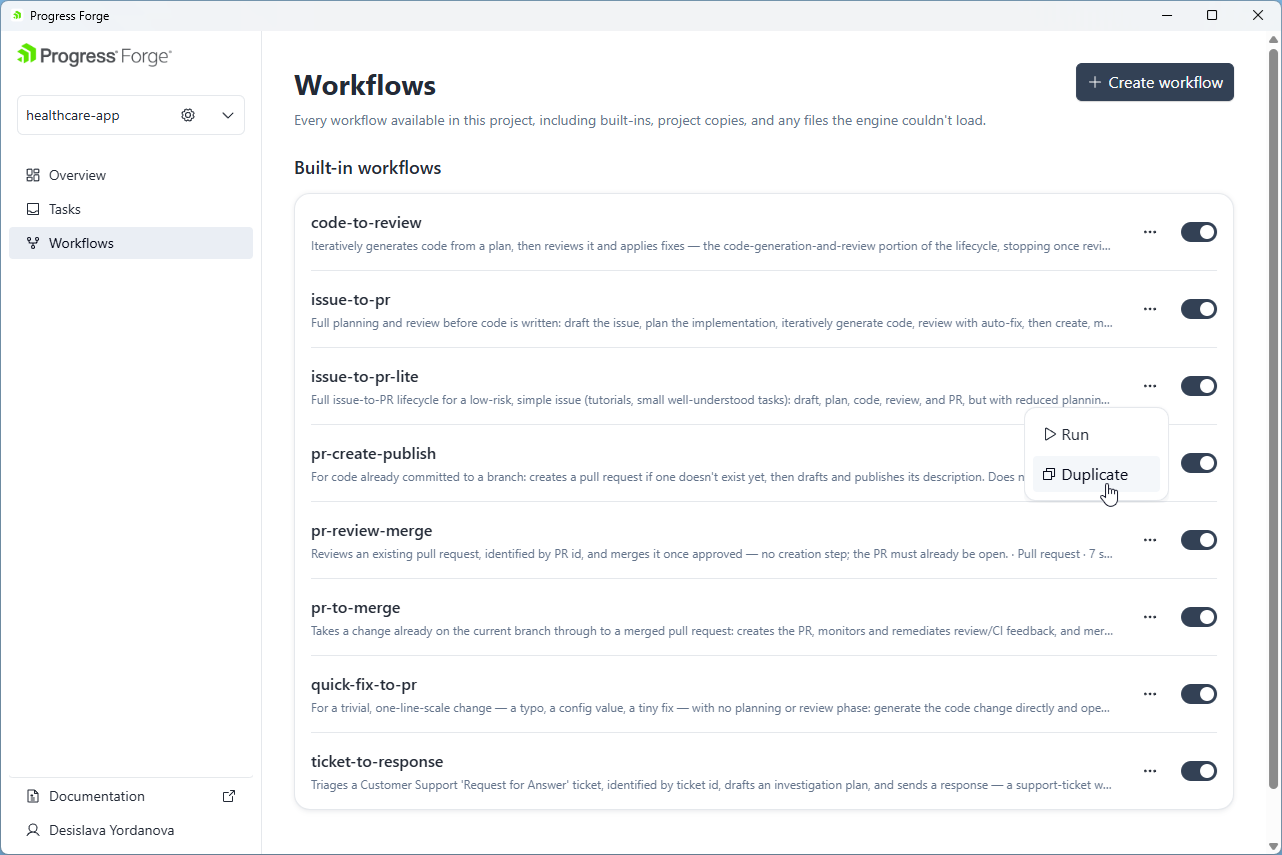
- In the project sidebar, select Workflows.
- To customize a built-in workflow, open its ellipsis (…) menu and select Duplicate. This creates a project copy that you can edit without changing the built-in workflow.
- Open the custom workflow to edit it. The editor provides a Workflows back link to return to the list.
The workflow list also provides a per-workflow on/off toggle and a Run action in the ellipsis menu. See Running Workflows for details about starting a run.
Edit the Workflow
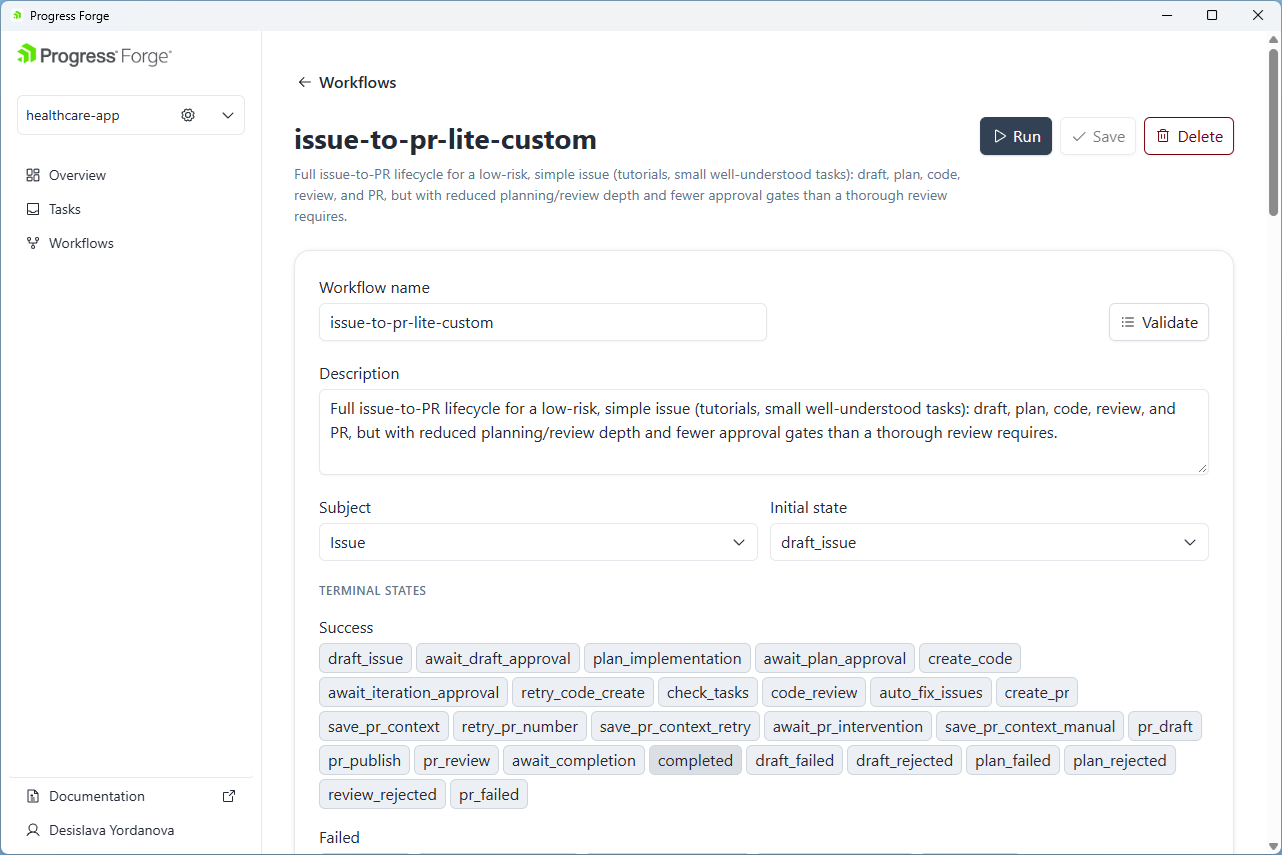
The workflow editor shows:
- The workflow name and description at the top of the page.
- Run, Save, and Delete actions in the page header.
- A Workflow name field and a Description field.
- A Validate button beside Workflow name.
- A Subject selector and an Initial state selector.
- A TERMINAL STATES section grouping terminal state identifiers under Success, Failed, and Cancelled.
- A STATES list containing numbered state cards with each state's name, and description.
- An Add state button below the state list.
The numbered order shows the workflow's state sequence. Review terminal-state groups and each state's transitions when changing the sequence or workflow outcomes.
Step list controls
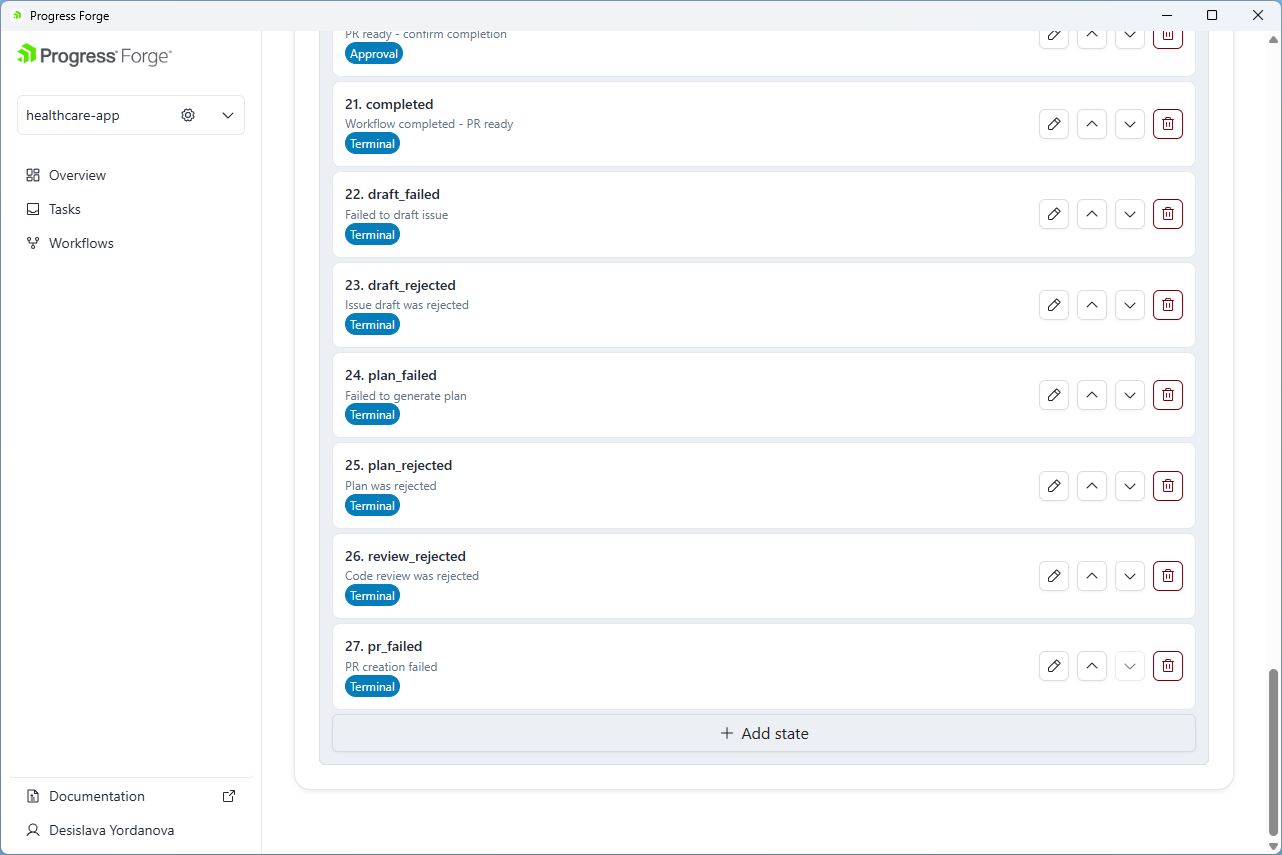
Each state card has buttons to edit the step, move it up or down in the order, and remove it. Select Add state below the list to add another state.
Edit an Individual Step
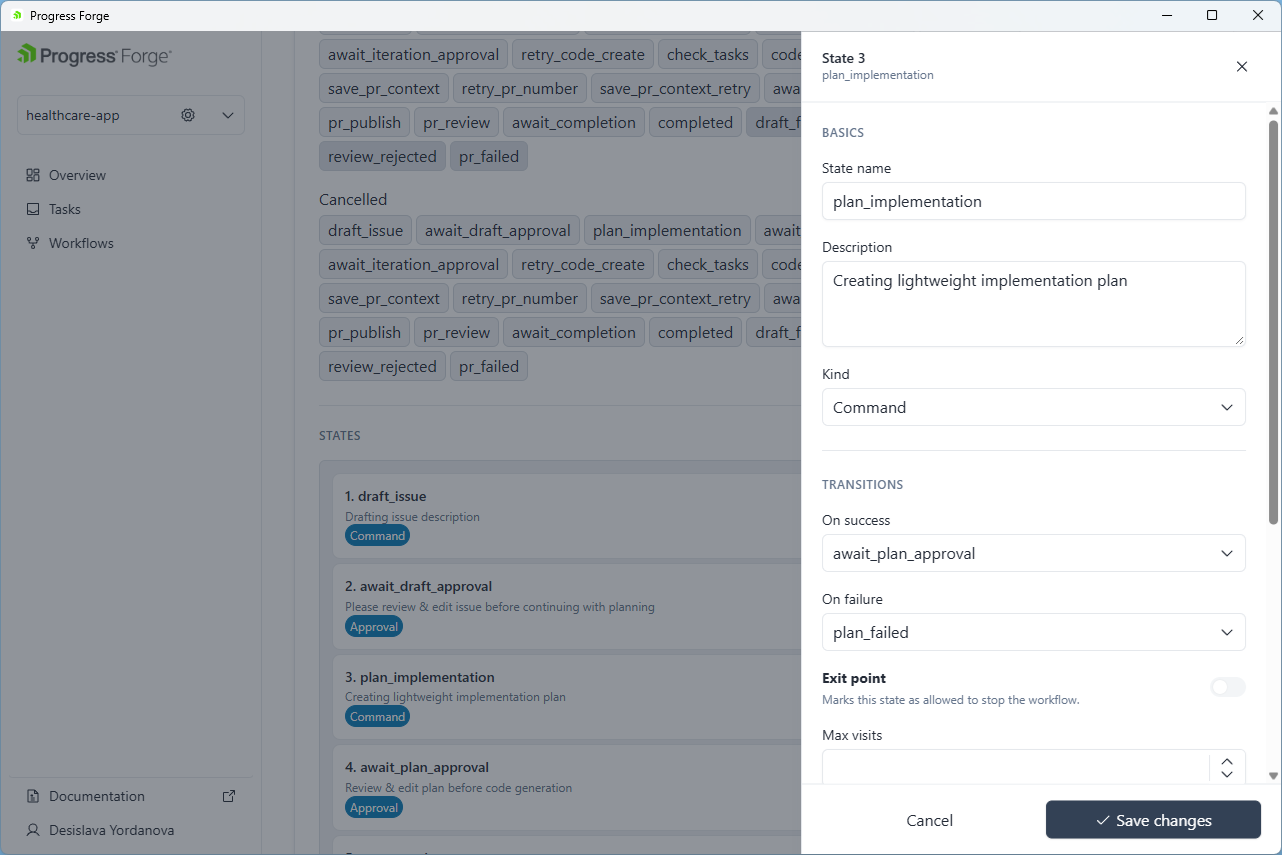
Select the edit button on a state card to open the state editor panel. Under BASICS, configure:
- State name: The identifier for the state.
- Description: A summary of the state's purpose.
- Kind: The state type, such as Command or Approval.
Under TRANSITIONS, select the destination state for On success and On failure. You can also configure:
- Exit point: Turn this on to allow the state to stop the workflow.
- Max visits: Set the maximum number of times the workflow can visit the state.
Select Save changes to apply the state edits, or Cancel or × to close the panel without saving.
Validate the Workflow
Select Validate beside Workflow name to check the workflow configuration. After editing, select Save in the page header to save workflow-level changes. State-level changes are submitted with Save changes in the state editor panel.