Creating Workflows
Workflows define the states and actions Forge uses to process a subject in a project. The Workflows page lists workflows available to the project, including built-ins, project copies, and files the engine could not load. Create a workflow from scratch or duplicate an existing workflow, then review its configuration and states in the workflow editor.
Create a Workflow
- In the project sidebar, select Workflows.
- Select Create workflow in the upper-right corner of the page.
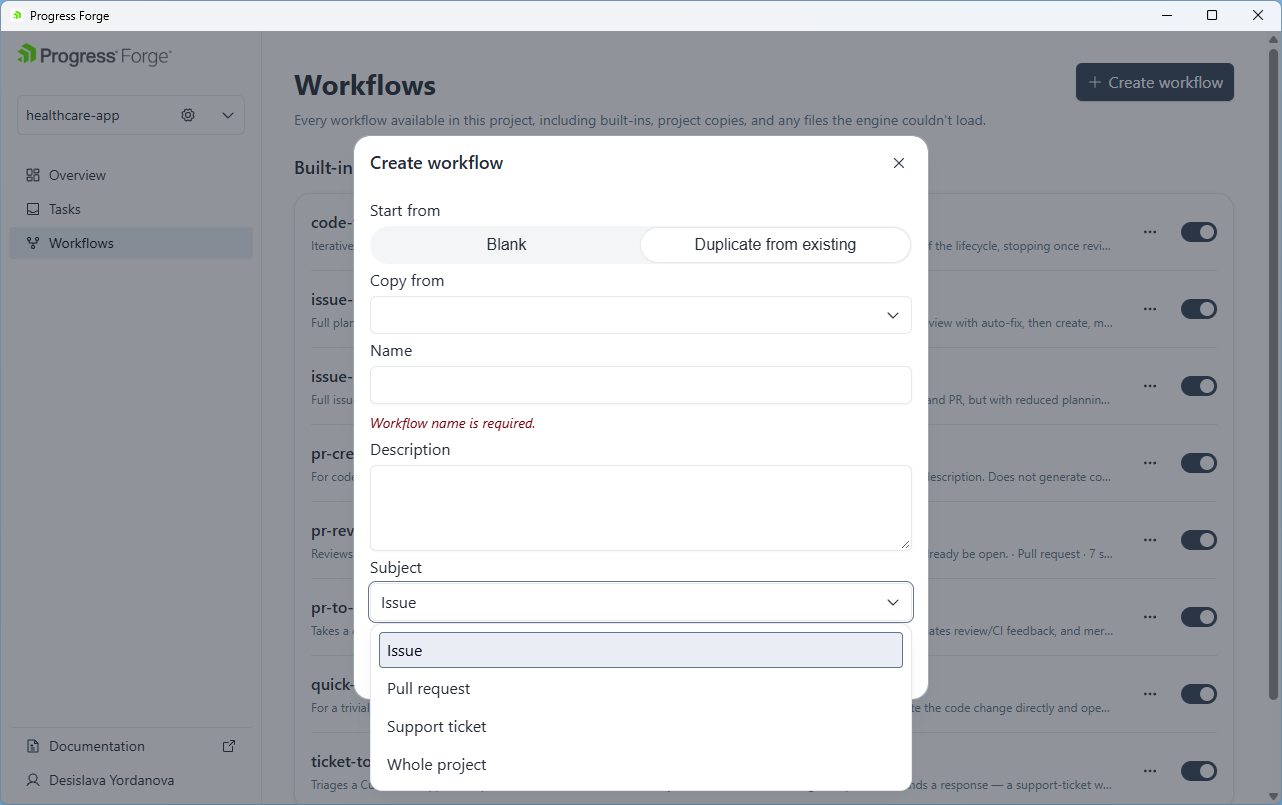
- In the Create workflow dialog, select Blank or Duplicate from existing under Start from.
- If you selected Duplicate from existing, choose the source workflow from Copy from.
- Enter a required Name, add a Description, and select a Subject.
- Select Create workflow. To close the dialog without creating a workflow, select Cancel.
The Subject options shown in the dialog are Issue, Pull request, Support ticket, and Whole project. The dialog defaults to Issue. Choose the subject that matches the work the workflow will handle.
Create a Workflow from Blank
Choose Blank under Start from to create a workflow without copying an existing one. Enter its name and description, select its subject, and select Create workflow. The editor opens with the workflow configuration ready for you to review and define.
Create a Workflow from an Existing Workflow
Choose Duplicate from existing under Start from, then select the source in Copy from. Enter a name for the new workflow, review its description and subject, and select Create workflow. The editor opens with the duplicated workflow configuration, which you can customize independently.
Configure the Workflow
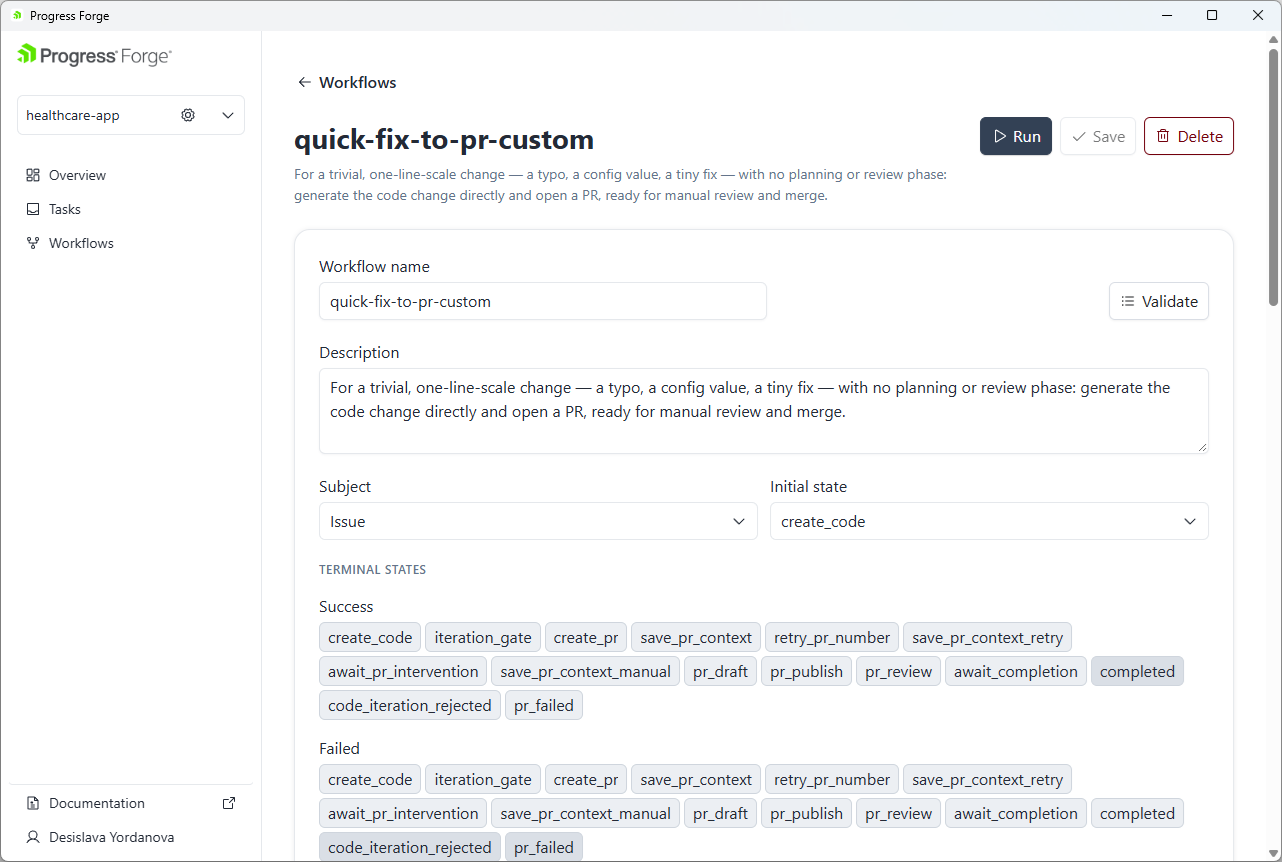
The workflow editor displays the workflow name and description at the top of the page. Its configuration form includes these fields and actions:
- Workflow name and Description: Set the name and explain what the workflow does.
- Subject: Review the type of work the workflow handles.
- Initial state: Choose the state where the workflow starts.
- Terminal states: Review the state identifiers grouped under Success, Failed, and Cancelled to see how each outcome is represented.
- Validate: Check the workflow configuration from the editor.
Review and Manage States
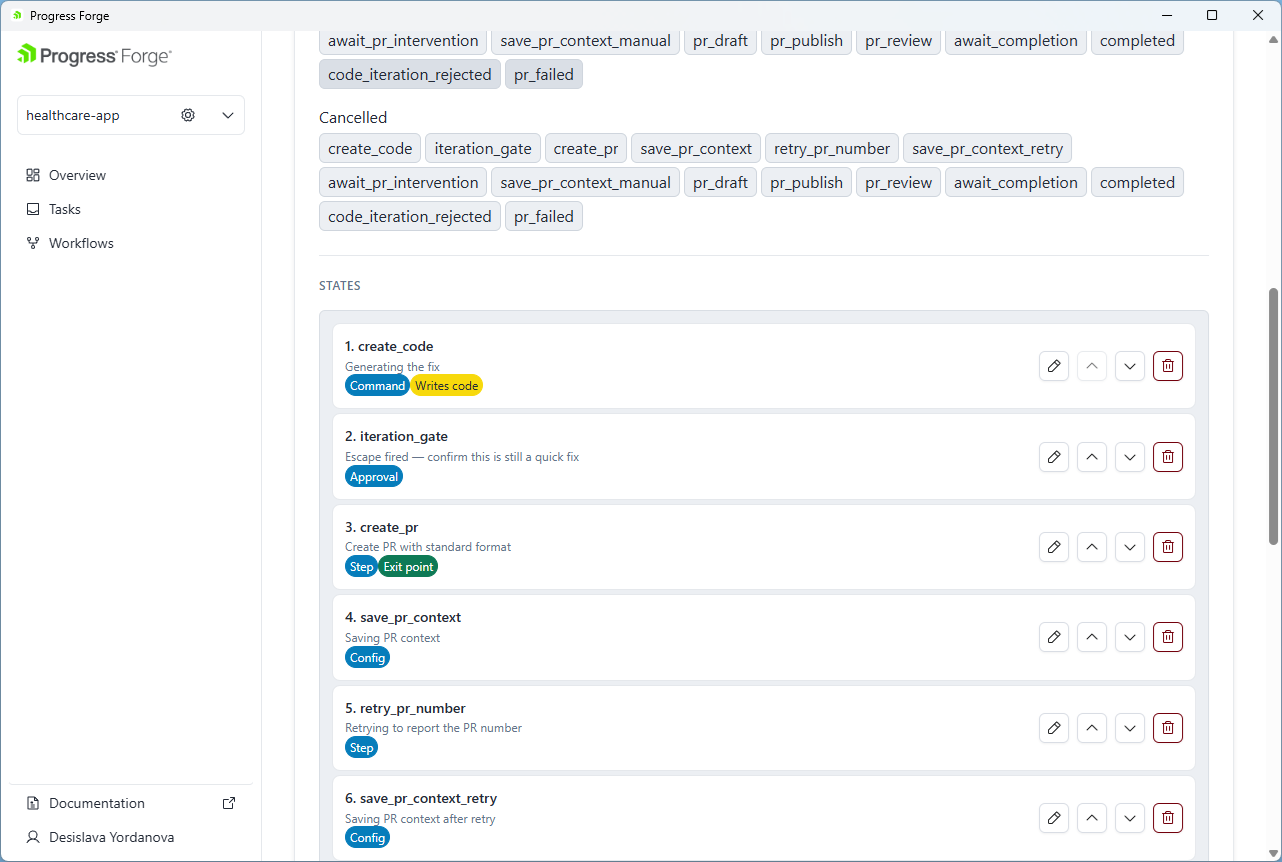
The STATES section lists the workflow's steps in numbered order. Each state card shows its identifier, description, and type badges.
Use the controls on a step card to edit the step, move it up or down in the sequence, or remove it. Review the step order and terminal-step groups together so the workflow sequence and outcomes match the intended process.
Save, Run, or Delete a Workflow
The Run, Save, and Delete actions appear in the upper-right corner of the editor. Validate appears beside Workflow name in the configuration form.
- Select Validate to check the configuration.
- Select Save to save your changes.
- Select Run to start the workflow.
- Select Delete to remove the workflow.
Validate and save the workflow after making changes. Before selecting Run, confirm the subject, initial state, state order, and terminal-state groups.