MCP Server
The Telerik Document Processing MCP (Model Context Protocol) server provides Document Processing context to AI-powered IDEs, apps, and tools. Use it to generate tailored code and complete complex tasks with the Telerik Document Processing Libraries.
Visual Studio can hang during tool calls. See Troubleshooting.
The npm package
@progress/telerik-dpl-mcpis deprecated. For current installations and updates, migrate to the NuGet packageTelerik.DPL.MCP.
The recommended way to install the MCP server is through the NuGet package. The Node.js/npm-based approach documented below is deprecated.
Supported Libraries
Prerequisites for the MCP Server
To use the Telerik Document Processing Libraries (DPL) MCP Server, you need:
- A Telerik user account.
- An active Telerik license that includes Telerik Document Processing.
- An application that uses the Telerik Document Processing Libraries.
- .NET 8 or later, or Node.js 18 or later.
- An MCP-compatible client (IDE, code editor, or app) that supports MCP tools (use the latest version). For example, the latest Visual Studio Code.
Installation
Install the Telerik DPL MCP server with the .NET tooling. The legacy Node.js package remains available for existing setups but is deprecated.
Install with Telerik CLI (Recommended)
The easiest way to install and configure the Telerik DPL MCP Server is through the Telerik CLI. A single command line sets up the MCP server for your IDE automatically:
Telerik CLI command that installs and configures the Telerik DPL MCP Server
telerik mcp config dplThis command automatically creates or updates the .mcp.json configuration file for all supported IDEs. You can also specify a target IDE with the --ide option (for example, telerik mcp config dpl --ide vscode). For more details, see Telerik CLI - Install DPL MCP Server.
Using the .NET Tooling
Use the dnx script (.NET 10 or later only) or the dotnet CLI (.NET 8 and .NET 9)
-
.NET 10:
Command that runs the Telerik DPL MCP Server with
dnxjsondnx Telerik.DPL.MCP -
.NET 8 and .NET 9:
Command that installs the Telerik DPL MCP Server with
dotnet tooljsondotnet tool install Telerik.DPL.MCP
Using npm
Deprecated: The npm package
@progress/telerik-dpl-mcpis deprecated. Migrate to the NuGet packageTelerik.DPL.MCPfor the current installation and configuration flow.
Use your AI-powered MCP client's documentation to add the legacy Telerik Document Processing MCP server package to a workspace or global configuration.
npm command that installs the Telerik DPL MCP Server package
npm i @progress/telerik-dpl-mcpNext, verify that the configuration in your mcp.json is correct, and then add your Telerik license.
Installing in VS Code
Visual Studio Code example of installing and configuring the Telerik DPL MCP Server
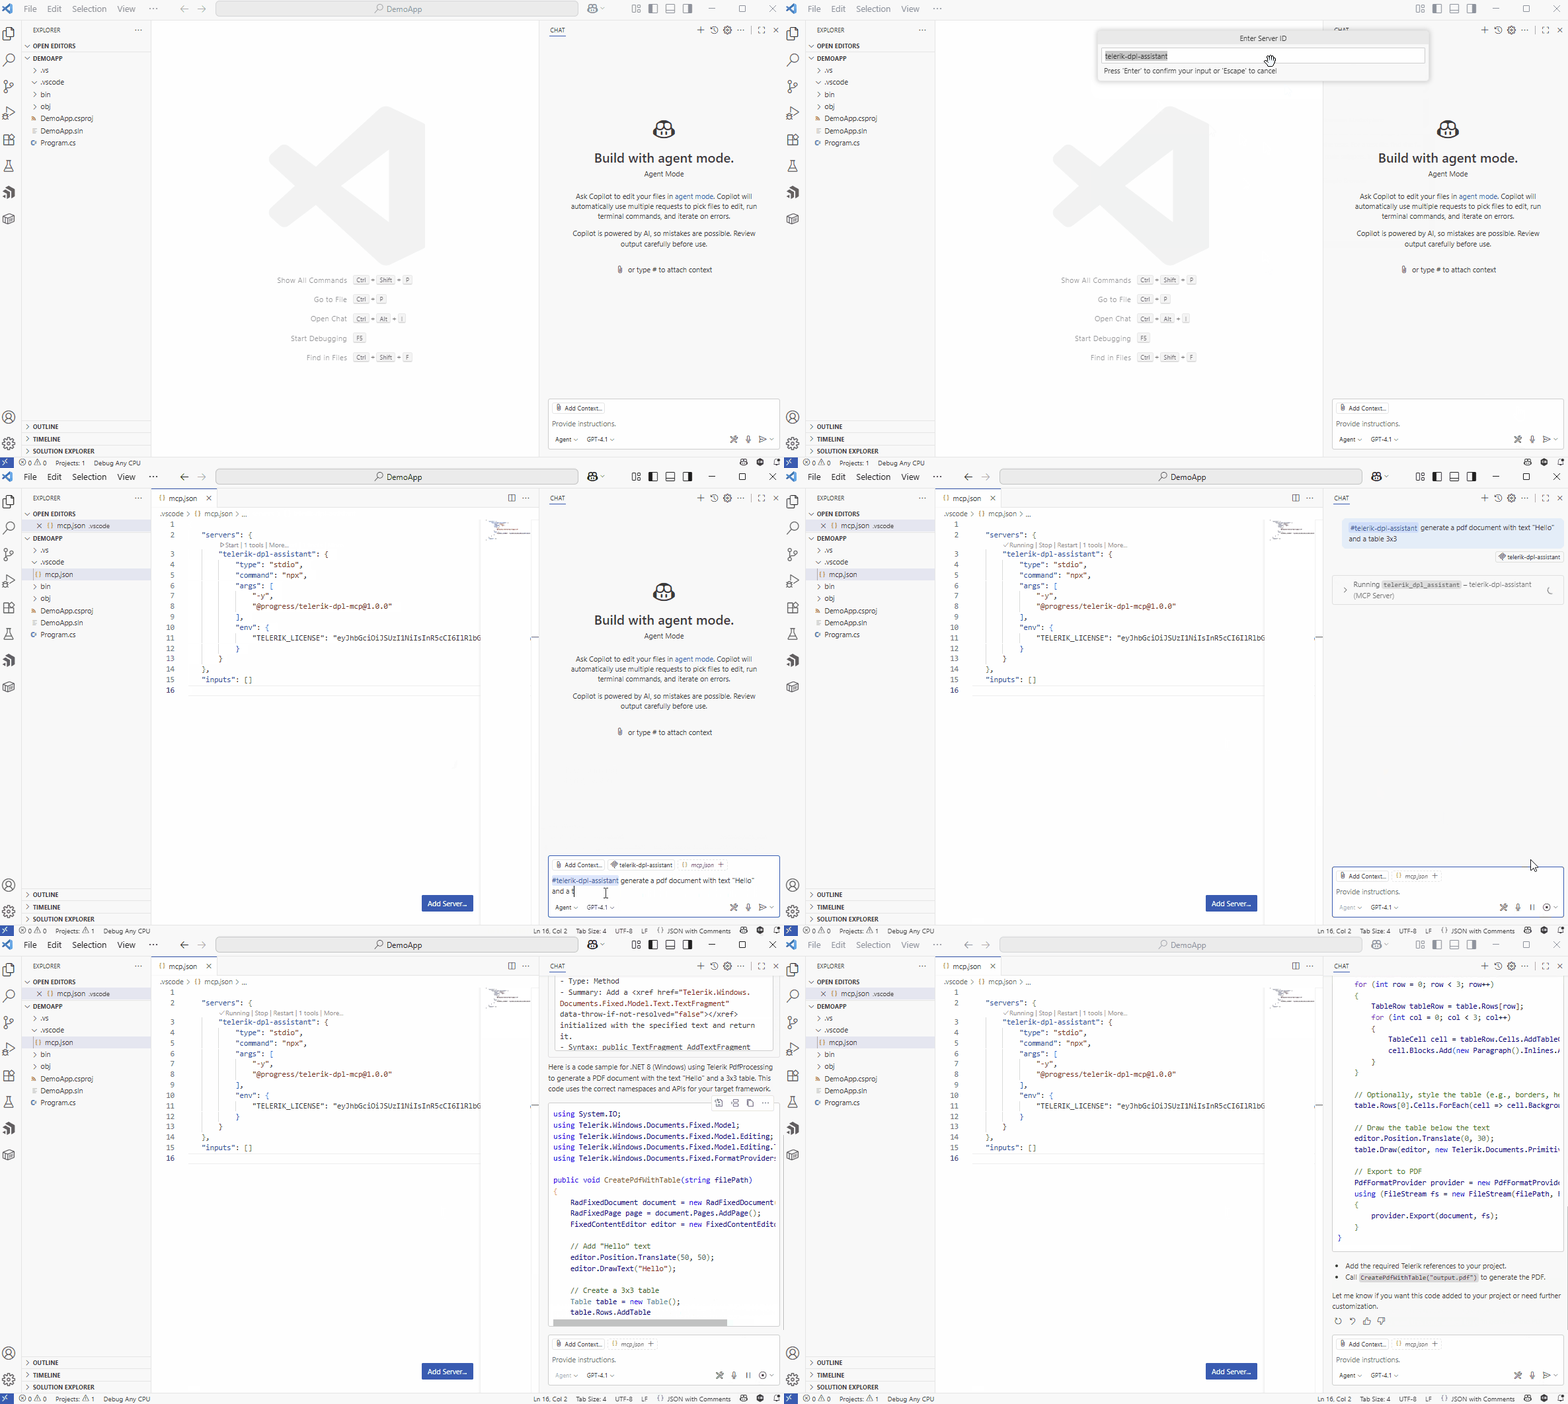
Configuration
To configure the Telerik DPL MCP server, configure the license and mcp.json as follows:
Configuring mcp.json
Use the settings in the following table to configure the Telerik DPL MCP server in the mcp.json file of your code editor. Select the correct value based on your development environment:
| Setting Name | .NET 10 Value | .NET 8 / .NET 9 Value | Node.js Value (Deprecated) |
|---|---|---|---|
| Package Name | "Telerik.DPL.MCP" | "Telerik.DPL.MCP" | "@progress/telerik-dpl-mcp" (deprecated) |
| Type | "stdio" | "stdio" | "stdio" (deprecated) |
| Command | "dnx" | "dotnet" | "npx" (deprecated) |
| Arguments | "Telerik.DPL.MCP", "--yes" | "tool", "run", "telerik-dpl-mcp" | "-y" (deprecated) |
| Server Name | "telerik-dpl-assistant" | "telerik-dpl-assistant" | "telerik-dpl-assistant" (deprecated) |
License Configuration
An active Document Processing license is required to use the Telerik DPL MCP server.
-
When installing the MCP server by using the .NET tooling (
dnxordotnet tool install), the Telerik license key is retrieved automatically if it is present in the default directory on your system (%AppData%\Telerik\telerik-license.txton Windows and~/.telerik/telerik-license.txton Linux). No additional action is required. -
When using the .NET tooling, but your license key file is not in the default directory, use one of the options below to configure your license.
-
When using Node.js, add your license key file as an environment variable in your
mcp.jsonfile using one of the options below: -
As a license file path (recommended)
License configuration example that references the Telerik license file path
json"env": { "TELERIK_LICENSE_PATH": "THE_PATH_TO_YOUR_LICENSE_FILE" } -
As a license key value
License configuration example that sets the Telerik license key directly
json"env": { "TELERIK_LICENSE": "YOUR_LICENSE_KEY_HERE" }
A license file path is recommended unless you share settings across different systems. Update your license key when necessary.
Usually, the
.mcp.jsonfile is expected to be found in the user's directory: %USERPROFILE%
Visual Studio Configuration
- Early Visual Studio 17.14 versions require the Copilot Chat window to be open when opening a solution for the MCP server to work properly.
- For complete setup instructions, see Use MCP servers in Visual Studio.
The steps below describe the sample procedure for configuring the Telerik DPL MCP server in Visual Studio.
- Add an
.mcp.jsonfile to either of the following locations:
-
For a workspace-specific setup, add the file to the solution's folder.
-
For a global setup, add the file to your user directory,
%USERPROFILE%(for example,C:\Users\YourName\.mcp.json).
- Add the following configuration to the mcp.json file:
-
In .NET 10:
Visual Studio
.mcp.jsonexample for a .NET 10 Telerik DPL MCP Server setupjson{ "servers": { "telerik-dpl-assistant": { "type": "stdio", "command": "dnx", "args": ["Telerik.DPL.MCP", "--yes"], "env": { "TELERIK_LICENSE_PATH": "THE_PATH_TO_YOUR_LICENSE_FILE", // or "TELERIK_LICENSE": "YOUR_LICENSE_KEY" } } }, "inputs": [] } -
In .NET 8 and .NET 9:
-
Global Installation
-
Run
dotnet tool install --global Telerik.DPL.MCPin the Terminal. -
Update global MCP config: %userprofile%.mcp.json with following configuration:
-
Visual Studio global
.mcp.jsonexample for a .NET 8 or .NET 9 Telerik DPL MCP Server setupjson{ "servers": { "telerik-dpl-assistant": { "type": "stdio", "command": "telerik-dpl-assistant", "env": { "TELERIK_LICENSE_PATH": "THE_PATH_TO_YOUR_LICENSE_FILE", // or "TELERIK_LICENSE": "YOUR_LICENSE_KEY" } } }, "inputs": [] }-
Local Installation
-
Navigate to the solution folder.
-
Run
dotnet tool new-manifestin the Terminal. -
Run
dotnet tool install Telerik.DPL.MCPin the Terminal. -
Create/update solution based MCP Config %solutiondir%.mcp.json with the following configuration:
-
Visual Studio workspace
.mcp.jsonexample for a .NET 8 or .NET 9 Telerik DPL MCP Server setupjson{ "servers": { "telerik-dpl-assistant": { "type": "stdio", "command": "dotnet", "args": ["tool", "run", "telerik-dpl-assistant"], "env": { "TELERIK_LICENSE_PATH": "THE_PATH_TO_YOUR_LICENSE_FILE", // or "TELERIK_LICENSE": "YOUR_LICENSE_KEY" } } }, "inputs": [] } -
-
In Node.js:
Deprecated: Node.js/npm-based setup uses deprecated package
@progress/telerik-dpl-mcp. Use the NuGet-based setup from Telerik DPL MCP Server as a NuGet Package for new and updated configurations.Visual Studio
.mcp.jsonexample for a Node.js Telerik DPL MCP Server setupjson{ "servers": { "telerik-dpl-assistant": { "type": "stdio", "command": "npx", "args": ["-y", "@progress/telerik-dpl-mcp@latest"], "env": { "TELERIK_LICENSE_PATH": "THE_PATH_TO_YOUR_LICENSE_FILE", // or "TELERIK_LICENSE": "YOUR_LICENSE_KEY" } } }, "inputs": [] }
-
Restart Visual Studio.
-
Enable the
telerik-dpl-assistanttool in the Copilot Chat window's tool selection dropdown.
Add the .mcp.json file to your user directory (%USERPROFILE%, for example, C:\Users\YourName\.mcp.json).
Visual Studio Code
For complete setup instructions, see Use MCP servers in Visual Studio Code.
Visual Studio Code 1.102.1 or later is required to use the Telerik MCP Server.
For complete setup instructions, see Use MCP servers in Visual Studio Code.
The basic setup in Visual Studio Code involves the following steps:
- Enable
chat.mcp.enabledin Visual Studio Code settings. - Create
.vscode/mcp.jsonin your workspace root (or user folder for global setup):
-
In .NET 10:
Visual Studio Code
mcp.jsonexample for a .NET 10 Telerik DPL MCP Server setupjson{ "servers": { "telerik-dpl-assistant": { "type": "stdio", "command": "dnx", "args": ["Telerik.DPL.MCP", "--yes"], "env": { "TELERIK_LICENSE_PATH": "THE_PATH_TO_YOUR_LICENSE_FILE", // or "TELERIK_LICENSE": "YOUR_LICENSE_KEY" } } }, "inputs": [] } -
In .NET 8 and .NET 9:
Visual Studio Code
mcp.jsonexample for a .NET 8 or .NET 9 Telerik DPL MCP Server setupjson{ "servers": { "telerik-dpl-assistant": { "type": "stdio", "command": "dotnet", "args": ["tool", "run", "telerik-dpl-assistant"], "env": { "TELERIK_LICENSE_PATH": "THE_PATH_TO_YOUR_LICENSE_FILE", // or "TELERIK_LICENSE": "YOUR_LICENSE_KEY" } } }, "inputs": [] } -
In Node.js:
Deprecated: Node.js/npm-based setup uses deprecated package
@progress/telerik-dpl-mcp. Use the NuGet-based setup from Telerik DPL MCP Server as a NuGet Package for new and updated configurations.Visual Studio Code
mcp.jsonexample for a Node.js Telerik DPL MCP Server setupjson{ "servers": { "telerik-dpl-assistant": { "type": "stdio", "command": "npx", "args": ["-y", "@progress/telerik-dpl-mcp@latest"], "env": { "TELERIK_LICENSE_PATH": "THE_PATH_TO_YOUR_LICENSE_FILE", // or "TELERIK_LICENSE": "YOUR_LICENSE_KEY" } } }, "inputs": [] }
- For global discovery, enable
chat.mcp.discovery.enabledinsettings.json:
Visual Studio Code settings example that enables global MCP discovery
{
  "chat.mcp.discovery.enabled": true
}- Restart Visual Studio Code.
Visual Studio Code example with the Telerik DPL MCP Server enabled in Copilot Chat
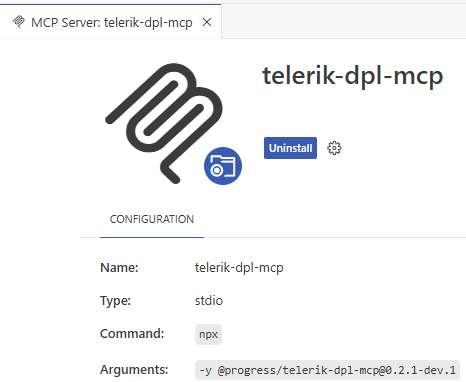
Cursor
For complete setup instructions, see Model Context Protocol.
Create .cursor/mcp.json in your workspace root (or user folder for global setup):
-
In .NET 10:
Cursor
mcp.jsonexample for a .NET 10 Telerik DPL MCP Server setupjson{ "mcpServers": { "telerik-dpl-assistant": { "type": "stdio", "command": "dnx", "args": ["Telerik.DPL.MCP", "--yes"], "env": { "TELERIK_LICENSE_PATH": "THE_PATH_TO_YOUR_LICENSE_FILE", // or "TELERIK_LICENSE": "YOUR_LICENSE_KEY" } } }, "inputs": [] } -
In .NET 8 and .NET 9:
Cursor
mcp.jsonexample for a .NET 8 or .NET 9 Telerik DPL MCP Server setupjson{ "mcpServers": { "telerik-dpl-assistant": { "type": "stdio", "command": "dotnet", "args": ["tool", "run", "telerik-dpl-assistant"], "env": { "TELERIK_LICENSE_PATH": "THE_PATH_TO_YOUR_LICENSE_FILE", // or "TELERIK_LICENSE": "YOUR_LICENSE_KEY" } } }, "inputs": [] } -
In Node.js:
Deprecated: Node.js/npm-based setup uses deprecated package
@progress/telerik-dpl-mcp. Use the NuGet-based setup from Telerik DPL MCP Server as a NuGet Package for new and updated configurations.Cursor
mcp.jsonexample for a Node.js Telerik DPL MCP Server setupjson{ "mcpServers": { "telerik-dpl-assistant": { "type": "stdio", "command": "npx", "args": ["-y", "@progress/telerik-dpl-mcp@latest"], "env": { "TELERIK_LICENSE_PATH": "THE_PATH_TO_YOUR_LICENSE_FILE", // or "TELERIK_LICENSE": "YOUR_LICENSE_KEY" } } }, "inputs": [] }
Using the MCP Server
By default, MCP clients do not call MCP tools in a deterministic way. Some MCP clients such as VS Code allow you to explicitly reference the desired MCP tool in your prompt.
When switching between tasks and files, start a new session in a new chat window to avoid polluting the context with irrelevant or outdated information.
To use the Telerik DPL MCP server:
-
Choose your preferred mode and model.
At the time of publishing, Claude Sonnet 4 and GPT-5 produce optimal results.
-
Start your prompt with
#telerik-dpl-assistant(or with # followed by your custom server name, if set). -
Inspect the output and verify that the MCP Server is used. Look for a similar statement in the output (the exact text may vary across tools):
- Visual Studio:
Running telerik-dpl-assistant - Visual Studio Code:
Running telerik-dpl-assistant - Cursor:
Calling MCP tool telerik-dpl-assistant
- Visual Studio:
-
If the MCP server is not used even though it is installed and enabled, verify the server name in your configuration and rephrase your prompt.
-
Grant permissions when prompted (per session, workspace, or always).
-
Start fresh sessions for unrelated prompts to avoid context pollution.
-
Use in Chat (Ask) and Agent modes.
Improving Server Usage
To increase the likelihood of the Telerik DPL MCP server being used, add custom instructions to your AI tool:
Sample Prompts
The following examples demonstrate useful prompts for the Telerik Document Processing MCP Server:
-
"
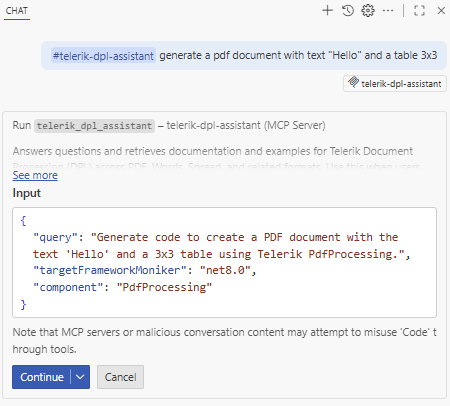
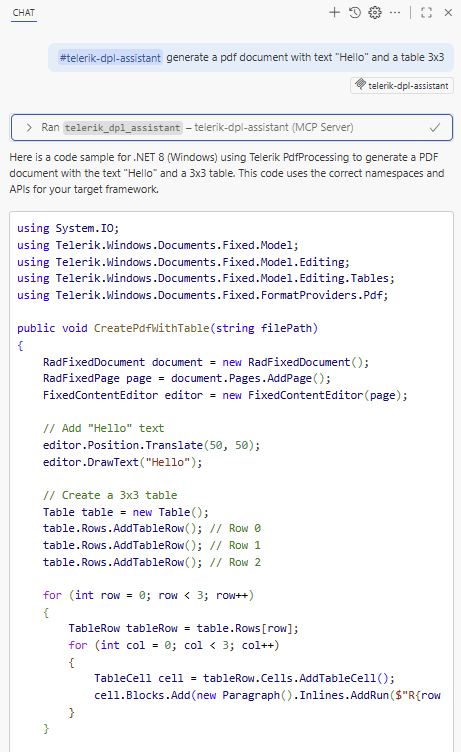
#telerik-dpl-assistantgenerate a pdf document with text "Hello" and a table 3x3"Visual Studio Code sample prompt that asks the Telerik DPL MCP Server to generate a PDF document

Visual Studio Code example of the MCP tool call and generated result for the sample PDF prompt
| Copilot calling the DPL MCP Server in VS Code | Copilot final answer in VS Code |
|---|---|
 |  |
- "
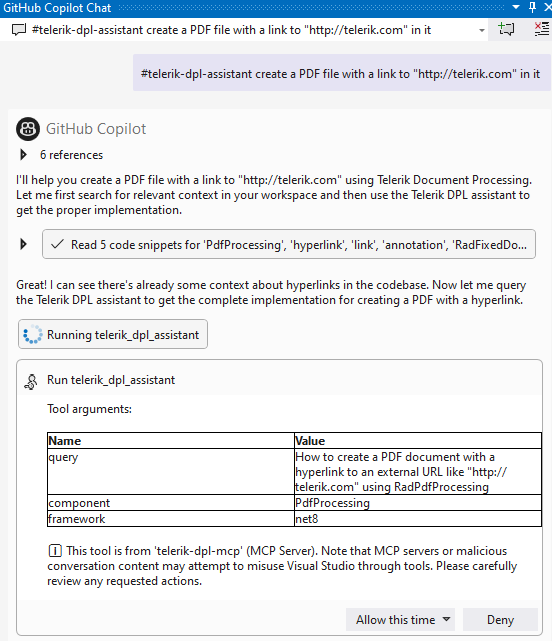
#telerik-dpl-assistantcreate a PDF file with a link to "http://telerik.com" in it"
Visual Studio example of running a Telerik DPL MCP Server prompt that creates a PDF with a hyperlink
Usage Limits
A Telerik Subscription license is recommended to use the Telerik DPL AI Coding Assistant without restrictions. Perpetual license holders and trial users can make a limited number of requests per year.
Local AI Model Integration
You can use the Telerik DPL MCP server with local large language models (LLMs):
- Run a local model, for example, through Ollama.
- Use a bridge package like MCP-LLM Bridge.
- Connect your local model to the Telerik DPL MCP server.
This setup allows you to use the Telerik AI Coding Assistant without cloud-based AI models.