UX Crash Course: Prototyping

Summarize with AI:
Even if you don’t have access to advanced prototyping tools, there’s still a lot you can do. Let’s take a look at some different options for prototyping and how you can leverage them.
Earlier in the crash course series, we talked about storyboards and wireframes—so now, let’s tackle one of the other common ways to share and test your work: prototypes!
The primary difference between prototypes and other UI mockup approaches is the ability to interact with a prototype. Prototypes let the user (or anyone, really) click, explore and navigate through a UI design before it’s been coded.
Prototypes, of course, won’t have the full scope of functionality available in a complete, finished application. However, advanced prototyping tools can get us pretty darn close—closer than you might imagine! With options like Figma or Axure, you can create prototypes that accurately mimic 80-90% of full app behavior. This offers incredible value when it comes to both usability testing and communicating interaction behavior during the handoff process.
That being said, even if you don’t have access to those advanced tools, there’s still a lot you can do. Let’s take a look at some different options for prototyping and how you can leverage them.
Paper Prototyping

Look, I’ll be completely honest here: paper prototypes are not my favorite prototyping approach. But, they are still an option—and a great one for a few specific use cases—so I’d be remiss not to talk about them.
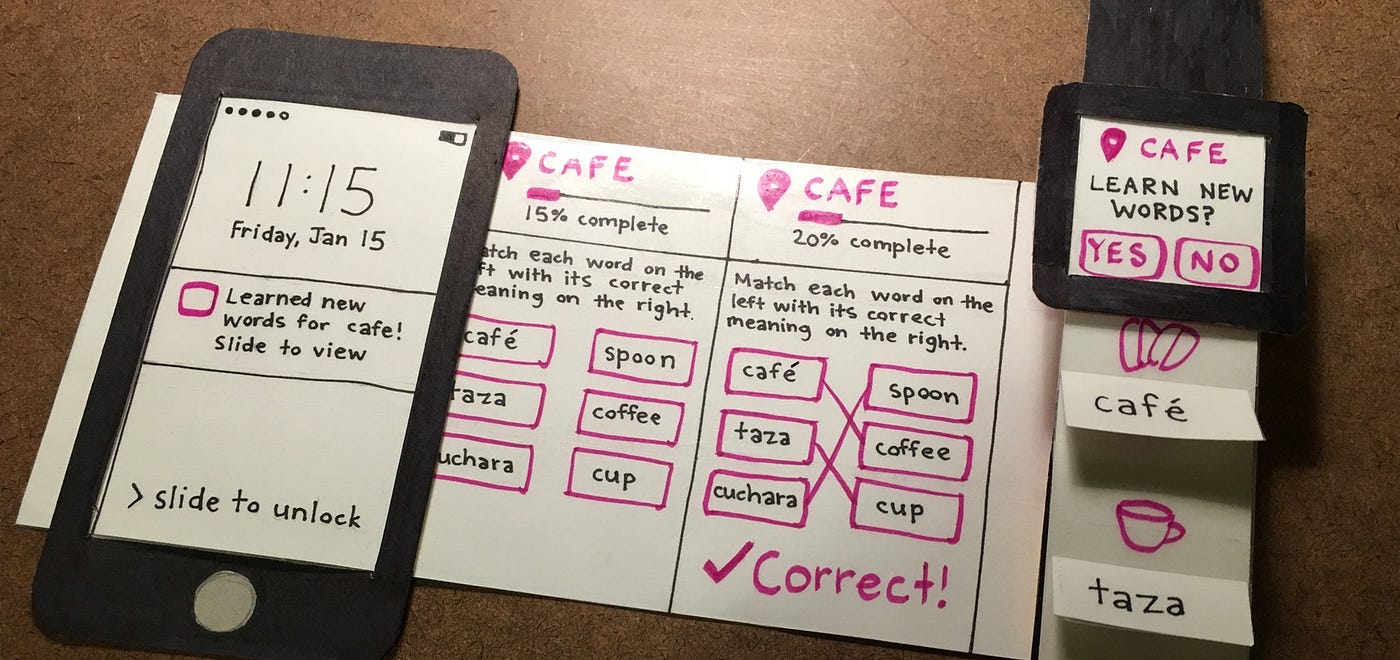
Paper prototypes are pretty much exactly what they sound like: a UI, drawn on paper, that allows for manual interaction. With a paper prototype, you need a facilitator there to handle the “behind the scenes” controls—to actually make the change happen when a user “clicks” a button.
Those changes might look like a new layer of paper added on top to simulate a modal, changing one piece of paper for another to simulate a page change, adding post-it notes to simulate form fields and more. This takes a little bit of imagination and suspension of disbelief for the user. Obviously, they can see you swapping out papers or expanding folded “accordion” components, so it’s not going to be a direct replica of how the final product will work.
There’s a very fair argument to be made that other tools—even basic ones, like Google Slides or PowerPoint—allow you to create more elaborate UI prototypes both faster and more easily. There is a grain of truth to that, assuming that you’re designing standard application UIs; most of the time you probably won’t reach for paper prototyping. However, there are a few situations in which it really shines.
First, it’s great for quickly communicating ideas with internal teams. In this case, you really don’t need something to look polished or behave perfectly—you’re just trying to get ideas out of your head and into someone else’s, so you can both be aligned on the concept. At this point in the design process, you’ll actually waste a lot more time using a prototyping tool because it will force you to think about typefaces, colors, sizing, layout, etc.—all of which just isn’t important when you’re only trying to explain the general app flow to someone. Click here, this happens. Swipe that, this happens. Paper prototypes are perfect for figuring out that kind of high-level interaction design and sharing it with others internally.
Paper prototypes are also useful for testing non-standard interfaces or devices. If you’re designing hardware—not just software—paper prototypes are great! Things like remotes, smart devices with small screens or other unique situations can be more easily and realistically mocked via paper and cardboard than on the computer. In this case, the amount of imagination required is actually less than if you were asking someone to interact with a 3D mockup on the computer. They can actually hold something, see if they can reach all the buttons with one hand, understand how it would fit in their pocket or handbag. Sure, it’s a niche—but an important one.
Slideware Prototypes

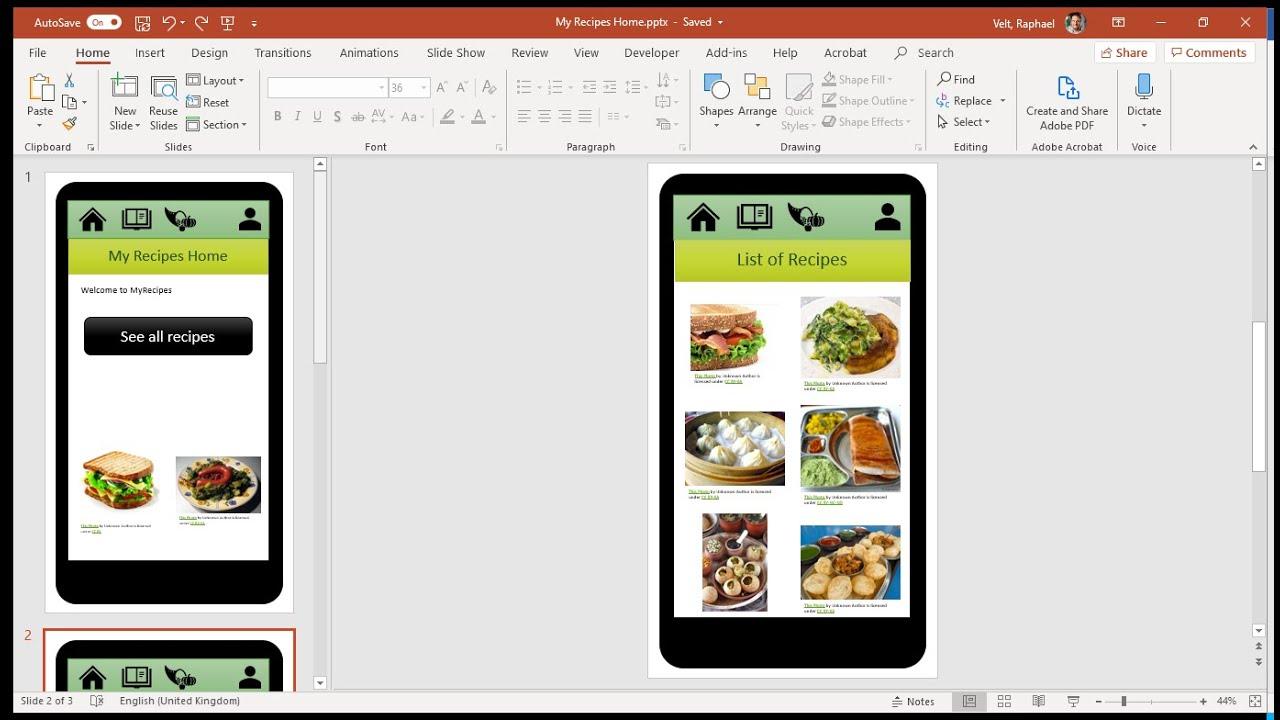
If you’re interested in creating digital prototypes, but don’t have access to or aren’t interested in the learning curve of prototyping-specific tools, that’s OK—you can still make great prototypes with slideware like Keynote, PowerPoint or Google Slides. Of course, these will naturally need to be simpler and more streamlined prototypes, but there’s nothing inherently wrong with that. In fact, just like with sketching, there can be some benefits to keeping things simple and not getting too caught up in “pixel-perfect” UI.
Prototypes in slideware can be created by using the slide linking feature. You’ll just create a simplified version of your UI on a slide, then link the specific element (like a button) that you want to navigate to a new slide. Obviously, this is pretty straightforward for basic things like page navigation—but it will start to get tricky when it comes to representing things like state changes.
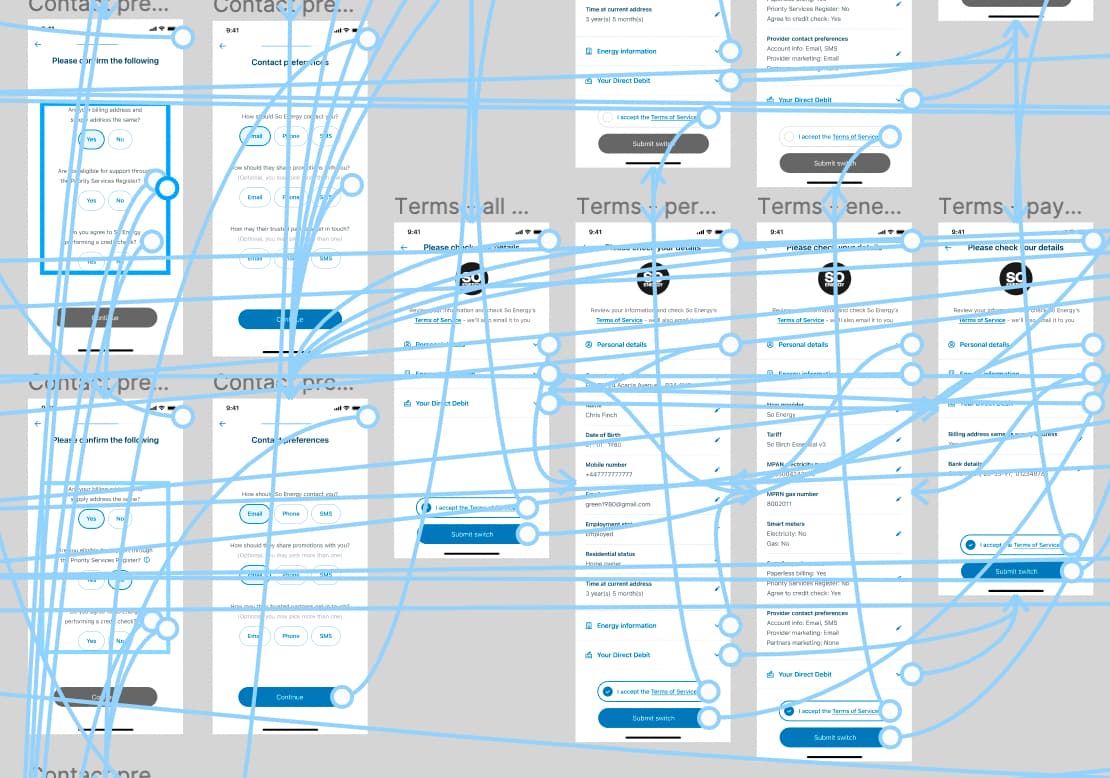
You can, of course, build all this out and link together slides in varying paths to represent different choices the user can make … but you’ll find that, before long, your slides start to number in the hundreds. This presents obvious challenges, especially if you want to make changes—updating a single word in a page headline could mean updating 30 or 40 slides.
Slideware prototyping is great for simple and smaller-scoped work. Things like working out the site map structure or prototyping a single feature can be easily done using this approach. It’s nice because it’s something that everyone has access to, and it can be easily shared—unlike the more advanced tools, which might require subscription seats or specialized software downloads.
It also has the benefit of being something that you already know how to use. Pretty much everyone knows their way around at least one common slideware program, so you don’t have a learning curve the way you would with a whole new piece of software. Sure, you’ll be somewhat limited to what you can create with the basic shapes and text tools, but websites are mostly made of rectangles anyway. You can create some very solid low- and medium-fidelity work using slideware, and it’s a great (and highly accessible) way to dip your toe into prototyping!
High-Fidelity Prototypes

If you want to create one of those prototypes that’s going to be nearly indistinguishable from the finished product, then you’re going to need to get comfortable in prototyping software.
The good news is that there are good options available, even if you don’t have the budget to pay for a fancy subscription service. Figma offers a limited free tier, while PenPot is completely open-source—both of these will allow you to add basic interactivity, like chaining pages together, toggling checkboxes, opening dropdowns, etc. When you’re feeling ready to invest in something a little more powerful, a Figma or Axure subscription will offer you tooling that allows you to create prototypes that could genuinely pass as finished applications and websites.
Prototypes made in actual prototyping software are going to be a lot easier and faster to create than those made in slideware. These prototypes will also be quicker to update and can include more advanced interactivity. Many prototyping software solutions also allow you to build in things like animations, transitions and some basic level of state management (remembering selections and updating UI based on user choices). Going into that level of detail will obviously require a fair bit of time and effort, but (depending on your project) might be well worth it.
When we put a high-fidelity rendering in front of a user, we can get a lot of the same feedback we might get during usability testing—before the product actually exists! This goes double for interactive prototypes, where users can really “use” the interface. This can give us invaluable information, validating our assumptions about what works, helping us catch mistakes and more.
There are also significant benefits if you’re working on a project that is important or extremely high-budget. In that situation, nervous stakeholders often prefer to see a highly detailed view before approving the move to development. If you’re the designer in this situation, making sure that the higher-ups have seen and signed off on the work before moving to the next phase can be a smart move. Get that approval in writing and make sure everyone is aligned before development begins!
Get Prototyping!
Many people imagine high-fidelity, incredibly detailed prototypes when they think about prototyping—but it’s good to keep in mind that you have other options! Prototyping offers immense benefits, regardless of how you go about it. While a high-fidelity prototype can be valuable, don’t assume that’s your only choice. Even if you don’t have the tools or experience to use prototyping software, you can still benefit from going through the process either on paper or using free slideware. Time to get prototyping!

Kathryn Grayson Nanz
Kathryn Grayson Nanz is a developer advocate at Progress with a passion for React, UI and design and sharing with the community. She started her career as a graphic designer and was told by her Creative Director to never let anyone find out she could code because she’d be stuck doing it forever. She ignored his warning and has never been happier. You can find her writing, blogging, streaming and tweeting about React, design, UI and more. You can find her at @kathryngrayson on Twitter.

