Using Mocks While Unit Testing ASP.NET Core Apps

Summarize with AI:
Usually implementing unit tests takes time and demands effort, but this task can become very simple with the help of Telerik JustMock. Check out this article on how to easily mock your code and make your tests pass successfully.
The use of mocks is indispensable for the creation of efficient unit tests. Through them, it becomes possible to simulate real scenarios, such as searching for records in a database or making a request to an external API. Telerik has a great tool to help create mocks—JustMock. See in this article how to implement unit tests mocked with JustMock in an ASP.NET Core application.
Using Mocks in Unit Tests
Unit testing is a subject that has gained a lot of attention lately—after all, through it we can verify that the code we write is working as expected. This guarantees that the logic behind the functionality covered by the test is actually functional and prevents many bugs from reaching the production environment. This is because the test runs the code and, if something is wrong, the test result will indicate it.
Although the use of automated tests is highly recommended in software projects, there are several situations that can make it difficult to use this practice.
Some aspects that usually make the use of automated tests difficult are:
- Dependencies between different pieces of software, such as the service layer that accesses the database layer.
- Integrations with partners that do not provide suitable environments for testing
To solve this problem, mocks are often used in order to create a simulation of the expected behavior.
Mocks are constructs that emulate the behavior of an object and make it possible to validate structures that depend on them, such as unit tests.
To assist in the implementation of mocking test techniques, there is a great option available at Telerik with JustMock. Fast, flexible and complete, JustMock is the perfect tool for creating unit tests in integrated .NET solutions.
This article will demonstrate how to implement efficient unit tests with the help of JustMock in a .NET 6 web application.
About the Project
The project will be a minimal API in .NET 6 that will persist some sample data when the database is generated through the EF Core commands and will have an endpoint to return the records. Then a test project with Telerik JustMock will be implemented with a unit test using mocks to cover the main parts of the code. Find the source code here.
Prerequisites
- Telerik JustMock Library
- Visual Studio 2022
- .NET 6 SDK
Creating the Project
To create the project in Visual Studio:
- Create a new project
- Choose “ASP.NET Core Web API”
- Name the project (“Warehouse” is suggested)
- Choose “.NET 6 (Long-term support)”
- Uncheck “Use controllers”
- Create
Dependencies
The following are the project dependencies:
<ItemGroup>
    <PackageReference Include="JustMock.Commercial" Version="2022.1.223.1" />
    <PackageReference Include="Swashbuckle.AspNetCore" Version="6.2.3" />
	  <PackageReference Include="Microsoft.EntityFrameworkCore" Version="6.0.3" />
	  <PackageReference Include="Microsoft.EntityFrameworkCore.Design" Version="6.0.3">
		  <PrivateAssets>all</PrivateAssets>
		  <IncludeAssets>runtime; build; native; contentfiles; analyzers; buildtransitive</IncludeAssets>
	  </PackageReference>
	  <PackageReference Include="Microsoft.EntityFrameworkCore.Sqlite" Version="6.0.3" />
	  <PackageReference Include="Microsoft.EntityFrameworkCore.Tools" Version="6.0.3">
		  <PrivateAssets>all</PrivateAssets>
		  <IncludeAssets>runtime; build; native; contentfiles; analyzers; buildtransitive</IncludeAssets>
	  </PackageReference>
  </ItemGroup>
Models
Create a “Models” folder and, inside it, the following class:
- Order
namespace Warehouse.Models
{
     public class Order
     {
         public int Id { get; set; }
         public string? ProductName { get; set; }
         public int Quantity { get; set; }
         public bool IsCompleted { get; set; }
     }
}
Creating the Db Context
The context class has the database settings. Through Entity Framework Core and SQLite, all database configuration and creation will be simplified.
So, create a new “Data” folder and inside it create the class below:
- ApplicationDbContext
using Microsoft.EntityFrameworkCore;
using Warehouse.Models;

namespace Warehouse.Data
{
    public class ApplicationDbContext : DbContext
    {
        public DbSet<Order> Orders { get; set; }

        protected override void OnConfiguring(DbContextOptionsBuilder options)
            => options.UseSqlite("DataSource = warehouse_db; Cache=Shared");

        protected override void OnModelCreating(ModelBuilder modelBuilder)
        {
            var seedData = Enumerable.Range(1, 11).Select(i => new Order
            {
                Id = i,
                Quantity = i * 10,
                ProductName = "ProductExample" + i,
            }).ToList();

            modelBuilder.Entity<Order>().HasData(
                seedData[0], seedData[1], seedData[2], seedData[3], seedData[4], seedData[5],
                seedData[6], seedData[7], seedData[8], seedData[9], seedData[10]);
        }
    }
}
In the Program.cs file add the following line of code:
builder.Services.AddDbContext<ApplicationDbContext>();
Running EF Core Commands
In order for the database to be created, it is necessary to run the commands below:
dotnet ef migrations add InitialModeldotnet ef database update
Services
The service class communicates with the context class; it will be accessed by the API endpoint. Create a “Services” folder and, inside it, the following class:
- WarehouseService
using Warehouse.Data;
using Warehouse.Models;

namespace Warehouse.Services
{
    public class WarehouseService
    {
        private readonly ApplicationDbContext _dbContext;

        public WarehouseService(ApplicationDbContext dbContext)
        {
            _dbContext = dbContext;
        }
        public virtual List<Order> GetOrders() => _dbContext.Orders.ToList();
    }
}
Program
Replace the code in the Program.cs file with the following:
using Warehouse.Data;
using Warehouse.Services;

var builder = WebApplication.CreateBuilder(args);

// Add services to the container.
// Learn more about configuring Swagger/OpenAPI at https://aka.ms/aspnetcore/swashbuckle
builder.Services.AddEndpointsApiExplorer();
builder.Services.AddSwaggerGen();
builder.Services.AddDbContext<ApplicationDbContext>();
builder.Services.AddScoped<WarehouseService>();

var app = builder.Build();

// Configure the HTTP request pipeline.
if (app.Environment.IsDevelopment())
{
    app.UseSwagger();
    app.UseSwaggerUI();
}

app.UseHttpsRedirection();

app.MapGet("/orders", (WarehouseService service) =>
{
    return Results.Ok(service.GetOrders());

}).WithName("GetOrders");

app.Run();
The code above:
- Adds dependency injection of ApplicationDbContext and WarehouseService classes.
- Creates an endpoint (/orders) to fetch the records in the database.
Running the Project
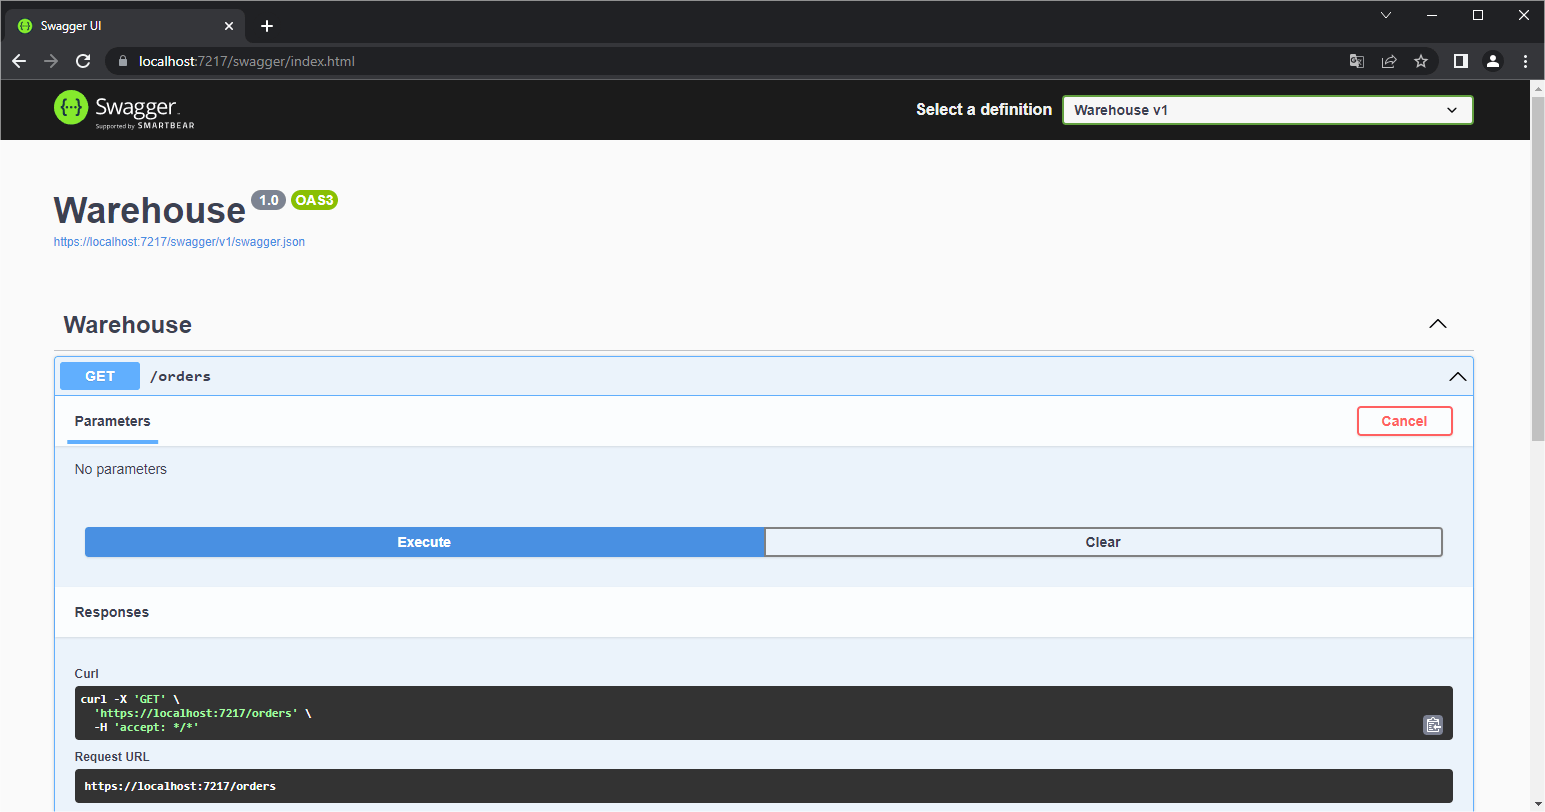
We will run the project just to verify that the application is working. If everything went well, the following Swagger panel will be displayed.
Implementing the Test Project
To create the test project, it is necessary to have the JustMock tool installed. Then, follow the steps below:
- Right-click on the solution project
- Add
- New Project
- Select “C# JustMock Test Project (.NET Core)”
- Name the project (“Warehouse.JustMockTest” is suggested)
- Create
Replace the existing content in the “JustMockTest” class with the code below:
using Microsoft.VisualStudio.TestTools.UnitTesting;
using System;
using System.Collections.Generic;
using System.Linq;
using System.Text;
using Telerik.JustMock;
using Warehouse.Data;
using Warehouse.Models;
using Warehouse.Services;

namespace Warehouse.JustMockTest
{
    /// <summary>
    /// Summary description for JustMockTest
    /// </summary>
    [TestClass]
    public class JustMockTest
    {
        [TestMethod]
        public void GetOrders_AreEqualsOne()
        {
            //Arrange
            var dbContext = new ApplicationDbContext();
            Mock.Arrange(() => dbContext.Orders).ReturnsCollection(FakeOrders());

WarehouseService service = Mock.Create<WarehouseService>();
            Mock.Arrange(() => service.GetOrders()).Returns(dbContext.Orders.ToList());

            //Action
            var query = from o in dbContext.Orders
                        where o.Id == 1
                        select o;

            var queryService = from s in service.GetOrders()
                               where s.Id == 1
                               select s;

            // Assert
            Assert.AreEqual(1, query.Count());
            Assert.AreEqual(1, query.First().Id);

            Assert.AreEqual(1, queryService.Count());
            Assert.AreEqual(1, queryService.First().Id);
        }

        public IList<Order> FakeOrders()
        {
            var order = new Order();
            order.Id = 1;
            order.ProductName = "Smartphone";
            order.Quantity = 53;
            order.IsCompleted = true;

            var fakeOrders = new List<Order>();
            fakeOrders.Add(order);

            return fakeOrders;
        }
    }
}
The code above:
- Defines a test class by the
[TestClass]attribute - Defines a test method by the
[TestMethod]attribute - Contains a method (
FakeOrders) that generates a list of false orders to be used in the Test execution method. It is good practice to create fake objects in separate methods, as they can be reused in other methods. - Contains a method “
GetOrders_AreEqualsOne” responsible for executing the test.
In the GetOrders_AreEqualsOne method, the context class mock is created, where the expected result is defined through the method (ReturnsCollection(FakeOrders()), despite the dbContext.Orders being used.
When the test is executed, no query is made in the database—after all, we are assigning the return value of the method (FakeOrders()) to this list, that is, mocking the class and the object returned by the method.
Then the service class method is being mocked too and returning the context data, which is false, as it was mocked.
Finally, we go through the lists and compare the result with the value 1, which means that the lists are not empty—they contain the mock value of the orders, which makes the test pass without any problem.
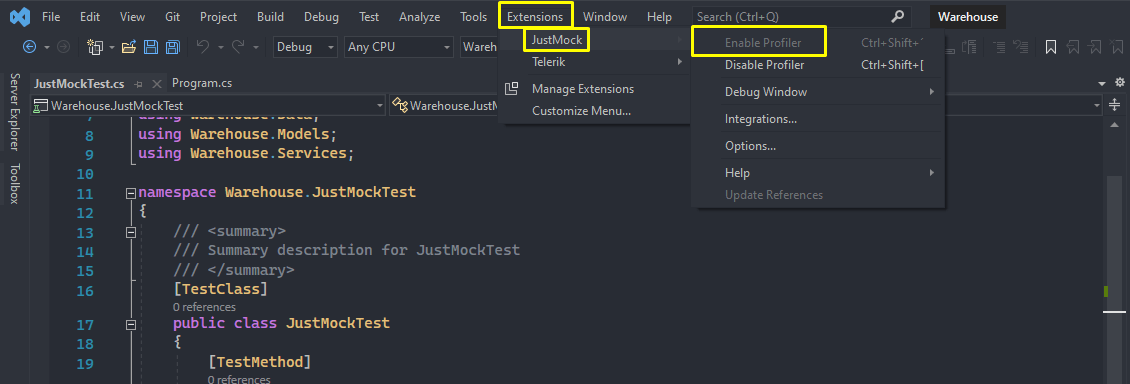
Important: You must enable JustMock in the project, otherwise when running the test an error will be displayed. To enable it, in Visual Studio, click on the “Extensions” button located at the top. Then “JustMock” and finally “Enable Profiler.”
Running the Unit Tests
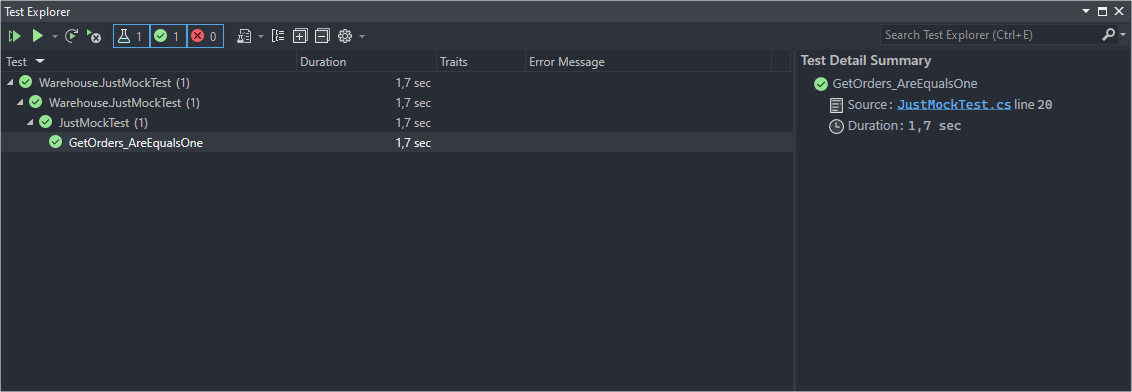
If you run the tests through Visual Studio Test Explorer, you will see that the test has passed, as shown in the image below:
Conclusion
Creating unit tests can become a simple task with the help of JustMock. In this article, we created a simple app that has an endpoint to retrieve some records from the database. Then we created a test project with JustMock and mocked all the main classes and methods present in the code, ensuring that they worked as expected.
There are many other possibilities using JustMock—feel free to explore them.


