
Using Kendo UI with Telerik UI for ASP.NET Core: Tag vs. HTML Helper Syntax

Summarize with AI:
Learn how to use the HTML Helpers and Tag Helpers from Telerik UI for ASP.NET Core inside your JavaScript project with Kendo UI.
It is easy to determine what Progress Telerik UI for ASP.NET Core is from its name. It is a component library for .NET web developers. But have you heard of Kendo UI? It is a valuable tool for web developers who need to create UI for their apps and it works seamlessly with ASP.NET Core.
Progress Kendo UI is a collection of four JavaScript UI component libraries for Angular, React, Vue and jQuery. While each is built natively for their respective frameworks, the APIs and development style are as similar across frameworks as possible.
You learn it once and use it in several project types like ASP.NET Core, jQuery, React or Vue. However, there are differences in syntax between technologies that I will demonstrate in this post. I am sharing the differences between HTML and Tag Helper development syntax. Both are easy to understand, and you can pick the one that is better for your team.
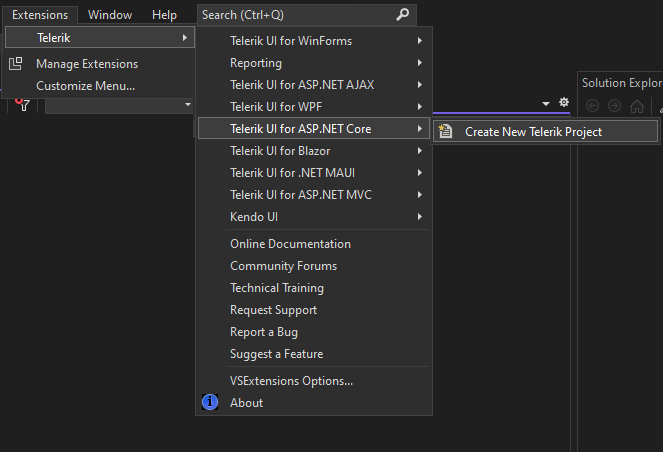
When you install Telerik UI for ASP.NET Core, you get useful Visual Studio add-ins that will help boost your development productivity. To start, you can create a New Telerik Project in Telerik UI for ASP.NET Core from the Extension menu in Visual Studio.
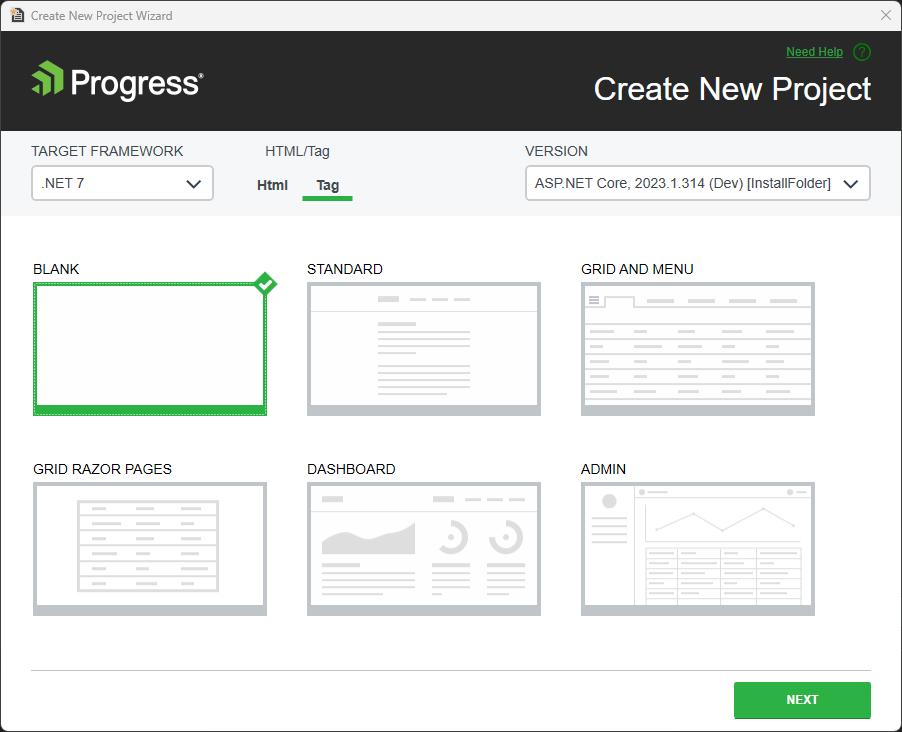
Here you choose either a template or a blank solution. At this moment, you can choose for the project what helper your application will use: HTML or Tag.
What are the Differences Between HTML Helpers and Tag Helpers?
Look at this piece of code from the same template project, “Grid and Menu,” using HTML and Tag Helpers:
HTML Helpers:
@(Html.Kendo().Button().Name("PrimaryButton").ThemeColor(ThemeColor.Primary).Content("Primary Button"))
Tag Helpers:
<kendo-button name="PrimaryButton" theme-color="ThemeColor.Primary class="textButton">Primary Button</kendo-button>
Your team can decide which syntax is more comfortable for the solution you choose to start. For example, the Tag Helper could look at first glance a classic way, but technically they will give you the same result.
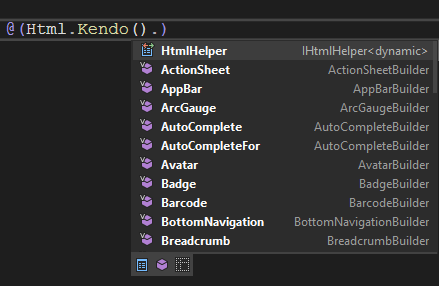
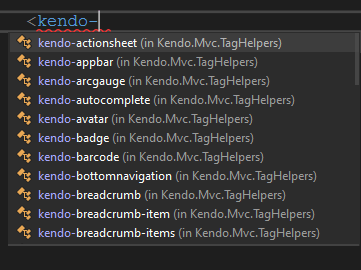
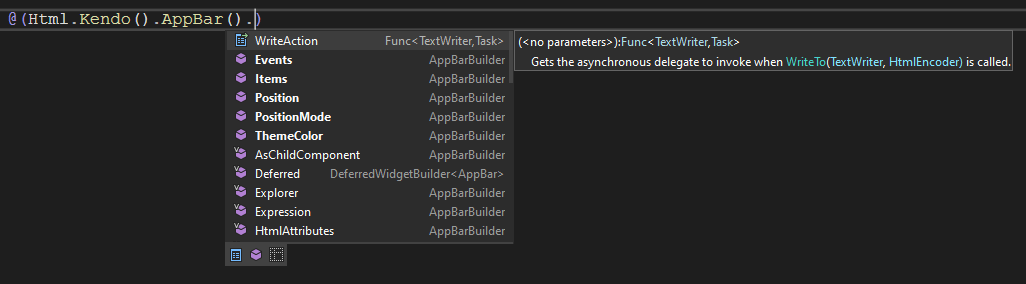
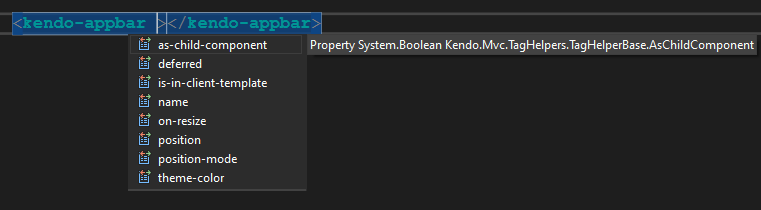
When you start a new HTML/Tag Helper and press CTRL + Space, the Visual Studio IDE shows a menu with the options for autocomplete:
HTML Helpers:
Tag Helpers:
Autocomplete for the properties:
HTML Helpers:
Tag Helpers:
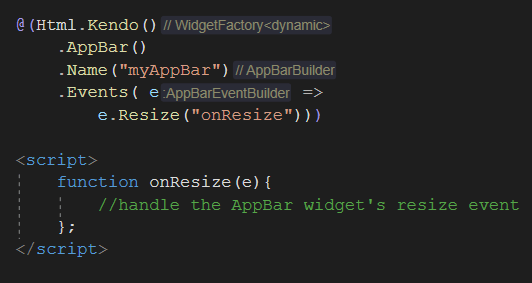
Handling events is slightly different, and HTML Helpers allow you to code inside it.
HTML Helpers:
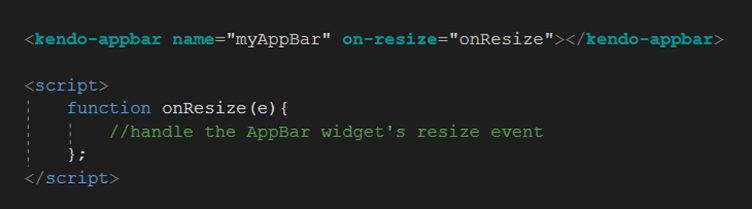
Tag Helpers:
With HTML Helpers, you can code inside events doing whatever you need and validate whether it will be fired or just disabled. However, there is a significant difference in your solutions that manage events for components.
The sample below demonstrates that e.Resize() has a pre-condition to raise it.

For example, to understand the possibilities of coding, check that the column can be loaded under the condition hideCity.
@(Html.Kendo().Grid<TelerikAspNetCoreApp1.Models.OrderViewModel>()
    .Name("grid")
    .Columns(columns =>
    {
        columns.Bound(p => p.OrderID).Filterable(false);
        columns.Bound(p => p.Freight);
        columns.Bound(p => p.OrderDate).Format("{0:MM/dd/yyyy}");
        columns.Bound(p => p.ShipName);

        if (this.ViewData.TryGetValue("hideCity", out var hideCity))
        {
            if ($"{hideCity}".Equals("0"))
            {
                columns.Bound(p => p.ShipCity);
            }
        }

    })
    .Pageable()
    .Sortable()
    .Scrollable()
    .Groupable()
    .Filterable()
    .HtmlAttributes(new { style = "height:550px;" })
    .DataSource(dataSource => dataSource
    .Ajax()
    .PageSize(20)
    .Read(read => read.Action("Orders_Read", "Grid"))
    )
    )
The sample above demonstrates that you can run code inside a column definition for any purpose.
Here you have the best way to hide a column: https://docs.telerik.com/kendo-ui/knowledge-base/grid-show-edit-and-delete-buttons-conditionally.
public ActionResult Index()
{
    ViewBag.IsAdmin = true;
    return View();
}

@(Html.Kendo()
  .Grid<DetailGrids.Models.Inventory>()
  .Name("InvGrid")
  .Columns(columns =>
  {
    columns.Bound(p => p.OnOrder).Width(125).Hidden(ViewBag.IsAdmin);
    columns.Command(command => { command.Edit(); command.Destroy(); }).Hidden(!ViewBag.IsAdmin);
  })
)
Conclusion
You need to check with your team which is the best choice for your development—HTML Helpers or Tag Helpers. It would be best if you analyzed with your team the requirements for your project and choose wisely.
References
Each of the above comes with a free 30-day trial. Or sample everything with Telerik DevCraft. Try it for free today!

Jefferson S. Motta
Jefferson S. Motta is a senior software developer, IT consultant and system analyst from Brazil, developing in the .NET platform since 2011. Creator of www.Advocati.NET, since 1997, a CRM for Brazilian Law Firms. He enjoys being with family and petting his cats in his free time. You can follow him on LinkedIn and GitHub.
Related Posts
Comments
All articles
Topics
Web MobileMobile
Desktop
Design
Productivity
People
