
Updating to Angular's HttpClient for Simpler HTTP Calls and More

Summarize with AI:
HttpClient introduces a simpler way to make HTTP calls and a whole bunch of new features. In this post we'll dig into the benefits and how you can update your app.
One of the best things about Angular is that it's a constantly-evolving ecosystem. The Angular team works hard to listen to users and incorporate feedback into new development - all the while being mindful of not adding breaking changes too quickly. The new HttpClient is a great example of this.
What's New?
Added in Angular 4.3, HttpClient introduces a simpler way to make HTTP calls and a whole bunch of new features. It starts with the HttpClientModule, which is in @angular/common/http. This new module replaces HttpModule (and thus no need for @angular/http anymore!). HttpClient features a simplified API, improved testability features, typed request and response objects, streamlined error handling, and much more. There are also improved Observable APIs. No need to map your response to JSON anymore - HttpClient does this for you! Finally, one of the best new features is the return of HTTP interceptors, which were extremely popular in AngularJS for things like adding authentication to outgoing requests. For more detailed information on the new features, you can read the updated official documentation.
Luckily, the old Http still exists alongside of the new HttpClient in Angular 5, which lets us update our services incrementally. To that end, let's learn how to update a service to use the new HttpClient!
The Sample Project
To follow along, clone the sample project for my course, Upgrading AngularJS (a comprehensive video course all about upgrading from AngularJS to Angular). You can check out this commit:
git checkout 6e09b071be9badd5bf3d0140f4a76c7ee0e880f6At this point in the project, we're using Angular 4. You can either make sure that Angular 4.3+ installs for you (you might need to tinker with the package.json to be sure), or you can copy and paste the most recent package.json from the project to use Angular 5.
Then, just run npm or yarn install inside of both the public and server folders to get started.
Switch to the New HttpClientModule
Let's start using the new HttpClient in our project.
Import into NgModule
In order use the new HttpClient, we first need to import it into our NgModule. Let's open up app.module.ts. In a large application, we'd want to add the new module alongside the old one so that we don't break anything. Since this is a small demo application with only a few services, we're just going to replace HttpModule with the new HttpClientModule on line 10. We'll also change the location of the import to @angular/common/http. It will look like this:
import { HttpClientModule } from '@angular/common/http';Remove the Old Package
Since we're just switching cold, let's also use this time to update our package.json file. Again, if you are migrating a large application, you'd probably want to do this incrementally and not swap it out all once. All we need to do is go to line 19 and delete our dependency on @angular/http.
That's all we need to do to start using the new HttpClient, so let's get started updating our services!
Updating a Service
Now that we're using the new HttpClient in our project, let's work on updating our CustomerService (/customers/customer.service.ts). You'll find that the new HttpClient is a lot simpler and easier to use. To update this service, we only have to do a few things.
Update the Import
First, we need to import HttpClient and ditch the Response object on line 2. Then we need to change our import from @angular/http to @angular/common/http. We'll end up with this:
import { HttpClient } from '@angular/common/http';Update the Constructor
Next, we can update our constructor. First, let's change our instance of Http on line 12 to HttpClient. We can leave the name of the instance variable as Http. We can also clean up the constructor a little bit. Since we're using the private keyword, we don't have to also set this.http equal to Http. The private keyword does this for us, so we can delete line 13 altogether. Here's our finished constructor:
constructor(private http: HttpClient) {}Update the Calls
Now let's take advantage of the simpler API the HttpClient provides. First, we can delete .map from getCustomers and getCustomer. The new HttpClient no longer requires us to map our response to JSON - it just does this for us! So, we can delete lines 16 and 20. Our calls will look like this so far:
getCustomers(): Observable<Customer[]> {
  return this.http.get('/api/customers');
}

getCustomer(id): Observable<Customer> {
  return this.http.get(`/api/customers/${id}`);
}
Similarly, we can also delete the .json on line 25, so postCustomer will look like this:
postCustomer(customer): Promise<any> {
  return this.http.post('/api/customers', customer)
                  .toPromise()
                  .then((data) => data);
}
Specify Response Types
If you're using Visual Studio Code, you should see some red squiggles indicating that IntelliSense is mad at us. If you hover over the red squiggles, you can see an error that says that type Observable<Object> is not assignable to type Observable<Customer>.
Luckily, the HttpClient has a nice, simple way to get rid of this: we can add a response type specification to our calls. On line 15, we can add <Customer[]> right after get. We can do the same thing on line 19 but with <Customer>. This syntax lets us specify the type of the response object. Pretty handy, huh? The finished calls look like this:
getCustomers(): Observable<Customer[]> {
  return this.http.get<Customer[]>('/api/customers');
}

getCustomer(id): Observable<Customer> {
  return this.http.get<Customer>(`/api/customers/${id}`);
}
Clean Up Imports
Finally, let's do one last bit of cleanup. Thanks to the simpler API, we can delete our import of the map operator on line 6.
Check That It Works
This is all we need to do to update our CustomerService! Let's be sure that everything's still working.
To start up the Express server, which is the API serving up our data, open up a terminal and run:
cd server && npm startThis will navigate to the server folder and start our API server.
To run the Webpack development server, open up a second terminal and run:
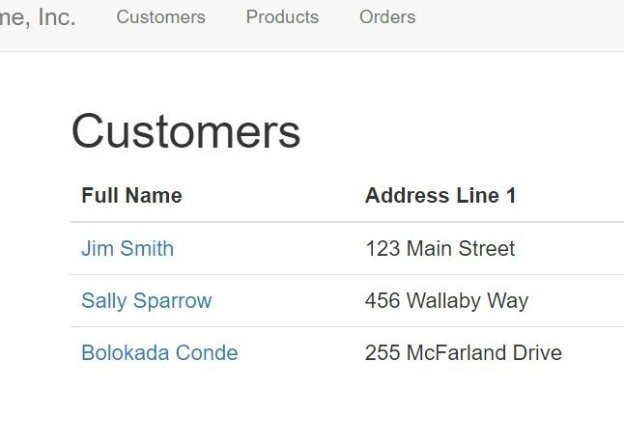
cd public && npm run devYou'll see that the application still bundles just fine. You can now switch over to the browser and head over to localhost:9000. If you click on the the Customers tab, you'll see that we still get our customers data:
Fantastic.
Now, of course, since we swapped out the new HttpClient instead of the old one, if we try to click the products tab we'll get an error in the console. That's because there is no more HttpModule inside of the application, and we expected that. Since this update was so easy, though, let's go ahead and update our OrderService and ProductService as a way to practice remembering these steps.
Update the Order Service
Let's start with the OrderService (/orders/order.service.ts). This service is very similar to the CustomerService.
First, let's just change our import statement to use HttpClient, and add the /common:
import { HttpClient } from '@angular/common/http';Next, we'll change our instance of Http in the constructor to HttpClient, and delete line 13 again:
constructor(private http: HttpClient) { }Now let's get rid of our instances of .map and .json. So, we'll delete the .json off of lines 17 and 28 (getOrders and getOrdersByCustomer, which are still promises), and we'll delete the .map from lines 22 and 32 (getOrder and postOrder, which are observables).
That just leaves specifying our types. On lines 15 and 25, we'll add our type <Order[]> after get. On lines 21 and 31, we'll specify <Order> after get and post. Our finished calls will look like this:
getOrders(): Promise<Order[]> {
  return this.http.get<Order[]>('/api/orders')
                  .toPromise()
                  .then((response) => response);
}

getOrder(id): Observable<Order> {
  return this.http.get<Order>(`/api/orders/${id}`);
}

getOrdersByCustomer(customerId): Promise<Order[]> {
  return this.http.get<Order[]>(`/api/customers/${customerId}/orders`)
                  .toPromise()
                  .then((response) => response);
}

postOrder(order): Observable<Order> {
  return this.http.post<Order>('/api/orders', order);
}
Finally, let's just delete our import of map from the top of our file.
If you hop back over to the browser, our Orders tab should now be working:

Great! Let's finish this off by updating the ProductService.
Update the Product Service
We just have one more service - the ProductService (/products/product.service.ts). By now, you're probably an old pro at this!
Just like before, let's first fix our import on line 2:
import { HttpClient } from '@angular/common/http';Then update our constructor:
constructor(private http: HttpClient) {}Do you remember what's next? That's right - we can delete our maps and jsons, so we can delete lines 16 and 21. Then remove the .json on line 25.
In this service, we're only explicitly specifying a return type on our getProduct call, so on line 19, we'll specify a type of <Product> after get . Our calls look like this now:
getProducts() {
  return this.http.get('/api/products');
}

getProduct(id): Observable<Product>{
  return this.http.get<Product>(`/api/products/${id}`);
}

postProduct(product){
  return this.http.post('/api/products', product)
                  .toPromise()
                  .then((response) => response);
}
If you've kept your Webpack dev server running in the background, you'll notice an error right now in your terminal:
Type object is not assignable to type anyI have to keep you on your toes, right? In turns out we actually need to specify the type <any> after our get on line 14. By default, the HttpClient methods return plain objects. Here's the finished getProducts call:
getProducts() {
  return this.http.get<any>('/api/products');
}
Finally, let's just remove our import of the map operator from line 6.
Let's go check out the browser and click on the Products tab. You should now see this:

You could also click on the Orders tab and select an Order to see the Order Detail screen. The Order Detail screen uses information from all three services, so it's a great final test. Let's check out Sally Sparrow's first order:

Yes! Everything is working. Nice job!
You can see all of the final code in this commit on the repo.
Conclusion
Angular's new HttpClient is a great improvement on the old Http. A simpler interface and new features make it a joy to write our data services. In this article, you've learned how to take services and update them to take advantage of all of these improvements. If you want to go deeper in understanding the new API and even how to test these services, be sure to check out the official documentation.
See you next time!

Sam Julien
Sam Julien is an Angular teacher and developer and the founder of the comprehensive video course UpgradingAngularJS.com. He's also the co-organizer of Angular Portland. When he's not coding, you'll find Sam outside hiking and camping like a good Oregonian.