Real-Time Geofencing and Location Monitoring Using Socket.io and Vue

Summarize with AI:
In this tutorial, we'll create an application that monitors a user's location and sends updates in real time using Vue and Socket.io.
Geofencing can be defined as the use of GPS or RFID to trigger pre-programmed actions when a mobile device or tag enters or exits a virtual boundary set up around a geographical location. This virtual boundary can be defined as a geofence.
Vue is a frontend web development framework for developing a range of applications that can be served on multiple platforms. It has a huge ecosystem and a dedicated following. Alongside its simple integration, detailed documentation and flexibility, Vue lets you extend the template language with your own components and use a wide array of existing components.
To follow this tutorial, a basic understanding of Vue and Node.js is required. Please ensure that you have Node and npm installed before you begin.
We’ll be creating an application that tracks the location of guests within an exclusive island. Our application notifies the admins when an active guest is exiting the boundaries of the ranch and also when their location is updated.
Here’s a screenshot of the final product: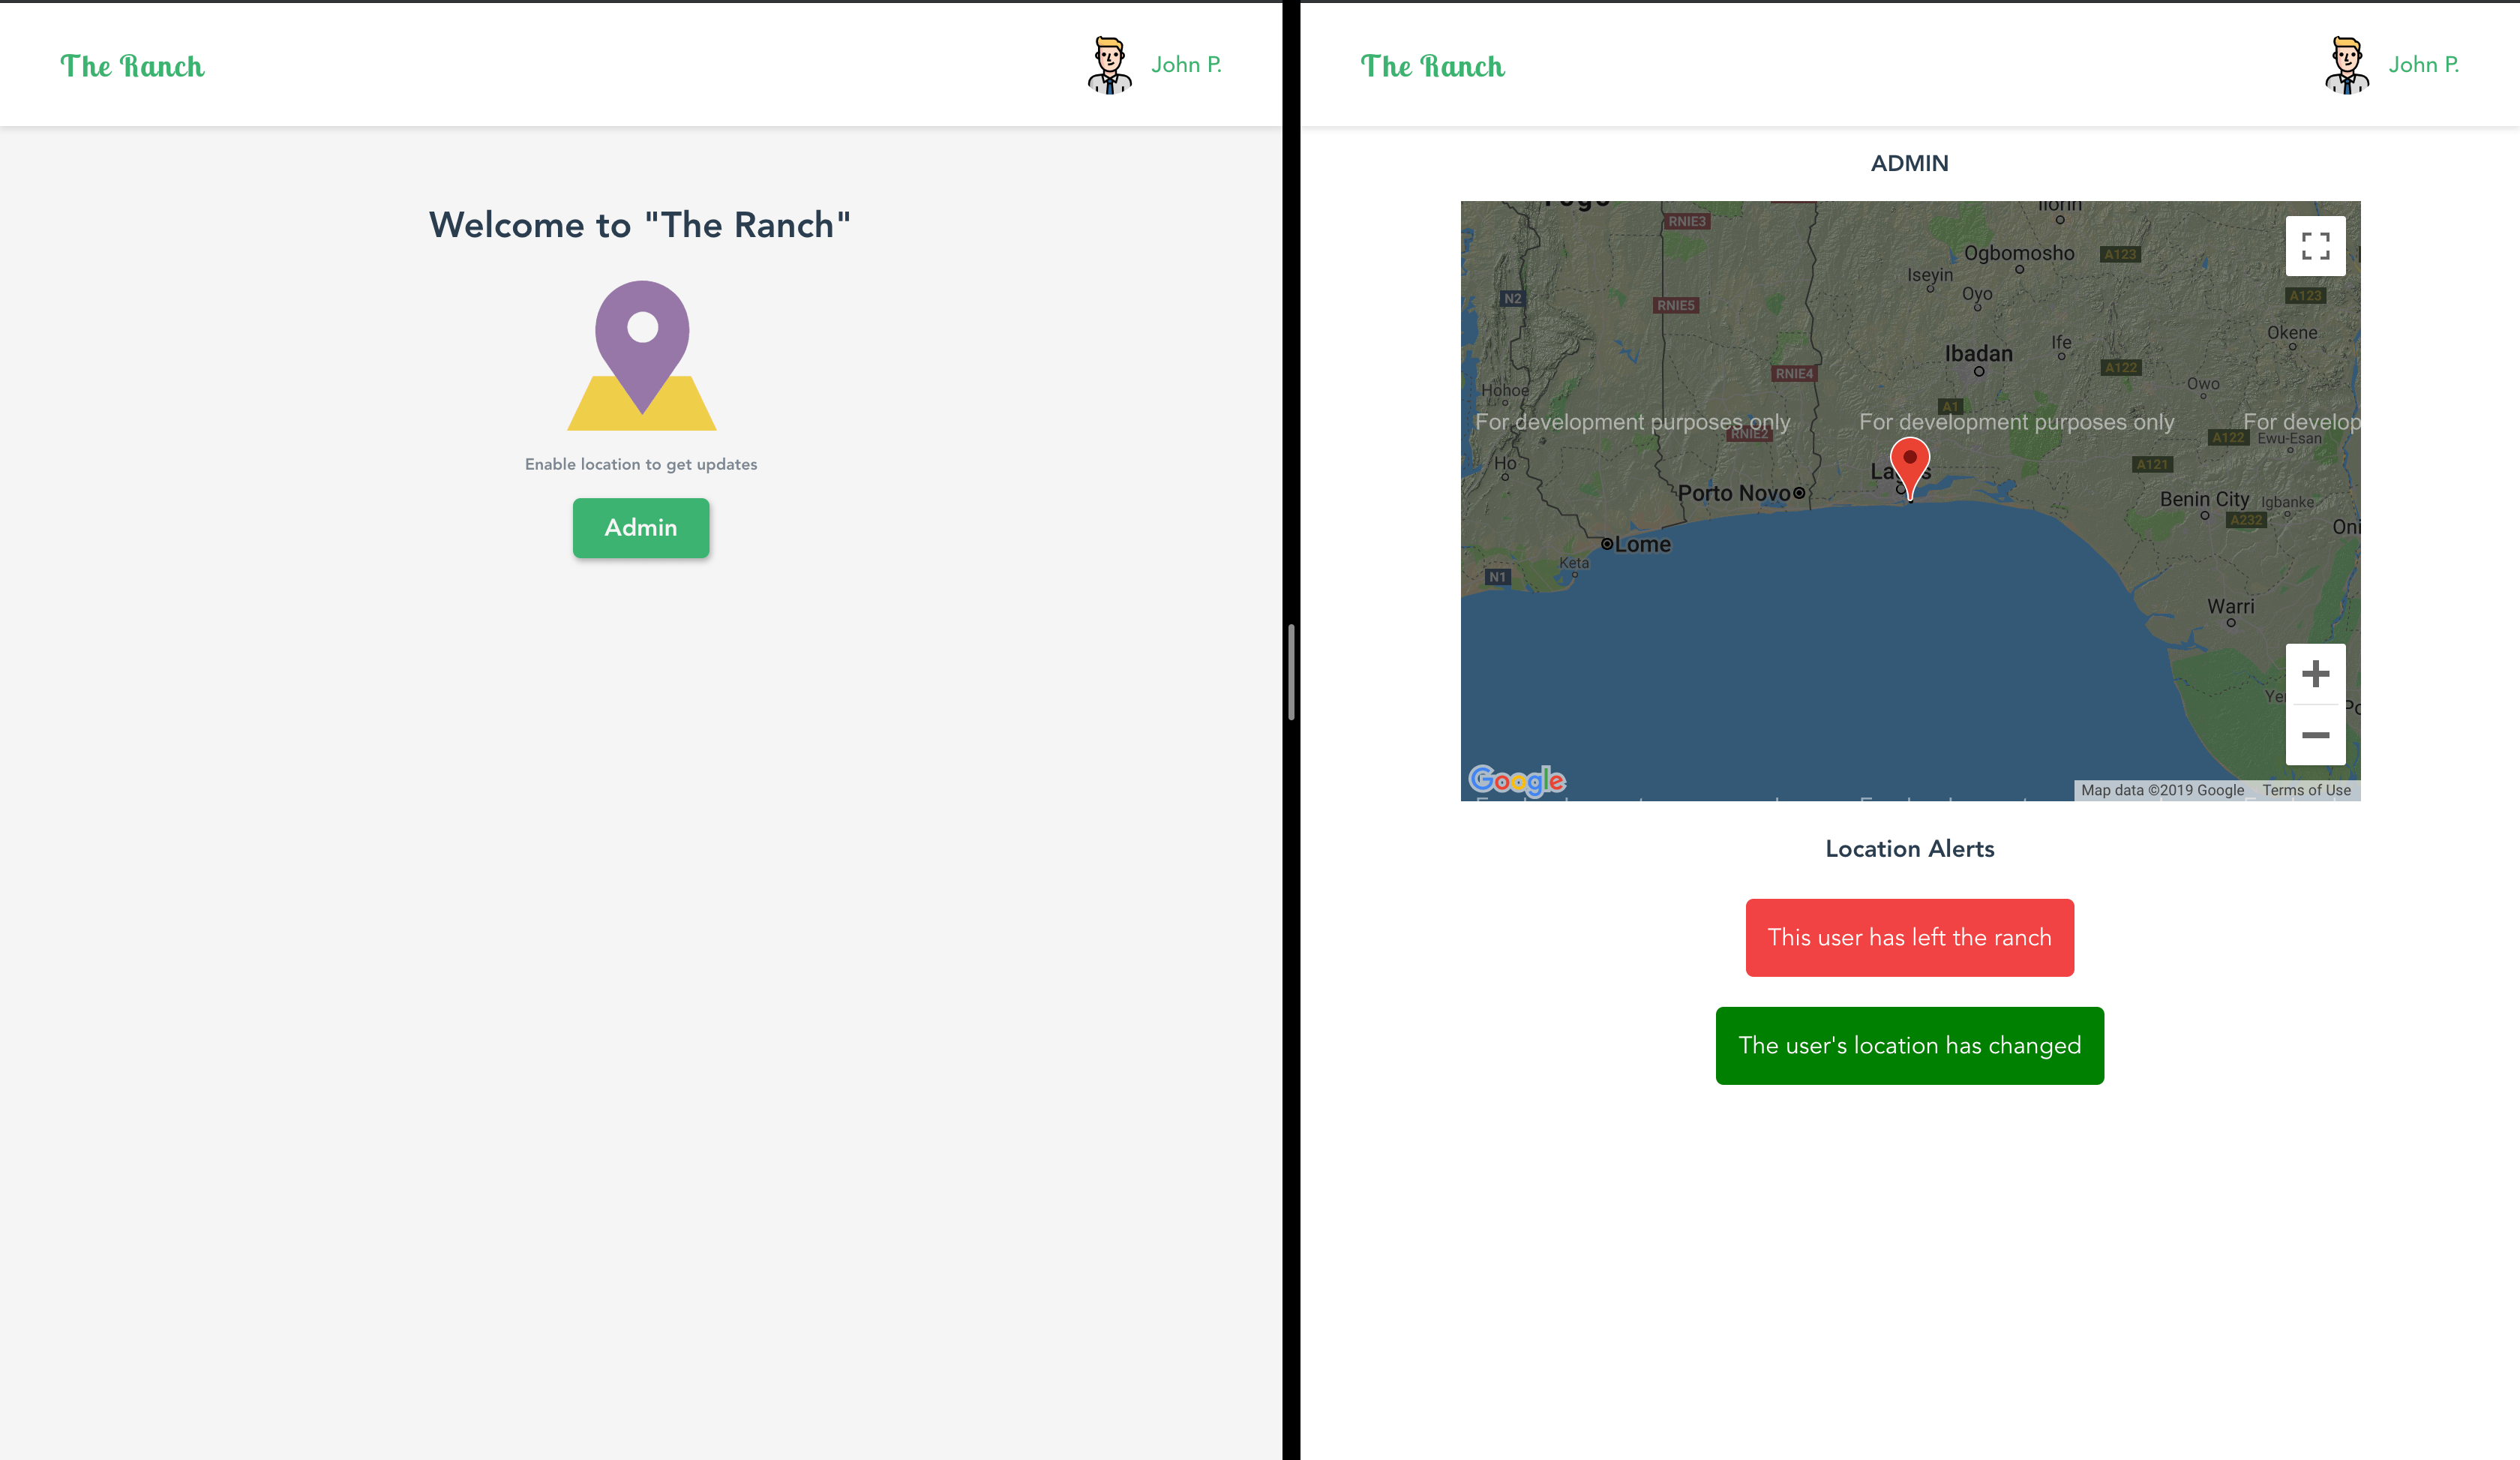
Initializing the Application and Installing Project Dependencies
To get started, we will use the vue-cli to bootstrap our application. First, we’ll install the CLI by running npm install -g @vue/cli in a terminal.
To create a Vue project using the CLI, we’ll run the following command:
vue create vue-geofencing
After running this command, rather than selecting the default configuration, we’ll opt for the manual setup. Within this setup, we’ll check the router and CSS pre-processor options. Follow the screenshot below: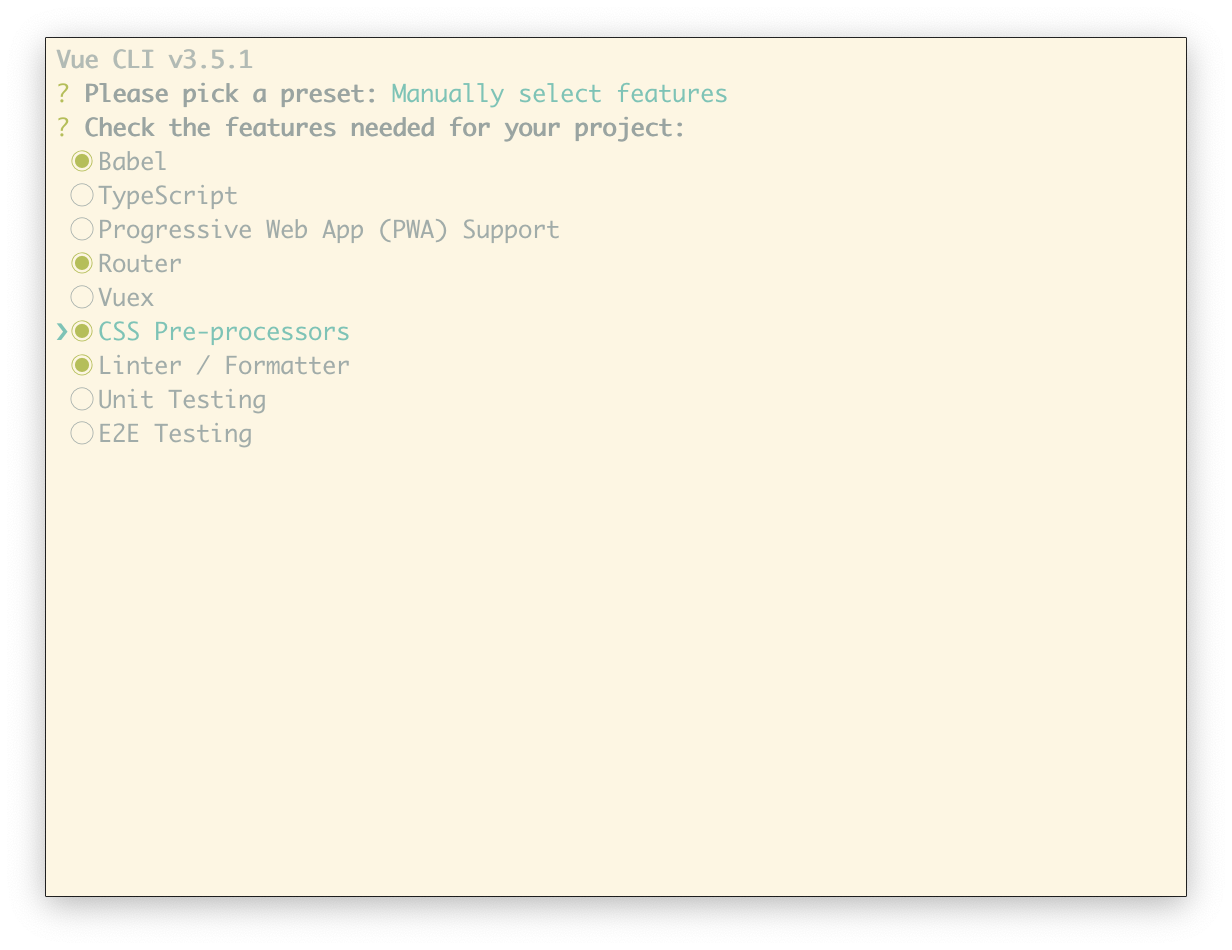
The rest of the prompts can be set up as they best suit you.
Next, run the following commands in the root folder of the project to install dependencies.
    // install dependencies required to build the server
    npm install express socket.io

    // frontend dependencies
    npm install vue-socket.io vue2-google-maps
Start the app dev server by running npm run serve in a terminal in the root folder of your project.
A browser tab should open on http://localhost:8080. The screenshot below should be similar to what you see in your browser: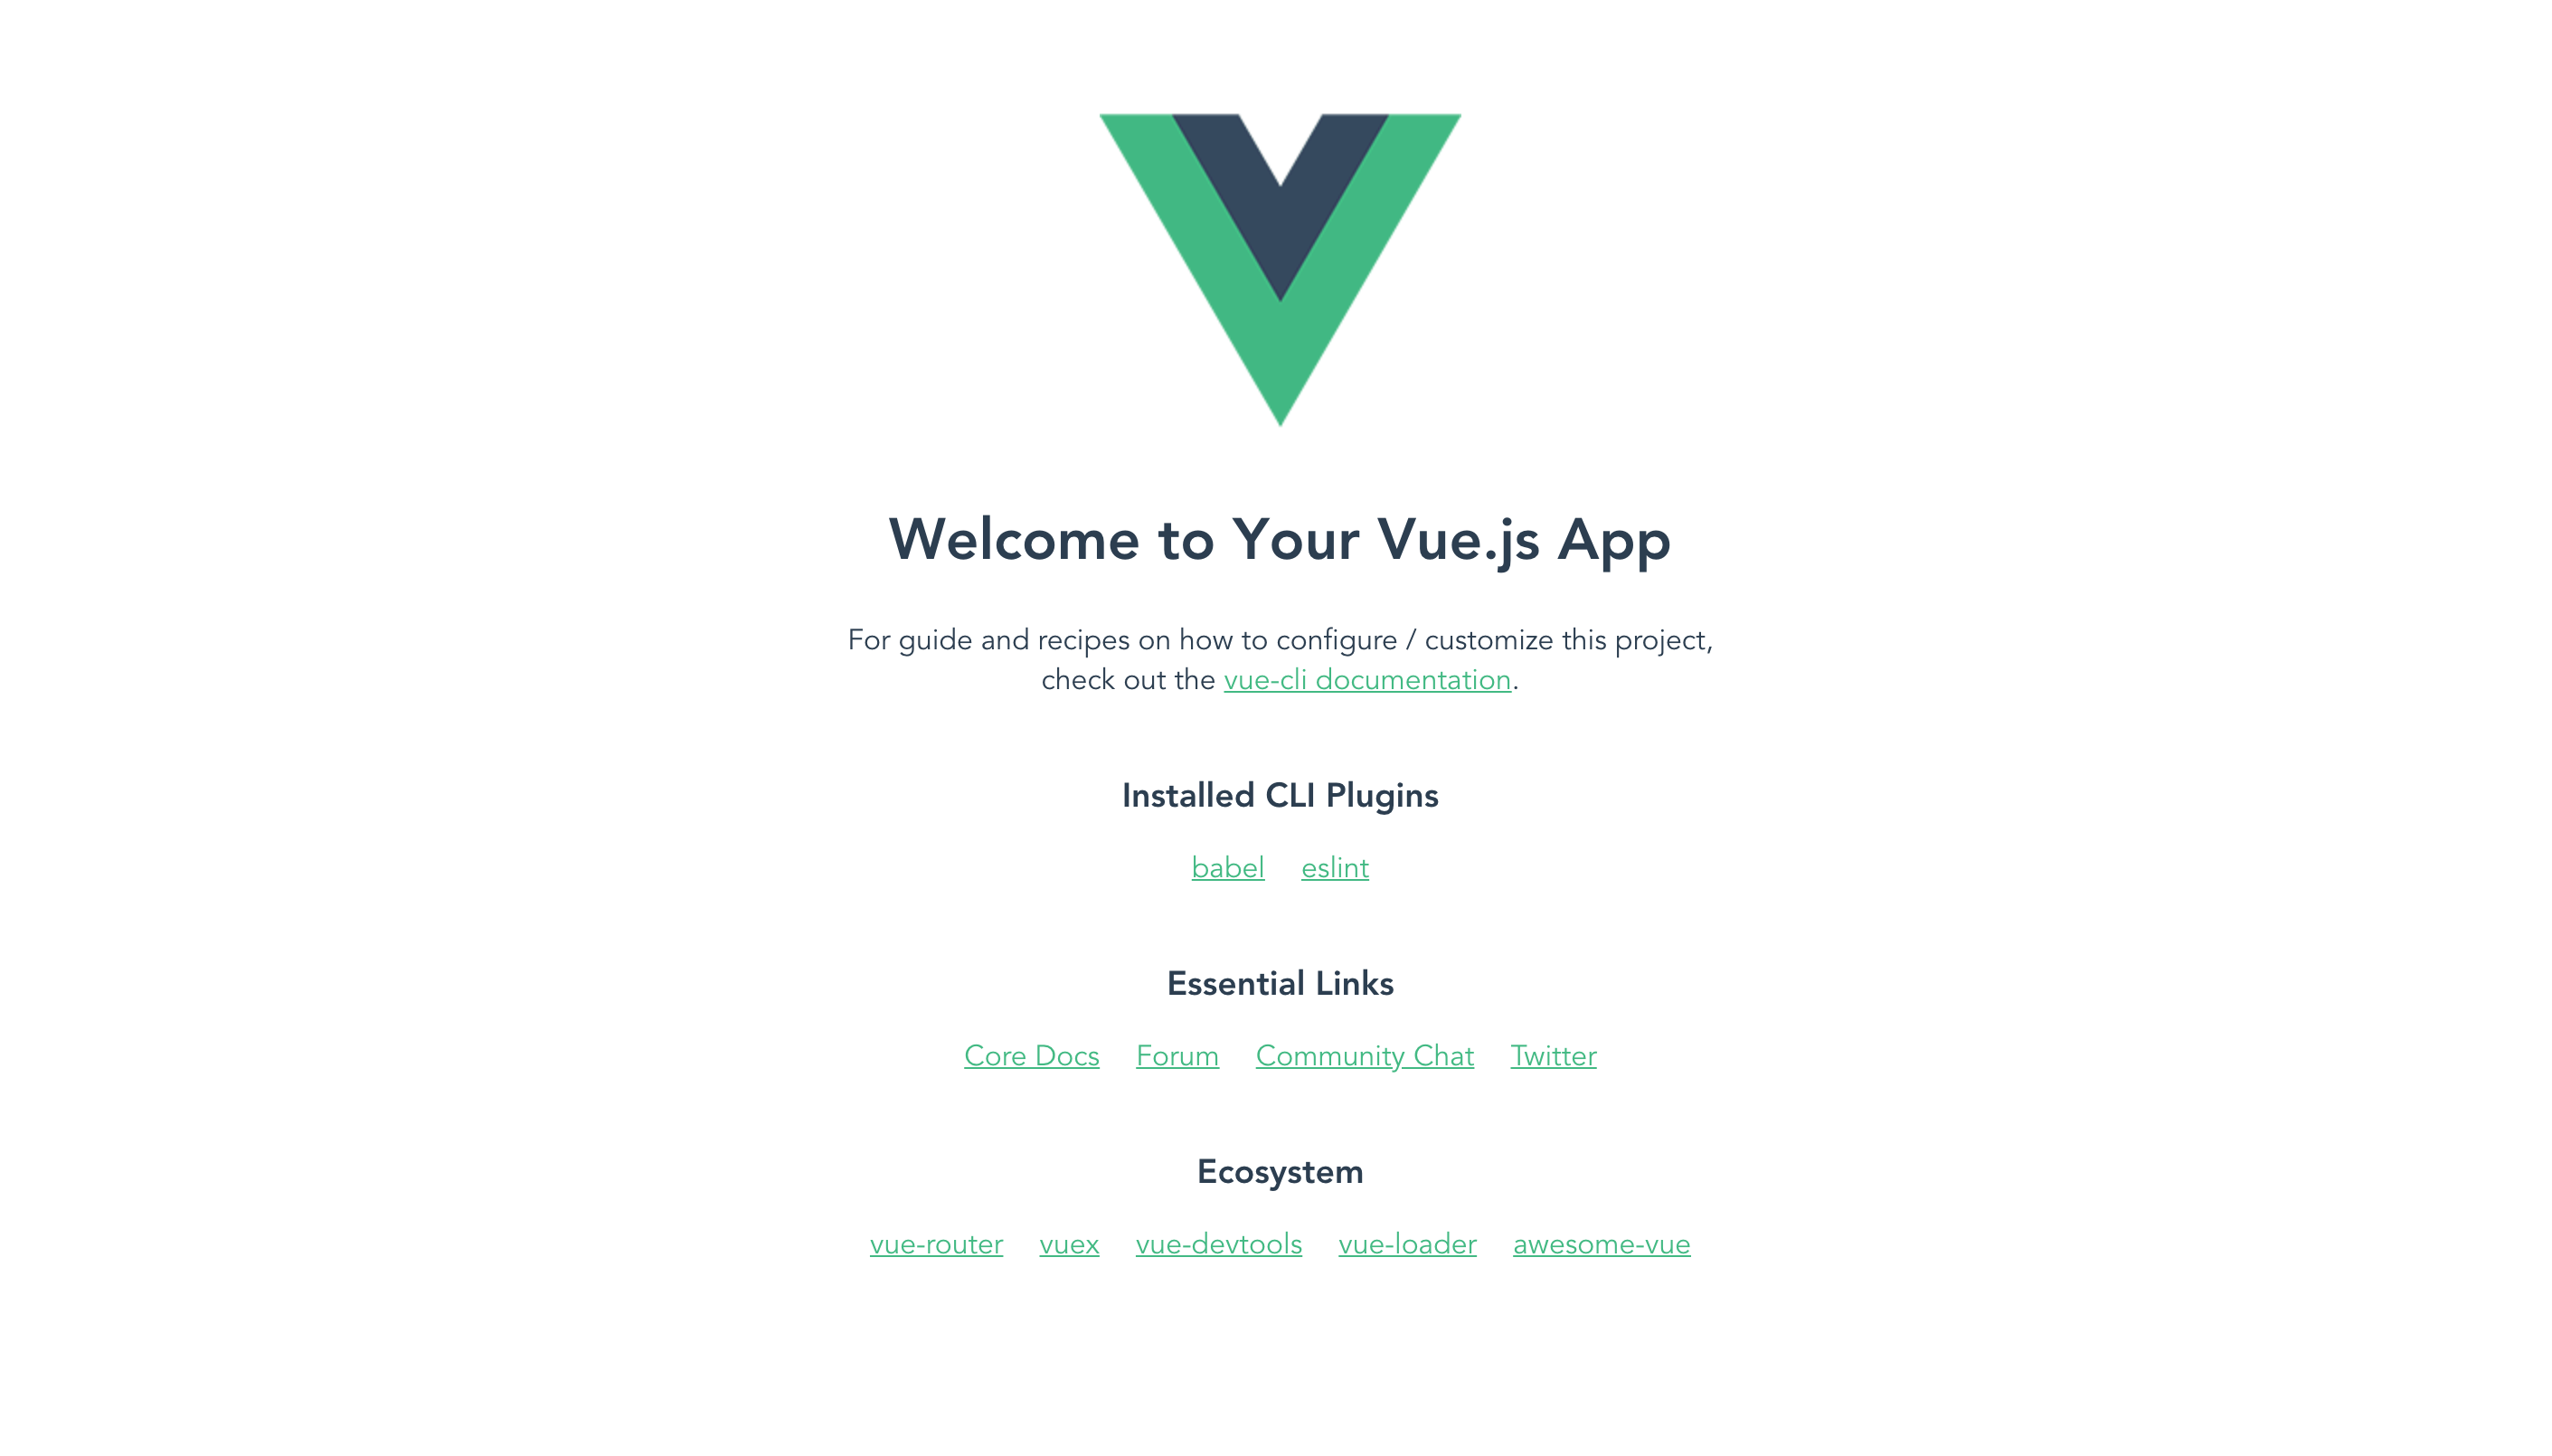
Building Our Server
We’ll build our server using Express. Express is a fast, unopinionated, minimalist web framework for Node.js.
Create a file called server.js in the root of the project and update it with the code snippet below:
    // server.js
    const express = require('express');
    const app = express();
    const http = require('http').createServer(app);
    const io = require('socket.io')(http);
    const port = process.env.PORT || 4001;

    io.on('connection', async (socket) => {
      socket.on('ping', (data) => {
        socket.emit('newLocation', data);
      });
    });

    http.listen(port, () => {
      console.log(`Server started on port ${port}`);
    });
The setup here is pretty standard for Express applications using Socket.io. There’s no problem if you have no prior knowledge of Socket.io, as we’ll only be making use of two methods: emit for dispatching events and io.on for listening for events. You can always go through the official tutorial here.
We’ll listen for a ping event after the socket has been connected successfully, this event will be triggered by the client application. On receipt of the event, we dispatch an event voted to the client.
Run the following command in a terminal within the root folder of your project to start the server:
node server
Home View
Create a file Home.vue in the src/views directory. This file will house the home component. The views folder will only be generated if you opted for routing when setting up the application using the CLI. The home component will be the view users see when they visit. It will request for permission to get the user’s current location.
Open the Home.vue file and update it following the steps below. First, we’ll add the template area:
    // src/views/Home.vue

    <template>
      <div>
        <!-- header area -->
        <div class="content">
          <h2>Welcome to "The Ranch"</h2>
          <img src="../assets/placeholder.svg" alt>
          <h6>Enable location to get updates</h6>
          <router-link to="/admin">Admin</router-link>
        </div>
      </div>
    </template>
Note: All assets used in the article are available in the GitHub repo.
The view itself is static. There won’t be a lot happening in this particular view except the request to get the user’s current location. We set aside an area for the header component in the markup. The component was created because the same header will be reused in the admin page. We’ll create the component shortly.
Styling
Update the component with the styles below:
    // home.component.scss

    <template>
      ...
    </template>

    <style lang="scss" scoped>
      .content {
      display: flex;
      flex-direction: column;
      align-items: center;
      padding: 30px 0;
      img {
        height: 100px;
      }
      h6 {
        margin: 15px 0;
        opacity: 0.6;
      }
      a {
        background: mediumseagreen;
        padding: 12px 21px;
        border-radius: 5px;
        border: none;
        box-shadow: 1px 2px 4px 0 rgba(0, 0, 0, 0.3);
        font-weight: bold;
        font-size: 16px;
        color: whitesmoke;
        text-decoration: none;
        line-height: 1;
      }
    </style>
Next, we’ll create the script section of the component, here we’ll define methods to get the user’s location and sending the location to the server.
    // src/views/Home.vue

    <template>
      ...
    </template>

    <style lang="scss" scoped>
      ...
    </style>

    <script>
    export default {
      name: "home",
      mounted() {
        if ("geolocation" in navigator) {
          navigator.geolocation.watchPosition(position => {
            const location = {
              lat: position.coords.latitude,
              lng: position.coords.longitude
            };
          });
        }
      }
    };
    </script>
In the mounted lifecycle, we check if the current browser supports the geolocation API, within the if block we watch for location changes. Later in the article, we’ll send location changes to the server.
Header Component
The header component will display the application logo and the cart total. The component will display the number of items in the cart. The cart prop will be passed from the parent component.
Create a file Header.vue within the src/components folder. Open the file and follow the three-step process of creating the component below:
First, we’ll create the template section:
    // src/components/Header.vue
    <template>
       <header>
        <div class="brand">
          <h5>The Ranch</h5>
        </div>
        <div class="nav">
          <ul>
            <li>
              <img src="../assets/boy.svg" alt="avatar">
              <span>John P.</span>
            </li>
          </ul>
        </div>
      </header>
    </template>
NB: Image assets used can be found in the repository here.
Next, we’ll style the header within the style section. Update the file using the snippet below:
    // src/components/Header.vue
    <template>
      ...
    </template>


    <style lang="scss" scoped>
    header {
      display: flex;
      background: mediumseagreen;
      margin: 0;
      padding: 5px 40px;
      color: whitesmoke;
      box-shadow: 0 2px 4px 0 rgba(0, 0, 0, 0.1);
      .brand {
        flex: 1;
        display: flex;
        align-items: center;
        h5 {
          font-family: "Lobster Two", cursive;
          font-size: 20px;
          margin: 0;
          letter-spacing: 1px;
        }
      }
      ul {
        list-style: none;
        padding-left: 0;
        display: flex;
        li {
          display: flex;
          align-items: center;
          img {
            height: 40px;
            border-radius: 50%;
          }
          span {
            margin-left: 8px;
            font-size: 15px;
            font-weight: 500;
          }
        }
      }
    }
    </style>
Finally, we’ll include the script section. Within the script section, we’ll create a cart property within the props array. This will allow the component to receive props from the parent component:
    <template>
      ...
    </template>

    <style lang="scss" scoped>
      ...
    </style>

    <script>
     export default {
      name: 'Header',
    }
    </script>
Let’s render the Header component within the Home component. Open the src/views/Home.vue component file and update the template section:
    <template>
      <div>
        <Header />
        <div class="content">
          ...
        </div>
      </div>
    </template>

    <style lang="scss" scoped>
      ...
    </style>

    <script>
    // @ is an alias to /src
    import Header from "@/components/Header.vue";
    export default {
      name: "home",
      ...
      components: {
        Header
      },
    };
    </script>
Next, we’ll include the link to the external fonts we’ll be using in the project.
Open the public/index.html file and update it to include the link to the external fonts:
    <!DOCTYPE html>
    <html lang="en">
      <head>
        <meta charset="utf-8">
        <meta http-equiv="X-UA-Compatible" content="IE=edge">
        <meta name="viewport" content="width=device-width,initial-scale=1.0">
        <link rel="icon" href="<%= BASE_URL %>favicon.ico">
        <link href="https://fonts.googleapis.com/css?family=Lobster+Two:700" rel="stylesheet">
        <title>vue-geofencing</title>
      </head>
      <body>
        <noscript>
          <strong>We're sorry but vue-geofencing doesn't work properly without JavaScript enabled. Please enable it to continue.</strong>
        </noscript>
        <div id="app"></div>
        <!-- built files will be auto injected -->
      </body>
    </html>
We’ll also update the App.vue component to negate the default margin on the HTML body and to remove the CLI generated template:
  //  src/App.vue

    <template>
      <div id="app">
        <router-view/>
      </div>
    </template>

    <style lang="scss">
    #app {
      font-family: "Avenir", Helvetica, Arial, sans-serif;
      -webkit-font-smoothing: antialiased;
      -moz-osx-font-smoothing: grayscale;
      text-align: center;
      color: #2c3e50;
    }
    body {
      margin: 0;
    }
    </style>
Admin Page
To monitor and track people using our application, we’ll need an admin page accessible to privileged employees. The page will use Google Maps to visualize the location of the user. A user’s location will be monitored and updated in real time using Socket.io.
We’ll be using the vue-google-maps library, which has a set of reusable components for using Google Maps in Vue applications.
To use the components in our project, we’ll need to update the src/main.js file to register the library’s plugin:
    //src/main.js
    import Vue from 'vue';
    import App from './App.vue';
    import router from './router';
    import * as VueGoogleMaps from 'vue2-google-maps';

    Vue.use(VueGoogleMaps, {
      load: {
        key: 'GOOGLE_MAPS_KEY',
        libraries: 'geometry', // This is required when working with polygons
      },
    });

    Vue.config.productionTip = false;
    new Vue({
      router,
      render: (h) => h(App),
    }).$mount('#app');
Note: Be sure to replace the placeholder value with your Google API key.
Now we’ll create the Admin page by creating a file within the src/views folder. After creating the file, open it and update it by following the following steps.
First we’ll create the template section:
    // src/views/Admin.vue

    <template>
      <section>
        <Header/>
        <div class="main">
          <h3>Admin</h3>
          <GmapMap :center="center" :zoom="zoom" map-type-id="terrain" style="width: 600px; height: 400px" ref="mapRef">
            <GmapMarker
              :position="center"
              :clickable="true"
              :draggable="true"
            />
            <GmapPolygon :paths="polygon"/>
          </GmapMap>
          <h4>Location Alerts</h4>
          <div class="alert" v-if="showAlert">
            <p>This user has left the ranch</p>
          </div>
          <div class="location alert" v-if="showLocationUpdate">
            <p>{{message}}</p>
          </div>
        </div>
      </section>
    </template>
In the snippet above, we’re using the components to render a map on the view, alongside a marker and polygon. Next, we’ll attach some styles to the component by adding a style section. Update the component by following the snippet below:
    // src/views/Admin.vue

    <template>
      ...
    </template>

    <style lang="scss" scoped>
    .main {
      display: flex;
      flex-direction: column;
      justify-content: center;
      align-items: center;
      margin: auto;
      h3 {
        font-size: 15px;
        font-weight: bold;
        text-transform: uppercase;
        margin-bottom: 15px;
      }
      .alert {
        background: #f14343;
        color: white;
        padding: 15px;
        border-radius: 5px;
        p{
          margin: 0;
        }
      }
      .location{
        background: green;
        margin-top: 20px;
      }
    }
    agm-map {
      height: 400px;
      width: 600px;
    }
    <style>
Finally, we’ll create the variables and methods used in the template within the script area. Update the file to create a script section:
    // src/views/Admin.vue
    <template>
      ...
    </template>

    <style lang="scss" scoped>
      ...
    </style>

    <script>
    import Header from "@/components/Header";
    import { gmapApi } from "vue2-google-maps";

    export default {
      name: "Admin",
      components: {
        Header
      },
      data() {
        return {
          message: "",
          theRanchPolygon: {},
          showAlert: false,
          showLocationUpdate: false,
          zoom: 16,
          center: {
            lat: 6.435838,
            lng: 3.451384
          },
          polygon: [
            { lat: 6.436914, lng: 3.451432 },
            { lat: 6.436019, lng: 3.450917 },
            { lat: 6.436584, lng: 3.450917 },
            { lat: 6.435006, lng: 3.450928 },
            { lat: 6.434953, lng: 3.451808 },
            { lat: 6.435251, lng: 3.451765 },
            { lat: 6.435262, lng: 3.451969 },
            { lat: 6.435518, lng: 3.451958 }
          ]
        };
      },
      computed: {
        google: gmapApi
      },
      mounted() {
        // Wait for the google maps to be loaded before using the "google" keyword
        this.$refs.mapRef.$mapPromise.then(map => {
          this.theRanchPolygon = new this.google.maps.Polygon({
            paths: this.polygon
          });
        });
      }
    };
    <script>
First, we import the gmapApi object from the vue-google-maps library. This object exposes and gives us access to the google object. Then we went on to create some variables:
polygon: this is an array of latLngs that represent the polygon around our ranch.ranchPolygon: this variable will hold the polygon value generated by Google Maps.
In the mounted lifecycle, we do a few things:
- We wait for the Google Maps script to load in the promise returned, and we create a polygon using the array of LatLng objects.
Now that both pages have been created, let’s update the router.js file to create a route for the Admin view. Open the router.js file and add the Admin component to the routes array:
    // src/router.js

    import Vue from 'vue'
    import Router from 'vue-router'
    import Home from './views/Home.vue'

    Vue.use(Router)

    export default new Router({
      mode: 'history',
      base: process.env.BASE_URL,
      routes: [
        {
          path: '/',
          name: 'home',
          component: Home
        },
        {
          path: '/admin',
          name: 'admin',
          // route level code-splitting
          // this generates a separate chunk (about.[hash].js) for this route
          // which is lazy-loaded when the route is visited.
          component: () => import(/* webpackChunkName: "about" */ './views/Admin.vue')
        }
      ]
    })
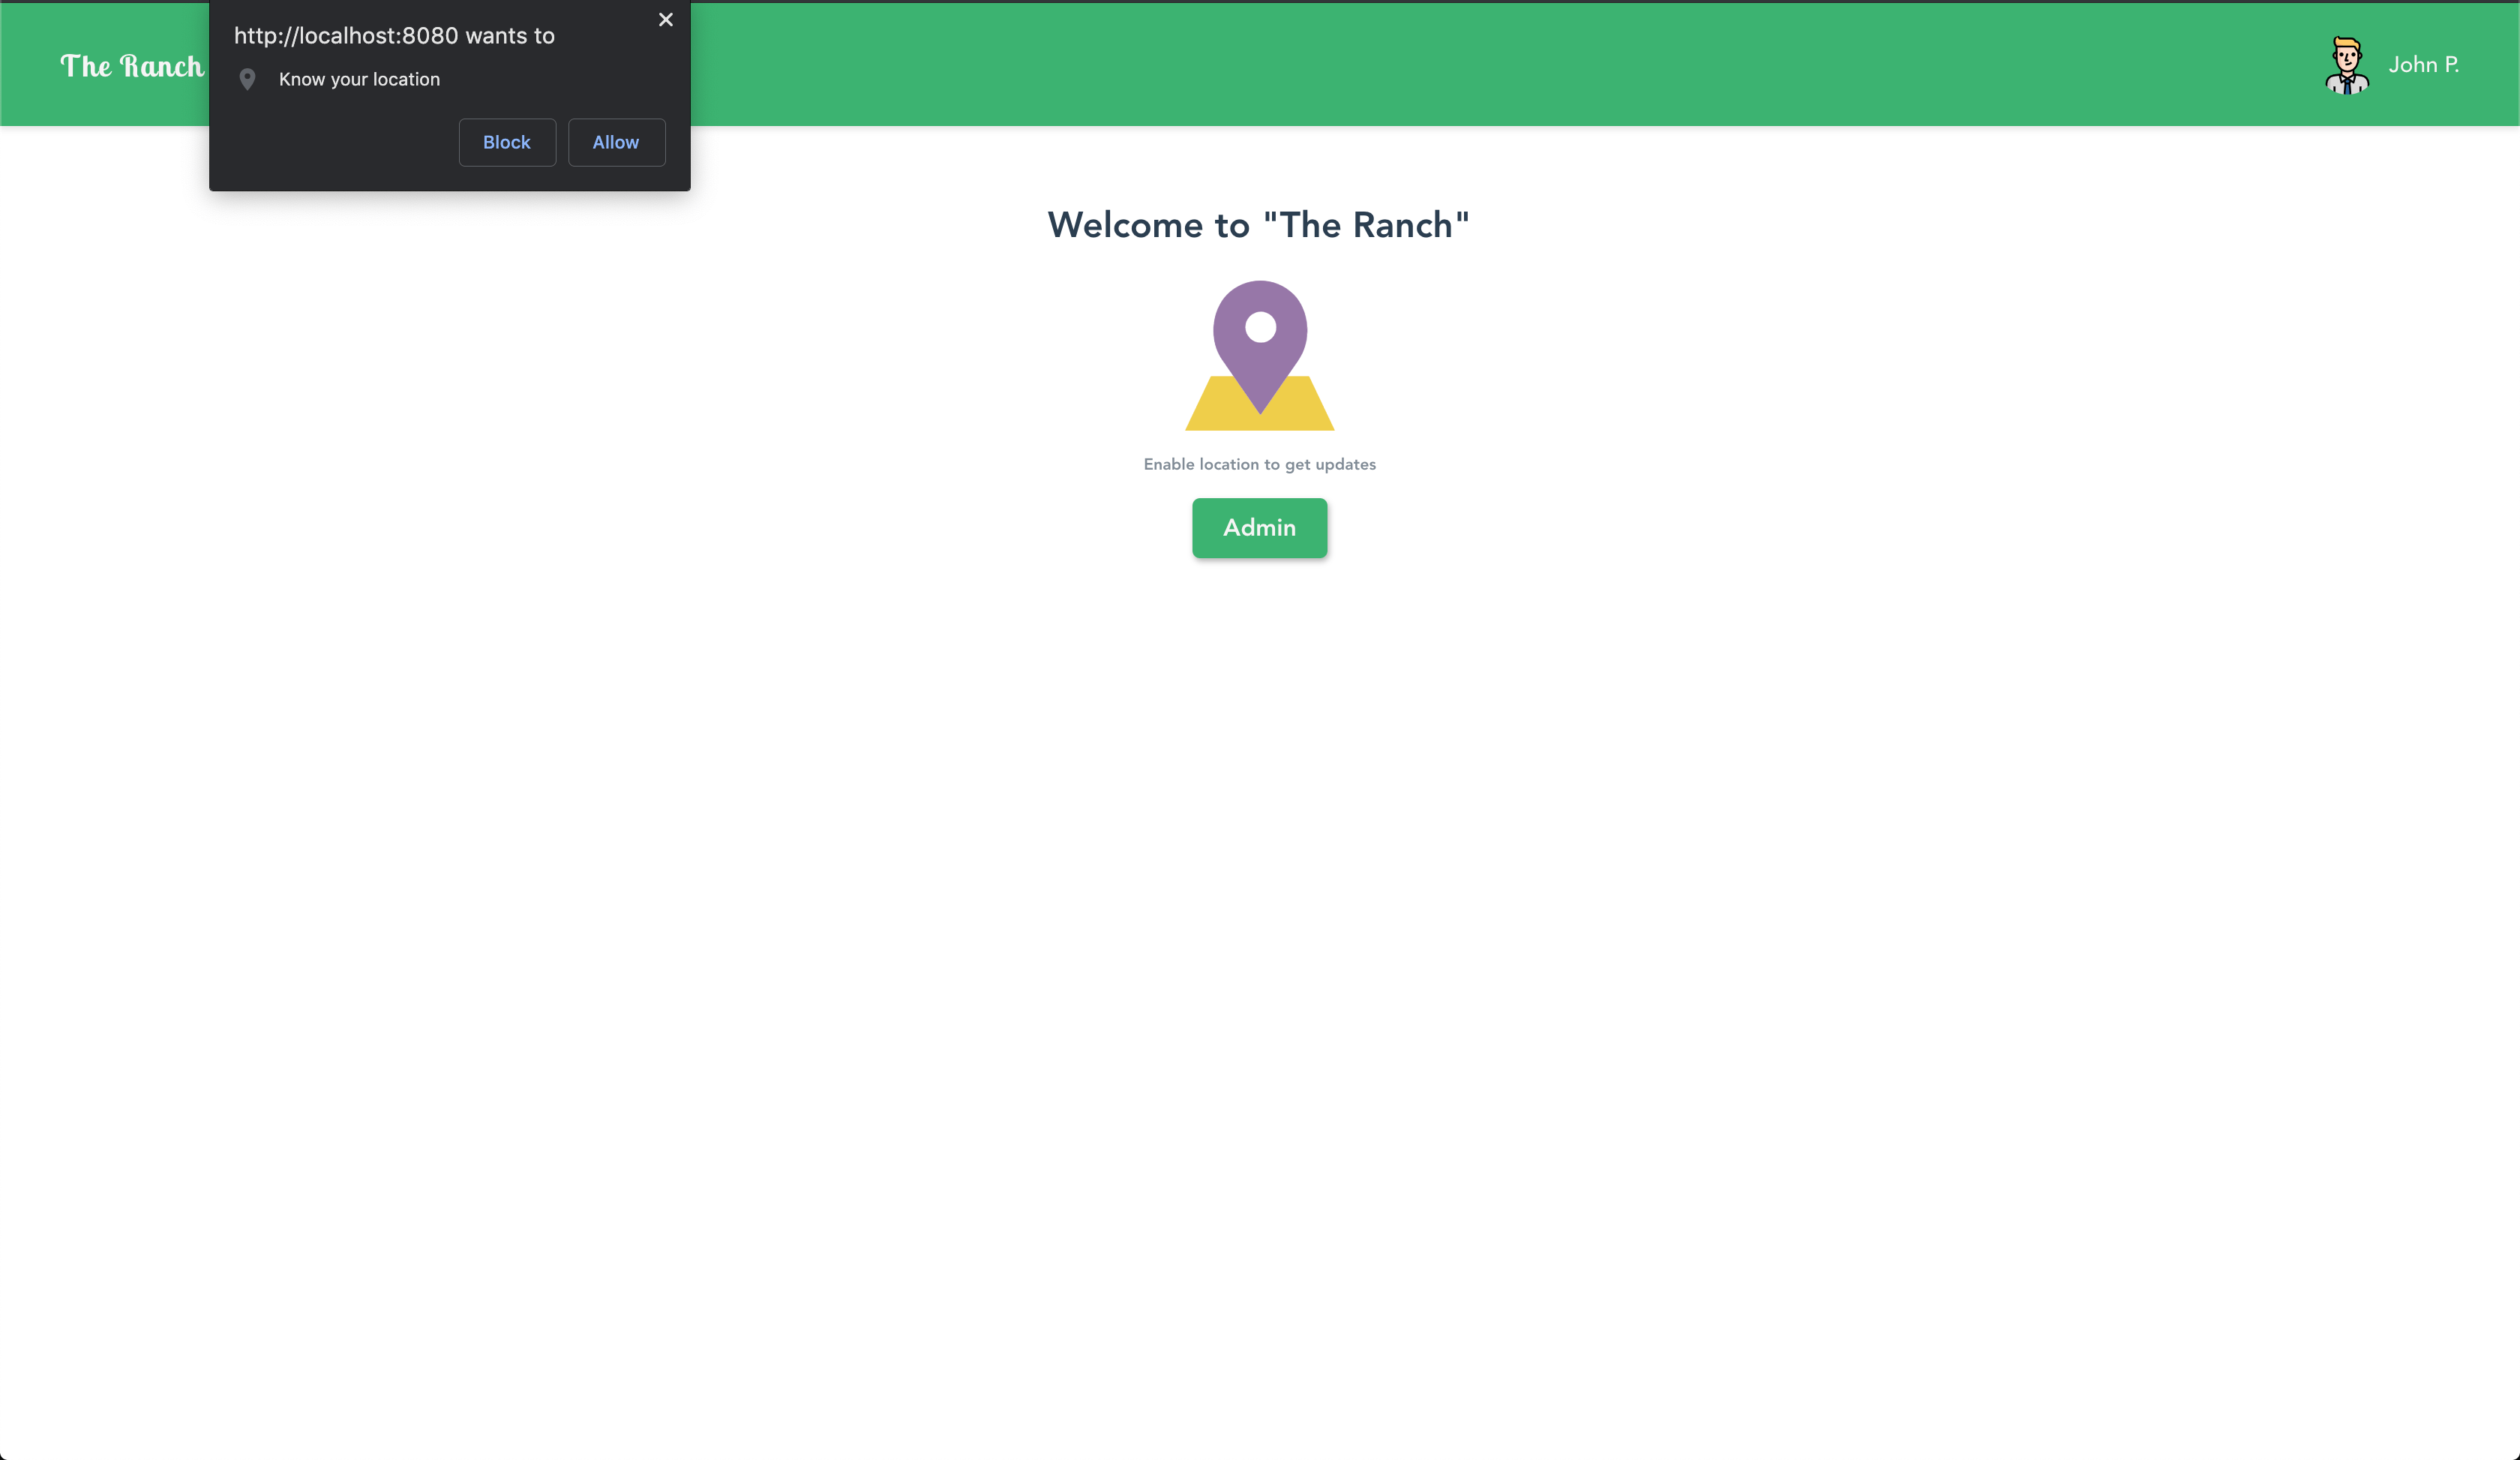
Navigate to http://localhost:8080 to view the home page and http://localhost:8080/admin to view the admin page.
Introducing Socket.io
So far we have an application that tracks the current position of users using the Geolocation API. Now we have to set up Socket.io on the client to update the user’s position in real time. To solve the real-time problem, we’ll include the vue-socket.io library that allows us to communicate with the server in real-time.
Open the src/main.js file and register the Socket.io plugin:
    // src/main.js

    import Vue from 'vue';
    ...
    import VSocket from 'vue-socket.io';

    Vue.use(
      new VSocket({
        debug: true,
        connection: 'http://localhost:4000',
      })
    );

    // ... rest of the configuration
This makes the library available to the whole application, which means we can listen for events and emit them. The connection property within the object is the URI of our server and we enabled debug mode for development.
Let’s update the Home view component to emit an event whenever the user’s location changes and also the Admin view to listen for events from the server.
Open the Home.vue file and update it like the snippet below:
    // src/views/Home.vue

    <template>
      ...
    </template>

    <style lang="scss" scoped>
      ...
    </style>

    <script>
    export default {
      name: "home",
      components: {
        Header
      },
      mounted() {
        if ("geolocation" in navigator) {
          navigator.geolocation.watchPosition(position => {
            const location = {
              lat: position.coords.latitude,
              lng: position.coords.longitude
            };
            this.$socket.emit("ping", location);
          });
        }
      }
    };
    </script>
Installing the vue-socket.io plugin adds a $socket object for emitting events. Within the watchPosition callback, we emit an event containing the selected current location of the user as the payload.
Next, update the Admin component to listen for location changes. Adding the plugin in our application provides a sockets object within the component. We’ll include the sockets object to the component, this object lets us set up listeners for events using the object keys. Open the Admin.vue file and add the sockets object to the component:
    <template>
      ...
    </template>

    <style lang="scss" scoped>
     ...
    </style>

    <script>
    import Header from "@/components/Header";
    import { gmapApi } from "vue2-google-maps";
    export default {
      name: "Admin",
      components: {
        Header
      },
      data() {
        return {
          ...
        }
      },
      sockets: {
        connect(){
          console.log('connected');
        },
        newLocation(position) {
          this.center = {
            ...position
          };
          const latLng = new this.google.maps.LatLng(position);
          this.showLocationUpdate = true;
          this.message = "The user's location has changed";
          if (
            !this.google.maps.geometry.poly.containsLocation(
              latLng,
              this.theRanchPolygon
            )
          ) {
            this.showAlert = true;
          } else {
            this.message = "The user is currently in the ranch";
          }
        }
      },
      computed: {
        ...
      },
      mounted() {
        ...
      }
    };
    </script>
First, we added the sockets object to the component. Within the object we added two methods. The methods within the object are event listeners for dispatched events.
connect: this method listens for a successful connection to the server.newLocation: this method is called when apingevent is triggered by the server. Within this method, we get the location payloadpositionwhich contains the current position of the user.
Using the payload:
- We created a LatLng using the position using the
googlemaps object. - Finally, we checked if the position is outside the polygon and then we display an alert if it is.
Now when a user changes position, an event is emitted with the user’s current location as the payload. The payload is received by the Admin view and a check is done against the polygon to see if the user is within the defined polygon.
Now when you navigate to http://localhost:8080/admin you should receive location updates from the user:
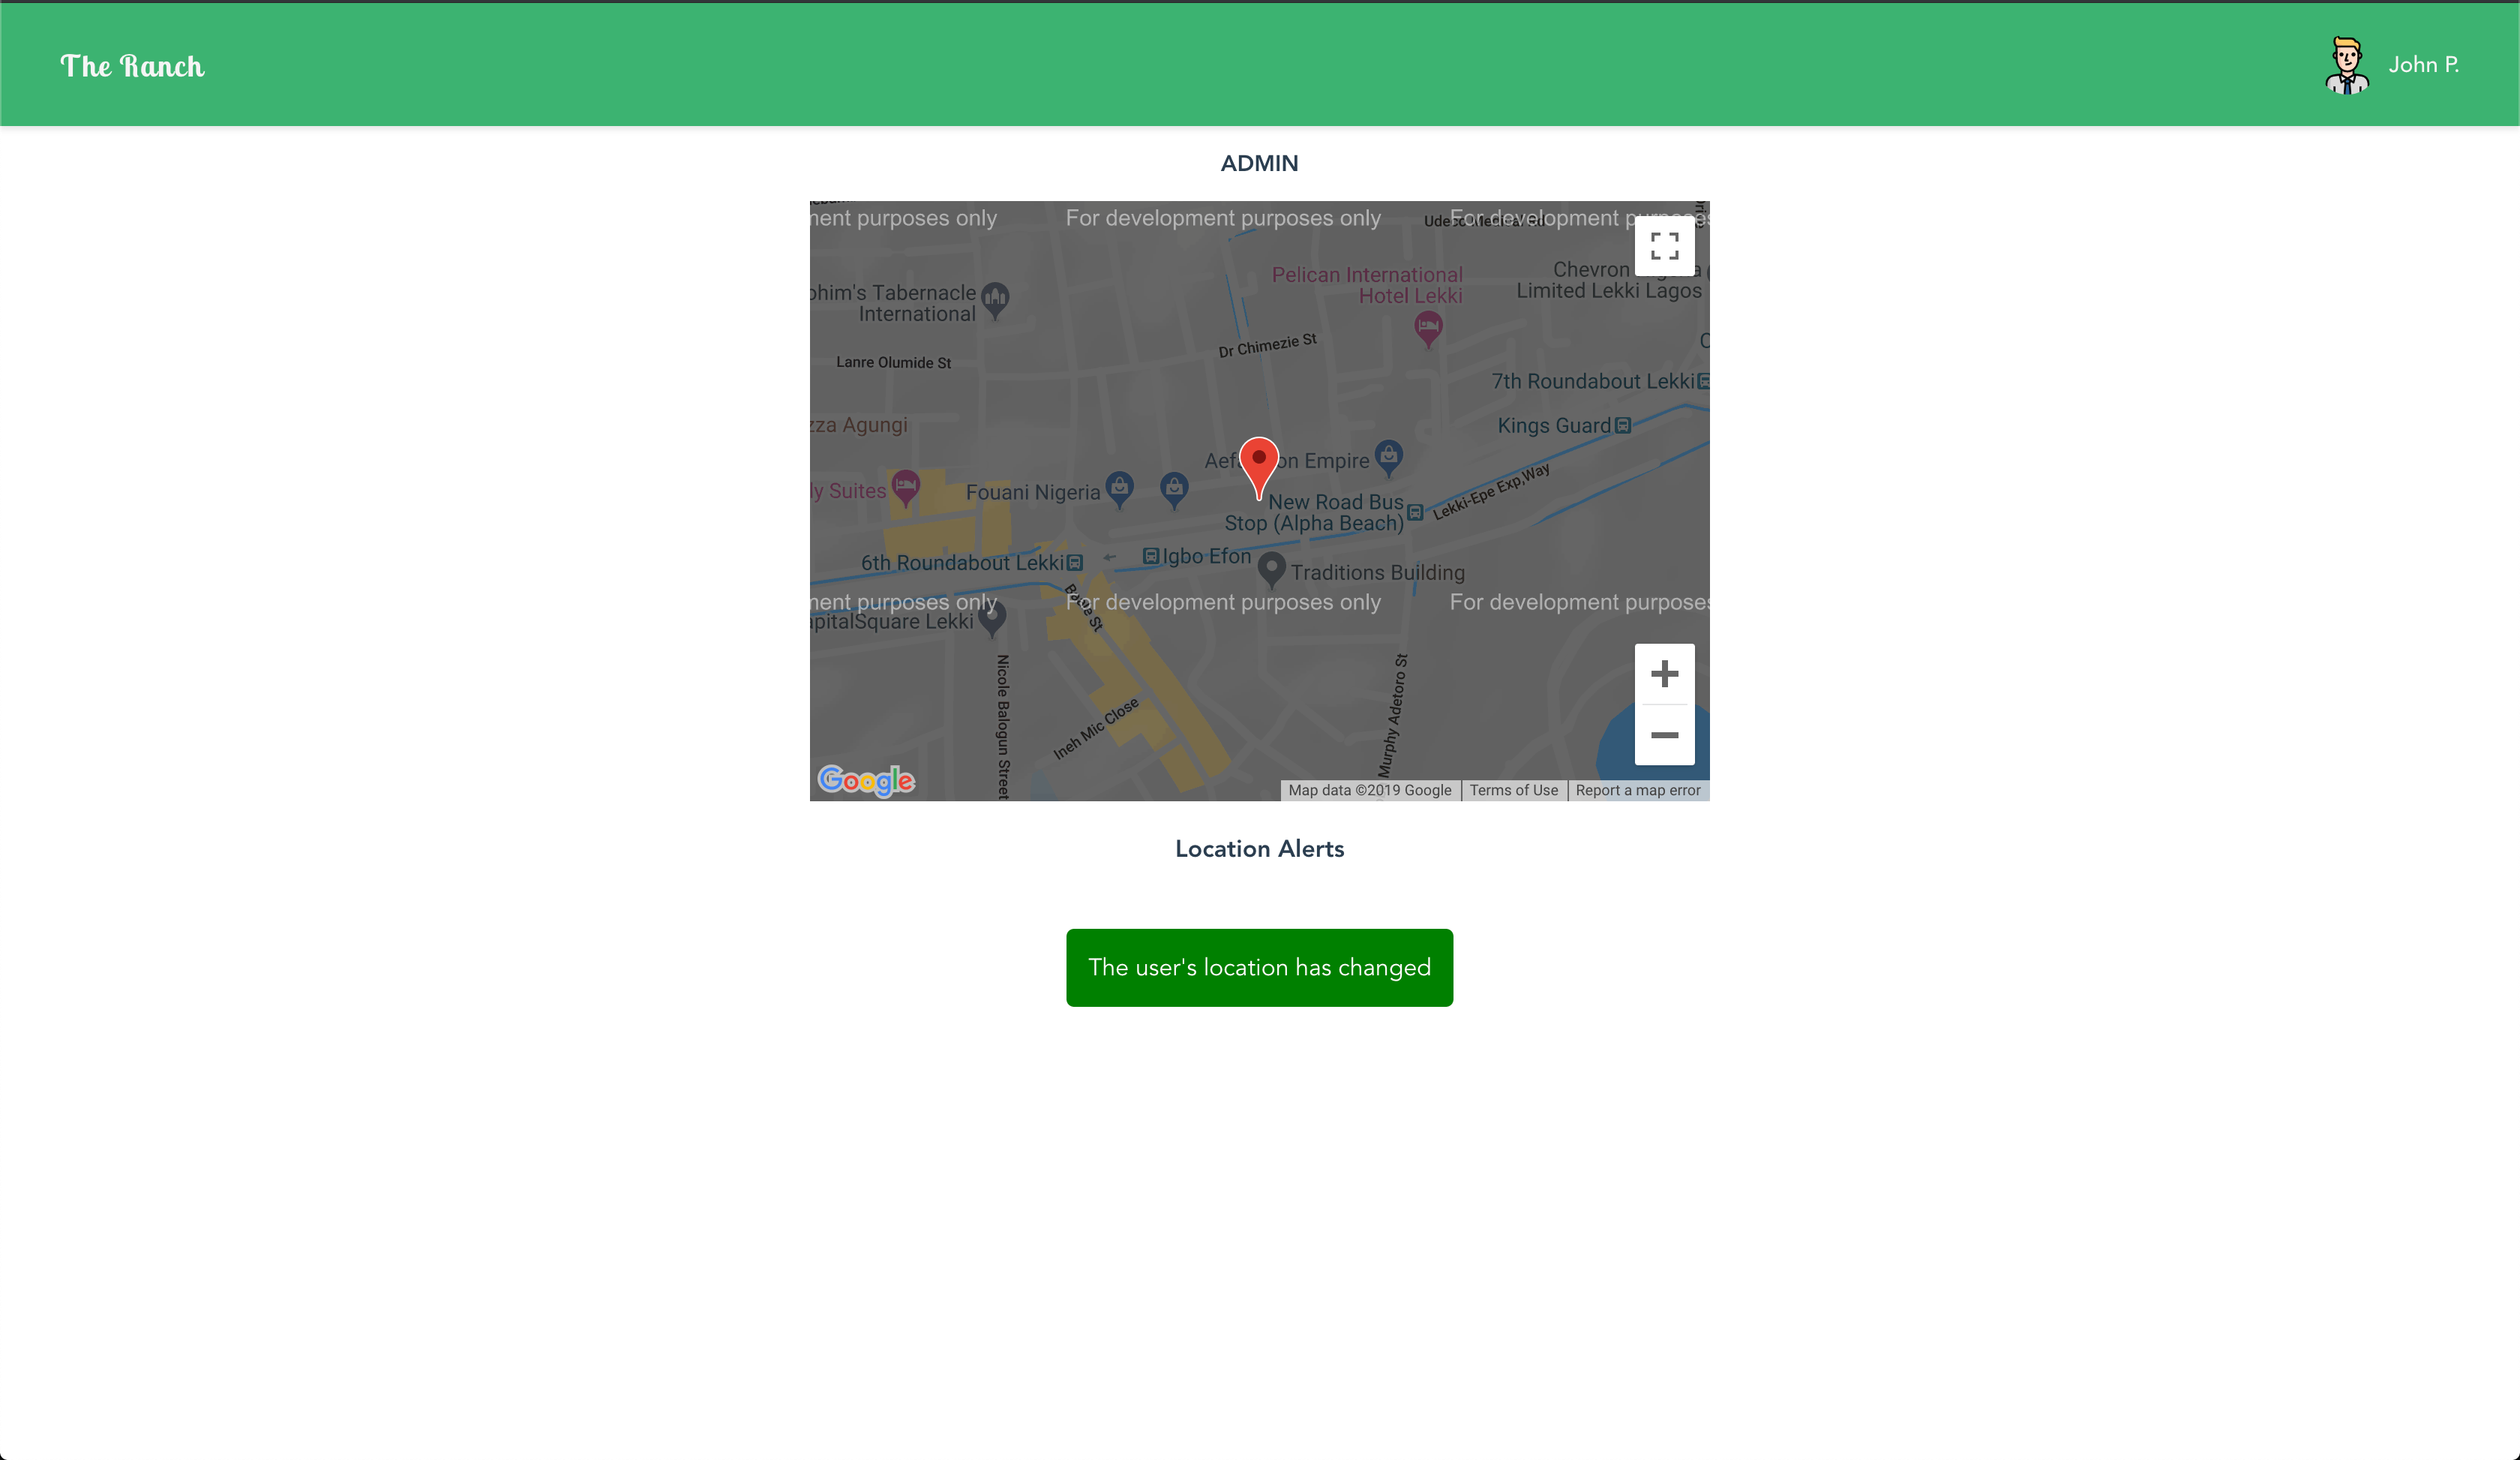
To test the real-time functionality of the application, open two browsers side-by-side and engage the application. Location updates should be in real-time.
Conclusion
With the help of Vue, we’ve built out an application that tracks a user’s location, we received real-time location update using Socket.io and Google Maps to visualize the user’s location on the map. Using geofences, we’ll be able to tell when an active guest is leaving the virtual boundary we set up. You can check out the repository containing the demo on GitHub.

Christian Nwamba
Chris Nwamba is a Senior Developer Advocate at AWS focusing on AWS Amplify. He is also a teacher with years of experience building products and communities.
