Persisting Data with Xamarin.Forms is a Pain in the BaaS

I'll admit it isn't just Xamarin that has this problem, it is every mobile app that contains some degree of complexity. Whether it is a sign-up form on Skype, ESPN, Moe's or your personal favorite, Tinder, everyone needs a way to work with cloud storage. So how can we address this without pulling out our hair like Gary Busey?
Telerik started building Backend Services that people would actually want to use. Our goal was to make SDKs available for every mobile platform and offer the ability to use it with just a few lines of code. In this post, we'll use Xamarin.Forms to create an application that ties into our Backend Services and works with iOS and Android apps.
Before we get started, you'll need to download Xamarin and sign up for the Telerik Platform, if you haven't already done so.
Start with Defining our Backend Service
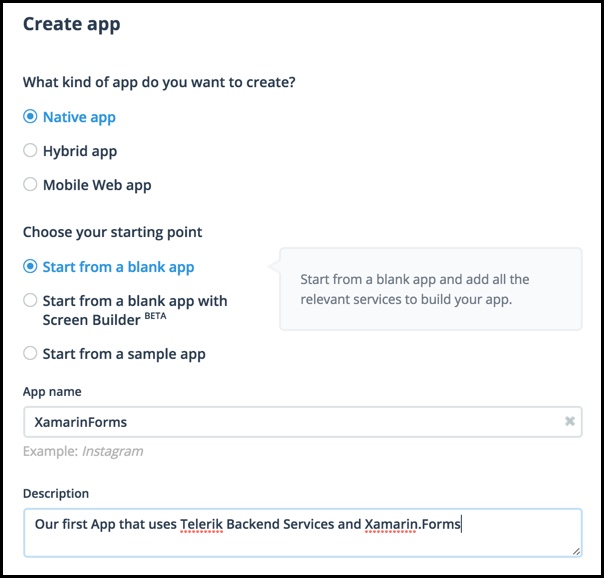
We'll begin by logging into the Telerik Platform, creating a new app, setting the app to native and starting from a blank app. Finish up by giving it a name as shown below.
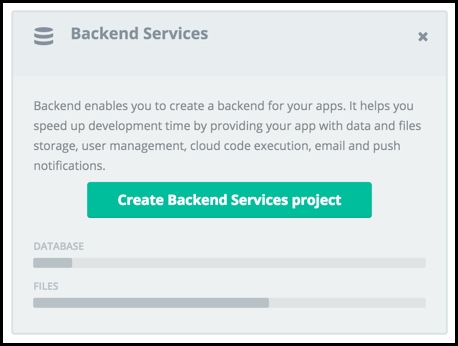
Once our app is created, we are going to add in the Backend Services option. Simply press the "Create Backend Services project" to get started.
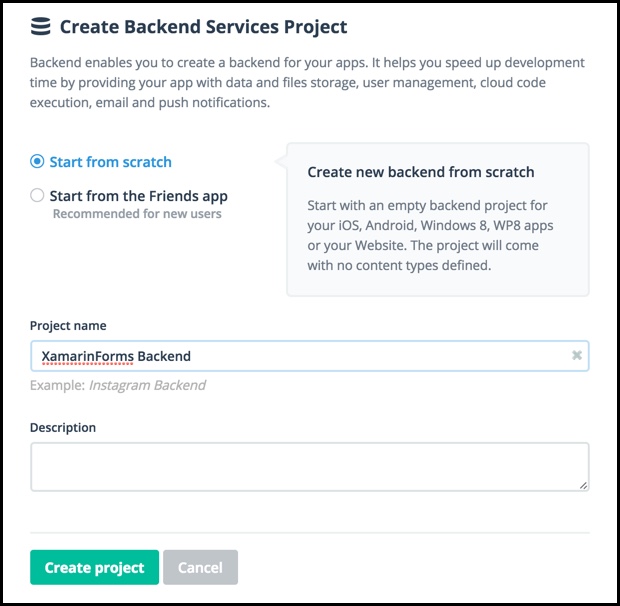
We will again "Start from scratch" and give it a project name and press the "Create Project" button.
We have several options once we create a Backend Services project, but all we want is "Cloud Data". Again press the "Add to project" button.
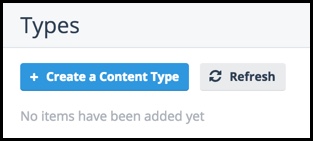
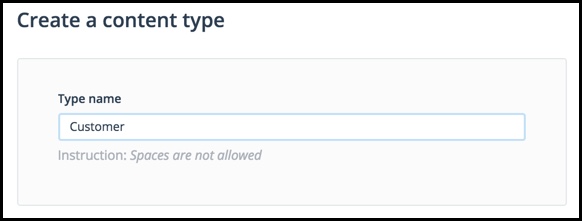
We need to setup a content type, so click "Create a Content Type" now and give it the name of "Customer".
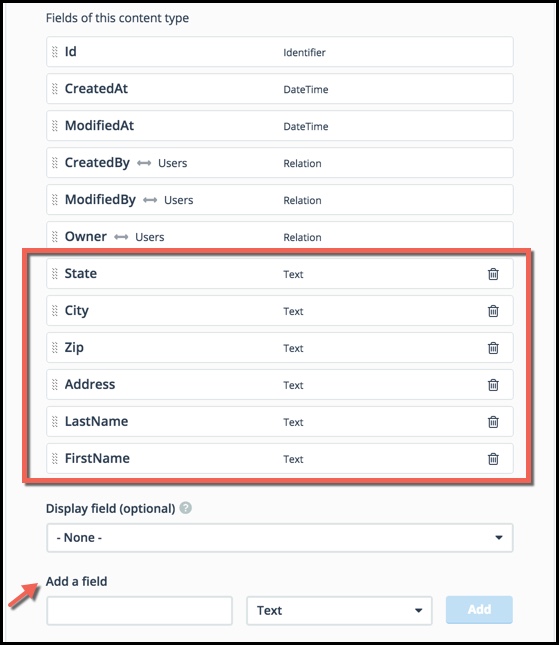
We are going to setup the following fields from the "Add a field" button:
- FirstName
- LastName
- Address
- City
- State
- Zip
All will be set to the type "Text".
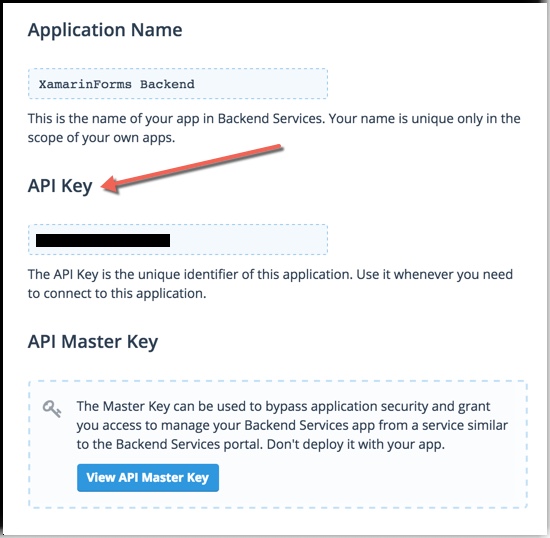
On the right hand side of your screen, you will see "Overview" -> "API Keys". Copy your API key as you will need it later.
Before we leave this screen and jump into Xamarin Studio, make sure you download the .NET SDK required to use Backend Services. Download the one that supports the .NET Framework 4.5 and higher. Once extracted you will have a Telerik.Everlive.Sdk.dll file.
Setting up our Xamarin.Forms App
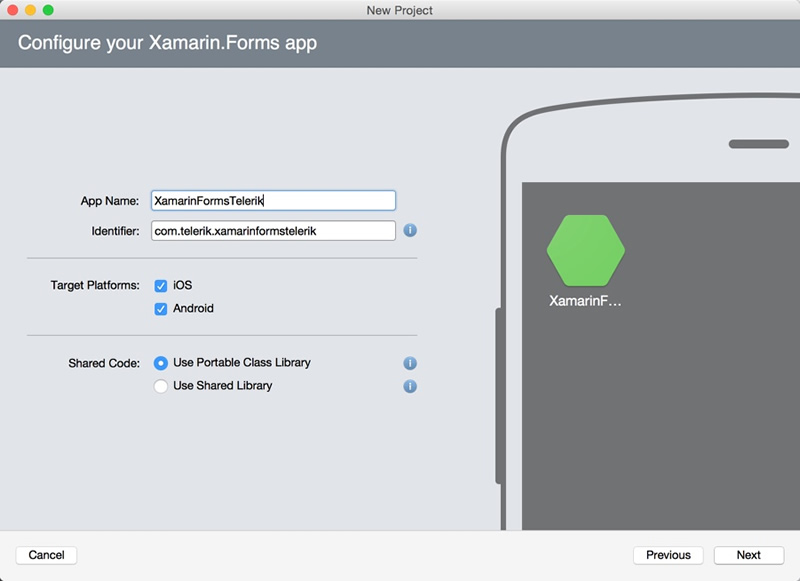
We are going to use Xamarin Studio to create our app and will begin by selecting a "Blank Xamarin.Forms app" and using a Portable Class Library as shown below:
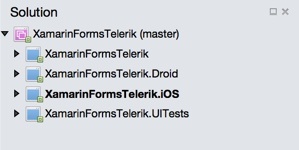
Once our project is loaded, then we will see the following project structure.
Notice that we have 4 Projects:
- XamarinFormsTelerik - Where we will be reusing our UI and shared business logic.
- XamarinFormsTelerik.Droid - Our Android app that will reference the PCL project.
- XamarinFormsTelerik.iOS - Our iOS app that will reference the PCL project.
- XamarinFormsTelerik.UITests - Our Unit Testing project.
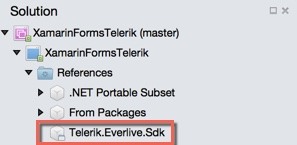
Add the Telerik.Everlive.Sdk.dll file to the "References" of each project as shown below:
Adding the Model
Create a class called "Customer" and include the following properties that map back to the fields we entered into Telerik's Backend Service:
using System;
using Telerik.Everlive.Sdk.Core.Model.Base;

namespace XamarinFormsTelerik
{
    public class Customer : DataItem
    {
        private string _firstName;
        private string _lastName;
        private string _address;
        private string _city;
        private string _state;
        private string _zip;

        public string FirstName
        {
            get { return _firstName; }
            set
            {
                if (value != _firstName)
                {
                    _firstName = value;
                    OnPropertyChanged("FirstName");
                    OnPropertyChanged ("HasValidInput");
                }
            }
        }

        public string LastName
        {
            get { return _lastName; }
            set
            {
                if (value != _lastName)
                {
                    _lastName = value;
                    OnPropertyChanged("LastName");
                    OnPropertyChanged ("HasValidInput");
                }
            }
        }

        public string Address
        {
            get { return _address; }
            set
            {
                if (value != _address)
                {
                    _address = value;
                    OnPropertyChanged("Address");
                }
            }
        }

        public string City
        {
            get { return _city; }
            set
            {
                if (value != _city)
                {
                    _city = value;
                    OnPropertyChanged("City");
                }
            }
        }

        public string State
        {
            get { return _state; }
            set
            {
                if (value != _state)
                {
                    _state = value;
                    OnPropertyChanged("State");
                }
            }
        }

        public string Zip
        {
            get { return _zip; }
            set
            {
                if (value != _zip)
                {
                    _zip = value;
                    OnPropertyChanged("Zip");
                }
            }
        }
    }
}
Notice that the base class is DataItem that automatically implements INotifyPropertyChange. This is included in the Backend Services SDK.
Adding the View Model
Create a new folder named, "ViewModels" and add another class called "MainViewModelController".
using System;
using System.Windows.Input;
using Xamarin.Forms;
using Telerik.Everlive.Sdk.Core;
using Telerik.Everlive.Sdk.Core.Model.Base;

namespace XamarinFormsTelerik.ViewModels
{
    public class MainPageViewModel : Customer
    {

        public ICommand ShowNameCommand { get; private set;}
        public ICommand ResetFieldsCommand { get; private set;}

        public bool HasValidInput { get { return !String.IsNullOrEmpty (FirstName) && !String.IsNullOrEmpty(LastName); } }

        public MainPageViewModel ()
        {

            ShowNameCommand = new Command (() => {

                var backend = new EverliveApp("API_KEY_PROVIDED_EARLIER");

                var customerData = backend.WorkWith().Data<Customer>();

                customerData.Create(this).ExecuteSync();

                ResetFieldsCommand.Execute(null);

            });

            ResetFieldsCommand = new Command (() => {

                FirstName = null;
                LastName = null;
                Address  = null;
                City  = null;
                State  = null;
                Zip  = null;
            });

        }
    }
}
Notice that the base class is "Customer", which includes the properties for each field that we wish to store in our Backend Services. We then add two Commands that we will wire up to buttons to save our data in the backend services and another one to reset the fields. We also have a check to see if the FirstName and LastName fields have content in them before the "Submit" button is enabled.
Notice that it took 3 lines of code to send the data from this form to our backend service. I could have made it 2 lines, but then I would be just showing off.
Adding the View
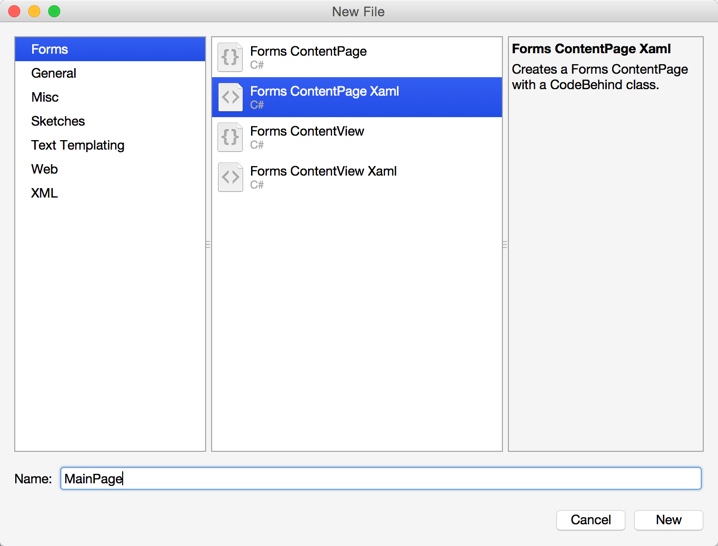
Working with the XamarinFormsTelerik project, we will leverage the power of MVVM through Xamarin.Forms. Simply create a new Forms ContentPage Xaml and name it "MainPage".
The contents of this page will include a reference to our ViewModel, as well as each field defined in our class. All of the entry fields are binding to our properties and the buttons are binding to our commands.
<?xml version="1.0" encoding="UTF-8"?>
<ContentPage xmlns="http://xamarin.com/schemas/2014/forms"
xmlns:x="http://schemas.microsoft.com/winfx/2009/xaml"
xmlns:vm="clr-namespace:XamarinFormsTelerik.ViewModels;assembly=XamarinFormsTelerik"
x:Class="XamarinFormsTelerik.MainPage">
  <ScrollView>

    <StackLayout Orientation="Vertical" Padding="30" Spacing="10">
    <StackLayout.BindingContext>
        <vm:MainPageViewModel />
    </StackLayout.BindingContext>

      <Label Text="Enter User Info" Font="Large" HorizontalOptions="Center"/>

      <StackLayout Orientation="Horizontal" Spacing="5">
        <Label Text="First Name" Font="Large" VerticalOptions="End"/>
        <Entry x:Name="entryFirstName" HorizontalOptions="FillAndExpand" Text="{Binding FirstName}"/>
      </StackLayout>

       <StackLayout Orientation="Horizontal" Spacing="5">
        <Label Text="Last Name" Font="Large" VerticalOptions="End"/>
        <Entry x:Name="entryLastName" HorizontalOptions="FillAndExpand" Text="{Binding LastName}"/>
      </StackLayout>

      <StackLayout Orientation="Horizontal" Spacing="5">
        <Label Text="Address" Font="Large" VerticalOptions="End"/>
        <Entry x:Name="entryAddress" HorizontalOptions="FillAndExpand" Text="{Binding Address}"/>
      </StackLayout>

      <StackLayout Orientation="Horizontal" Spacing="5">
        <Label Text="City" Font="Large" VerticalOptions="End"/>
        <Entry x:Name="entryCity" HorizontalOptions="FillAndExpand" Text="{Binding City}"/>
      </StackLayout>

      <StackLayout Orientation="Horizontal" Spacing="5">
        <Label Text="State" Font="Large" VerticalOptions="End"/>
        <Entry x:Name="entryState" HorizontalOptions="FillAndExpand" Text="{Binding State}"/>
      </StackLayout>

      <StackLayout Orientation="Horizontal" Spacing="5">
        <Label Text="Zip" Font="Large" VerticalOptions="End"/>
        <Entry x:Name="entryZip" HorizontalOptions="FillAndExpand" Text="{Binding Zip}"/>
      </StackLayout>

      <StackLayout Orientation="Horizontal" Spacing="5">
        <Button Text="Submit" HorizontalOptions="FillAndExpand" Command="{Binding ShowNameCommand}"
        IsEnabled="{Binding HasValidInput}" />
        <Button Text="Reset" HorizontalOptions="FillAndExpand" Command="{Binding ResetFieldsCommand}"/>
      </StackLayout>

    </StackLayout>
  </ScrollView>
</ContentPage>
The Code-behind page will be left as is, because all of our work is being done in the ViewModel.
The last change that we will need to make is in XamarinFormsTelerik.cs. We need to modify the App constructor to this one line:
MainPage = new MainPage();
Run it!
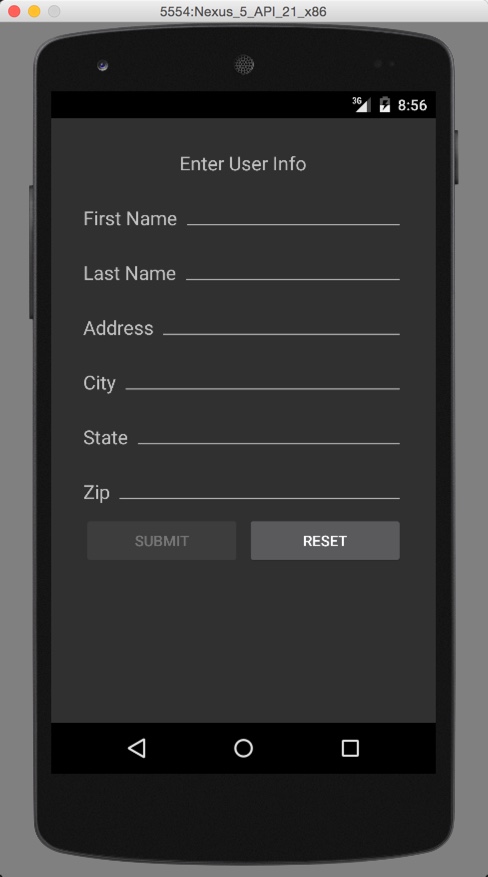
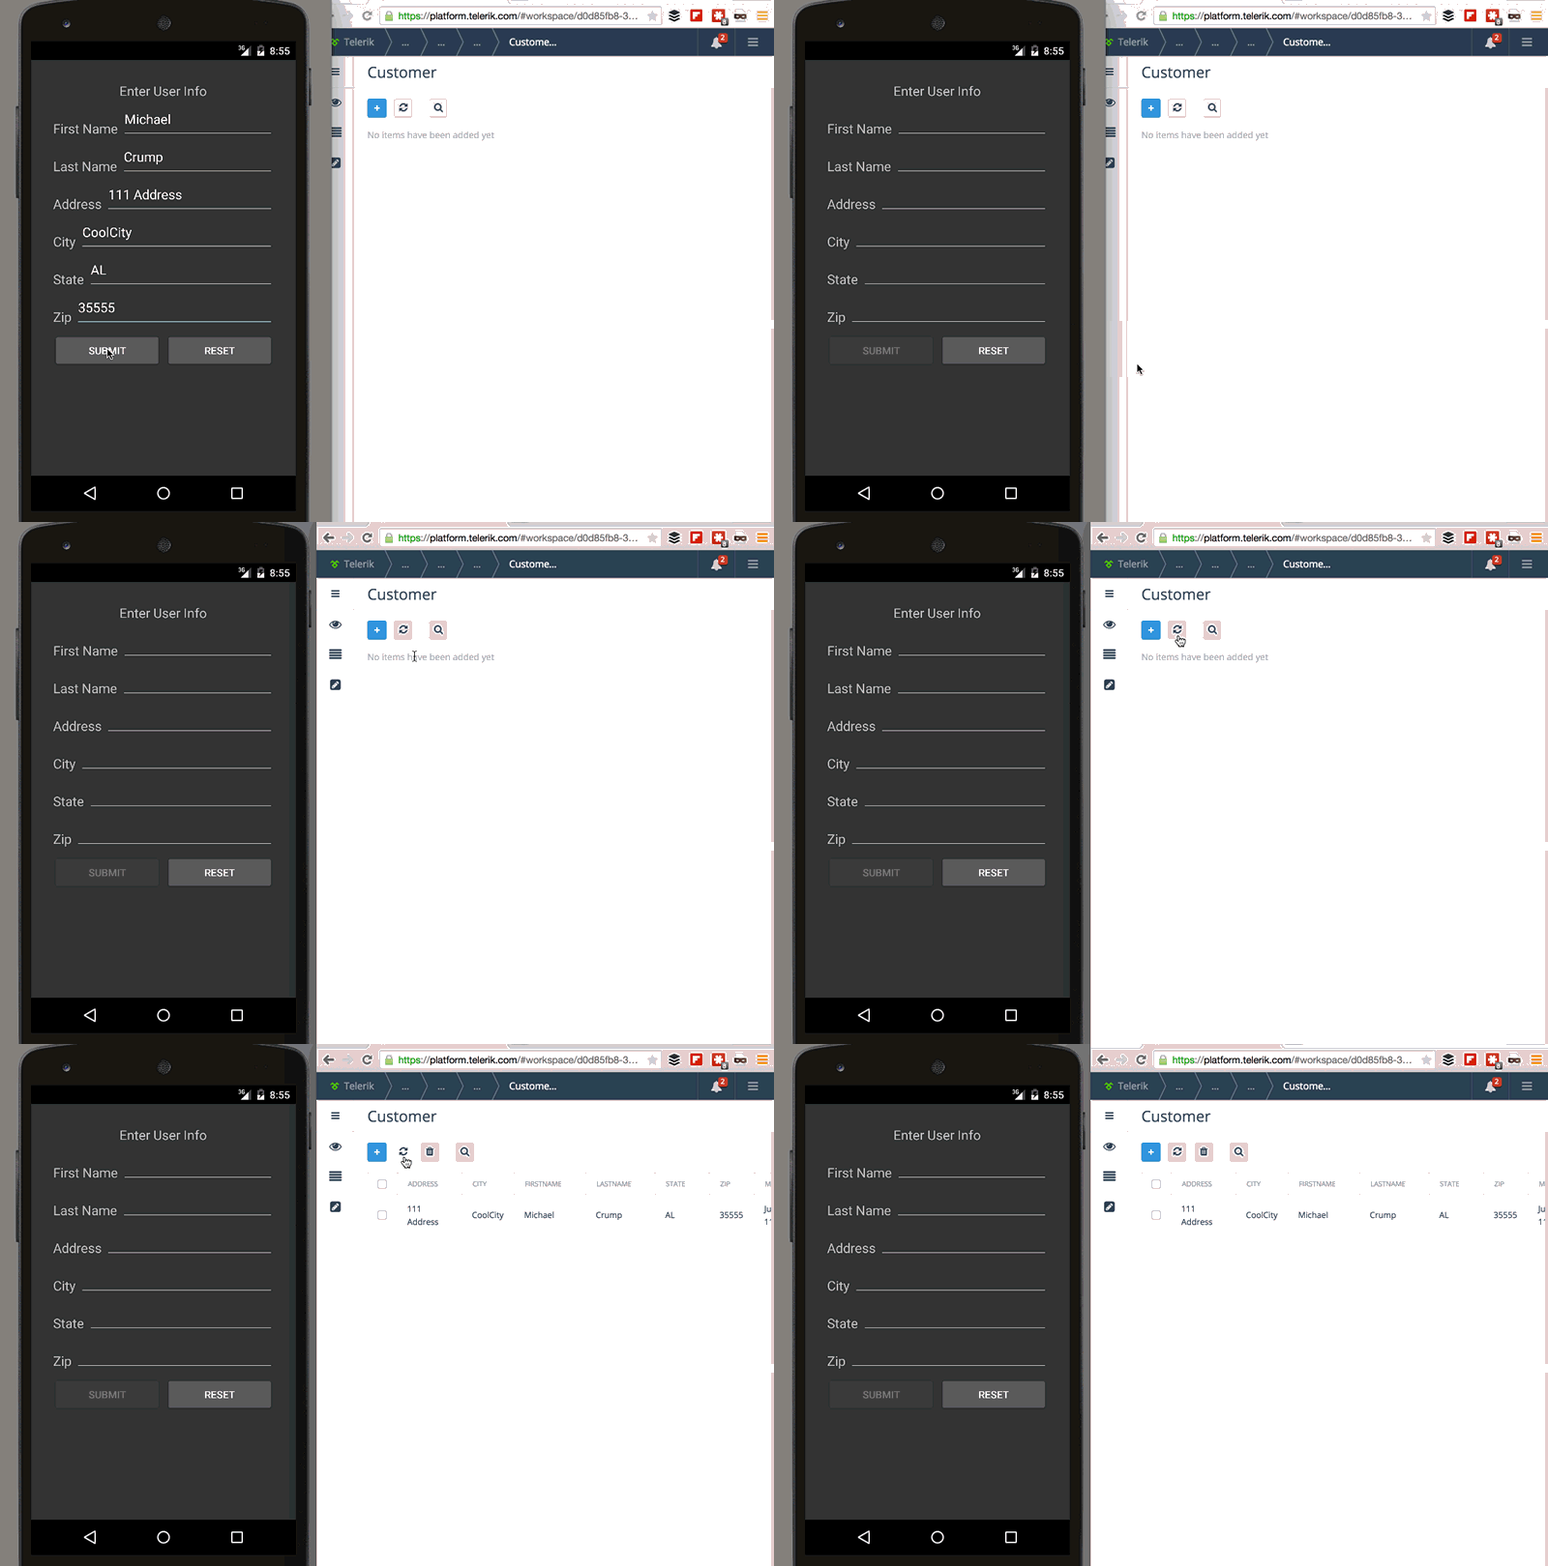
We'll begin by running the app on an Android device. As you can see it automatically has the material theme and the "Submit" button is disabled by default until the user enters a first and last name.
If we go ahead and fill out the form with some valid data, we will see it appear in our Customer table within Backend Services.
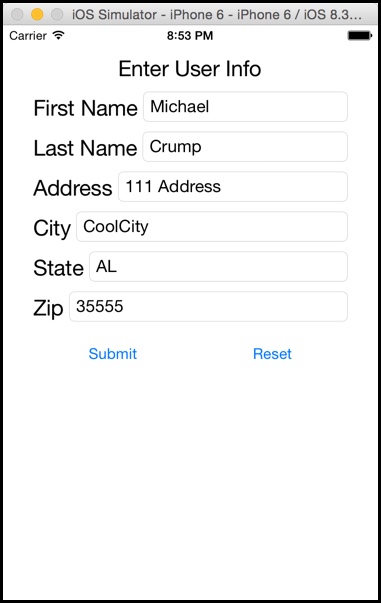
Here is what the same app looks like in the iOS Simulator.
The complete source code for this project can be found on GitHub along with the API key that I removed earlier.
In the End
At the end of the day, you can leave work early or tell your boss that you're going to need a few extra days to implement cloud storage. I think Zach Galifianakis would approve either way.
While your enjoying watching the Zach Galifianakis loop, we also have a couple of controls for Xamarin.Forms included in our UI for Xamarin Control Suite. Also, we've recently released a free cheat sheet for Xamarin Studio that you might find helpful.
Thank to Ed Charbeneau for helping me track down and fix a bug.
Header image courtesy of Emergency Brake

Michael Crump
Michael Crump is a Microsoft MVP, Pluralsight and MSDN author as well as an international speaker. He works at Telerik with a focus on everything mobile. You can follow him on Twitter at @mbcrump or keep up with his various blogs by visiting his Telerik Blog or his Personal Blog.


