
The .NET CLI Decoded

Summarize with AI:
You have done it hipsters. Thanks to you, we're back in the 80's and command line tooling is cool again - even for .NET development. Guess what else is hot? ASCII art! I'm contemplating adding some ASCII artwork on top of my C# code files, before heading out for the evening in my skinny jeans. That’s savage!

Jokes aside - the command line is really cool and powerful. And CLI tooling provides developers with lots of flexibility to aid in development and DevOps workflows, in addition to appealing to our inner geekiness. With the new .NET Core framework, the focus is squarely on CLI tooling to lower the barrier to entry and make .NET development accessible to all.
Whether you use Windows, OSX or Linux, the command line works the same way everywhere. Let us explore some of the new cross-platform .NET CLI tooling.
For a deeper look at CLI tools and the .NET CLI, check out our whitepaper, The Command Line: Reinvented for Modern Developers, which celebrates the resurgence of CLI tools and provides insight into how modern development platforms cater to application development through CLI—for web, desktop and mobile channels.
The new .NET CLI
Let us see what the new .NET development experience is like on a fresh OSX machine. First, you need to get some things set up. You can get started at dot.net:
-
Install XCode Command Line tooling, if you don't have it. No, we're not doing iOS development, but some things are included in the XCode CLI that are needed. You can install just the CLI without getting the gigantic XCode IDE - simply enter
xcode-select --installin terminal and accept the install.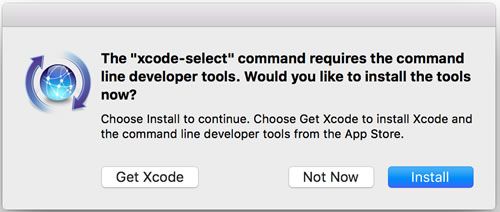
-
Get HomeBrew, if you haven't already.
/usr/bin/ruby -e "$(curl -fsSL https://raw.githubusercontent.com/Homebrew/install/master/install)" -
You need an updated OpenSSL through Homebrew. These commands will do it:
brew update` brew install openssl brew link --force openssl -
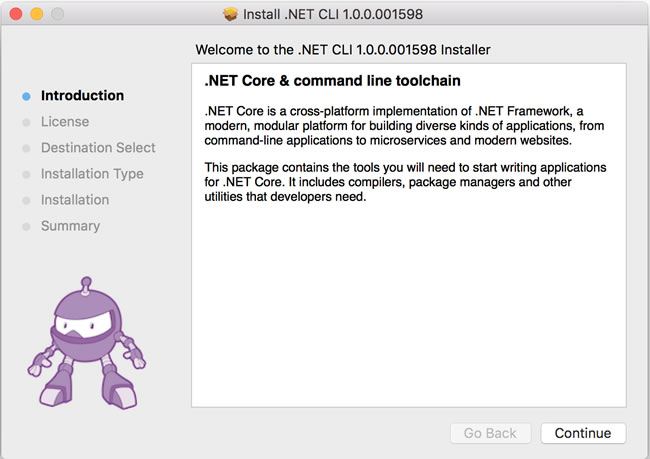
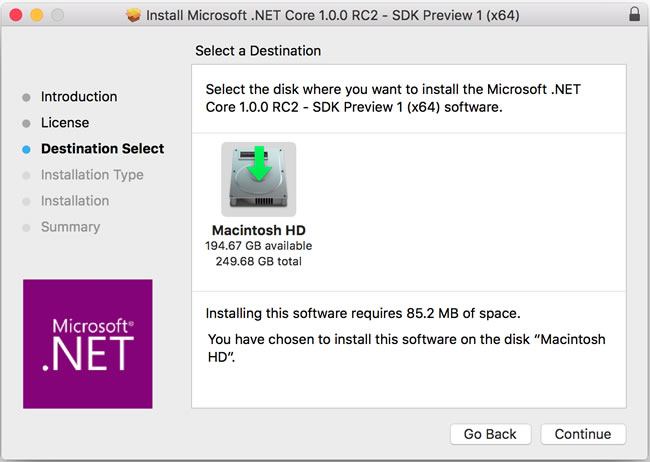
Install the official .NET Core for OSX Package. This should be a simple install wizard that sets everything up for you - including getting you the .NET CLI tools. .NET Core hit the RC2 milestone recently, so based on whether you did the install before or after, you'll see the changed logo. The official .NET logo is good, but the little robot was so much fun while it lasted.
...versus...
Once the install finishes, you should have all of the pieces in place to start building apps with the new .NET Core framework. The new CLI is a foundational cross-platform toolchain for developing .NET Core applications - one on which other complex tooling can be built on.
Meet dotnet - the generic driver for running the command-line tools. Invoked on its own, it will give out brief usage instructions or be able to fire up specific IL code if pointed to a DLL path . The primary usage, however, is using the convention dotnet <command>, where you execute verbs/commands through the dotnet driver. Any time you need help, fire up the help command, like so: dotnet -h/--help.
DotNet Commands
The new .NET CLI comes pre-packed with some existing commands - essentially 'verbs' that the dotnet driver can execute. Each command has a set of optional parameters and can take arguments. Let's explore all the available built-in commands, along with the popular options that you may find useful.
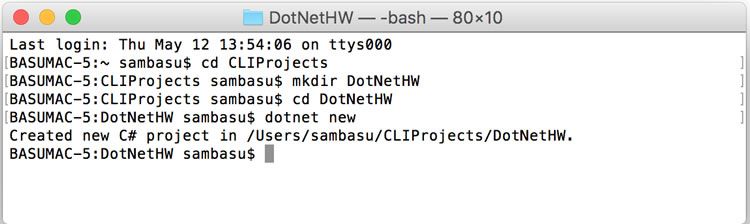
dotnet new
- Initializes a .NET Core application project
- Bootstraps project with bare essential files
Options:
- -l/--lang | Choose preferred language | Valid choices - 'C##/F##'
- -t/--type | Choose preferred app type | Valid choice now - 'console' | May be expanded in future
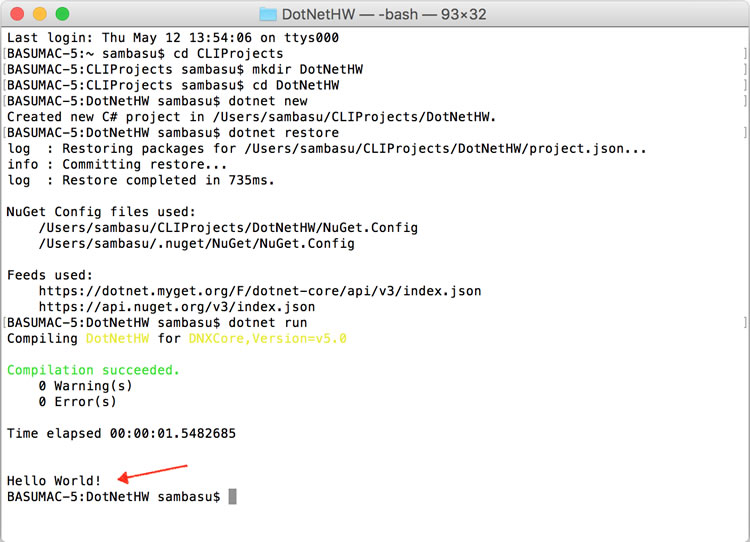
You can see a sample usage where a new directory is created and then the dotnet new command is invoked - things work 'in place'.
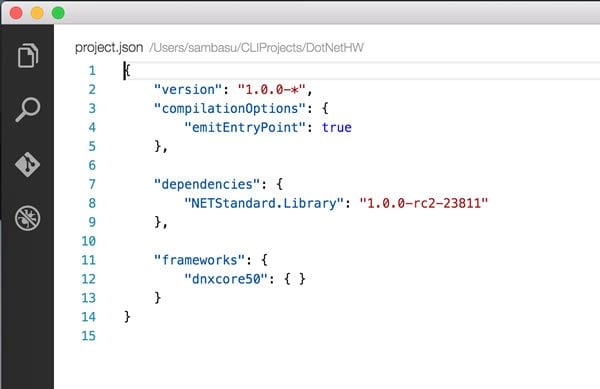
The result is pretty basic - a boilerplate console application with just enough to run itself. The ingredients are a project.json file with all dependencies, a program.cs file with executable code and a NuGet.Config that points to the NuGet source to resolve dependencies.

Here's the boilerplate project.json - notice the dependencies and frameworks nodes.
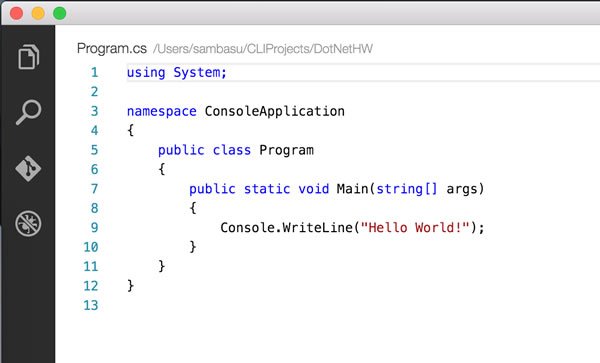
And here's program.cs - the glorious code that spits out 'Hello World' on console.
dotnet restore
- Restores the dependencies for a given project from NuGet using Project.JSon file
- The NuGet feed source is configured in the NuGet.config file
- By default, looks first for packages in the NuGet package cache
Options:
- -s/--source | Override NuGet.config source of NuGet packages
- --packages [Dir] | Specifies the target directory for restored packages
The first time you run dotnet restore on a fresh machine, all .NET Core basic dependencies will be pulled down from NuGet servers - about 100 packages.

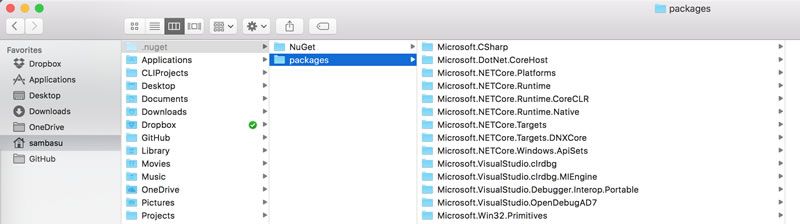
NuGet packages that are pulled down are cached for subsequent usage in a global NuGet cache, which, by default, is .nuget/packages in the user's home directory, as seen below. Subsequent restoration of the same dependencies is very quick.
dotnet build
- Builds a .NET Core application
- Compiles all dependencies to produce a binary executable
dotnet restoremust have been run prior- Outputs binaries in child Bin folder
Options:
- -o/--output [Dir] | Target directory to put compiled binaries
- -f/--framework [Framework] | Compile for a specific framework defined in project.json file
In our case, take a look at the binaries created for the corresponding frameworks - nice and simple.

dotnet run
- Runs application from source code 'in-place'
- Combines compile, build binaries and launch into one step
- Depends on
dotnet build
Options:
- -f/--framework [Framework] | Runs the app for a given framework identifier
- -p/--project [Path] | Specifies which project to run | Path points to project.json in the project directory
Here's our 'Hello World' console app - running unceremoniously.
dotnet test
- Executes unit tests for given project and gives you guilt if you don't unit test
- Uses configured test runner in project.json
- Resolves dependencies on NUnit/XUnit and bootstraps tests as class libraries
- Defaults to running tests in Console mode
Options:
- [Path] | Specifies the path to test project | Defaults to the current directory if omitted
- -o/--output [Dir] | Directory in which to find binaries to run
dotnet pack
- Creates a NuGet package of your code
- Build nupkg packages with source and debug symbols
- NuGet dependencies of the project being packed are added to the nuspec file for resolution
- Builds the project as first step before packaging
Options:
- [Path] | Specifies path to project to be packed | Defaults to the current directory if omitted
- -o/--output [Dir] | Directory in which built packages are placed
dotnet publish
- Publishes a .NET application in a bundled container
- Packs application and all dependencies into single folder for publishing
- Packaging includes application's Intermediate Language (IL) code and dependencies for portable applications
- For self-contained applications, packaging includes IL, dependencies and runtime of the targeted platform
Options:
- [Path] | Specifies path to project.json of project to be published
- -o/--output [Dir] | Directory in which the built packages are placed
- -f/--framework [Framework] | Publish the application for a given framework as defined in project.json
- -r/--runtime [Runtime] | Publish the application for a given runtime
Extending the .NET CLI
So hopefully you are on board with the new .NET CLI, but perhaps you realize that your development or DevOps workflows need a few more commands. Don't sweat. You can easily extend the .NET CLI through custom commands. .NET CLI tools can be extended in two main ways:
- NuGet Packages on per-project basis
- System Path on per-machine basis
The two extensibility options aren't mutually exclusive - you could easily mix and match.
NuGet Extensibility
To extend the .NET CLI with custom tools to use in specific projects, all you have to do is create a portable console application that runs on top of .NET Core. Your application can then be packaged up (using dotnet pack) and distributed through NuGet. To consume, you simply need to make a reference to the tooling in project.json. The custom tooling is only available in the context of the project that references/restores the NuGet package.
Your project needs to follow the .NET CLI driver-command nomenclature of dotnet-<command>. To consume, projects need to simply add a Tools section in their project.json, like so:
"tools": {
    "dotnet-domything": {
        "version": "1.0.0",
        "imports": ["dnxcore50"]
    }
}
Once dotnet restore is run on the project, the NuGet tool and all of its dependencies are resolved. You can then happily use the command dotnet-domything, but only in context of your project.
Since custom tools are simply portable applications, the user consuming the tool has to have the same version of the .NET Core libraries that the tool was built against in order to run the tool. Any other dependency that the tool uses and that is not contained within the .NET Core libraries is restored and placed in the NuGet cache. The entire tool is, therefore, run using the assemblies from the .NET Core libraries as well as assemblies from the NuGet cache.
Path Extensibility
Path-based extensibility allows you to build custom .NET CLI tooling that can be used across multiple projects, but only on the given machine. The one drawback is portability to another machine requires deploying the tool elsewhere. Nevertheless, Path-based extensibility wins with simplicity and ease of use - just follow the CLI extensibility conventions.
The dotnet driver can invoke any command that follows the dotnet-<command> convention. The default resolution logic will first probe several locations in the context of the project and finally fall back to the system PATH. If the requested command exists in the system PATH and is a binary that can be invoked, the dotnet driver can invoke it.
The custom binary tool can be pretty much anything that the operating system can execute. On Unix or OSX systems, this means any command script saved as dotnet-domything that has the execute bit set via chmod +x. On Windows it means anything that Windows knows how to run. That's it - simple.
Conclusion
Yes, command line tooling is very cool and powerful. Stop fighting it and embrace it with open arms - it will reward you with flexibility, if you know what you're doing. The new .NET framework is lean, modular and open source. It is cross-platform and takes your .NET apps to places that were never was possible before. And .NET CLI provides the consistent foundational toolchain to build new .NET Core applications everywhere.
While the new tooling definitely helps, your apps will continue to be complicated to serve specific business needs of your customers. And unless you're building console apps, you probably need professionally built UI controls - for web, desktop or mobile. Have I mentioned you should give Telerik DevCraft a shot? It's free to try - so what do you have to lose?
Step boldly thy .NET Developer - it's a brave new world. And the command line is your friend!
Related Resources
- The Command Line: Reinvented for Modern Developers (whitepaper)
- The .NET of Tomorrow (article)
- .NET Core Goes RC2 (article)
- How to Web with ASP.NET (article)
- The 2016 .NET Community Report (survey report)
- UI for ASP.NET MVC Now Supports ASP.NET Core 1.0 RC2 (article)

Sam Basu
Sam Basu is a technologist, author, speaker, Microsoft MVP and gadget lover. With a long developer background, he also worked as a Developer Advocacy Manager for advocating modern web/mobile/cloud development platforms on Microsoft/Telerik/Kendo UI technology stacks. His spare times call for travel, fast cars, cricket and culinary adventures with the family.