Mastering PDFs With the First WinUI PdfViewer on the Market

Summarize with AI:
Say goodbye to viewing PDF files with an external tool. Do it within your WinUI app using the Telerik PDF Viewer component. Get to know it more.
Today almost everyone has a version of Adobe Reader or another program on their computer that can read a PDF file. Some people even have multiple, and most of them warn of an expired trial version. 😁
Well, what about the case in which you are the one responsible for providing your end users the ability to view PDF documents within the app you are developing? Think no more, just open your arms and embrace the first PdfViewer control in the WinUI world—the RadPdfViewer!
In this blog, I will introduce you to the PdfViewer component of Telerik UI for WinUI. And the numerous features for viewing and manipulating PDF files it offers, of course.
Dive In
Officially shipped with UI for WinUI 2.0.0, the PdfViewer has surely not stopped its evolution ever since. A new set of features has recently been introduced with the release of UI for WinUI 2.1.0.
All in all, I believe it is best if we first learn how to reach this beauty:

Prerequisites include an already-set-up WinUI project and, of course, installation of the Telerik UI for WinUI components. Once you have that, don’t forget to add the assembly references to the project. The rest is super easy—a single line of code:
<telerik:RadPdfViewer DocumentSource="ms-appx:///PdfFiles/Sample.pdf"/>
Make sure to point the correct path to your app’s PDF doc, though.
The above code gives you access to the PdfViewer through the xmlns:telerik="using:Telerik.UI.Xaml.Controls" alias. And the DocumentSource, as you might have already guessed, is the one responsible for rendering the PDF file. The property is of type PdfDocumentSource, which allows you to provide a file Stream or Uri to load the PDF document model.
That’s just basics. Let’s dig a little deeper.
Under the Surface
One of the best things about the PDF viewer is the freedom it gives to you and your WinUI apps. What is better than viewing PDF documents right within the app, without the need for an external viewer, right?
But that’s not all. I am a fan of its total ease of use, too. Maybe the PdfViewerToolBar it comes hand in hand with plays a major role in that? All the common interaction options come with it.

All About the Toolbar
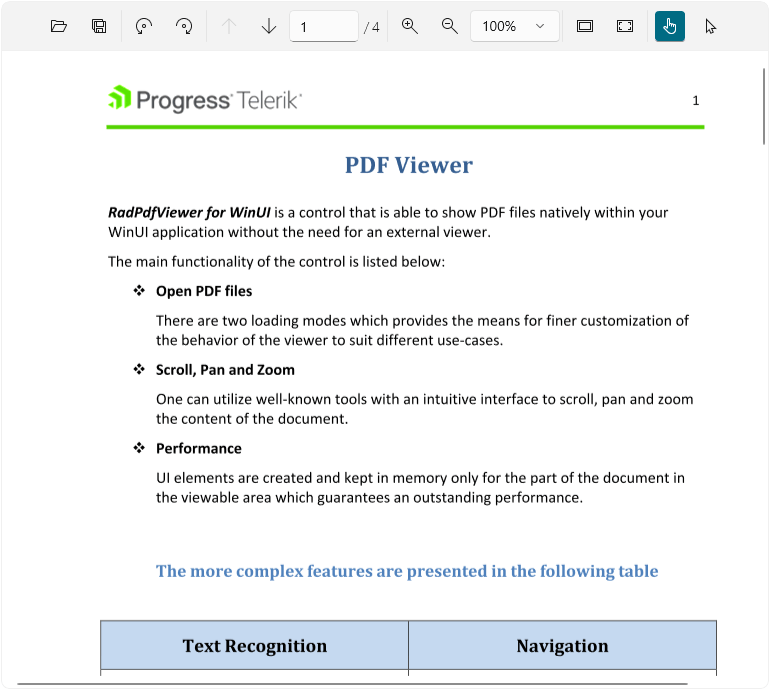
The icons of the toolbar buttons are self-explanatory, aren’t they? Just in case, let me list the options:
- Opening PDF documents
- Saving the previewed document as a new file
- Rotating the document
- Navigating through the pages with the page up/down buttons, and the textbox, of course
- Zooming in and out through the zoom in/out buttons, as well as choosing a predefined zoom level using the combo box next to them
- Fitting the document either to the window width, or fitting the whole page to window
- Choosing between the interaction modes of the control—pan or text selection
In case you do not need some of the above buttons and the functionality they enable, you can toggle their visibility through the properties listed in the WinUI PdfViewer ToolBar section of the control’s online documentation.
Under the Skin
Is there more than just a toolbar? Yes, there is. You can extend and customize the control with the help of its rich API. Be sure to check out the WinUI Pdf Viewer section in the documentation, as I do not want to flood you with too much information.
Well, I changed my mind a little. 😆 I cannot help but mention the support for various fonts (TrueType, Type 1, Type 3 and CID) and documents encrypted with Encryption Algorithm 4 (RC4/AES-128). Oh, and the extensible support for different stream compression filters.
P.S. The RadPdfViewer uses Windows Composition rendering for native performance, and I can assure you that this performance is amazing with large documents.
Sign & Verify
Cool things don’t stop. With the WinUI PdfViewer you can also display, sign and verify documents within your app and make sure that these documents have not been tampered with.
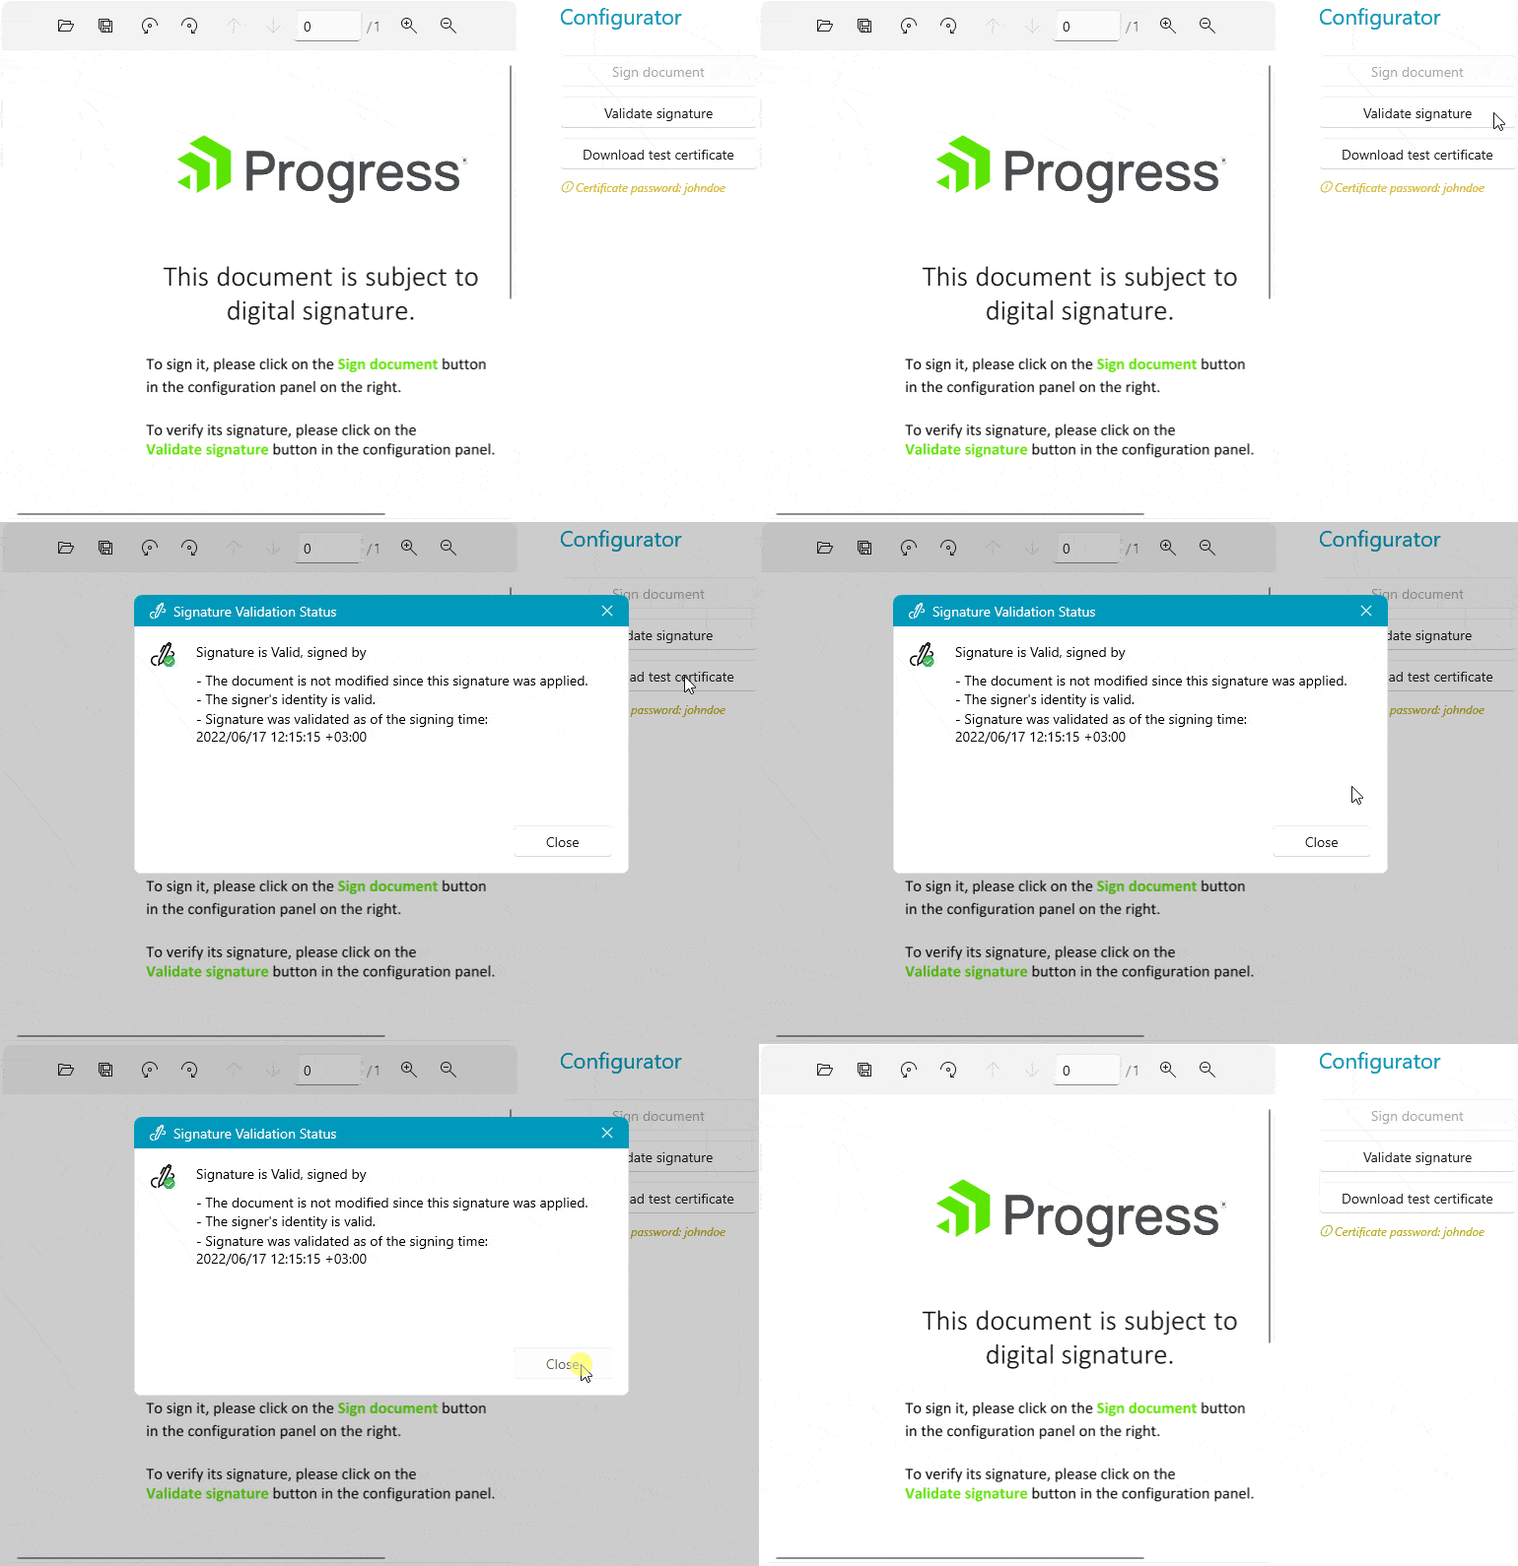
I am talking about digital signatures. In case you are not familiar with them, I will try to summarize—these are equivalent to the handwritten signature but are intended to solve security problems in digital communication. They are unique to each signer and widely used to confirm that the document content originated from the signer and has not been modified in any way.
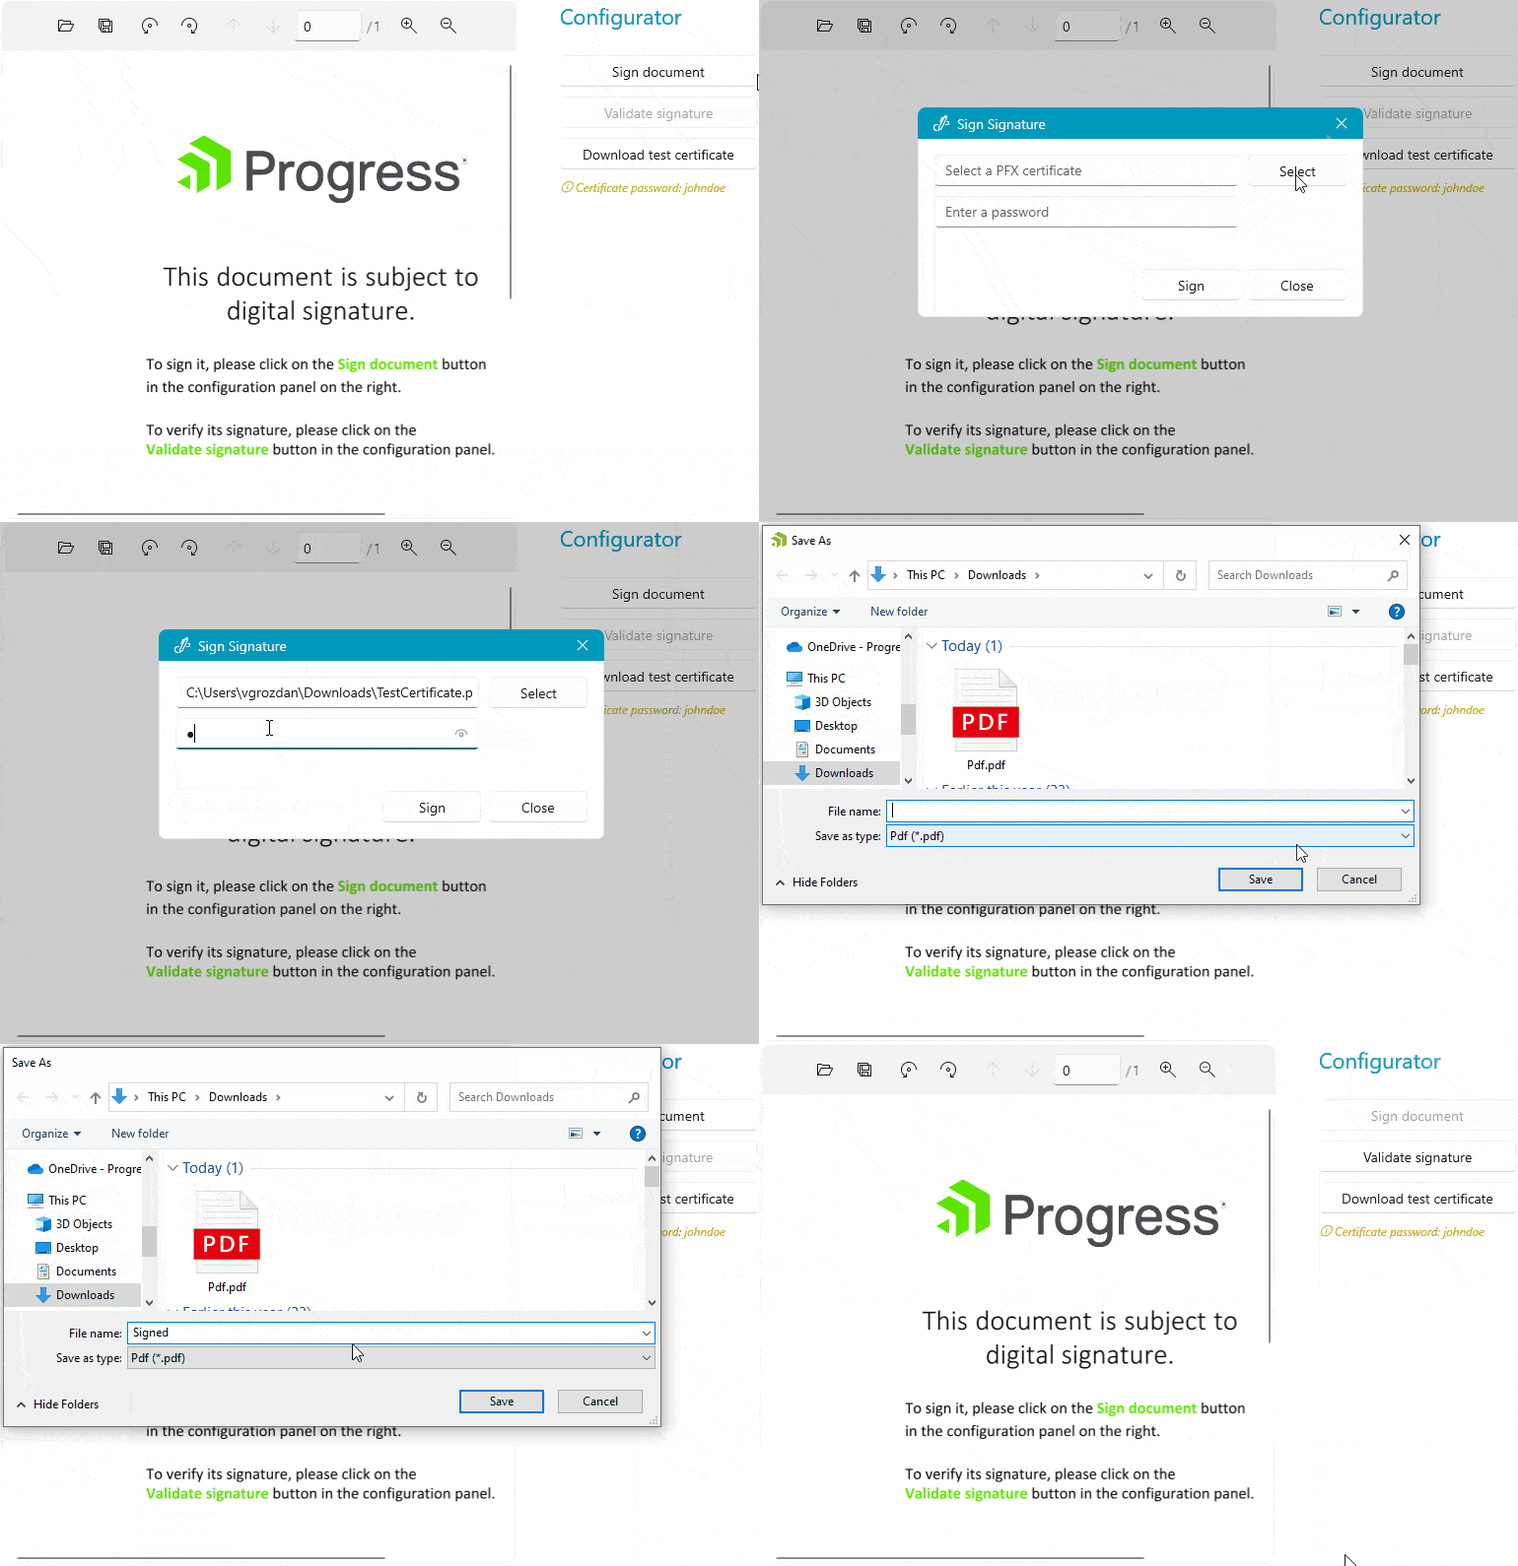
When a document containing a signature field is loaded in RadPdfViewer, you can apply a signature to it. This is done through the SignSignatureDialog, which gives you the ability to choose a .pfx file representing the certificate and enter the password for it. Clicking the Sign button prompts you to save the signed document to a new file. The newly saved file then opens in RadPdfViewer. Shall we try it together?

To use the SignSignatureDialog you should first register it like this:
<telerik:RadPdfViewer
	x:Name="pdfViewer"
	telerik:RadPdfViewerAttachedComponents.RegisterSignSignatureDialog="True"
	telerik:RadPdfViewerAttachedComponents.RegisterSignaturePropertiesDialog="True"/>
Let us verify the signature now. 🤞

Whew, we made it. Sign-ificant! ✨
Protection Check
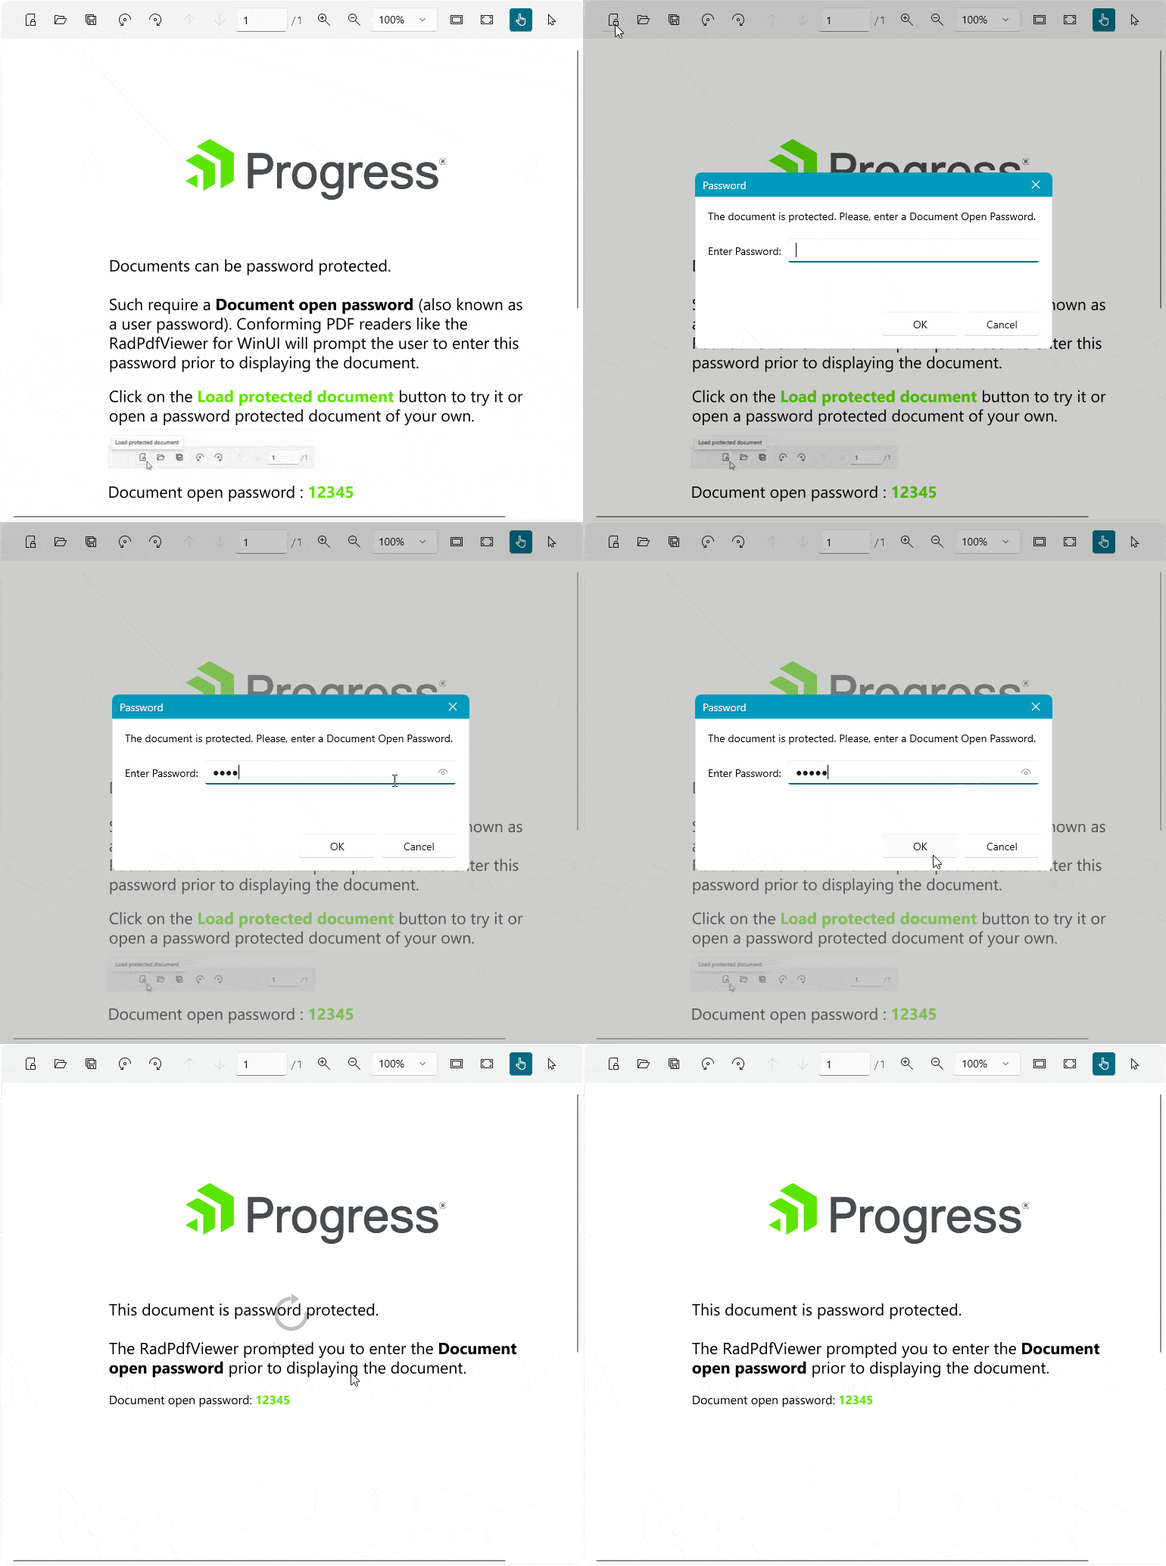
I mentioned earlier that the PDF viewer can open password-protected files. I am curious to check this out, too. Follow me.

Make sure to use stronger passwords, though. 😅
Note that we have added an extra button for opening a protected document in the toolbar. You can check the code of the demo to see how to add your own buttons to the PDF viewer’s toolbar.
And do not wonder where I found these awesome demos—go ahead and get the >Telerik UI for WinUI Examples now.
P.S. In case you need to find something in the documents that you will preview once you do this, just hit Ctrl + F.
Actions Matter
Your feedback is very important since it helps us hear your voice and determine the direction to take with the development of the products. If you’d like something new or different, do not stand still—share your thoughts in the comments below or use the Feedback Portal.
And since we’re speaking about actions, another one is to plug the PdfViewer in your WinUI app and give it a spin—it’s a certain win. 🎯 Existing customers can access the bits of Telerik UI for WinUI in your Telerik account and for new users use the link below.

Viktoria Grozdancheva
Viktoria is a Senior Front-end Developer with 5+ years of experience designing and building modern UI for desktop and mobile platforms on Microsoft/Telerik technology stacks. Her spare time is dedicated to friends and family and discovering new pieces of the world. Find her on Twitter and LinkedIn.

