Image Manipulation with NestJS and Sharp

Learn the importance of image optimization and how to integrate the Sharp library with NestJS to perform some image manipulation techniques.
In this post, we will create an image manipulation web app using the Sharp library and NestJS. We will learn the importance of image optimization and how to integrate the Sharp library with NestJS to perform image manipulation techniques like blurring, changing image format, rotating, flipping, etc.
What Is Sharp?
Sharp is an easy-to-use Node.js library for image processing. It is widely used because of its speed, output image quality and minimal code requirement.
For example, the code for resizing an image would look like this:
async function resizeImage() {
  try {
    await sharp("house.jpg")
      .resize({
        width: 40,
        height: 107,
      })
      .toFile("resized-house.jpg");
  } catch (error) {
    console.log(error);
  }
}
What Is NestJS?
NestJS is a backend Node.js framework widely loved for its modular architecture. This architecture promotes separation of concerns, allowing developers and teams to quickly build scalable and maintainable server-side applications.
NestJS also has several built-in modules to handle common tasks like file uploads and serving static files, which we will use to integrate Sharp into our app.
Importance of Image Optimization
While images enhance websites, unoptimized ones can slow them down. Unoptimized images lead to longer load times, poor user experience and increased website storage costs. This can be a significant difference between an amazing and a terrible site.
Image optimization means delivering high-quality visuals in an efficient format and size. Optimizing images can directly impact user retention and search engine rankings, so optimizing images is very important.
Areas for Image Optimization
Some key areas to consider are file format, image quality and size.
File Format
When choosing a file format, you first have to distinguish between older and more widely supported formats and newer, better-performing formats.
Older Formats:
- JPEG – A popular option for photos and detailed images. Think of images on a photography portfolio website.
- PNG – Think of graphics, images with sharp contrasts or transparent backgrounds.
Newer Formats:
- WebP – This is a good choice when prioritizing performance. It significantly reduces file size and is supported by most modern browsers.
- AVIF – This is another good choice for performance, often giving better compression than WebP and producing smaller files at the same quality level, although it is not as widely adopted as WebP.
Newer formats like WebP and AVIF are becoming more preferred, and fallback images can be used for compatibility with browsers that do not support them.
Quality and Size
- Optimize for the content – Tailor image quality based on purpose. Photos can tolerate more compression with lower quality, while images with text, fine lines or logos should have higher quality to preserve sharpness.
- Always resize before use – A pro tip is to resize images to the exact dimensions they will be used. This avoids unnecessarily large file sizes, improving rendering speeds and overall efficiency.
Project Setup
To begin, you’ll need to install the NestJS CLI if you haven’t done so already. Run the following command to install it:
npm i -g @nestjs/cli
Next, let’s use the NestJS CLI to create a new project by running the following command:
nest new sharp-demo
You will be prompted to pick a package manager. For this article, we’ll use npm (node package manager).

Once the installation is done, you’ll have a new folder called sharp-demo. This will be our project directory, and you can navigate to it by running this command:
cd sharp-demo
Next, let’s run the following command to scaffold an images module:
nest g resource images
Then select the REST API as shown in the image below.

Install Dependencies
Run the following command to install the dependencies we will need for our project:
npm i sharp && npm i --save @nestjs/serve-static && npm i -D @types/multer
The command above installs the sharp package, which we’ll use for image manipulation; the NestJS serve-static package, which we will use to serve our index.html; and the Multer typings package, which we will use in our file interceptor to extract our image.
Serve HTML Page
For the frontend of our app, we will create an HTML page and serve it with the NestJS ServeStaticModule.
Update your app.module.ts file with the following:
import { Module } from "@nestjs/common";
import { AppController } from "./app.controller";
import { AppService } from "./app.service";
import { ImagesModule } from "./images/images.module";
import { ServeStaticModule } from "@nestjs/serve-static";
import { join } from "path";

@Module({
  imports: [
    ServeStaticModule.forRoot({
      rootPath: join(__dirname, "..", "public"),
    }),
    ImagesModule,
  ],
  controllers: [AppController],
  providers: [AppService],
})
export class AppModule {}
In the code above, we configure our app to serve static files. We also point to the public directory located one level above the current directory as the directory containing our static files.
Next, create a folder called public at the root of your project, and in it, create two files named index.html and script.js.
The project directory should now look like this:
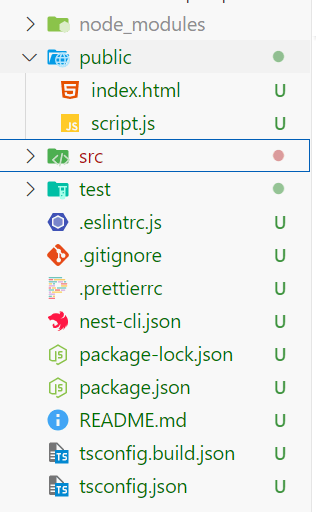
Update the index.html file with the following:
<!DOCTYPE html>
<html lang="en">
  <head>
    <meta charset="UTF-8" />
    <meta name="viewport" content="width=device-width, initial-scale=1.0" />
    <title>Image Manipulation with NestJS and Sharp</title>
    <style>
      body {
        font-family: Arial, sans-serif;
        margin: 20px;
      }
      .form-group {
        margin-bottom: 15px;
      }
      #output-container {
        margin-top: 20px;
        display: flex;
        gap: 20px;
      }
      img {
        max-width: 300px;
        max-height: 300px;
        object-fit: contain;
        border: 1px solid #ddd;
        padding: 5px;
      }
    </style>
  </head>
  <body>
    <h1>Image Manipulation with NestJS and Sharp</h1>
    <form id="imageForm">
      <div class="form-group">
        <label for="fileInput">Upload Image:</label>
        <input
          type="file"
          id="fileInput"
          name="file"
          accept="image/*"
          required
        />
      </div>
      <div class="form-group">
        <label for="technique">Choose Manipulation Technique:</label>
        <select id="technique" name="technique" required>
          <option value="blur">Blur</option>
          <option value="rotate">Rotate</option>
          <option value="tint">Tint</option>
          <option value="grayscale">Grayscale</option>
          <option value="flip">Flip</option>
          <option value="flop">Flop</option>
          <option value="crop">Crop</option>
          <option value="createComposite">Create Composite Image</option>
        </select>
      </div>
      <div class="form-group">
        <label for="format">Choose Output Format:</label>
        <select id="format" name="format" required>
          <option value="jpeg">JPEG</option>
          <option value="png">PNG</option>
          <option value="webp">WebP</option>
          <option value="avif">AVIF</option>
        </select>
      </div>
      <button type="submit">Submit</button>
    </form>

    <div id="output-container" style="display: none">
      <div>
        <h3>Original Image</h3>
        <img
          id="originalImage"
          width="300"
          height="300"
          src="#"
          alt="Original Image"
        />
      </div>
      <div>
        <h3>Manipulated Image</h3>
        <img id="manipulatedImage" src="#" alt="Manipulated Image" />
      </div>
    </div>

    <script src="script.js"></script>
  </body>
</html>
Also update the script.js file with the following:
document.addEventListener("DOMContentLoaded", () => {
  const form = document.getElementById("imageForm");
  const manipulatedImage = document.getElementById("manipulatedImage");
  const outputContainer = document.getElementById("output-container");
  const originalImage = document.getElementById("originalImage");

  form.addEventListener("submit", async (e) => {
    e.preventDefault();

    const formData = new FormData(form);
    const file = formData.get("file");
    if (!file) return;

    try {
      const response = await fetch("http://localhost:3000/images/process", {
        method: "POST",
        body: formData,
      });

      const result = await response.json();

      if (result.imageBase64) {
        manipulatedImage.src = result.imageBase64;

        const reader = new FileReader();
        reader.onloadend = function () {
          originalImage.src = reader.result;
        };
        reader.readAsDataURL(file);

        outputContainer.style.display = "flex";
      } else {
        alert("File upload failed");
      }
    } catch (error) {
      console.error("Error during upload:", error);
    }
  });
});
In the code above, we extract the processed image in Base64 format from the response and set it as the source of the manipulatedImage element, which allows it to be displayed dynamically.
Set Up Images Controller
Next, let’s update our ImagesController to handle file uploads and return the processed image in Base64 format.
Update the images.controller.ts file with the following:
import {
  Body,
  Controller,
  Post,
  UploadedFile,
  UseInterceptors,
} from "@nestjs/common";
import { ImagesService } from "./images.service";
import { FileInterceptor } from "@nestjs/platform-express";
import * as sharp from "sharp";

@Controller("images")
export class ImagesController {
  constructor(private readonly imagesService: ImagesService) {}

  @Post("process")
  @UseInterceptors(FileInterceptor("file"))
  async uploadAndProcessFile(
    @UploadedFile() file: Express.Multer.File,
    @Body()
    body: {
      technique: string;
      format: keyof sharp.FormatEnum;
    }
  ) {
    const base64Image = await this.imagesService.processImage(
      file,
      body.technique,
      body.format
    );
    return {
      message: "File uploaded and processed successfully",
      imageBase64: base64Image,
    };
  }
}
In the code above, we use the FileInterceptor to extract the uploaded file, while the technique and format are extracted from the request body with the @Body decorator. These parameters are then passed to the processImage method of ImagesService for processing.
Set Up Images Service
At the end of this section, your images.service.ts file should look like this:
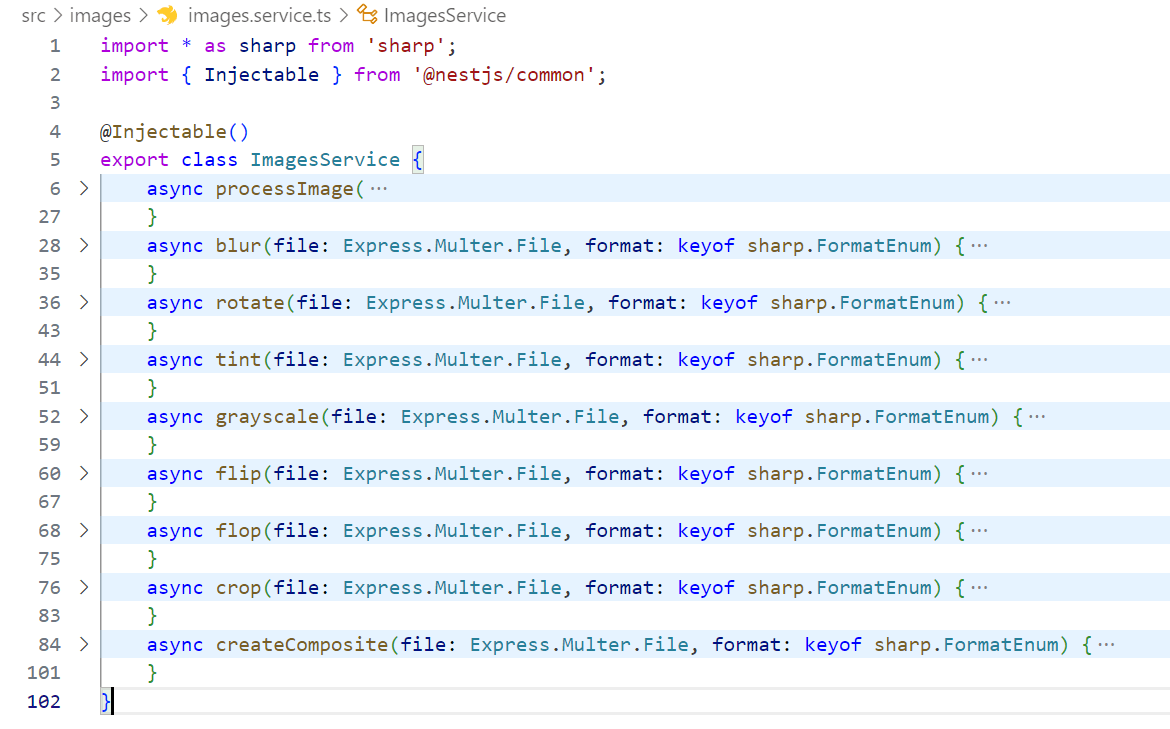
Update the images.service.ts file with the following:
import * as sharp from "sharp";
import { Injectable } from "@nestjs/common";

@Injectable()
export class ImagesService {
  async processImage(
    file: Express.Multer.File,
    technique: string,
    format: keyof sharp.FormatEnum
  ): Promise<Buffer> {
    try {
      const method = (this as any)[technique];
      if (typeof method !== "function") {
        throw new Error(
          `Method "${technique}" is not defined or not a function`
        );
      }
      return await method.call(this, file, format);
    } catch (error) {
      console.error(`Method "${technique}" is not defined or not a function`);
      throw new Error(
        `Failed to process image with technique "${technique}": ${error.message}`
      );
    }
  }
}
In the code above, the processImage method searches and calls a matching method in the ImagesService class based on the technique passed. This gives the flexibility to use different image manipulation methods with a single route based on the value of the technique in the request body.
Blurring an Image
Now that we have set up the processImage method, we can add any other method needed for image manipulation to the ImagesService class, and it can be used by passing its name as the value of the technique in the request body.
Let’s add the blur() method to blur an image:
async blur(file: Express.Multer.File, format: keyof sharp.FormatEnum) {
    const processedBuffer = await sharp(file.buffer)
        .resize(300, 300)
        .blur(10)
        .toFormat(format)
        .toBuffer()
    return `data:image/${format};base64,${processedBuffer.toString('base64')}`;
}
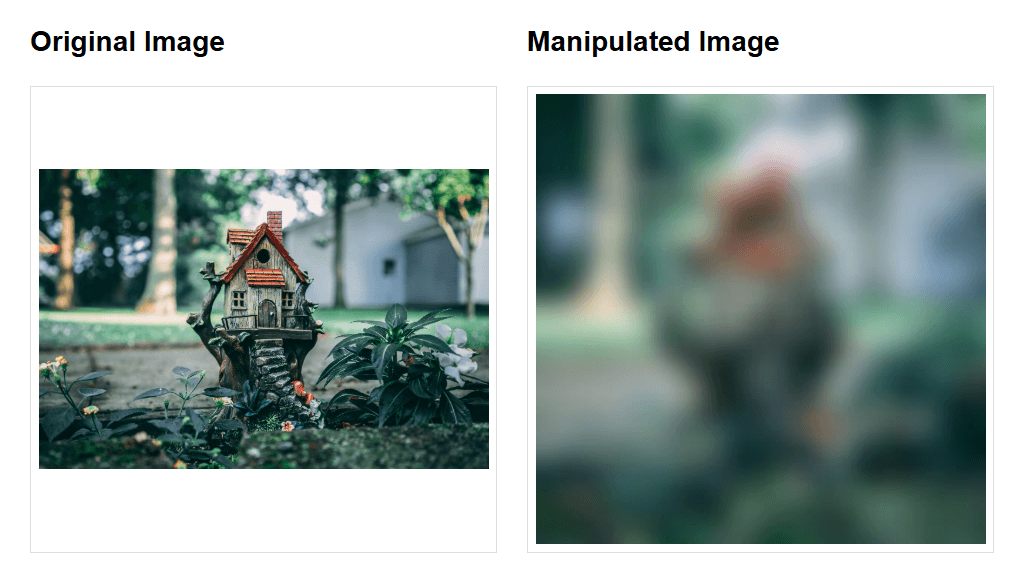
The code above takes an image’s buffer (the raw image data) and passes it to Sharp. The resize() method then resizes the image to 300x300 pixels. Next, the blur() method applies a blur effect with a strength of 9, although the method can take values of 0.3-1000.
Next, we convert the image to the specified format and generate the processed image as a buffer. Finally, the buffer is encoded to Base64 and sent as a data URL string.
The result when called is shown below:
Rotating an Image
Next, we’ll add the rotate() method to rotate an image:
async rotate(file: Express.Multer.File, format: keyof sharp.FormatEnum) {
  const processedBuffer = await sharp(file.buffer)
      .resize(300, 300)
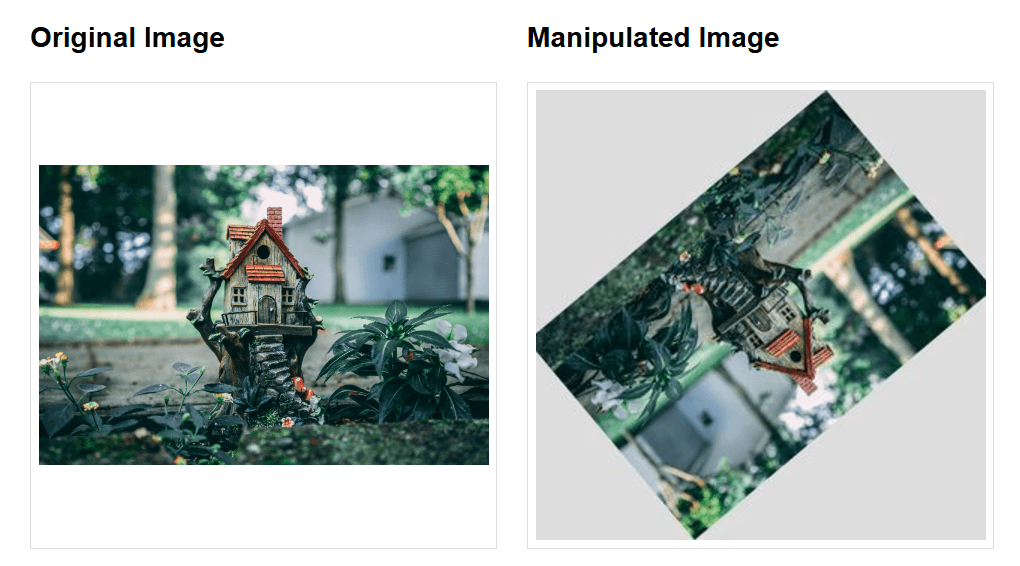
      .rotate(140, { background: "#ddd" })
      .toFormat(format)
      .toBuffer()
  return `data:image/${format};base64,${processedBuffer.toString('base64')}`;
}
The rotate() method takes the rotation angle and can also take a custom background color for non-90° angles.
When called, the result is:
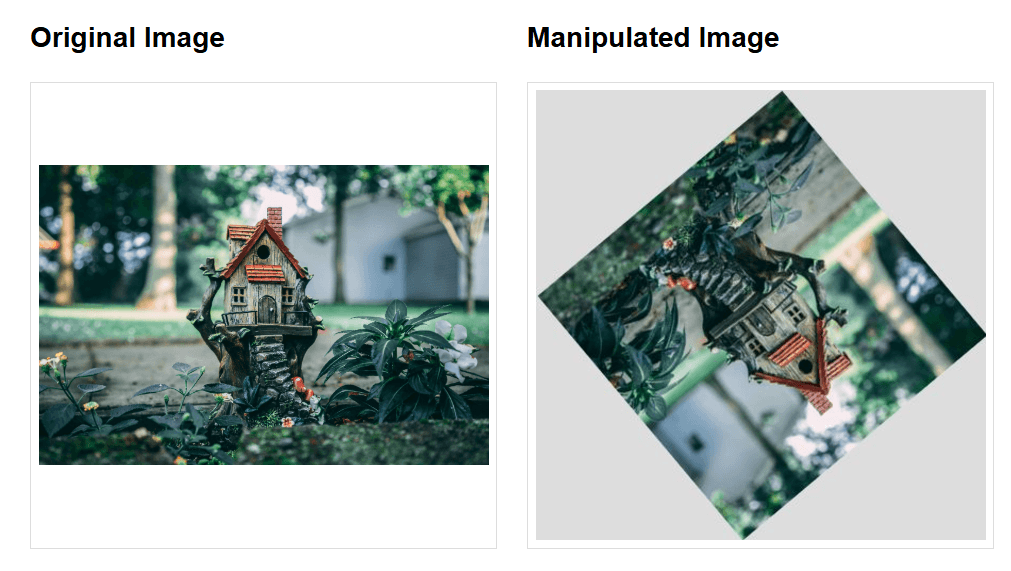
It is important to note that each transformation occurs on the image as it exists at that step, so if we had rotated the image before resizing it, we would have a different result, as shown below.
Tinting an Image
Let’s add the tint() method to tint an image:
async tint(file: Express.Multer.File, format: keyof sharp.FormatEnum) {
    const processedBuffer = await sharp(file.buffer)
        .resize(300, 300)
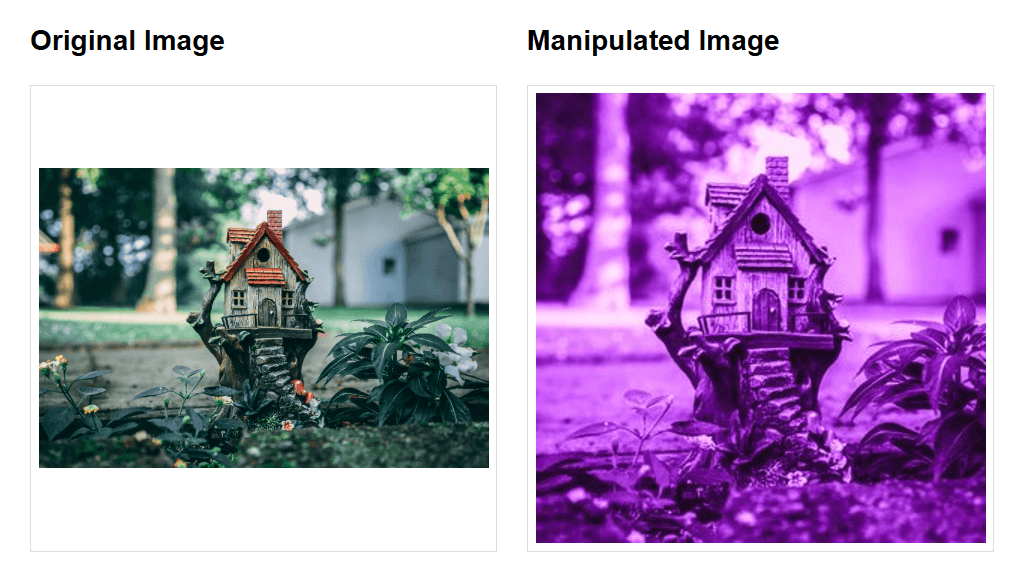
        .tint({ r: 150, g: 27, b: 200 })
        .toFormat(format)
        .toBuffer()
    return `data:image/${format};base64,${processedBuffer.toString('base64')}`;
}
The tint() method changes the color of an image by applying a specified tint based on the red, green, and blue (RGB) values. The range for each value is 0-255.
When called, the result is:
Converting Image to Grayscale
Next, let’s add the grayscale() method to convert an image to grayscale:
async grayscale(file: Express.Multer.File, format: keyof sharp.FormatEnum) {
  const processedBuffer = await sharp(file.buffer)
      .resize(300, 300)
      .grayscale() // or greyscale()
      .toFormat(format)
      .toBuffer()
  return `data:image/${format};base64,${processedBuffer.toString('base64')}`;
}
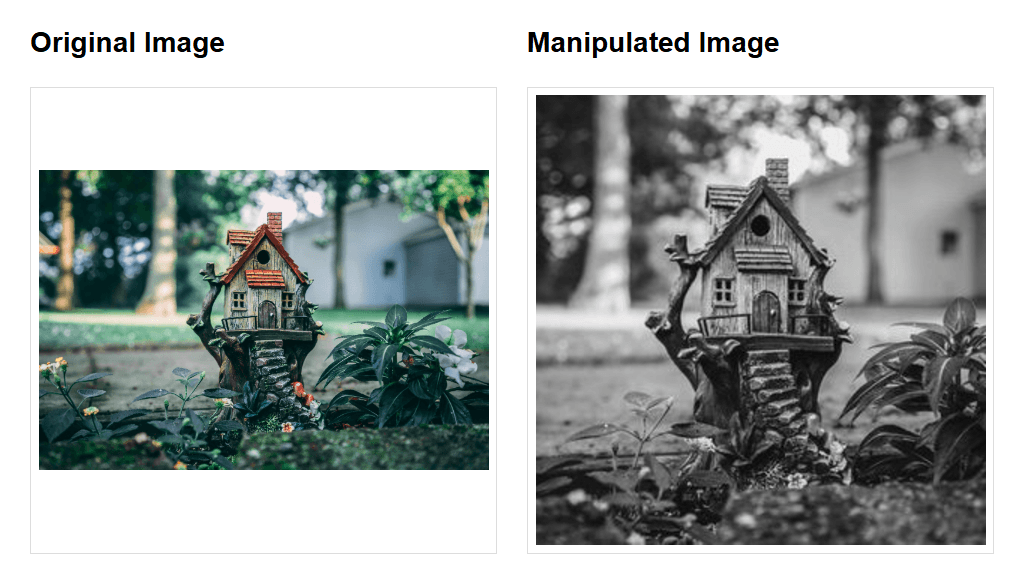
The grayscale() and greyscale() methods remove all the color information and represent the image using shades of gray.
When called, the result is:
Flipping an Image
Let’s add the flip() method to flip an image:
async flip(file: Express.Multer.File, format: keyof sharp.FormatEnum) {
  const processedBuffer = await sharp(file.buffer)
      .resize(300, 300)
      .flip()
      .toFormat(format)
      .toBuffer()
  return `data:image/${format};base64,${processedBuffer.toString('base64')}`;
}
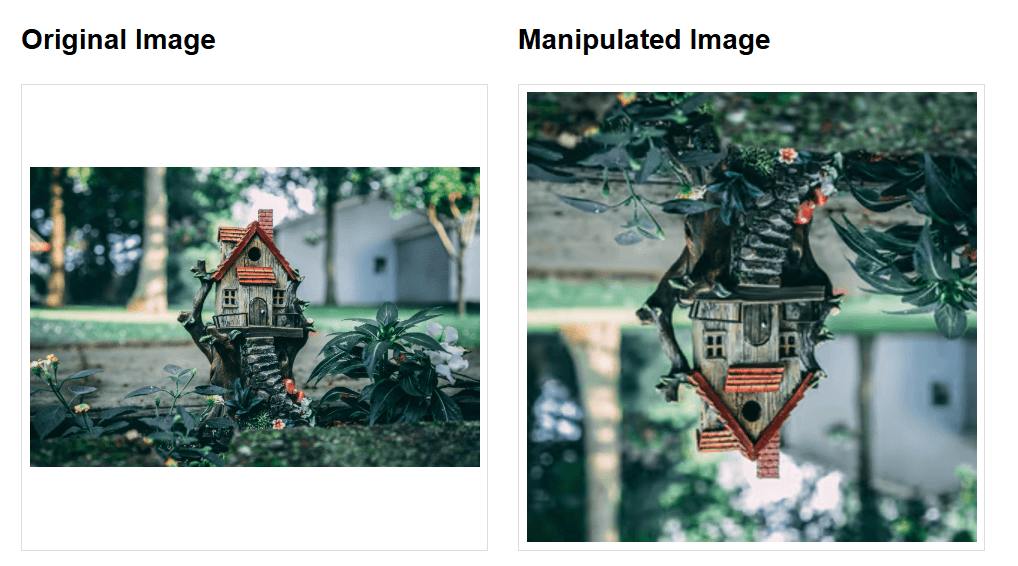
The flip() method vertically reverses an image. When called, the result is:
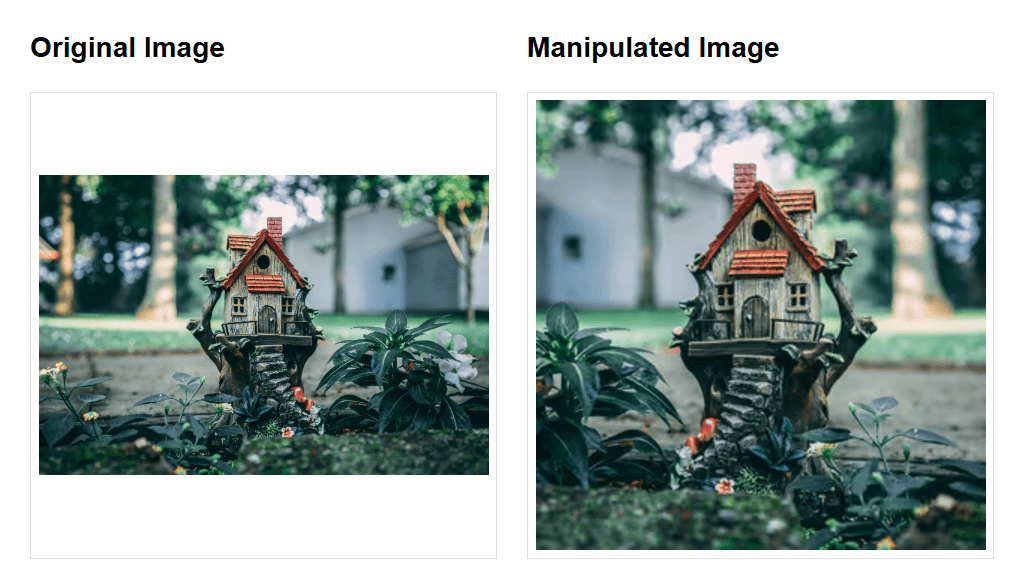
Flopping an Image
We can use the flop() method to flop an image:
async flop(file: Express.Multer.File, format: keyof sharp.FormatEnum) {
  const processedBuffer = await sharp(file.buffer)
      .resize(300, 300)
      .flop()
      .toFormat(format)
      .toBuffer()
  return `data:image/${format};base64,${processedBuffer.toString('base64')}`;
}
This method horizontally reverses an image. When called, the result is:
Cropping an Image
Next, let us add the crop() method to crop an image:
async crop(file: Express.Multer.File, format: keyof sharp.FormatEnum) {
  const processedBuffer = await sharp(file.buffer)
      .extract({ left: 140, width: 1800, height: 1800, top: 140 })
      .resize(300, 300)
      .toFormat(format)
      .toBuffer()
  return `data:image/${format};base64,${processedBuffer.toString('base64')}`;
}
The extract() method allows us to describe a box within the image to keep, cropping the rest.
- left – The horizontal position where the box should start
- width – The width of the box
- top – The vertical position where the box should start
- height – The height of the box
When called, the result is:
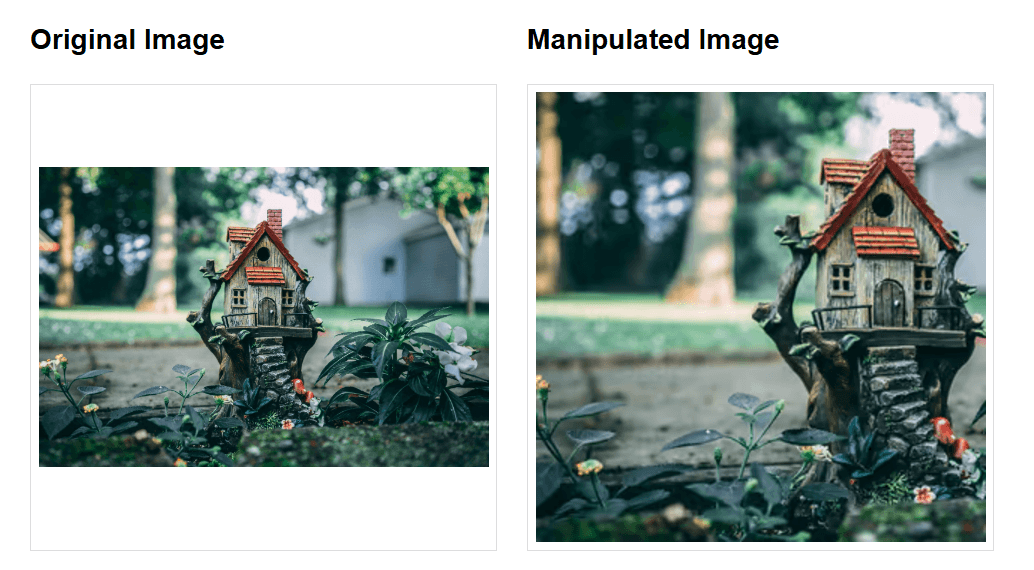
As mentioned above, the order when chaining the Sharp methods is important. This is why we called extract() before resize()—otherwise, we would get a different result.
Creating a Composite Image
Finally, let’s add the createComposite method:
async createComposite(file: Express.Multer.File, format: keyof sharp.FormatEnum) {
  const greyHouse = await sharp(file.buffer)
      .resize(150, 150)
      .grayscale()
      .toBuffer()
  const processedBuffer = await sharp(file.buffer)
      .composite([
          {
              input: greyHouse,
              top: 50,
              left: 50,
          },
      ])
      .resize(300, 300)
      .toFormat(format)
      .toBuffer()
  return `data:image/${format};base64,${processedBuffer.toString('base64')}`;
  }
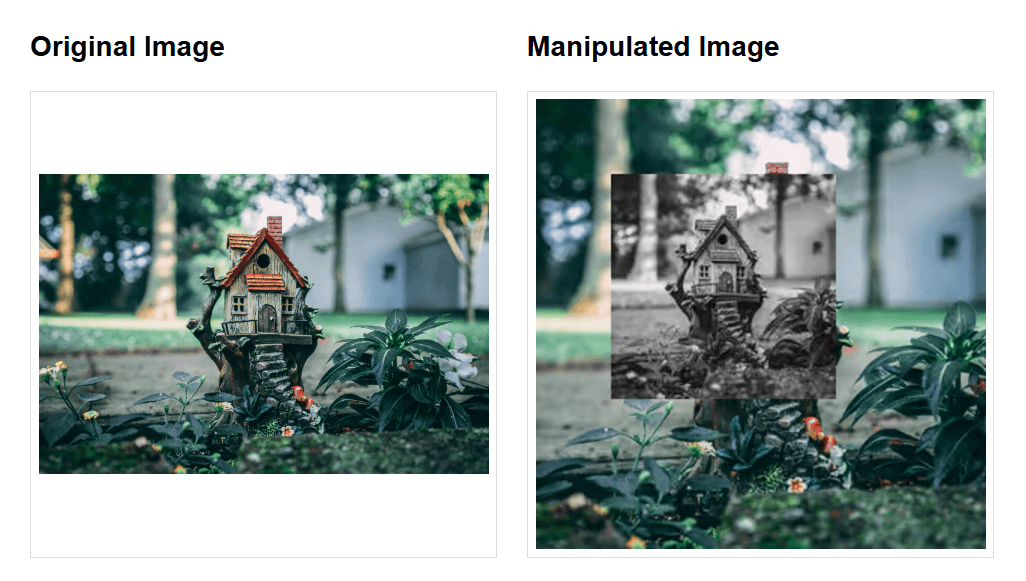
The composite() method takes an array of overlay objects containing input, top and left properties. It positions each overlay using the top and left properties.
In the code above, we create a small grayscale version of the image to use as an overlay. When called, the result is:
Starting Server
Now that we have completed the setup, we can start our server. Save all the files and start the NestJS server by running the following command:
npm run start
You should see this:

To access our index.html page, navigate to http://localhost:3000/index.html.
Conclusion
Images play an important role on the web. Hence, optimizing them and using other image manipulation techniques with libraries like Sharp and backend frameworks like NestJS is important.
After building the image manipulation web app, you should be able to blur, rotate, tint, convert to grayscale, flip, flop, crop, create a composite image and convert images to a different format.

Christian Nwamba
Chris Nwamba is a Senior Developer Advocate at AWS focusing on AWS Amplify. He is also a teacher with years of experience building products and communities.

