A Guide to Building GraphQL APIs with NestJS

Summarize with AI:
You’ll learn how GraphQL works, how to use GraphQL with NestJS, and how to use TypeORM with NestJS for our Postgres database.
In this post, we will create a GraphQL API using NestJS and a Postgres database. You’ll learn how GraphQL works, how to use GraphQL with NestJS, and how to use TypeORM with NestJS for our Postgres database.
We’ll build a simple movie CRUD API to do all of this. However, first, let’s understand the technologies we’ll be using.
What Is GraphQL?
It is a data query and manipulation language for APIs that allows the frontend to ask exactly what it needs.
Using GraphQL’s type system, we can easily describe a schema for our data on the backend. Because of this, the frontend simply describes what data it wants in a simple format that mirrors the expected JSON response. As a REST API alternative, GraphQL is more efficient.
With GraphQL, we don’t need multiple URLs to fetch different data; we simply describe what we want in a single request.
What Is NestJS?
NestJS is a Node.js framework that uses a modular architecture to build scalable server-side applications.
NestJS comes with pre-built components and patterns that we can simply plug in to build our application. One of these pre-built components is the @nestjs/graphql module, which we will use. With NestJS, developers get built-in support for various features so they do not constantly reinvent the wheel.
Project Setup
Run the following command to install the NestJS CLI if you have not done so already.
npm i -g @nestjs/cli
Next, run the following command to use the NestJS CLI to create a new project:
nest new movies-graphql-api
Next, you’ll be prompted to pick a package manager. I’ll select npm.

Once the installation is complete, you’ll have a new folder named movies-graphql-api. This folder is our project directory; you can navigate it by running this command:
cd movies-graphql-api
Next, let’s create the necessary files for our movie module—including the resolver, service, entity and model. Run the following command to do so:
nest generate module movie
nest generate service movie
nest generate resolver movie
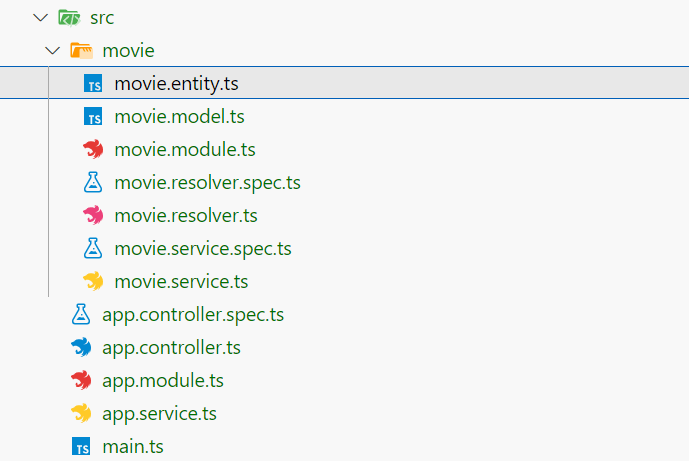
You should see a folder called movie in the src directory when you’re done. Open it and create two more files called movie.model.ts and movie.entity.ts.
Your src directory should now look like this.
With that done, run this command to install the needed dependencies we need:
npm install @nestjs/graphql @nestjs/apollo @apollo/server graphql @nestjs/typeorm typeorm pg
We’ll be using @nestjs/graphql, graphql-tools and graphql for the GraphQL integration. While @nestjs/typeorm, typeorm and pg will be used for the TypeORM and Postgres database integration.
Configure TypeORM and PostgreSQL
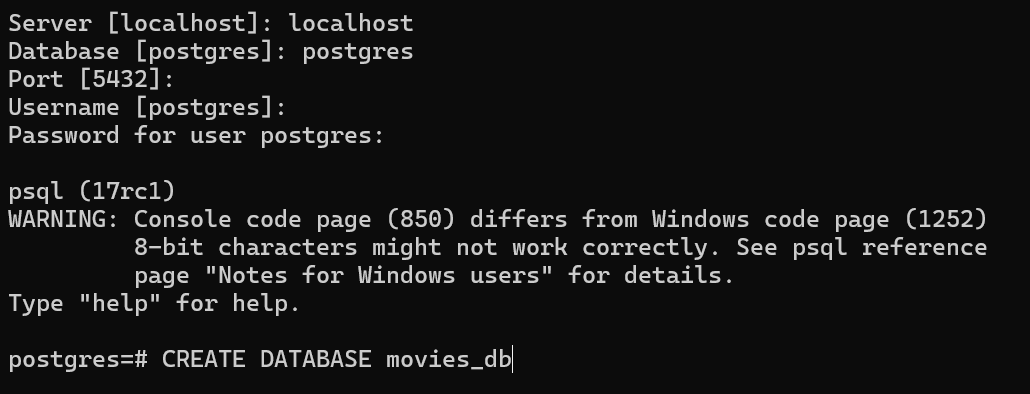
You’ll need to download and install Postgres if you haven’t already. Open the psql shell, fill in the prompts and create a database called movies_db.
To configure TypeORM to connect to our local Postgres database, add the following code to the imports array in the AppModule within your app.module.ts file:
TypeOrmModule.forRoot({
  type: 'postgres',
  host: 'localhost',
  port: 5432,
  username: 'postgres',
  password: 'postgres',
  database: 'movies_db',
  autoLoadEntities: true,
  synchronize: true,
}),
Make sure to fill in your actual database username and password.
Configure GraphQLModule
Next, we need to import the GraphQL module into our AppModule. Add the following code to the imports array:
GraphQLModule.forRoot<ApolloDriverConfig>({
  driver: ApolloDriver,
  autoSchemaFile: join(process.cwd(), 'src/schema.gql'),
}),
To configure the GraphQLModule, we pass an options object to the forRoot() static method. Here, the driver option is used to state the GraphQL server implementation we will be using, and the autoSchemaFile option is used to state where our automatically generated GraphQL schema should be created.
Your AppModule should now look like this:
import { Module } from "@nestjs/common";
import { AppController } from "./app.controller";
import { AppService } from "./app.service";
import { MovieModule } from "./movie/movie.module";
import { TypeOrmModule } from "@nestjs/typeorm";
import { GraphQLModule } from "@nestjs/graphql";
import { ApolloDriver, ApolloDriverConfig } from "@nestjs/apollo";
import { join } from "path";
@Module({
  imports: [
    TypeOrmModule.forRoot({
      type: "postgres",
      host: "localhost",
      port: 5432,
      username: "postgres",
      password: "postgres",
      database: "movies_db",
      autoLoadEntities: true,
      synchronize: true,
    }),
    GraphQLModule.forRoot<ApolloDriverConfig>({
      driver: ApolloDriver,
      autoSchemaFile: join(process.cwd(), "src/schema.gql"),
    }),
    MovieModule,
  ],
  controllers: [AppController],
  providers: [AppService],
})
export class AppModule {}
Code First vs. Schema First
NestJS has two ways of building GraphQL applications: code-first and schema-first methods.
With the code-first approach, we use decorators and TypeScript classes to automatically generate the corresponding GraphQL schema. With the schema-first approach, you write the schema directly, and NestJS generates the TypeScript definitions for you.
In this post, we’ll focus on the code-first approach and allow NestJS to generate the GraphQL schema for us.
Object Types
In GraphQL, an object type represents a domain object that the frontend might want to interact with. It defines how the data is structured in the GraphQL schema. Object types determine which fields end up being exposed to the GraphQL client.
Add the following code to the movie.model.ts file:
import { Field, ObjectType, Int, Float } from "@nestjs/graphql";
@ObjectType()
export class MovieModel {
  @Field(() => Int)
  id: number;

  @Field()
  title: string;

  @Field()
  description: string;

  @Field(() => Int)
  year: number;

  @Field(() => Float)
  rating: number;
}
We define and annotate a class with the @ObjectType and @Field decorators to describe our object type and its corresponding fields.
Now, the @Field decorator takes two optional arguments, a type function and an options object. We use the type function to clear any vagueness between the TypeScript type system and the GraphQL type system.
While not required for string and boolean types, it is needed for numbers, which we have to map to either Int or Float. On the other hand, the options object has three optional key-value pairs:
nullable: This takes a boolean.description: This takes a string.deprecationReason: This also takes a string.
Next, we need to make data transfer objects (DTOs) for creating and updating movies. In the movie folder, create a folder called dto. Then in the dto folder create two files: create-movie.dto.ts and update-movie.dto.ts.
Now, add the following code to the create-movie.dto.ts file:
import { InputType, Field, Float, Int } from "@nestjs/graphql";
@InputType()
export class CreateMovieInput {
  @Field()
  title: string;

  @Field()
  description: string;

  @Field(() => Int)
  year: number;

  @Field(() => Float)
  rating: number;
}
Add the following to the update-movie.dto.ts file:
import { Field, InputType, Int, PartialType } from "@nestjs/graphql";
import { CreateMovieInput } from "./create-movie.dto";
@InputType()
export class UpdateMovieInput extends PartialType(CreateMovieInput) {
  @Field((type) => Int)
  id: number;
}
For context, the InputType is a special kind of object type.
Entities and Services
Next, let’s create the data layer for our application. For some context, an entity is basically a class that maps to a database table. We’re going to have a Movie entity and a corresponding MovieService that interacts with the Movie table in our database.
Add the following to the movie.entity.ts file:
import { Entity, PrimaryGeneratedColumn, Column } from "typeorm";
@Entity()
export class Movie {
  @PrimaryGeneratedColumn()
  id: number;

  @Column()
  title: string;

  @Column()
  description: string;

  @Column()
  year: number;

  @Column("float")
  rating: number;
}
Also update the movie.service.ts file with the following:
import { Injectable } from "@nestjs/common";
import { InjectRepository } from "@nestjs/typeorm";
import { Movie } from "./movie.entity";
import { Repository } from "typeorm";
import { CreateMovieInput } from "./dto/create-movie.dto";
import { UpdateMovieInput } from "./dto/update-movie.dto";
@Injectable()
export class MovieService {
  constructor(
    @InjectRepository(Movie)
    private readonly movieRepository: Repository<Movie>
  ) {}

  findAll(): Promise<Movie[]> {
    return this.movieRepository.find();
  }

  async findOne(id: number): Promise<Movie> {
    const movie = await this.movieRepository.findOneBy({ id });

    if (!movie) {
      throw new Error("Movie not found");
    }
    return movie;
  }

  async create(createMovieInput: CreateMovieInput): Promise<Movie> {
    const movie = this.movieRepository.create(createMovieInput);
    return this.movieRepository.save(movie);
  }

  async update(updateMovieInput: UpdateMovieInput): Promise<Movie> {
    const movie = await this.movieRepository.findOneBy({
      id: updateMovieInput.id,
    });
    if (!movie) {
      throw new Error("Movie not found");
    }

    if (updateMovieInput.title) movie.title = updateMovieInput.title;
    if (updateMovieInput.description)
      movie.description = updateMovieInput.description;
    if (updateMovieInput.year) movie.year = updateMovieInput.year;
    if (updateMovieInput.rating !== undefined)
      movie.rating = updateMovieInput.rating;

    return this.movieRepository.save(movie);
  }

  async remove(id: number) {
    const movie = await this.movieRepository.findOneBy({ id });

    if (!movie) {
      throw new Error("Movie not found");
    }

    await this.movieRepository.delete(id);
    return movie;
  }
}
Finally, update your MovieModule in the movie.module.ts file to use the TypeOrmModule.
import { Module } from "@nestjs/common";
import { MovieService } from "./movie.service";
import { MovieResolver } from "./movie.resolver";
import { TypeOrmModule } from "@nestjs/typeorm";
import { Movie } from "./movie.entity";
@Module({
  imports: [TypeOrmModule.forFeature([Movie])],
  providers: [MovieService, MovieResolver],
})
export class MovieModule {}
Resolvers
Resolvers serve as middlemen between the incoming GraphQL operations (e.g., queries, mutations and subscriptions) and the data layer of our application (the entities and services).
To set up our resolver, we need to define a class with resolver functions as methods and annotate that class with the @Resolver decorator.
Now update the movies.resolver.ts file with the following:
import { Args, Int, Mutation, Query, Resolver } from "@nestjs/graphql";
import { MovieService } from "./movie.service";
import { MovieModel } from "./movie.model";
import { CreateMovieInput } from "./dto/create-movie.dto";
import { UpdateMovieInput } from "./dto/update-movie.dto";
@Resolver()
export class MovieResolver {
  constructor(private readonly movieService: MovieService) {}

  @Query(() => [MovieModel])
  async movies() {
    return this.movieService.findAll();
  }

  @Query(() => MovieModel)
  async movieById(@Args("id", { type: () => Int }) id: number) {
    return this.movieService.findOne(id);
  }

  @Mutation(() => MovieModel)
  async createMovie(
    @Args("createMovieInput") createMovieInput: CreateMovieInput
  ) {
    return this.movieService.create(createMovieInput);
  }

  @Mutation(() => MovieModel)
  async updateMovie(
    @Args("updateMovieInput") updateMovieInput: UpdateMovieInput
  ) {
    return this.movieService.update(updateMovieInput);
  }

  @Mutation(() => MovieModel)
  async removeMovie(@Args("id", { type: () => Int }) id: number) {
    return this.movieService.remove(id);
  }
}
In the code above, we annotate the methods of our MoviesResolver class with decorators indicating what GraphQL operation they perform.
- @Query is used when simply trying to fetch data. It can accept two arguments: a function returning the expected object type from the query operation and an optional options object.
- @Args is used to extract arguments from a request to use it in our method. It accepts two arguments: the name of the field to extract as an argument and an optional options argument.
- @Mutation is used when we want to create, update or delete data. It accepts a function returning the expected object type from the mutation operation.
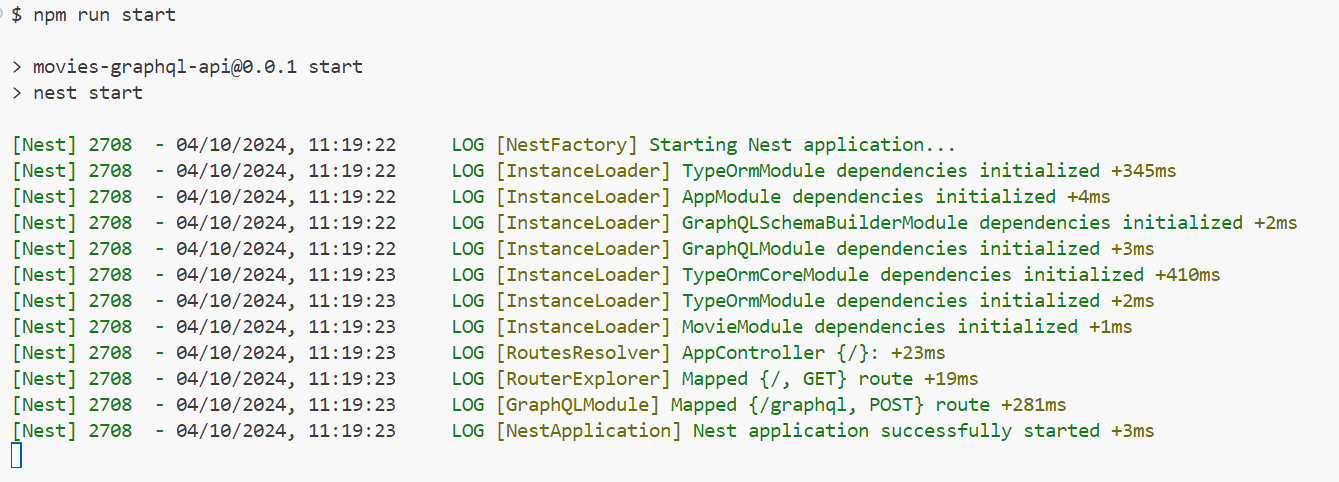
Having completed the setup, we can now start the server. Save all the files and start the NestJS service by running the following command:
npm run start
You should see this:
Testing with GraphQL Playground
The GraphQL playground is an in-browser IDE, which we get by default using the same URL as the GraphQL server. To access it, navigate to http://localhost:3000/graphql in your browser.
To add a movie, use the following mutation:
mutation {
  createMovie(
    createMovieInput: {
      title: "Wolfs"
      description: "Two rival fixers cross paths when they're both called in to help cover up a prominent New York official's misstep."
      year: 2024,
      rating: 6.5
    }
  ) {
    id
    title
    description
    year
  }
}
It should look like this.
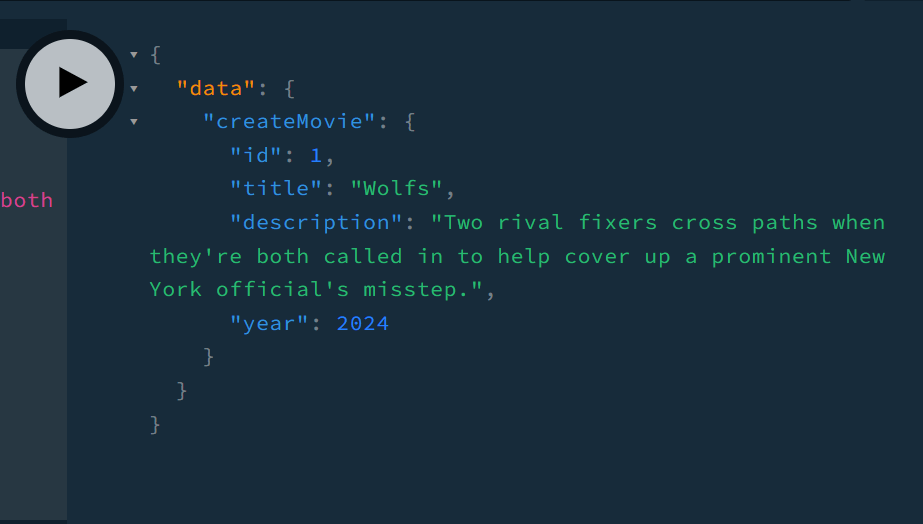
Now, let’s add two more movies:
mutation {
  createMovie(
    createMovieInput: {
      title: "Deadpool & Wolverine",
      description: "A movie, that shows sacrifice for love, contains a lot of humor, funny, has a lot of sexual language and violence",
      year: 2024,
      rating: 7.9
    }
  ) {
    id
    title
    description
    year
  }
}

mutation {
  createMovie(
    createMovieInput: {
      title: "The God Father",
      description: "Italian mafia and jokes",
      year: 1972,
      rating: 9.2
    }
  ) {
    id
    title
    description
    year
  }
}
Now, let’s try to fetch all the movies using the following query:
{
  movies {
    id
    title
    year
    rating
    description
  }
}
And you should get the following response:
{
  "data": {
    "movies": [
      {
        "id": 1,
        "title": "Wolfs",
        "year": 2024,
        "rating": 6.5,
        "description": "Two rival fixers cross paths when they're both called in to help cover up a prominent New York official's misstep."
      },
      {
        "id": 2,
        "title": "Deadpool & Wolverine",
        "year": 2024,
        "rating": 7.9,
        "description": "A movie, that shows sacrifice for love, contains a lot of humor, funny, has a lot of sexual language and violence"
      },
      {
        "id": 3,
        "title": "The God Father",
        "year": 1972,
        "rating": 9.2,
        "description": "Italian mafia and jokes"
      }
    ]
  }
}
Next, let’s try updating a movie using the following mutation:
mutation {
    updateMovie(updateMovieInput: {
        id: 2,
        rating: 9,
        description: "marvel movie"
    }) {
        id
        title
        rating
    }
}
You should get the following response:
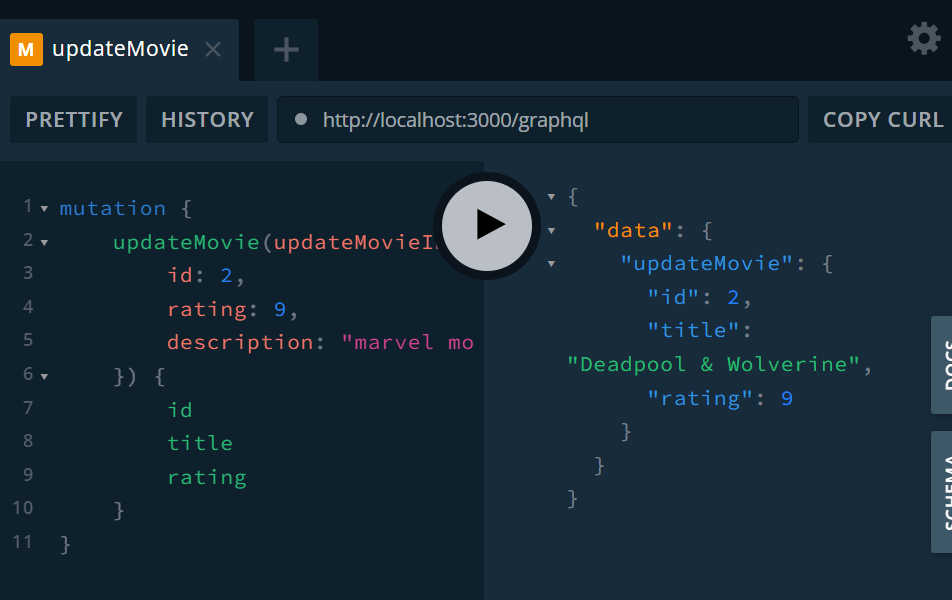
Next, let’s try fetching a single movie.
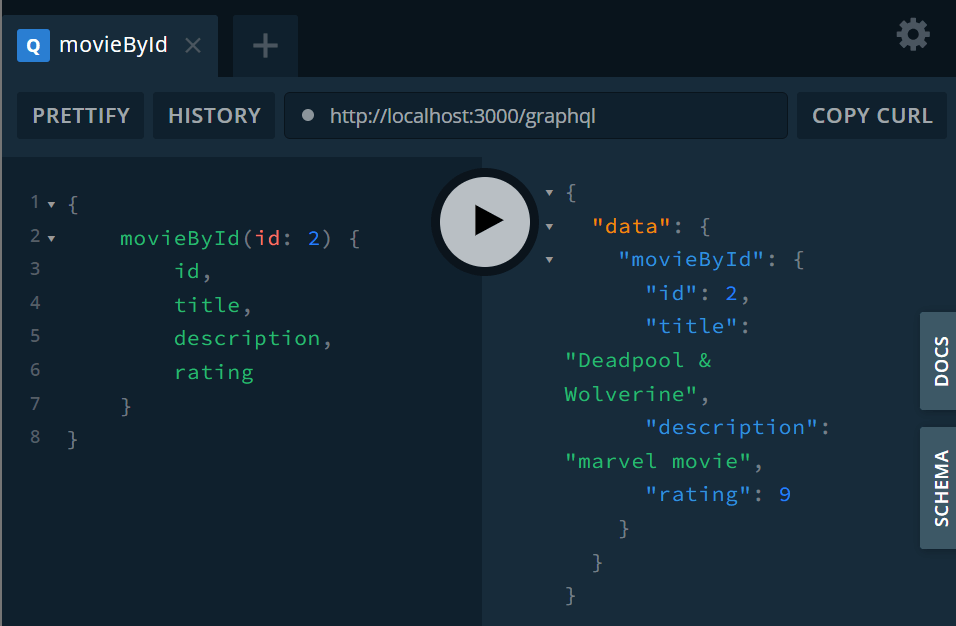
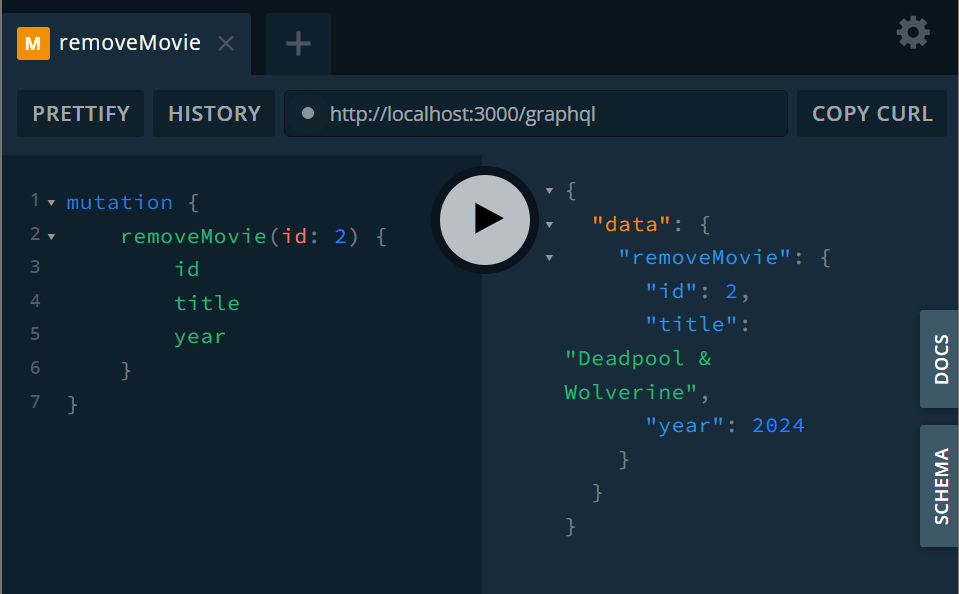
Finally, let’s try deleting a movie.
Conclusion
Now, you understand how GraphQL works and can create a GraphQL API using NestJS and a Postgres database.

Christian Nwamba
Chris Nwamba is a Senior Developer Advocate at AWS focusing on AWS Amplify. He is also a teacher with years of experience building products and communities.

