
Triple A File Uploads with Azure, ASP.NET Core and Angular

Summarize with AI:
This is BETA software.
This article was written prior to the Release Candidate of Kendo UI for Angular. The ASP.NET Core Template Pack is still in development and supports only Angular version 2.0.0. To remain compatible with Angular 2.0.0 a beta version of the Kendo UI for Angular is required. Note that some demos may not work with current versions of the any software outlined below. We will update this document as new releases become available.
Building a modern web application with a robust Angular client backed by the power of Azure and ASP.NET Core sounds like a difficult mix of bleeding edge technologies, but in actuality you might surprised at how simple it is to set up. In this article, we'll learn how to use the Kendo UI for Angular Upload component to create a stylish and functional UI for uploading files to Azure Blob Storage through an ASP.NET Core controller action.
Prerequisites
The task at hand requires some working knowledge of Azure, setting up an Angular application with ASP.NET Core, and installing Kendo UI for Angular. You can find resources to each of these topics below, this way we can target the scope of the article to the just the necessary bits.
Setting up an Azure storage blob is pretty straight forward, if you would like get started with Azure Blob storage using .NET just click here.
If you would like to get started using the command line interface than look no further than this handy guide on Cooking with ASP.NET Core and Angular. If Visual Studio templates are more your flavor of development, then building this quick tutorial on building a Single Project Full-Stack Angular application should do perfectly. Either resource will help you setup your Kendo UI for Angular account as well, it's a one stop knowledge shop.
TLDR
- get started with Azure Blob storage using .NET just click here
- Cooking with ASP.NET Core and Angular
- Single Project Full-Stack Angular
Overview
When building cloud-hosted applications, it's not ideal to have users uploading files and photos to the application's directories. Instead users should be uploading to other cloud storage locations like Azure Blob storage. This arrangement keeps our application's files separate from user content, offloads storage to a cheaper medium, and provides a solid infrastructure for fetching the files from storage. With Angular, Azure and ASP.NET Core this is a task that requires very little code with very big benefits.
In the following steps we'll setup an Azure container, create an ASP.NET Core Web API endpoint, and tie it all together with an Angular interface.
Azure
The first step in the process is to setup an Azure Blob Container for storing files. We'll log into our Azure account and click through the guided setup for creating new container.
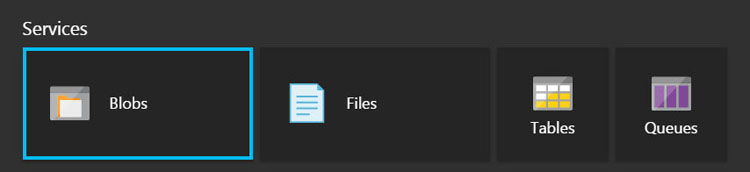
The process here is pretty straightforward, as Azure's GUI guides us through the process. There are just a few options, most importantly being the container name.
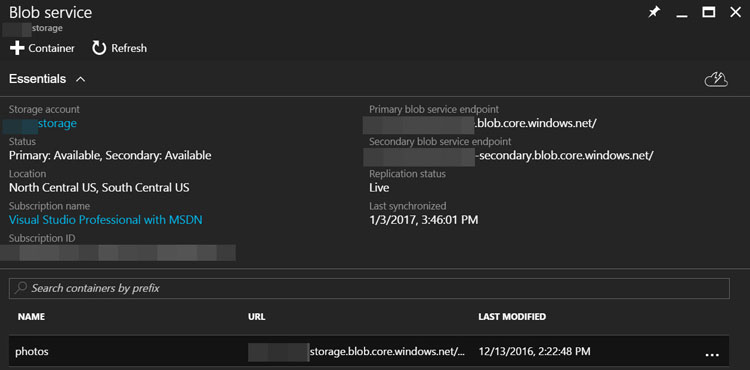
For this example we'll create a "photos" container to store a users headshot for their profile in our application.

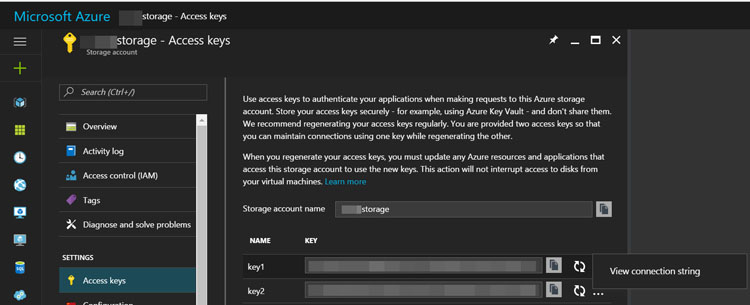
After the photos container is created, we'll need to navigate back to the main blade menu of the storage account. On this menu, under settings, we'll find the Access keys for the storage account. From the Access keys menu a connection string can be created that will allow us to access our storage from an API.
To create the connection string, select the ellipsis from one of the access keys on the page. Copy the connection string and store this in a safe place. Best practices for storing access keys are beyond the scope of this article, so we won't cover it here.
TIP: Don't place access keys in code that is under source control and publicly accessible, ex: GitHub.
ASP.NET Core Controller
Now that we have our blob storage container ready for our photos, we'll need to provide our application with a method for saving files. Since this application will use Angular for the client-side of the application, we'll need a WebAPI endpoint for Angular to communicate with. Let's create a controller and controller action for handling our file requests.
//FileUploadController.cs

[Route("api/[controller]")]

public class FileUploadController : Controller
{
    [HttpPost("[Action]")]
    async public Task<IActionResult> SaveFile(IFormFile files)
    {
        // Connect to Azure

        // Save file to blob

        // Respond with success
    }
}
The FileUploadController will handle a SafeFile request at the endpoint api/FileUpload/SaveFile. By accepting a parameter of IFormFile we'll be able to bind the incoming files value from the request body. The HTTP request below is what a file request should look like to ASP.NET when the request is made.
Entity
Content-Type: multipart/form-data; boundary=----WebKitFormBoundary*

Body
Content-Disposition: form-data; name="files"; filename="some-file.jpg"
Content-Type: image/jpeg
Next we'll connect to our Azure storage account and make a reference to the "photos" container we designated earlier as our storage for user photos. To work with Azure in .NET we'll add the WindowsAzure.Storage NuGet package. Once this package is installed we can make a reference to Microsoft.WindowsAzure.Storage and Microsoft.WindowsAzure.Storage.Blob giving us access to the Azure storage APIs.
// Connect to Azure

// Set the connection string
CloudStorageAccount storageAccount = CloudStorageAccount.Parse(connectionString);

// Create a blob client.
CloudBlobClient blobClient = storageAccount.CreateCloudBlobClient();

// Get a reference to a container
CloudBlobContainer container = blobClient.GetContainerReference("photos");
With the file and Azure container ready, we can save the file. We'll need a BlockBlobReference, this will create a new reference in Azure or allow us to overwrite an existing file. Next, we'll open a file stream and upload the file asnychronously to Azure.
// Save file to blob

// Get a reference to a blob
CloudBlockBlob blockBlob = container.GetBlockBlobReference(files.FileName);

// Create or overwrite the blob with the contents of a local file
using (var fileStream = files.OpenReadStream())
{
    await blockBlob.UploadFromStreamAsync(fileStream);
}
Once the file has been uploaded to Azure, we can respond back to the HTTP request with a success response. In the response, we'll include the file name that was saved, the file size, and most importantly the URI where the file can be found in storage. Depending on how the feature is used in an application, we may want to save this URI into a database so that it can be used later in our application's UI.
// Respond with success
return Json(new {
    name = blockBlob.Name,
    uri = blockBlob.Uri,
    size = blockBlob.Properties.Length
});
Angular Upload
Uploading from Angular requires very little effort when using Kendo UI for Angular. We'll just need to add the Kendo UI Upload component to our application and let it handle the UI for us.
Kendo UI for Angular is already installed for this application, a detailed outline of installing Kendo UI can be found in the Prerequisites in this article.
We'll create an upload component that will allow users to upload an image and display the image from Azure when it completes. To allow the user to upload a file, we'll add a kendo-upload component. The kendo-upload component renders the UI and handles the upload process for us. Using the [saveUrl] property, we can specify the endpoint on our server-side code, we can also bind to the success event of the kendo-upload component and populate an img element with the image uri in Azure.
<!-- upload.component.html -->

<kendo-upload [saveUrl]="uploadSaveUrl" (success)="successEventHandler($event)"></kendo-upload>
<img *ngIf="userPic" src="{{ userPic }}" />
The last step is to create the TypeScript code to wire everything up. We'll set the uploadSaveUrl to our server endpoint and set the userPic from the uri received from the success response from the server.
// upload.component.ts
import { Component } from '@angular/core';
@Component({
selector: 'upload',
template: require('./upload.component.html')
})
export class UploadComponent {
// ASP.NET Core endpoint
public uploadSaveUrl: string = "/api/FileUpload/SaveFile";
public userPic: string;
successEventHandler(e) {
// Get the file URI from the response
this.userPic = e.response.json().uri;
}
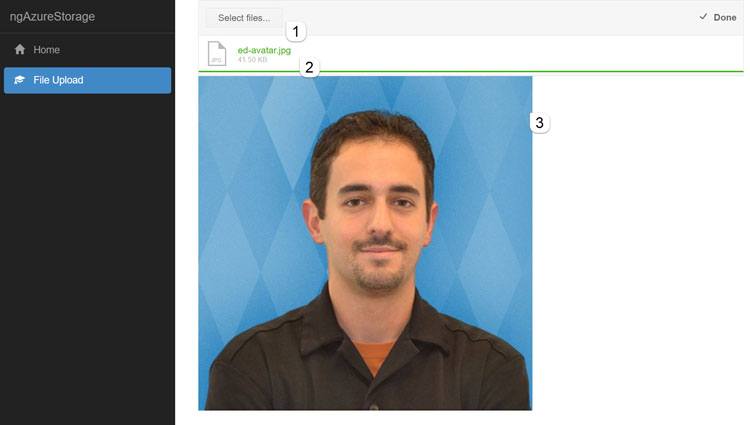
}The completed UI allows the user to select a file from their file system, upload, and displays the image from Azure on the page.
Wrap up
With very little code, we now have cloud storage for user files. We could easily extend this code to include multi-file uploading, validation, and write Azure URIs to SQL so we can fetch the images at a later time. The kendo-upload provides a solid UX showing file upload progress, success & fail status, and can even be configured to allow users to cancel or remove uploaded files.
Does this scenario fit your application? Drop a message below and let me know how you might use Azure Blobs, ASP.NET Core, or Kendo UI in your next app.
Header photo courtesy of West Point - The U.S. Military Academy.
Related resources:
- The State of the Union in ASP.NET Core (slack chat)
- Working with ASP.NET Core and Data Grids (article)
- My 360⁰ Guide to ASP.NET Core: Top Questions Answered (webinar)

Ed Charbeneau
Ed