
DIY IoT for Azure

Summarize with AI:
Learn how to build and program a custom Internet of Things (IoT) sensor device for an Azure IoT Hub, and how to consume and visualize this data in an ASP.NET Core MVC application.
For software developers, working with the Internet of things (IoT) usually means focusing exclusively on the server side. Typical questions and problems are first and foremost the selection of cloud providers or methods for efficient data storage and analysis. However, taking a closer look at the actual "things" - building and programming them - is just as fascinating.
An IoT End-to-End Scenario in Three Acts
In this blog post, we create a basic IoT scenario and look at it from an end-to-end perspective. With just a little bit of tinkering and programming, we can even build a custom IoT sensor device that posts data into an Azure IoT Hub. That data will later be consumed and visualized in an ASP.NET Core MVC application. This whole end-to-end scenario is structured into three acts.
- Act 1: preparation and configuration of the Azure IoT Hub
- Act 2: building and programming an IoT sensor device that provides data for the Azure IoT Hub
- Act 3: processing and visualizing data from Azure IoT Hub in an ASP.NET Core MVC application
Act 1: Preparations
Before we can start building and programming an actual IoT device, a couple of preparation steps need to be made inside the Microsoft Azure Portal.
Creating an IoT Hub
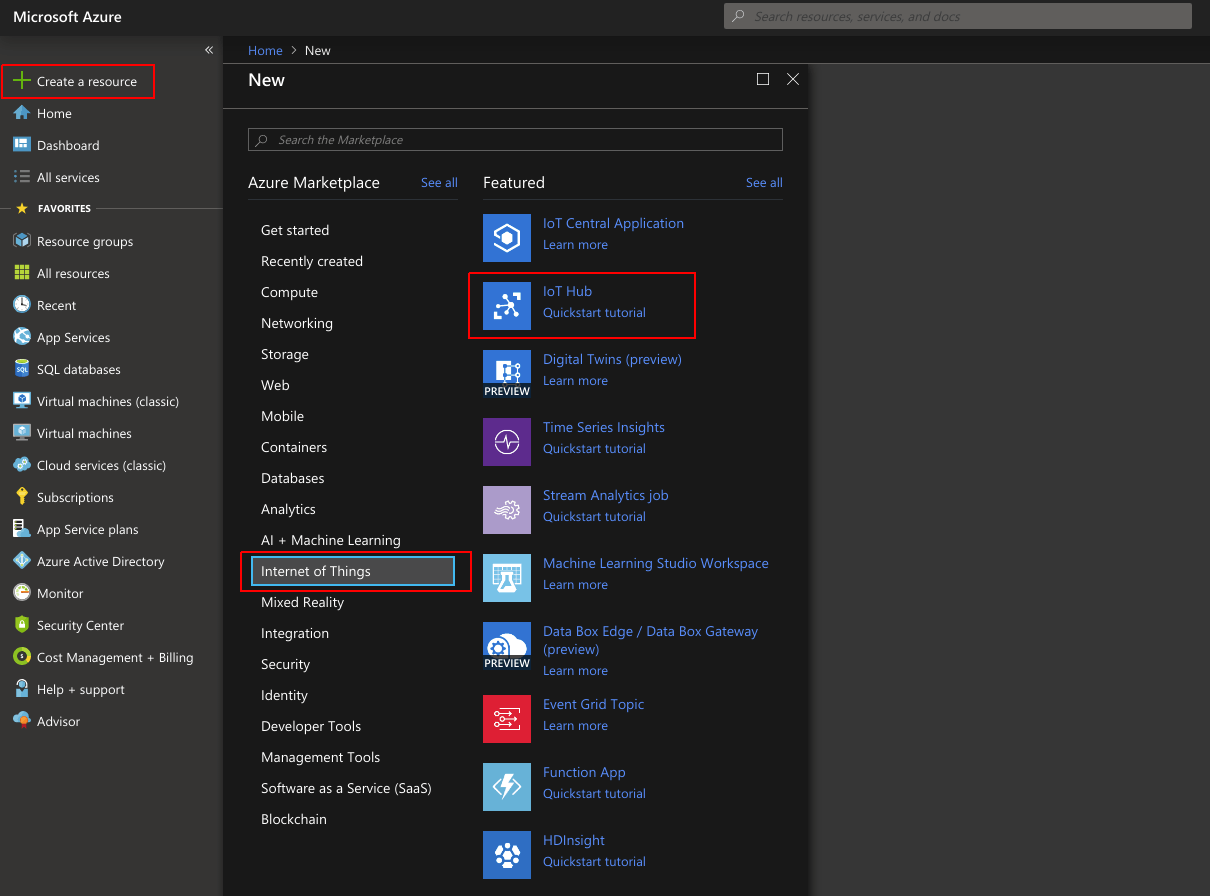
- First of all, an Azure IoT Hub must be created by selecting Create a resource - Internet of Things - IoT Hub.
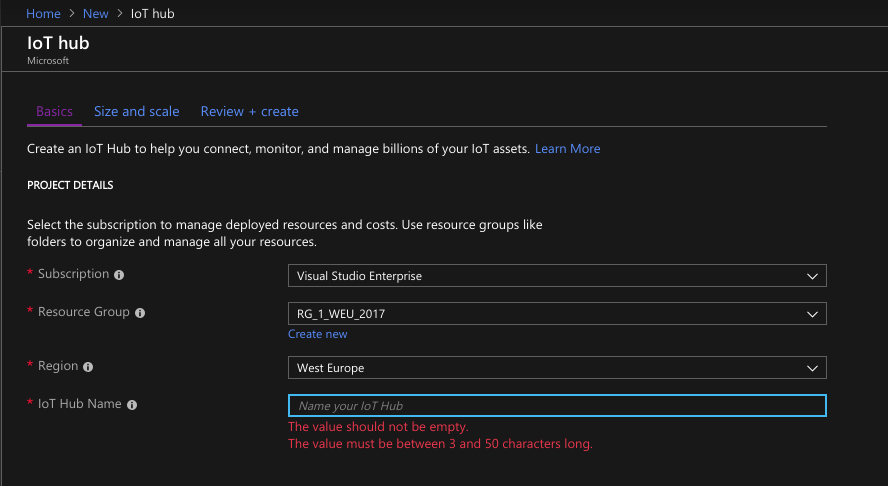
In the next step, a few mandatory settings have to be configured:
- Subscription: in case multiple subscriptions are available, one must be picked that is associated with the IoT Hub
- Resource Group: if no resource group exists, a new one must be created here
- Region: the geographic location where the IoT Hub will be hosted
- IoT Hub Name: this can be chosen arbitrarily as long as it is still available
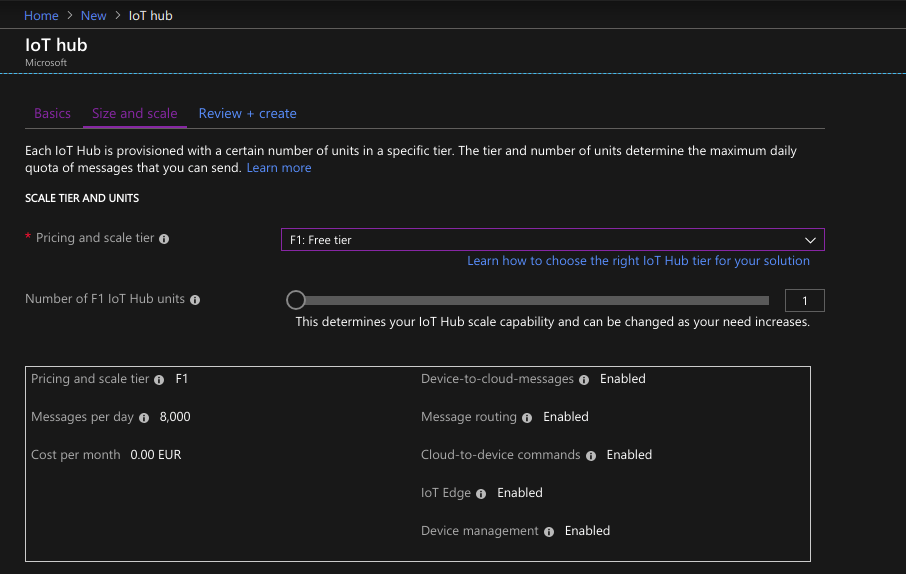
Then, size and scale of the IoT hub must be configured. For a demo purpose like this, Free Tier should definitely be enough.
Now that the IoT Hub has successfully been created, an actual IoT device (our later sensor) must be registered with it.
Registering an IoT Device
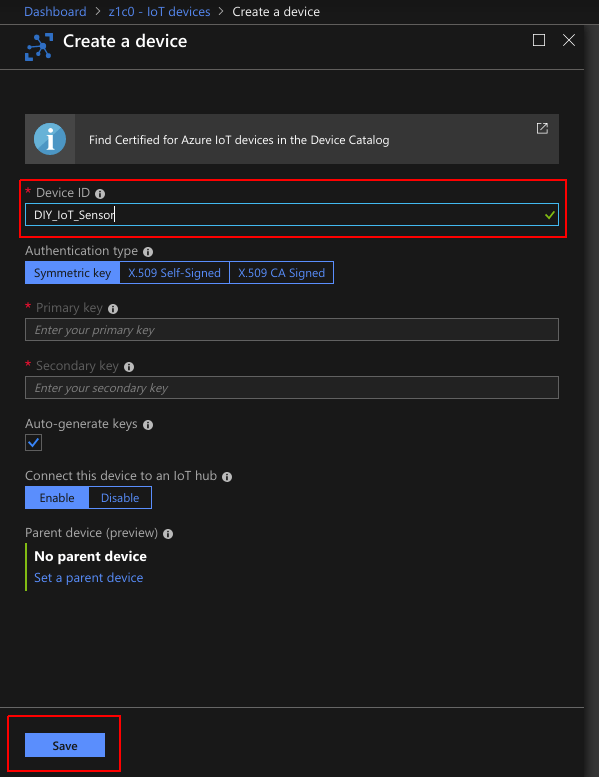
On the newly created IoT hub, select IoT devices and then click Add to register a new device.
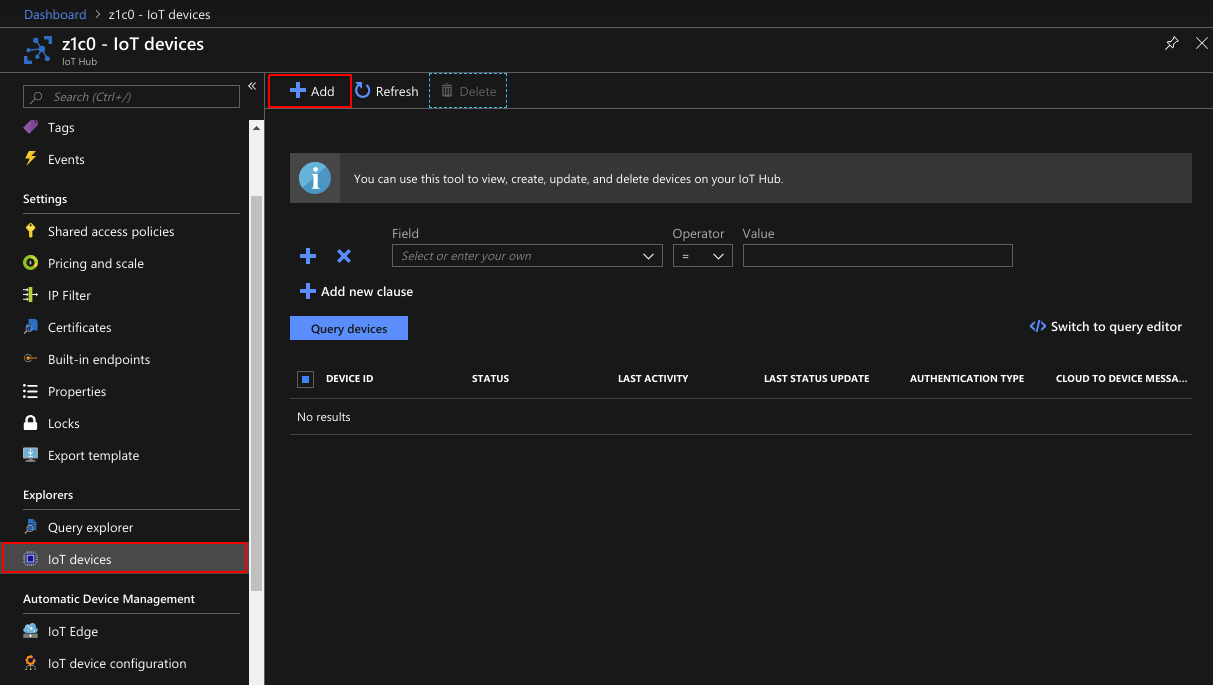
In the following step, this new device must be given a name (here: DIY_IoT_Sensor), and after clicking Save it will be registered and associated with the IoT Hub.
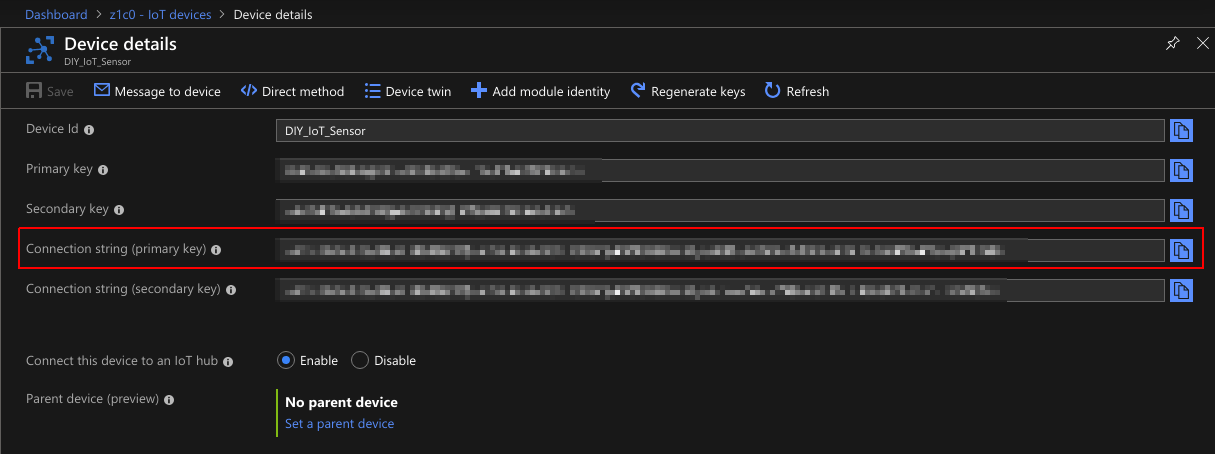
By selecting the device, its property page opens, which provides the information (among others) about this device's connection string. This connection string will be required later for associating an actual physical device with it. So now is a good time to copy this connecting string and save it for later use.
Download the Source Code
As a last preparation step, we will clone the sample application for the whole end-to-end scenario.
$ git clone https://github.com/z1c0/diy-iot-sample.gitThis repository consists of two folders/projects:
sensor: An Arduino project that contains the code for programming a NodeMCU microcontroller, which acts as a Microsoft Azure IoT sensor.webapp: An ASP.NET Core MVC application, which will consume and visualize the IoT sensor data.
Act 2: The IoT Sensor
Now that everything is in place and all preparation steps have been finished successfully, we can start developing and programming the actual IoT sensor.
Sensor Hardware
Creating a physical sensor device usually requires wiring up pieces of hardware. In this case, the following components have been used:
- NodeMCU Microcontroller: The NodeMCU is a very popular choice among microcontrollers, since it comes with built-in WIFI, has a Micro-USB connector and can be programmed using the Arduino platform. It's also really cheap with prices starting as low as $3.
- DHT11 Temperature and Humidity Sensor: This sensor is also frequently used in hobbyist and demo projects. It provides decent accuracy and is available for less then $1.
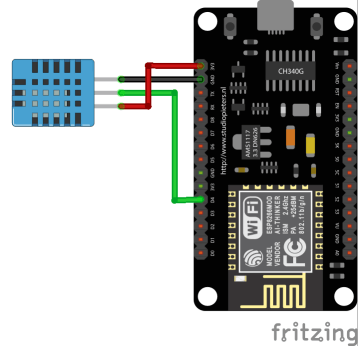
The following schematic shows how the sensor and the microcontroller need to be wired up.
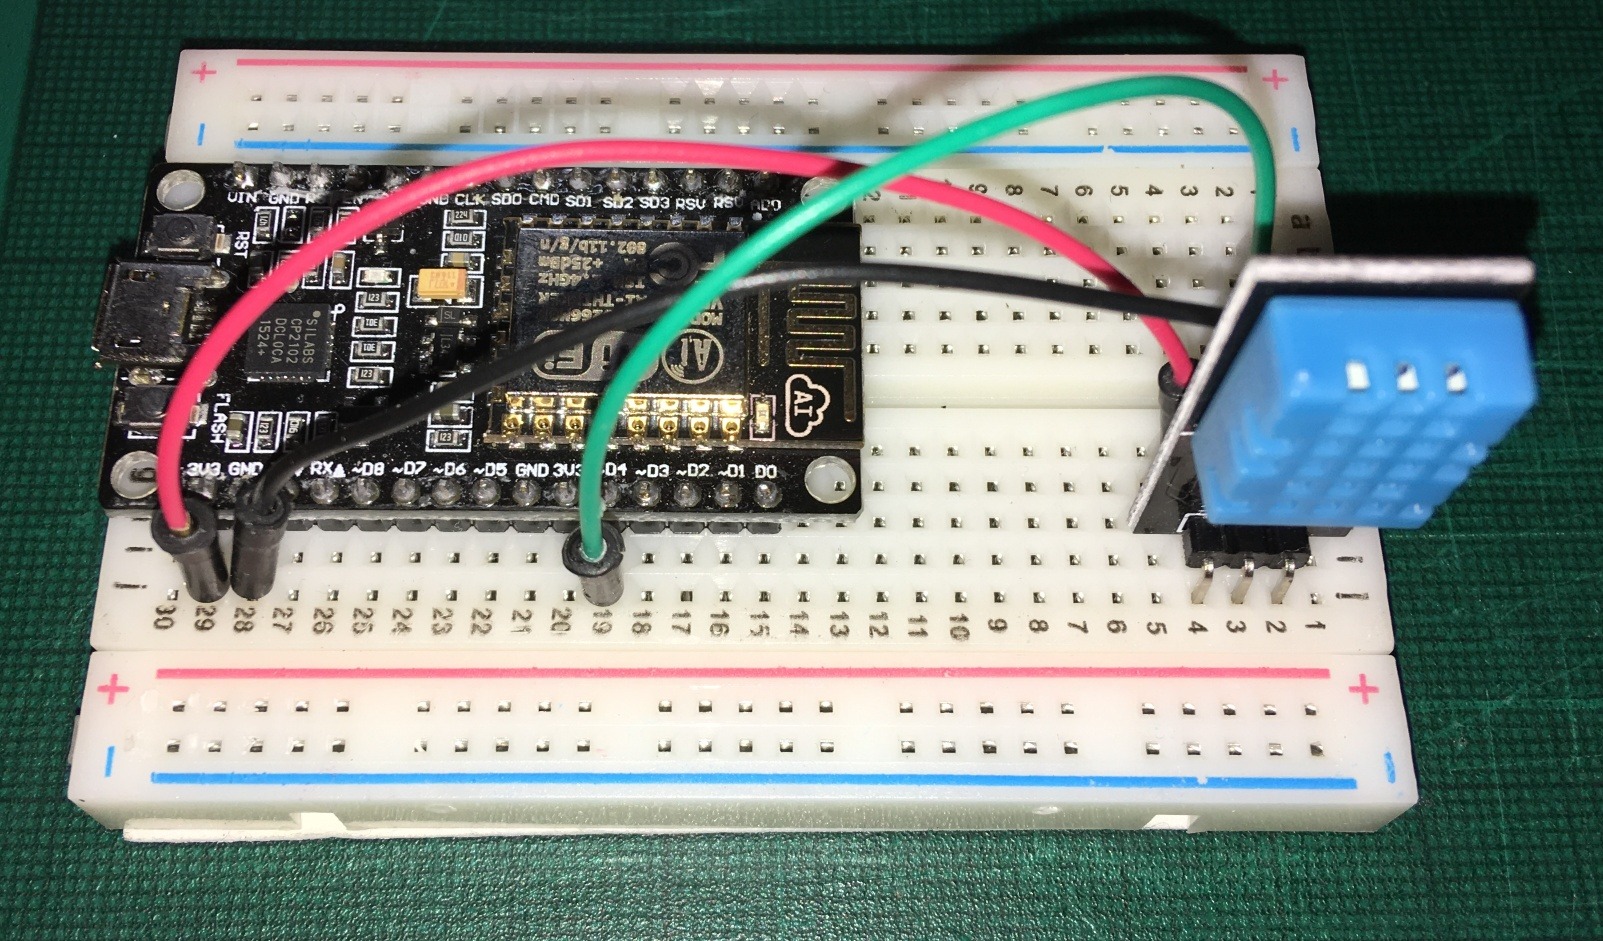
This is the actual circuit wired up on a breadboard.
Sensor Software
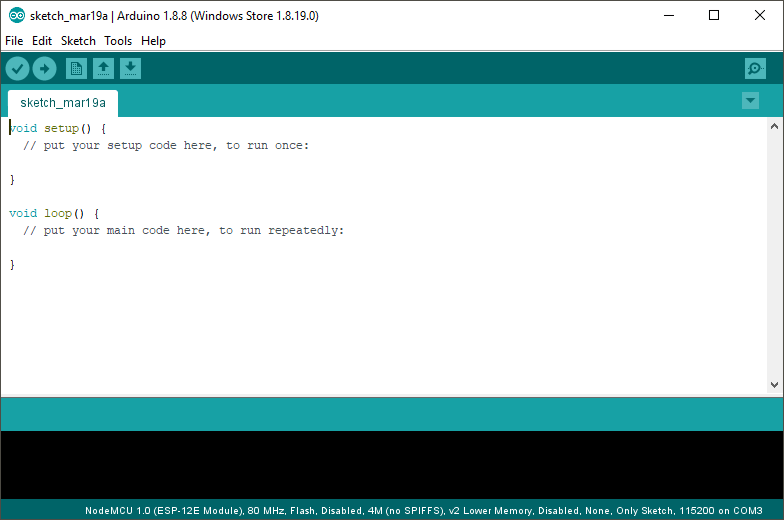
The NodeMCU microcontroller can be programmed using the Arduino IDE. This is a free development environment that can be downloaded from the Arduino website and supports a whole variety of different boards and microcontrollers in a standardized way.
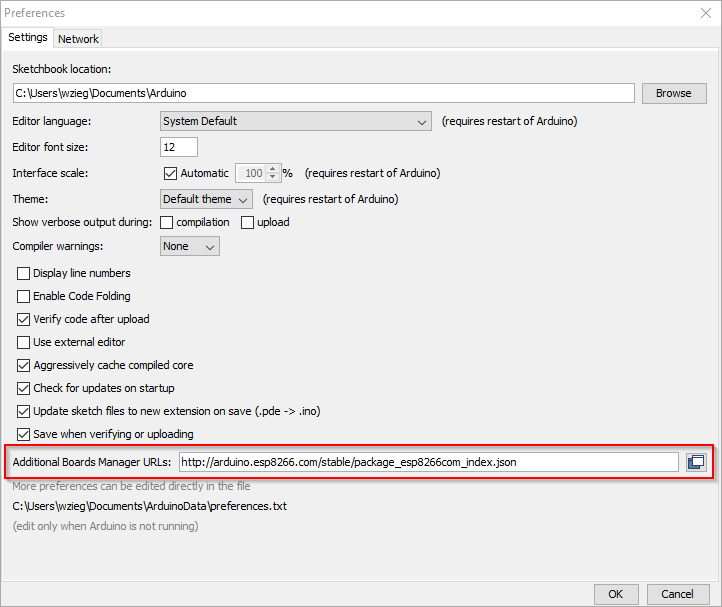
Since the NodeMCU microcontroller is not supported out of the box, an additional software package has to be installed first. For that, the Preferences dialog must be opened through the Tools menu, and this URL http://arduino.esp8266.com/stable/package_esp8266com_index.json must be added to the textbox labelled Additional Boards Manager URLs.
To download the actual addon package, open Tools - Board: - Board Manager, enter "esp8266" (ESP8266 is the chip used for NodeMCU and other microcontrollers) into the search box and install version 2.4.2 of that package.
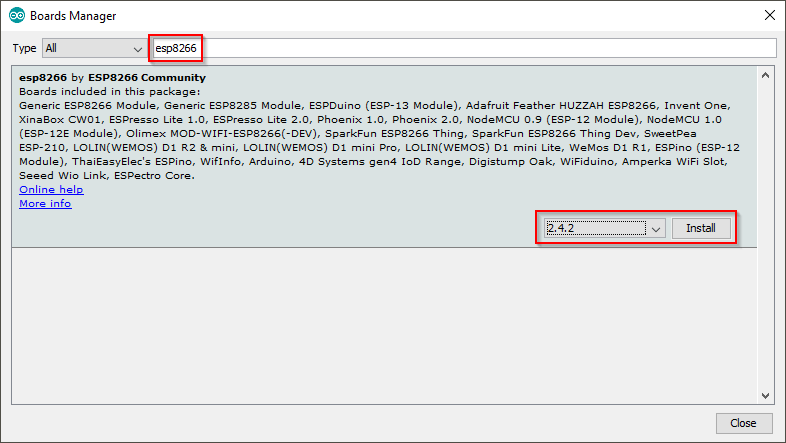
Note: The current latest version of the esp8266 package is 2.5.0. However, this version has compatibility problems with the Microsoft Azure IoT Arduino SDK, so we use version 2.4.2.
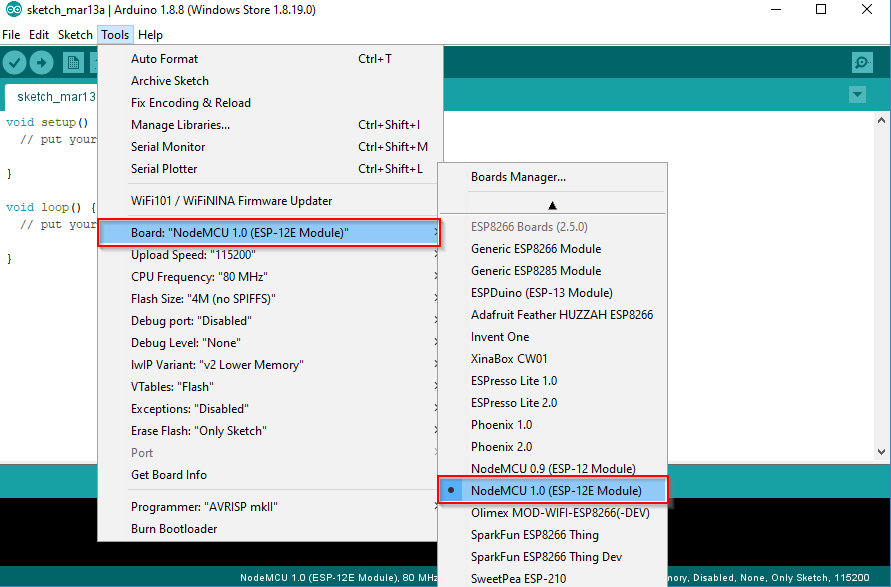
Now, the NodeMCU board should be available under the Tools - Board: menu and must be selected there.
The last thing to do before we can successfully compile the code from the previously cloned repository, is to install a couple of libraries needed in the sample code.
Arduino libraries can be downloaded opening the Libary Manager through Sketch - Include Library - Manage Libraries….
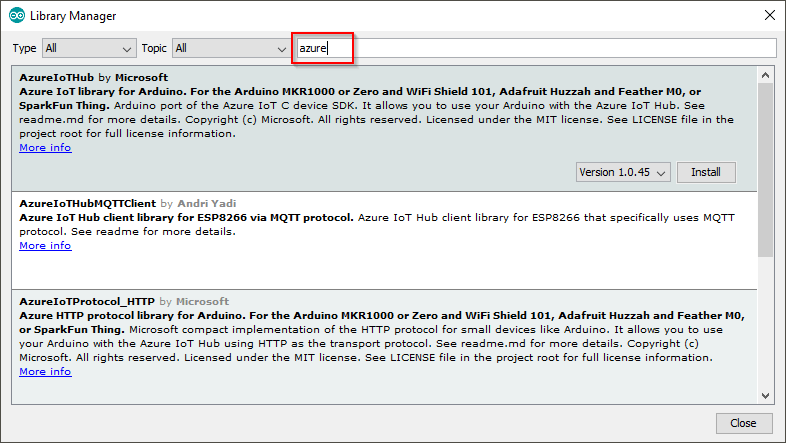
Those are the libraries which are required in order to use the Microsoft Azure IoT Arduino SDK and collect data from the temperature and humidity sensor:
- AzureIoTHub
- AzureIoTUtility
- AzureIoTProtocol_HTTP
- DHT sensor library
- Adafruit Unified Sensor
Now if we open the Arduino sketch sensor/Azure_IoT_Sensor/Azure_IoT_Sensor.ino from the diy-iot-sample repository, it should compile without errors.
Before finally uploading the sketch to the device, a last configuration step is required. Since the NodeMCU has no user interface and the sketch does not provide any interaction mechanism, connection settings for WIFI and the Azure IoT connection string (which we copied for later use in Act 1) are hard-coded.
// TODO: set these values before uploading the sketch
#define IOT_CONFIG_WIFI_SSID ""
#define IOT_CONFIG_WIFI_PASSWORD ""
#define IOT_CONFIG_CONNECTION_STRING ""
Note: For reasons of simplicity, these settings are managed as code constants. Make sure you don’t accidentally commit those into GitHub or any public source control system!
After having configured those settings, the sketch is ready to upload and our brand-new DIY IoT device should already be publishing data into the Azure IoT hub.
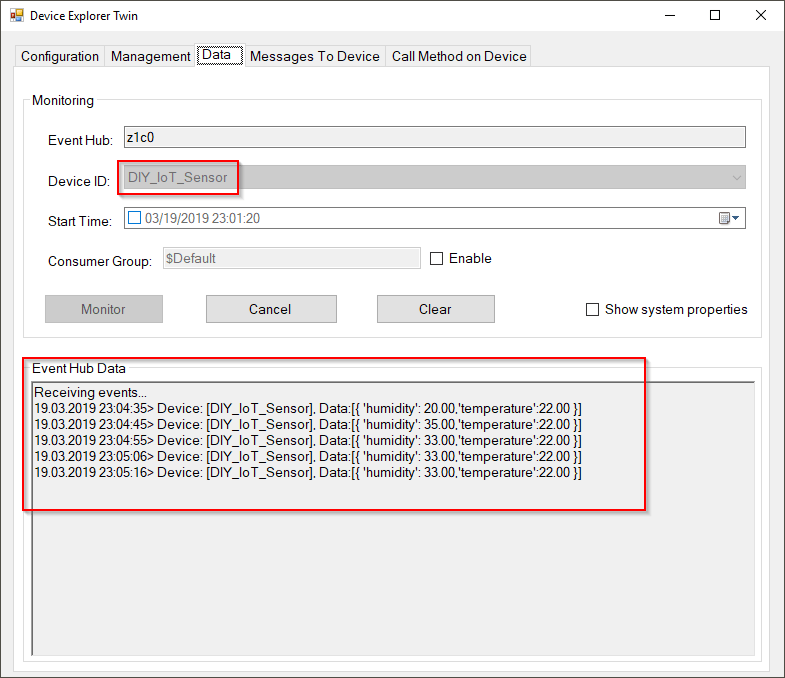
Sensor Test
A quick way to check whether the sensor is actually working correctly and publishing data is using a tool called Azure IoT Device Explorer. This is a small (Windows) test application that can be downloaded here and provides quick troubleshooting inside into Azure IoT Hub.
In case a different operating system than Windows is used, we can still verify whether our sensor works correctly by using the Azure CLI (az command).
After installing and download the Azure CLI, we have to log in initially:
$ az loginThen, we can connect to our IoT Hub by simply specifying its name and monitor incoming events.
$ az iot hub monitor-events --hub-name <IOT_HUB_NAME>If everything was set up correctly, the command's output should look similar to this:
Starting event monitor, use ctrl-c to stop...
{
  "event": {
    "origin": "DIY_IoT_Sensor",
    "payload": "{ 'humidity': 24.00,'temperature':22.00 }"
  }
}
{
  "event": {
    "origin": "DIY_IoT_Sensor",
    "payload": "{ 'humidity': 32.00,'temperature':22.00 }"
  }
}
Act 3: Visualizing the IoT Sensor Data
Now that we know our custom-developed sensor is actually providing IoT data, we want to visualize this data using an ASP.NET Core MVC application. The source code for this application can be found in the webapp folder of the previously cloned diy-iot-sample repository.
The application uses:
- The Microsoft.Azure.EventHubs NuGet package to connect to the Azure IoT Hub.
- ASP NET CoreSignalR is used to provide the collected sensor data to the web browser.
- Chart.js is used for rendering the actual sensor visualization data on the web page.
Before the web application can be run, a couple of constants need to be set to be able to successfully connect to the IoT Hub:
// Event Hub-compatible endpoint
private const string EventHubsCompatibleEndpoint = "...";

// Event Hub-compatible name
private const string EventHubsCompatiblePath = "...";

// SharedAccessKeyName
private const string IotHubSasKey = "...";
The easiest way to retrieve the correct values for these constants is using the Azure CLI (az command) again.
EventHubsCompatibleEndpoint:
$ az iot hub show \
  --query properties.eventHubEndpoints.events.endpoint \
--name <IOT_HUB_NAME>EventHubsCompatiblePath:
$ az iot hub show \
  --query properties.eventHubEndpoints.events.path \
--name <IOT_HUB_NAME>IotHubSasKey:
$ az iot hub policy show \
  --name iothubowner \
  --query primaryKey \
  --hub-name <IOT_HUB_NAME>
Note: For reasons of simplicity, these settings are managed as code constants. Make sure you don’t accidentally commit those into GitHub or any public source control system!
Ideally, use ASP.NET Core's built-in mechanisms for properly handling secrets.
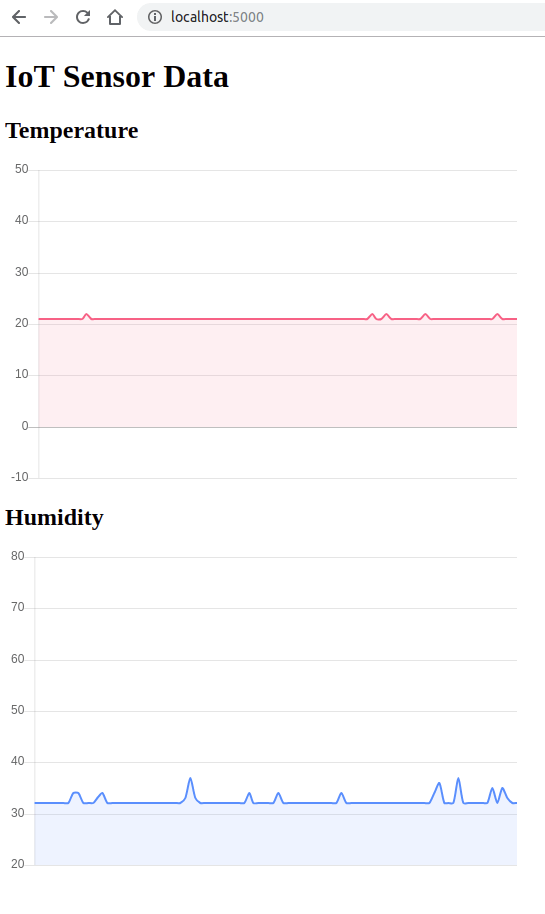
After that the application should start up, connect to our IoT Hub and display charts for the incoming sensor device data.
IoT for Everyone!
IoT is an exciting topic since it can be approached from more than one direction. Personal focus and interest may lie on the client side, building hardware and sensor devices. Or it can be processing incoming IoT data inside an IoT Hub, applying machine learning and AI techniques to it. It may also be on the visualization side of things, where the challenge is to condense all that data into easily understandable graphs and charts. Wherever your main area of interest lies, there's probably at least one IoT scenario waiting exactly for your skill set and problem solving capabilities.

Wolfgang Ziegler
Wolfgang is a professional software developer, techie, maker and geek dad located in Linz, Austria. By day he develops software at Dynatrace, and by night he's usually busy with all kinds of side projects involving electronics, 3D printing and, of course, code.
Follow him on Twitter at @z1c0 or visit his website and blog.