Creating Data Forms in Windows 10 Universal Platform Apps
Summarize with AI:
Data Forms are found in just about every LOB application–can’t we make it easier?
Creating Line-of-Business (LOB) applications can become tedious, especially if you’re designing a data entry screen. Typically, you gather data from your users with a TextBlock, TextBox, CheckBox, RadioButton and for so forth. You begin by dragging those onto your designer, name the controls and position them where they look nice on the screen. Any additional data validation will need to come from code. If you left out a field, it's back to the designer, as you have to reposition your UI elements. I’m pleased to announce that your life just got a lot easier with DataForm in UI for Windows Universal.
A Common Data Form Layout
Before we take a look at how we implement our DataForm control, let’s look at how we do it currently.
The MainPage.xaml for a typical data form may look like the following:
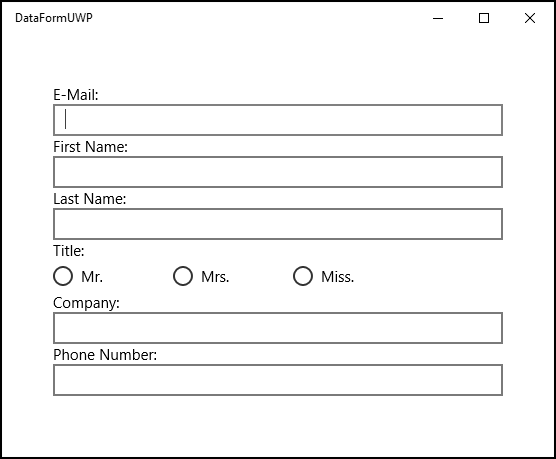
<StackPanel Grid.Row="1" Margin="50" > <TextBlock TextWrapping="Wrap" Text="E-Mail: "/> <TextBox x:Name="txtEmail" TextWrapping="Wrap" /> <TextBlock TextWrapping="Wrap" Text="First Name: " /> <TextBox x:Name="txtFirstName" TextWrapping="Wrap" /> <TextBlock TextWrapping="Wrap" Text="Last Name: "/> <TextBox x:Name="txtLastName" TextWrapping="Wrap" /> <TextBlock TextWrapping="Wrap" Text="Title: " /> <StackPanel Orientation="Horizontal"> <RadioButton x:Name="rdMr" Content="Mr." /> <RadioButton x:Name="rdMrs" Content="Mrs." /> <RadioButton x:Name="rdMiss" Content="Miss." /> </StackPanel> <TextBlock TextWrapping="Wrap" Text="Company: "/> <TextBox x:Name="txtCompany" TextWrapping="Wrap" /> <TextBlock TextWrapping="Wrap" Text="Phone Number: " /> <TextBox x:Name="txtPhoneNumber" TextWrapping="Wrap" /></StackPanel>Which results in the following screen:

Each input field is given a name and some properties have been set. So far, we have seen a lot of XAML and are using a simple StackPanel to display the data properly.
What if you could define your UI through a class and have it generate your UI automatically? That's where the new DataForm comes into play.
Using DataForm Included in UI for Universal
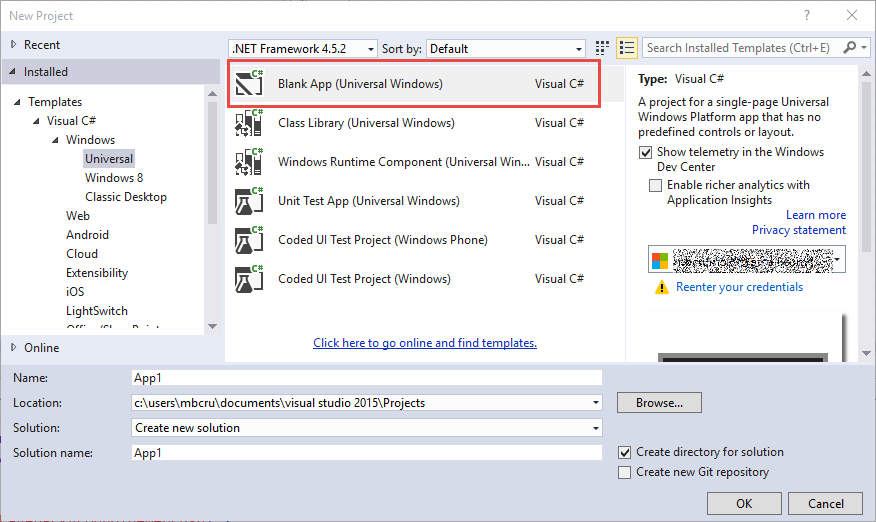
After you have installed the Windows Software Development Kit (UWP), you will see the following templates:

Begin by using the Blank App (Universal Windows) template and adding references to the following files:
- Telerik.Core.dll
- Telerik.Data.dll
- Telerik.UI.Xaml.Input.dll
- Telerik.UI.Xaml.Primitives.dll
- Telerik.UI.Xaml.Controls.Data.dll
We are going to use the DataForm to automatically generate our UI in our app, so let’s begin by adding a class to this project to collect contact details. As you can see from the screenshot, the contact details on the first page include E-mail, First Name, Last Name, Title, Company and Phone Number. You can name the class Contact, and we will add the other fields later. The code contained in this file looks like this:
public class Contact{ private string email; private string firstName; private string lastName; private UserTitle title; private string company; private string phonenumber; public enum UserTitle { Mr, Mrs, Miss } public string Email { get { return this.email; } set { this.email = value; } } public string FirstName { get { return this.firstName; } set { this.firstName = value; } } public string LastName { get { return lastName; } set { lastName = value; } } public UserTitle Title { get { return title; } set { title = value; } } public string Company { get { return this.company; } set { this.company = value; } } public string PhoneNumber { get { return phonenumber; } set { phonenumber = value; } }}A Look at Our MainPage.xaml
Our UI is simply going to reference the DataForm control. Let’s go ahead and add the proper XML namespace as shown below:
xmlns:telerikDF="using:Telerik.UI.Xaml.Controls.Data"Add the following code snippet to the Grid already located on the MainPage.xaml.
<telerikDF:RadDataForm x:Name="radDataForm"/>Switching Back to Our MainPage.xaml.cs File
We will need to add in the following code to set the Item property of the DataForm displayed on the screen:
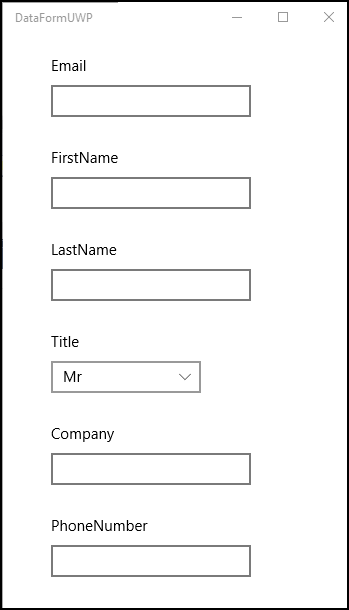
Contact _contact = new Contact();public MainPage(){ this.InitializeComponent(); this.radDataForm.Item = _contact;}Once complete, we see this:

As you can see, it automatically generated our UI based off the class that we instantiated. But, you may want to edit the field names as right now the “FirstName” needs a space between it (along with the other fields), or maybe you want to rearrange your UI to put the Company name after your last name. This is easily accomplished by adding the following property attribute to the class as shown below:
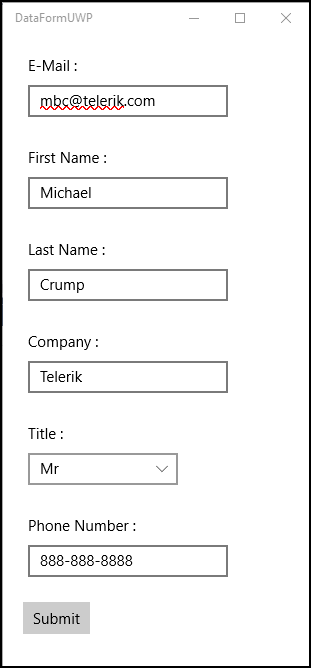
[Label("First Name :")][Index(1)]public string FirstName{ get { return this.firstName; } set { this.firstName = value; }}With this small change, we now have Labels with the correct spacing, and by using the Index property attribute, we changed our UI without going back inside our XAML file. We can finish this app up by adding a button and accessing the data the user entered with the click event handler.
private async void Button_Click(object sender, RoutedEventArgs e){ var messageDialog = new MessageDialog("First Name : " + _contact.FirstName + Environment.NewLine + "Last Name : " + _contact.LastName); await messageDialog.ShowAsync();}
Wrap-Up
Now our DataForm is starting to become alive! You could submit the data to a webserver, perform validation and so forth. I hope this helped; if you would like early access to a preview build of our Windows 10 controls, email universalwindows@telerik.com. Until next time, happy coding!


Michael Crump
Michael Crump is a Microsoft MVP, Pluralsight and MSDN author as well as an international speaker. He works at Telerik with a focus on everything mobile. You can follow him on Twitter at @mbcrump or keep up with his various blogs by visiting his Telerik Blog or his Personal Blog.
