
Building a Food Store with Kendo UI and jQuery

Summarize with AI:
In this tutorial, we will build a food store with HTML, CSS, jQuery and Kendo UI, complete with notifications when items are added to the cart.
An e-commerce application is one where people can place orders for items from their browser, thus saving them the stress of going physically to the store. Many e-commerce giants have emerged over time, selling various merchandise. Companies like Alibaba and Amazon top the charts. In this tutorial, we will build a basic version of an online food store.
Prerequisites
To follow this tutorial, a basic understanding of jQuery and JavaScript is required. HTML/CSS knowledge is also recommended but not mandatory.
To build the required application, here are a few tools we’ll use:

Initializing the Application
Shopping carts, e-commerce and stores are buzzwords that make it seem difficult to develop. While development may be tasking, basic versions can be trivial to build. We will go through the steps necessary to create one with HTML/CSS and jQuery.
Create a folder called foodstore and define this folder structure inside it:
    foodstore/
          css/
           store.css
          js/
           store.js
          index.html
Displaying our Store Items
Open your index.html and add the following lines of code to it:
    <!-- ./index.html -->
    <html>
      <head>
        <title>Food Store</title>
                <link rel="stylesheet" href="https://kendo.cdn.telerik.com/2019.1.220/styles/kendo.common.min.css">
              <link rel="stylesheet" href="https://kendo.cdn.telerik.com/2019.1.220/styles/kendo.rtl.min.css">
              <link rel="stylesheet" href="https://kendo.cdn.telerik.com/2019.1.220/styles/kendo.default.min.css">
              <link rel="stylesheet" href="https://kendo.cdn.telerik.com/2019.1.220/styles/kendo.mobile.all.min.css">
              <link rel="stylesheet" href="styles.css">
              <script src="https://kendo.cdn.telerik.com/2019.1.220/js/kendo.all.min.js"></script>
             <link rel="stylesheet" href=" https://stackpath.bootstrapcdn.com/bootstrap/4.3.1/css/bootstrap.min.css">
             <link rel="stylesheet" href="https://use.fontawesome.com/releases/v5.7.2/css/all.css" integrity="sha384-fnmOCqbTlWIlj8LyTjo7mOUStjsKC4pOpQbqyi7RrhN7udi9RwhKkMHpvLbHG9Sr" crossorigin="anonymous">
      </head>

      <body>
          <main>
             <header>
                <nav class="navbar navbar-light bg-light justify-content-between">
                     <a class="navbar-brand">Food Store</a>
                            <div id="cart-container">
                              <div id="cart">
                                <i class="fa fa-shopping-cart  openCloseCart" aria-hidden="true">cart</i>
                                <p class="p-2">
                                  <i class="fas fa-trash-alt"  id="emptyCart">Empty cart</i>
                                </p>
                              </div>
                            <span id="itemCount"></span>
                       </div>
                 </nav>
            </header>

                        <div id="shoppingCart">
                            <div id="cartItemsContainer">
                                <h2>Items in your cart</h2>
                                <i class="fa fa-times-circle-o fa-3x openCloseCart" aria-hidden="true"></i>
                                <div id="cartItems"></div>
                                <span id="cartTotal"></span>
                             </div>
                        </div>

                       <div class="row">
                          <div class="col-sm-4">
                            <div class="card">
                              <img class="card-img-top" src="https://images.pexels.com/photos/723198/pexels-photo-723198.jpeg?auto=compress&cs=tinysrgb&dpr=2&h=650&w=940" alt="Card image cap">
                              <div class="card-body">
                                <h5 class="card-title">Rice </h5>
                                <p class="card-text price">Price: $10.00</p>
                                <a href="#" id="showPopupNotification" class="add btn btn-primary">Add to cart</a>
                              </div>
                            </div>
                          </div>
                        <div class="col-sm-4">
                          <div class="card">
                            <img class="card-img-top" src="https://images.pexels.com/photos/236812/pexels-photo-236812.jpeg?auto=compress&cs=tinysrgb&dpr=2&h=650&w=940" alt="Card image cap">
                            <div class="card-body">
                              <h5 class="card-title">Eggs</h5>
                              <p class="card-text price">Price: $5.00</p>
                              <a href="#" id="showPopupNotification" class="add btn btn-primary">Add to Cart</a>
                            </div>
                          </div>
                        </div>
               <div class="col-sm-4">
                  <div class="card">
                    <img class="card-img-top" src="https://images.pexels.com/photos/264537/pexels-photo-264537.jpeg?auto=compress&cs=tinysrgb&dpr=2&h=650&w=940" alt="Card image cap">
                        <div class="card-body">
                          <h5 class="card-title">Vegatables</h5>
                          <p class="card-text price">Price: $20</p>
                          <a href="#" id="showPopupNotification" class="add btn btn-primary">Add to Cart</a>
                  </div>
                </div>
              </div>
           </div>
          </main>
      <script src="https://code.jquery.com/jquery-3.3.1.js" integrity="sha256-2Kok7MbOyxpgUVvAk/HJ2jigOSYS2auK4Pfzbm7uH60=" crossorigin="anonymous"> </script>
        <script src="styles.js"></script>
      </body>
    </html>
In our file, we do a few things. Let’s piece them out one by one.
- Import all relevant assets in via CDN—assets include jQuery, KendoUI, Bootstrap and Font Awesome, plus our custom stylesheet
- We then define the area where the items will be displayed
- The header contains the current cart items and a button to empty the chart
- After that we define the div to hold the chart items whenever we view it
- We then display static food items with information to simulate our store data
- Finally we import jQuery and our custom js file
To make sense of this application, we need to view it. But before we do, let’s add some CSS to it to give it some structure.
Open your store.css file and add the following styles to it:
    // css/store.css
    main {
      padding: 10px 0;
      width: 1024px;
      margin: 0 auto;
    }
    #cart-container {
      float: right;
      width: 210px;
      position: relative;
    }
    #itemCount {
      position: absolute;
      display: none;
      top: -10px;
      left: -10px;
      width: 20px;
      height: 20px;
      border-radius: 50%;
      background: red;
      color: white;
      text-align: center;
    }
    img {
      width: 100%;
    }
    .item {
      width: 31%;
      float: left;
      margin: 1%;
    }
    .itemText p {
      margin-bottom: 20px;
    }
    .price-container {
      margin-top: 20px;
    }
    i:hover {
      cursor: pointer;
    }
    #shoppingCart {
      top: 0;
      left: 0;
      height: 100%;
      width: 100%;
      display: none;
      position: absolute;
      z-index: 9999;
      background: rgba(0, 0, 0, 0.6);
    }
    #cartItemsContainer {
      position: relative;
      width: 600px;
      left: 50%;
      top: 150px;
      margin-left: -300px;
      padding: 40px;
      box-shadow: 0 0 10px black;
      background: #e9e9e9;
      overflow: auto;
    }
    #cartItemsContainer i {
      position: absolute;
      top: 20px;
      right: 20px;
    }
    #cartItemsContainer .itemDetails {
      overflow: auto;
      width: 100%;
      margin-bottom: 40px;
    }
    #cartItemsContainer .itemImage {
      float: left;
      width: 260px;
      padding: 0 40px;
    }
    #cartItemsContainer .itemText {
      float: right;
      width: 260px;
      padding: 0 40px;
    }
    #cartItemsContainer .itemText .price-container {
      margin-top: 0;
    }
    .removeItem {
      margin-left: 40px;
    }
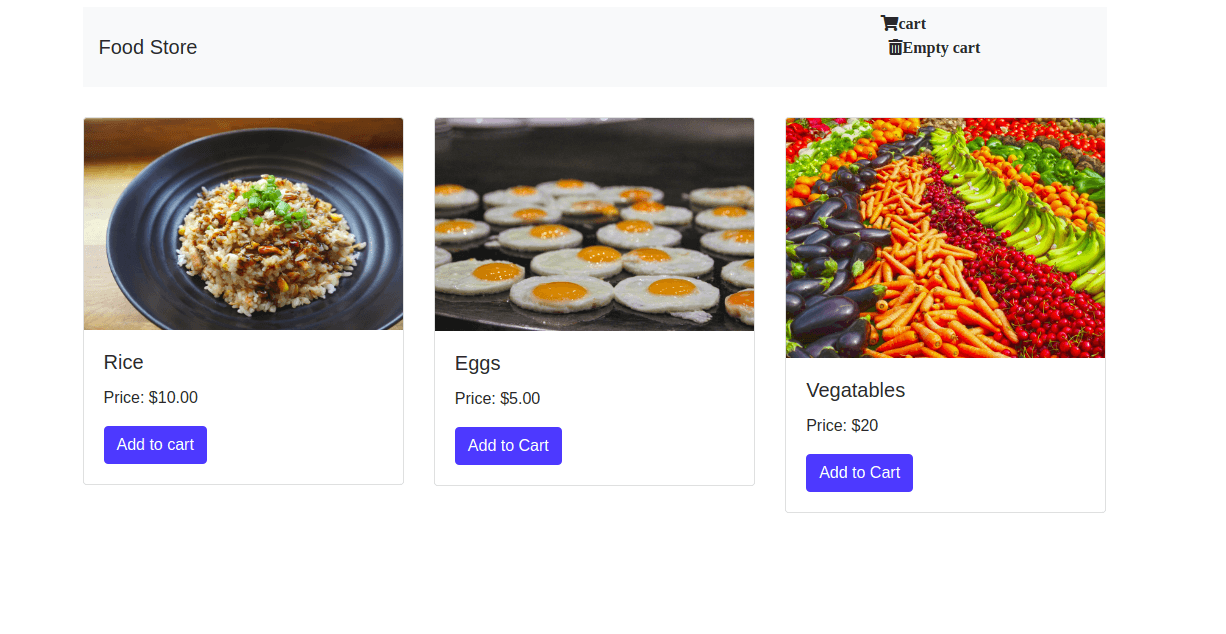
Now when you open your index.html, in the browser you should see this:
Adding Functionality with jQuery and Kendo UI
Now we have our store displaying products. Let’s add some functionality to it.
Open your js and add the following lines of code:
    // js/store.js
    function init() {

      var itemCount = 0;
      var priceTotal = 0;

    // Add Item to Cart
    $('.add').click(function (){
      itemCount ++;

      $('#itemCount').text(itemCount).css('display', 'block');
      $(this).siblings().clone().appendTo('#cartItems').append('<button class="removeItem">Remove Item</button>');

      // Calculate Total Price
      var price = parseInt($(this).siblings().find('.price').text());
      priceTotal += price;
      $('#cartTotal').text("Total: $" + priceTotal);
    });

    // Hide and Show Cart Items
    $('.openCloseCart').click(function(){
      $('#shoppingCart').toggle();
    });

    // Empty Cart
    $('#emptyCart').click(function() {
      itemCount = 0;
      priceTotal = 0;

      $('#itemCount').css('display', 'none');
      $('#cartItems').text('');
      $('#cartTotal').text("Total: €" + priceTotal);
    });

    // Remove Item From Cart
    $('#shoppingCart').on('click', '.removeItem', function(){
      $(this).parent().remove();
      itemCount --;
      $('#itemCount').text(itemCount);

      // Remove Cost of Deleted Item from Total Price
      var price = parseInt($(this).siblings().find('.price').text());
      priceTotal -= price;
      $('#cartTotal').text("Total: €" + priceTotal);

      if (itemCount == 0) {
        $('#itemCount').css('display', 'none');
      }
    });
    }
    $(init);
Here we define functions we will need in our application. Using the Click method we target specific elements and update their state based on which button is clicked.
Finally we initialize our file by using jQuery’s $ to invoke the init function once it is loaded on our index page.
Adding Notifications with Kendo UI
Before we end our store, let’s use Kendo UI’s Notification component to show our users alerts whenever an item is added to the chart.
We have already imported Kendo UI into our project. All we need to do now is to add the function.
Open your index.html file and add the following lines of code to it (read the comments to know where to insert the snippets) :
    // ./index.html

    //add the `showPopupNotification` id to every Add to cart link
    <a href="#" id="showPopupNotification" class="add btn btn-primary">Add to cart</a>

    //add this span before the end of the main tag to display the notification
    <span id="popupNotification"></span>
Now let’s initialize the function in our js file. Open up the store.js file and add this code to it:
    // js/store.js

    // add inside init function
     var popupNotification = $("#popupNotification").kendoNotification().data("kendoNotification");
      $("#showPopupNotification").click(function(){
            popupNotification.show("item added");
       });
Here we set the notification to display “item added” whenever you add an item to the cart.
Now open up your index.html file in the browser and you will see this:

Conclusion
In this tutorial, we learned how to use jQuery, HTML and Kendo UI’s Notification component to build a basic food store. The knowledge from here is merely an introduction to creating store applications. Be sure to post comments for clarity on parts you don’t understand. Happy coding.

Christian Nwamba
Chris Nwamba is a Senior Developer Advocate at AWS focusing on AWS Amplify. He is also a teacher with years of experience building products and communities.