Using default themes
All themes that come with Telerik UI for WinForms since version R2 2008 are available as standalone components, apart from the control's assemblies. This improvement has been added in order to simplify the way themes are added to the application and to improve the application’s loading time.
Related Video
Applying themes to RadControls for WinForms at the control and form level introduces theme selection for individual controls and forms.
For written instructions instead of the video, follow Apply a theme to a control and Apply a theme to all controls in the current form below.
Apply a theme to a control
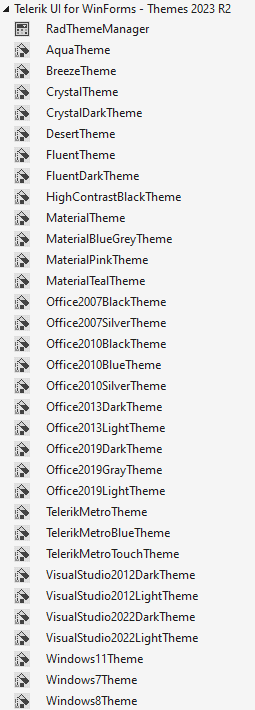
If you have installed the suite from the provided installation files, you will see the themes loaded in the Visual Studio (VS) toolbox. If you do not see them, add the theme components to the Visual Studio toolbox.
Figure 1: The themes in the Visual Studio toolbox.
Since R2 2020, the ControlDefault theme offers Scalable Vector Graphics (SVG) images as well as raster images. SVG images are displayed by default. See Vector Images to choose which image type to display.
Since R1 2021 Telerik UI for Winforms suite has introduced the brand new Office2019Light theme. Inspired by the latest Microsoft Office application, the Office2019Light theme is here to help delivering that fresh look and feel to your WinForms application. As of R2 2021 there are Gray and Dark variations of the Office2019 theme.
Since R2 2023 Telerik UI for WinForms suite introduced VisualStudio2022Dark theme.
Since R1 2022 Telerik UI for WinForms suite introduced VisualStudio2022 theme inspired by the last released version of Visual Studio.
- Drag the desired theme component from the VS Toolbox to the form. This adds a reference to the corresponding theme assembly in the project and makes the theme available in the ThemeName drop-down of all Telerik controls on the form.
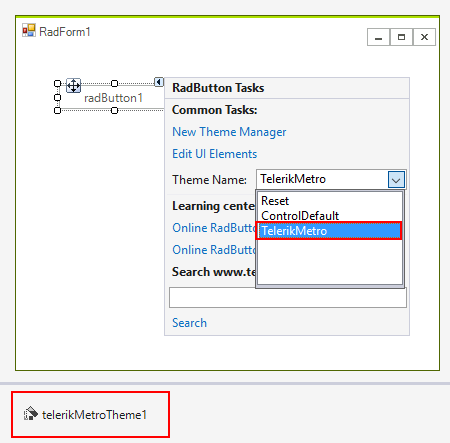
- Select the theme from the control's ThemeName drop-down in the smart tag, or set ThemeName programmatically.
Figure 2: Set the theme at design time using the SmartTag.
Setting a default theme for a whole application programmatically
Before using the following code snippets, add the desired theme's dynamic-link library (DLL) file to your project references.
Setting a default theme for the entire application
Create the theme component and set ThemeResolutionService.ApplicationThemeName as shown below.
protected override void OnLoad(EventArgs e)
{
    base.OnLoad(e);
    Office2007SilverTheme theme = new Office2007SilverTheme();
    ThemeResolutionService.ApplicationThemeName = "Office2007Silver";
}
As of R1 2021 the ThemeResolutionService.ControlDefaultThemeName forces an update at runtime. It is possible to define the control default theme name for the entire application. The property works similarly to the ThemeResolutionService.ApplicationThemeName but it has lower priority.
When setting a theme, the priority is as follows, starting with the lowest:
- ThemeResolutionService.ControlDefaultThemeName - globally sets the default theme.
- RadControl.ThemeName - locally sets the theme for a control.
- ThemeResolutionService.ApplicationThemeName - globally sets the theme for the entire application and overrides all other settings.
Applying theme to all controls in the current form.
At design time, apply the form's theme to its controls:
- Set the form's ThemeName to the desired theme.
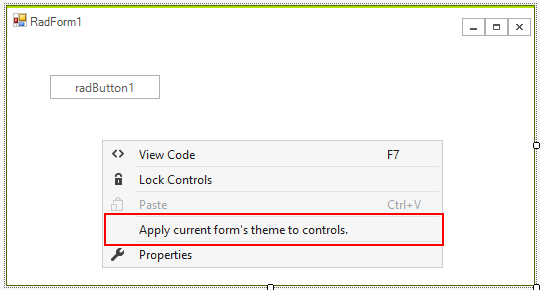
- Right-click the form and choose Apply current form's theme to controls.
Figure 3: Apply the current form theme to all controls.