First Steps with Telerik UI for WinForms
This tutorial shows how to create your first Telerik UI for WinForms desktop application. You will create a new project, configure the Telerik NuGet feed, install the Telerik UI for WinForms packages, and bind sample data to RadGridView.
Prerequisites
- To download Telerik UI for WinForms packages, you need a Telerik account. If you do not have an account, you can create one for free.
- To build an application, you need an up-to-date Visual Studio IDE installation with a compatible .NET version and the Telerik UI for WinForms workload installed.
Step 0: Start Your Free Trial
-
If you already have an active license for Telerik UI for WinForms, skip this step and continue with Step 1.
-
If you do not have an active license, follow these steps to activate your free trial:
-
Download the WinForms Installer and start the installation.
-
Make sure that Telerik UI for WinForms is selected and continue with the setup.
-
Log in with your Telerik account and complete the installation.
After the installer completes, it activates your 30-day free trial and downloads your license key file. You can then skip Step 1 and continue with Step 2: Create a New WinForms Telerik Project.
-
Step 1: Download Your License Key File
Telerik UI for WinForms requires license activation through a trial or commercial license key. To download and install your Telerik license key file:
- Go to the License Keys page in your Telerik account.
- Click the Download License Key button.
- Save the
telerik-license.txtfile to%AppData%\Telerik\telerik-license.txt.
This makes the license key available to all Telerik applications that you develop on your local machine.
To download the Telerik license key automatically, use Telerik Visual Studio Extensions.
Step 2: Create a new WinForms Telerik Project
In this step, create a basic Telerik WinForms project that you can use as a starting point for your application:
-
Open Visual Studio and select Create a new project in the start window.
-
Select the Telerik C# Windows Forms Application template, and click Next. This template creates a .NET project. If you want to create a .NET Framework project, select the Telerik C# Windows Forms Application (Net Framework) template instead.
Figure 1: Create a new Telerik WinForms project
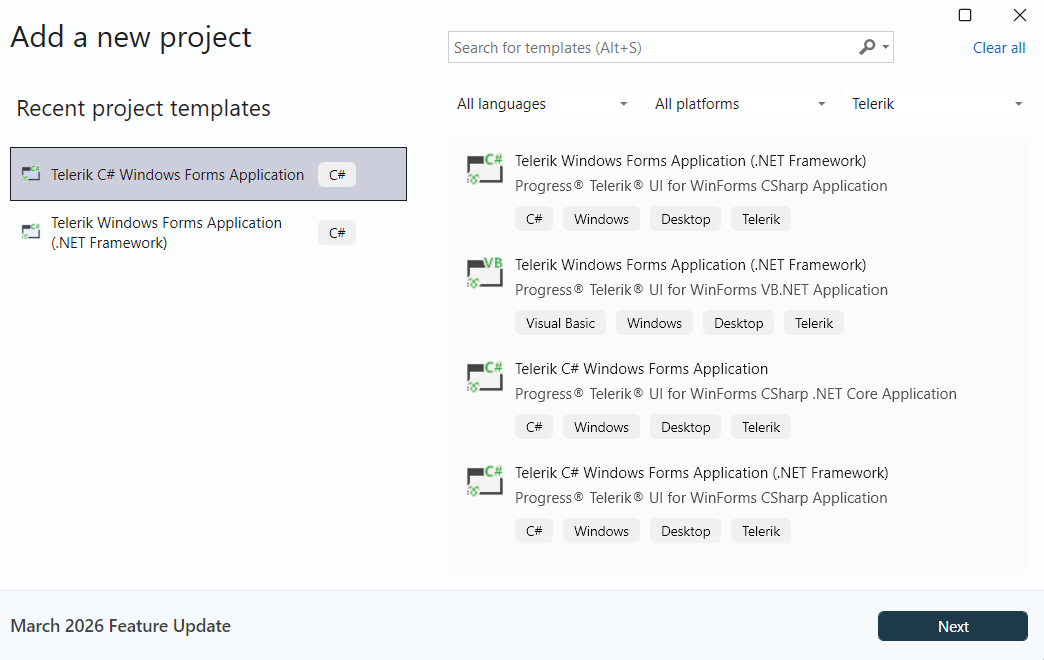
Telerik project templates are available in C# and VB for .NET and .NET Framework.
Step 3: Add the Telerik NuGet Server
Telerik maintains a NuGet feed with official Telerik UI for WinForms releases. These packages are available to registered users with an active trial or commercial license. Adding the Telerik NuGet server as a package source in Visual Studio lets you download and install Telerik packages that contain controls and utilities.
Starting with the Q3 2026 release, all Telerik UI for WinForms NuGet packages will also be available on NuGet.org. If you use NuGet.org, you do not need to configure the Telerik NuGet server.
Because the Telerik NuGet server requires authentication, first create an API key that you will use instead of a password. This approach is more secure, especially when you work with the NuGet.Config file.
-
Go to the API Keys page in your Telerik account.
-
Click Generate New Key +.

-
In the Key Note field, add a note that describes the API key.
-
When ready, click Generate Key.
-
Select Copy and Close. Once you close the window, you can no longer copy the generated key. For security reasons, the API Keys page displays only a portion of the key.
-
Store the generated NuGet API key because you will need it in the next steps. Whenever Visual Studio asks for Telerik NuGet credentials, use
api-keyas the username and your generated API key as the password.
Telerik API keys expire after two years. Telerik sends an email when a key is about to expire, but it is a good practice to keep your own reminder together with the places where you used the key, such as file paths, project links, Azure DevOps variables, or GitHub Actions secrets.
Next, add the Telerik NuGet feed to Visual Studio:
-
In Visual Studio, go to Tools > NuGet Package Manager > Package Manager Settings.
-
Select Package Sources, and then click + to add a new package source.
-
Enter a Name for the new package source, for example,
telerik.com. -
Enter
https://nuget.telerik.com/v3/index.jsonin the Source field, and click OK. -
Whenever Visual Studio displays a dialog to enter credentials for
nuget.telerik.com, useapi-keyas the username and your NuGet API key as the password.
Figure 2: Add the Telerik NuGet feed
Step 4: Download Telerik UI for WinForms Controls
The easiest way to get Telerik UI for WinForms controls on your development machine is to install them with NuGet packages directly from NuGet Package Manager in Visual Studio.
-
In Visual Studio, go to Tools > NuGet Package Manager > Manage NuGet Packages for Solution.
-
Select the Telerik package source that you added in Step 3.
-
Search for
UI.for.WinForms.AllControls, and install the Telerik.UI.for.WinForms.AllControls package.
Figure 3: Install the Telerik.UI.for.WinForms.AllControls package
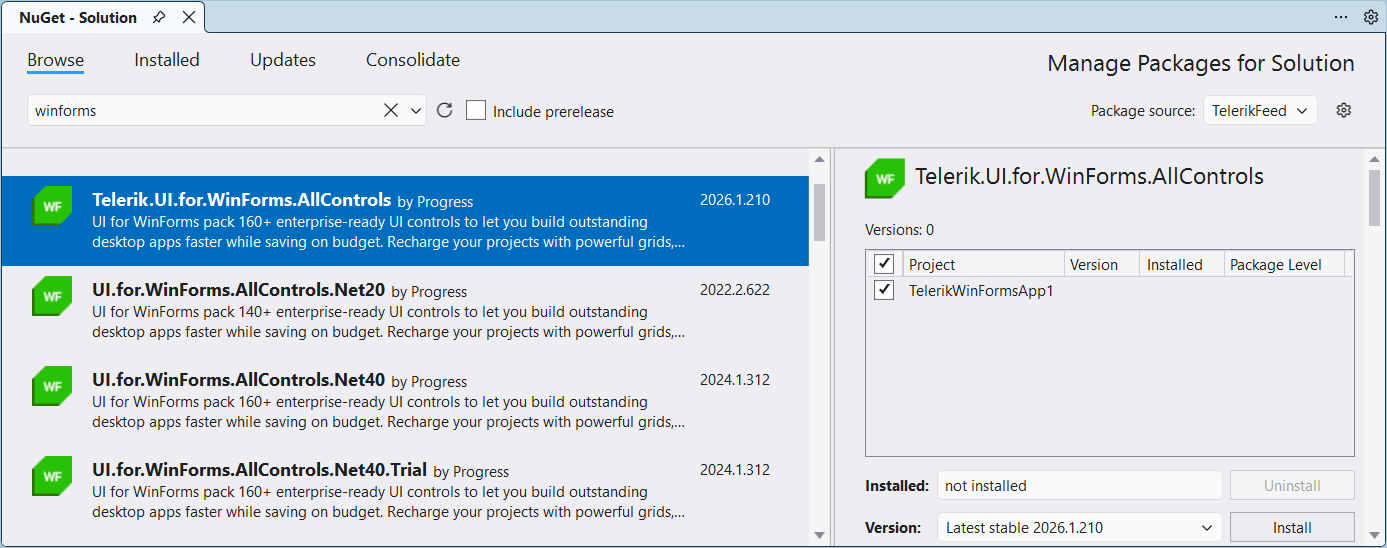
You can include prerelease versions by selecting the Include prerelease checkbox.
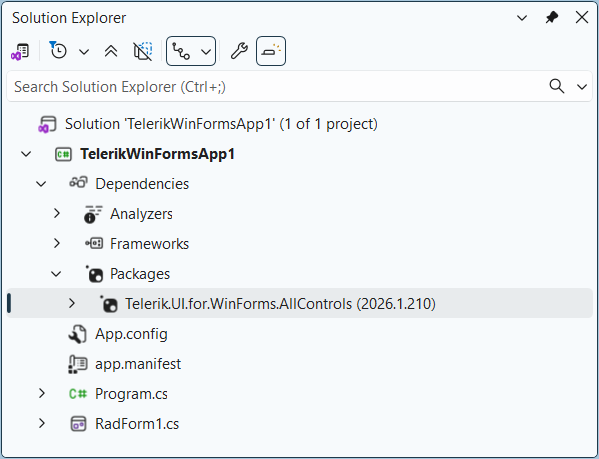
After installation, the Telerik.UI.for.WinForms.AllControls package appears under Packages in Solution Explorer:
Figure 4: Verify the installed Telerik package
Step 5: Add a Telerik UI for WinForms Control to the RadForm
After you install Telerik UI for WinForms, the controls appear in the Visual Studio Toolbox. To add a Telerik component, drag it from the Toolbox to the form designer surface.
5.1 Add RadGridView to the RadForm
Add the RadGridView control. Search for RadGridView in the Toolbox, and then drag it to the form designer surface.
Figure 5: Add RadGridView from the Toolbox
RadGridView is now added to the form. Next, bind the control to sample data so you can verify that the project is configured correctly.
5.2 Bind to BindingList of Custom Object
The following example defines an Employee class with several properties and binds a BindingList<Employee> to RadGridView.
Add the Employee class to your project:
public class Employee
{
    public int EmployeeID { get; set; }
    public string FullName { get; set; }
    public string JobTitle { get; set; }
    public string Department { get; set; }
    public string Country { get; set; }
    public string TimeZone { get; set; }
    public string WorkMode { get; set; }
}
Then create a BindingList<Employee> and assign it to the RadGridView.DataSource property. RadGridView automatically generates columns and populates them with the values from each Employee object.
Use the following code in your form:
public partial class RadForm1 : Telerik.WinControls.UI.RadForm
{
    private BindingList<Employee> employees;
    public RadForm1()
    {
        InitializeComponent();

        employees = new BindingList<Employee>
        {
            new Employee
            {
                EmployeeID = 84217,
                FullName = "Luca Bianchi",
                JobTitle = "Software Developer",
                Department = "Engineering",
                Country = "Italy",
                TimeZone = "EET (UTC+1)",
                WorkMode = "Remote"
            },
             new Employee
        {
            EmployeeID = 91354,
            FullName = "Sofia Ivanova",
            JobTitle = "Product Manager",
            Department = "Product",
            Country = "Bulgaria",
            TimeZone = "EET (UTC+2)",
            WorkMode = "Hybrid"
        },
            new Employee
            {
                EmployeeID = 77529,
                FullName = "Anna Müller",
                JobTitle = "UX Designer",
                Department = "Design",
                Country = "Germany",
                TimeZone = "CET (UTC+1)",
                WorkMode = "On-site"
            },
            new Employee
            {
                EmployeeID = 99012,
                FullName = "John Smith",
                JobTitle = "Prompt Engineer",
                Department = "AI Research",
                Country = "USA",
                TimeZone = "EST (UTC-5)",
                WorkMode = "Remote"
            },
            new Employee
            {
                EmployeeID = 73166,
                FullName = "Noah Duboisa",
                JobTitle = "Software Engineer",
                Department = "Engineering",
                Country = "Japan",
                TimeZone = "JST (UTC+9)",
                WorkMode = "On-site"
            },
            new Employee
            {
                EmployeeID = 55891,
                FullName = "Carlos García",
                JobTitle = "DevOps Engineer",
                Department = "IT",
                Country = "Spain",
                TimeZone = "CET (UTC+1)",
                WorkMode = "Remote"
            }
        };
        this.radGridView1.DataSource = employees;
        this.radGridView1.AutoSizeColumnsMode = GridViewAutoSizeColumnsMode.Fill;
    }
}Press F5 to run the application. If the setup is correct, the form opens and RadGridView displays the sample employee data.
Figure 6: The completed sample application

Next Steps
Now that Telerik UI for WinForms is running in your project, you can explore control features, customize behavior, or change the visual appearance:
Utilizing the Telerik AI Tools
Telerik UI for WinForms offers AI-powered development assistance through a unified MCP (Model Context Protocol) server. It provides context-aware guidance directly in your IDE and can help automate repetitive tasks while you explore the library and build applications faster.
If you want to start using the Telerik AI tool, see Getting Started with the Telerik UI for WinForms AI Coding Assistant.