Customize the ContextMenu
RadScheduler gives you the ability to easily customize its default context menu. This can be achieve by using the ContextMenuOppennig event.
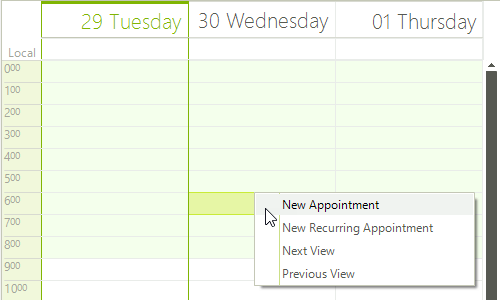
Figure 1: RadScheduler Context Menu
Replace the Default and the Appointments Context Menu.
-
Create a RadContextMenu and add the necessary items to it. Create another RadContextMenu and fill it with items.
-
Subscribe to the ContextMenuOpening event.
-
In the ContextMenuOpenning event handler replace the default context menus with the newly created ones.
void radScheduler1_ContextMenuOpening(object sender, SchedulerContextMenuOpeningEventArgs e)
{
    if (e.Element is AppointmentElement)
    {
        e.Menu = this.radContextMenu1;
    }
    else
    {
        e.Menu = this.radContextMenu2;
    }
}As you can see in the screenshots below, we can set different context menus depending on the element that invokes the context menu creation.
Figure 1: RadScheduler Cell Context Menu
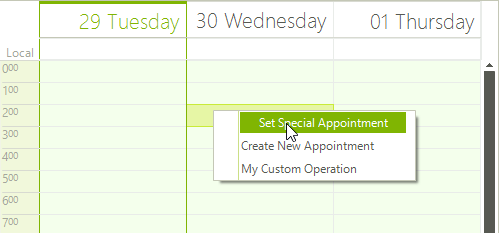
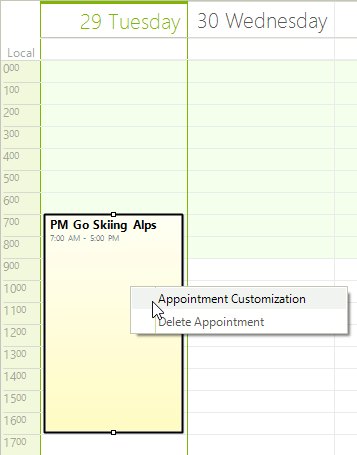
Figure 1: RadScheduler Appointment Context Menu
Change the Default Items or and Disable the Context Menu.
The Menu property of the SchedulerContextMenuOpeningEventArgs objects gives you the opportunity to change the existing items of the context menu. Also you can entirely disable the context menu by setting the Cancel property to true. For example you can change the context menu for the appointments and disable the default context menu as follows:
Handle ContextMenuOpening
void radScheduler1_ContextMenuOpening1(object sender, SchedulerContextMenuOpeningEventArgs e)
{
    if (e.Element is AppointmentElement)
    {
        e.Menu.Items.RemoveAt(0);
    }
    else
    {
        e.Cancel = true;
    }
}