Getting Started with the Telerik WinForms Converter
This article walks you through migrating an existing Microsoft WinForms application to Telerik UI for WinForms components using the Telerik WinForms Converter. By the end of this guide, your application—or parts of it, depending on its size—will be converted to use Telerik RadControls. This guide covers the full migration process — from opening your project to verifying the converted application.
Step 0: Check the Prerequisites
Before you start, ensure you have the following Converter prerequisites and configure the MCP server on your side. The section below shows the Visual Studio-specific configuration:
Configure MCP server in Visual Studio
- Add
.mcp.jsonto your solution folder. Choose the variant that matches your target .NET runtime:
{
  "servers": {
    "telerik-winforms-assistant": {
      "type": "stdio",
      "command": "dnx",
      "args": [ "Telerik.WinForms.MCP", "--yes" ],
      "env": {
        "TELERIK_LICENSE_PATH": "THE_PATH_TO_YOUR_LICENSE_FILE"
      }
    }
  }
}{
"servers": {
"telerik-winforms-assistant": {
"type": "stdio",
"command": ".\\.tools\\telerik-winforms-assistant.exe",
"env": {
"TELERIK_LICENSE_PATH": "THE_PATH_TO_YOUR_LICENSE_FILE"
}
}
}
}-
Restart Visual Studio.
-
Enable the
telerik-winforms-assistantMCP server and all its tools in the Copilot Chat window's tool selection dropdown.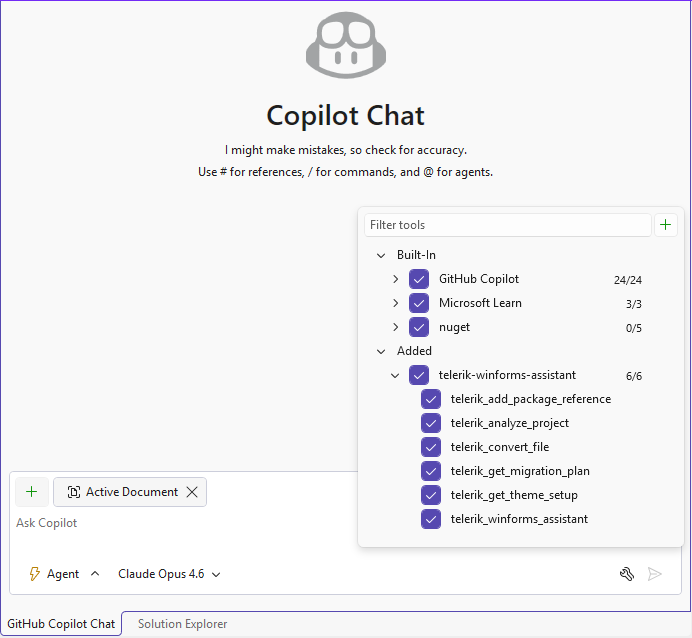
In the
telerik-winforms-assistantdropdown you can see all Telerik MCP tools used to convert your project. Please ensure thattelerik-winforms-assistantand its tools are enabled before starting conversion.
Step 1: Open Your Project
Open your WinForms solution in an MCP-compatible IDE. Verify that the telerik-winforms-assistant MCP server is active. In VS Code, check the MCP server status in the Copilot Chat panel. In Visual Studio, look for the "Running telerik-winforms-assistant" message in the Output pane.
Step 2: Start the Migration
Open the AI chat in 'Agent' mode and use one of the pre-built prompts from the MCP prompt list, or enter one of the following prompts:
Migrate this WinForms application to Telerik UI for WinForms. Use the Telerik MCP tools to guide each step — start with telerik_get_migration_plan and follow its workflow. Try to preserve all existing functionality. Do not guess package names, do not create stub controls, do not batch-convert files.
Migrate this WinForms application to Telerik UI for WinForms. Use the Telerik MCP tools to guide each step — start with telerik_get_migration_plan and follow its workflow. Try to preserve all existing functionality. Do not guess package names, do not create stub controls, do not batch-convert files. Use dryRun mode when calling telerik_convert_file so I can review each file's changes before they are applied.
Step 3: Review the Migration Plan
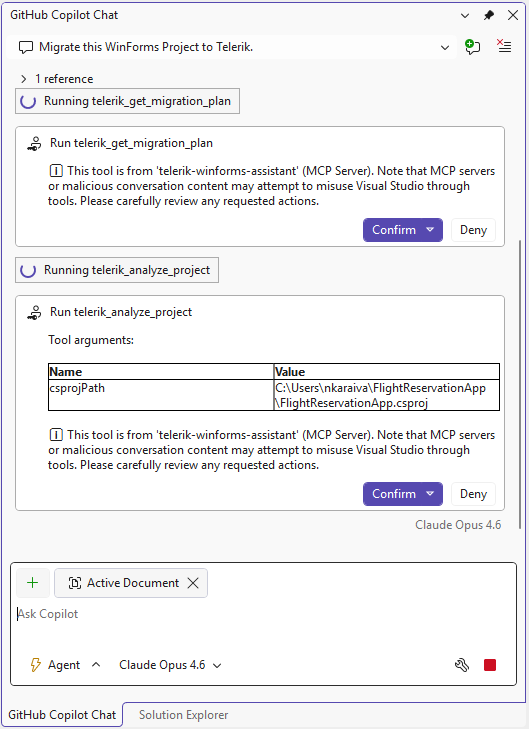
The AI agent first calls telerik_get_migration_plan to retrieve the recommended workflow. It then calls telerik_analyze_project to inspect your .csproj file. You may see output similar to:
- Project name and target framework (for example,
net8.0-windowsorv4.8). - Project style (
SDKorClassic). - Whether the
Telerik.UI.for.WinForms.AllControlsNuGet package is already installed.
If the AI agent cannot locate the
.csprojfile, it will prompt you to provide the correct path. Confirm the path in the dialog that appears.
When running different tools, 'telerik-winforms-assistant' may ask you for permission. You can choose whether to confirm each task individually or confirm all at once.
Step 4: Add Telerik NuGet References
The AI agent calls telerik_add_package_reference to add the Telerik.UI.for.WinForms.AllControls NuGet package to your project. For SDK-style projects, this adds a <PackageReference> element. For Classic-style projects, the tool modifies the .csproj directly.
After the package is added, the agent runs dotnet restore to download the Telerik assemblies from the Telerik NuGet server.
Ensure your NuGet configuration includes the Telerik NuGet source (
https://nuget.telerik.com/v3/index.json) with valid credentials. Refer to the Telerik NuGet server setup for configuration details.
Step 5: Convert Files
The AI agent converts your forms one at a time using the Divide and Conquer strategy:
- Converts
FormName.Designer.cs(control declarations and layout). - Converts
FormName.cs(event handlers and logic). - Builds the project and fixes any compilation errors in the converted pair.
- Moves to the next form.
For each file, the telerik_convert_file tool:
- Replaces Microsoft control types with Telerik equivalents (for example,
Button→RadButton). - Maps properties and enum values to their Telerik counterparts.
- Adds required
using Telerik.WinControls.UI;directives. - Comments out properties that have no Telerik equivalent and flags them for review.
- Creates a
.bakbackup of the original file.
If the agent reports items in the
itemsToReviewarray, it will automatically query thetelerik_winforms_assistanttool to find Telerik alternatives for removed properties.
Step 6: Apply a Theme
After all forms are converted, the AI agent calls telerik_get_theme_setup and applies the Fluent theme. The preferred method uses App.config:
<?xml version="1.0" encoding="utf-8"?>
<configuration>
  <appSettings>
    <add key="TelerikWinFormsThemeName" value="Fluent" />
  </appSettings>
</configuration>
Step 7: Verify the Migration
The AI agent runs a final build to confirm the migration is complete. At this point:
- Run the application and verify the UI renders correctly.
- Test key user workflows to confirm functionality is preserved.
- Review the
.bakfiles if you need to compare original and converted code.
Use source control (Git) to review the full diff of changes. The converter creates
.bakfiles as an additional safety net, but source control provides the most reliable comparison.
Step 8: Final Results
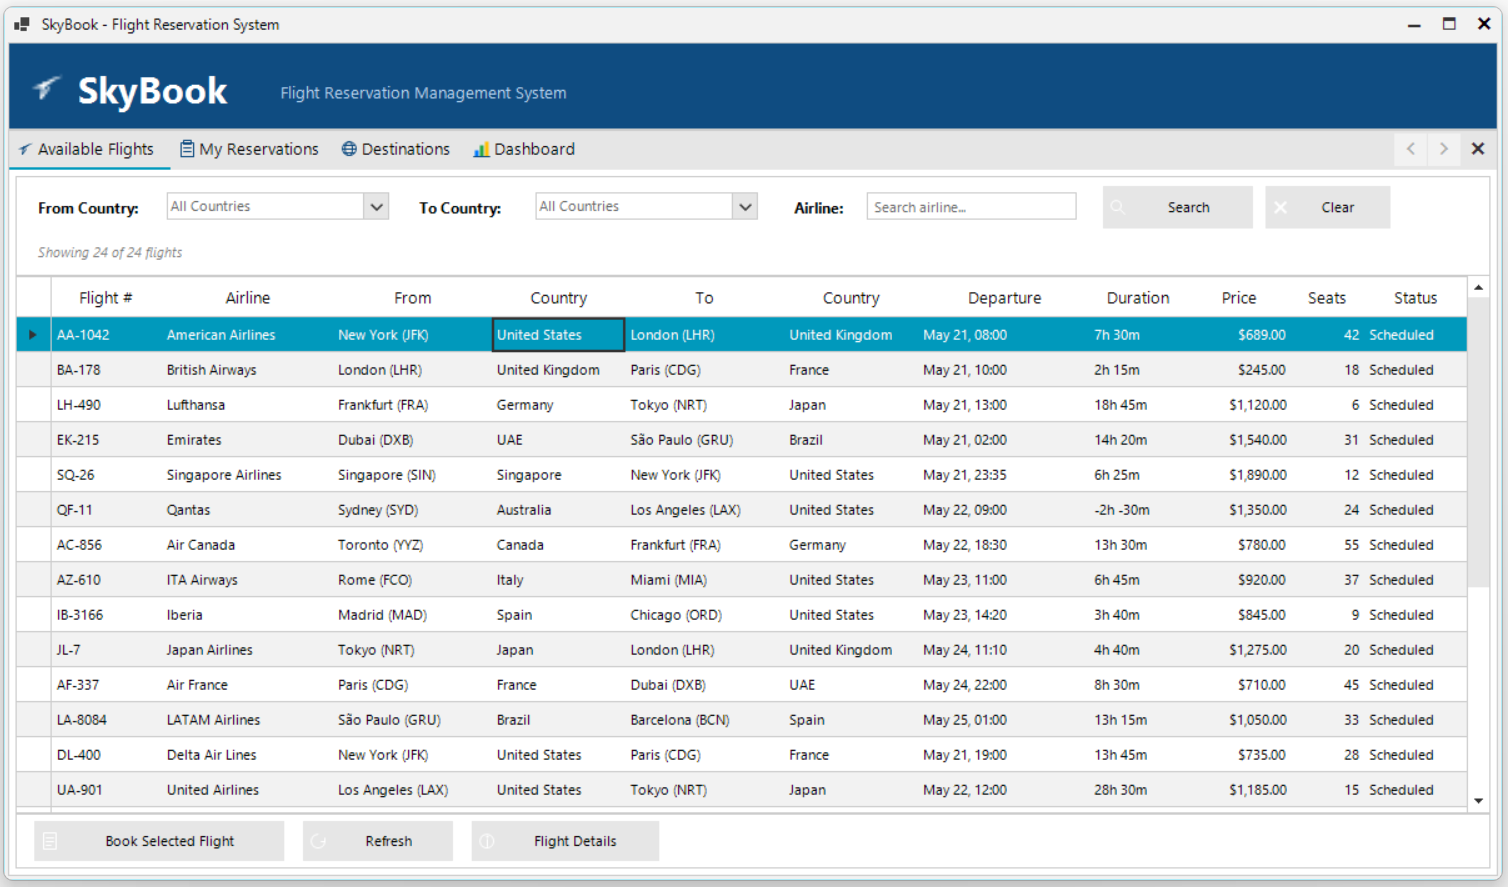
At the end, you will have the WinForms app converted to use Telerik UI for WinForms components. A short summary is displayed along with recent changes and updated files so you can preview them:
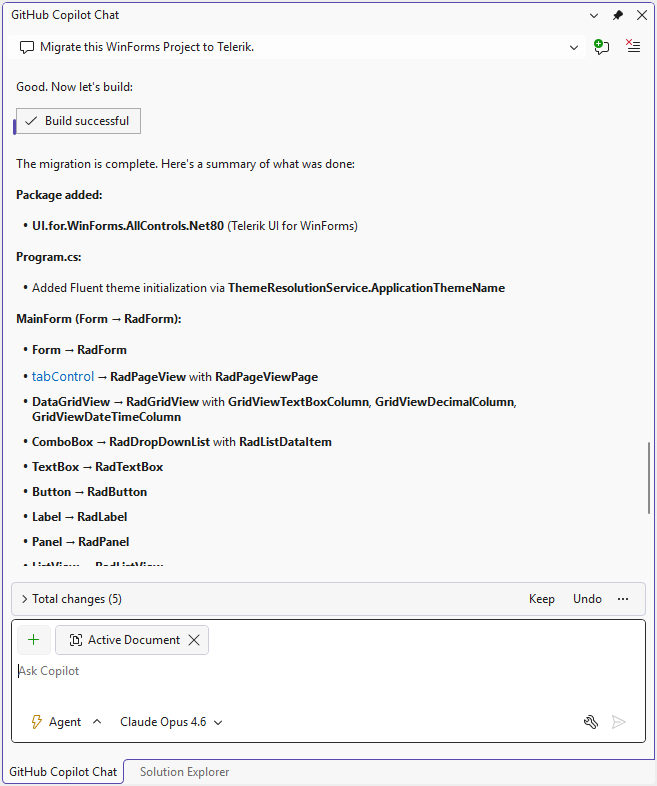
Below you can see the result after conversion completes:
Before conversion (Microsoft WinForms):
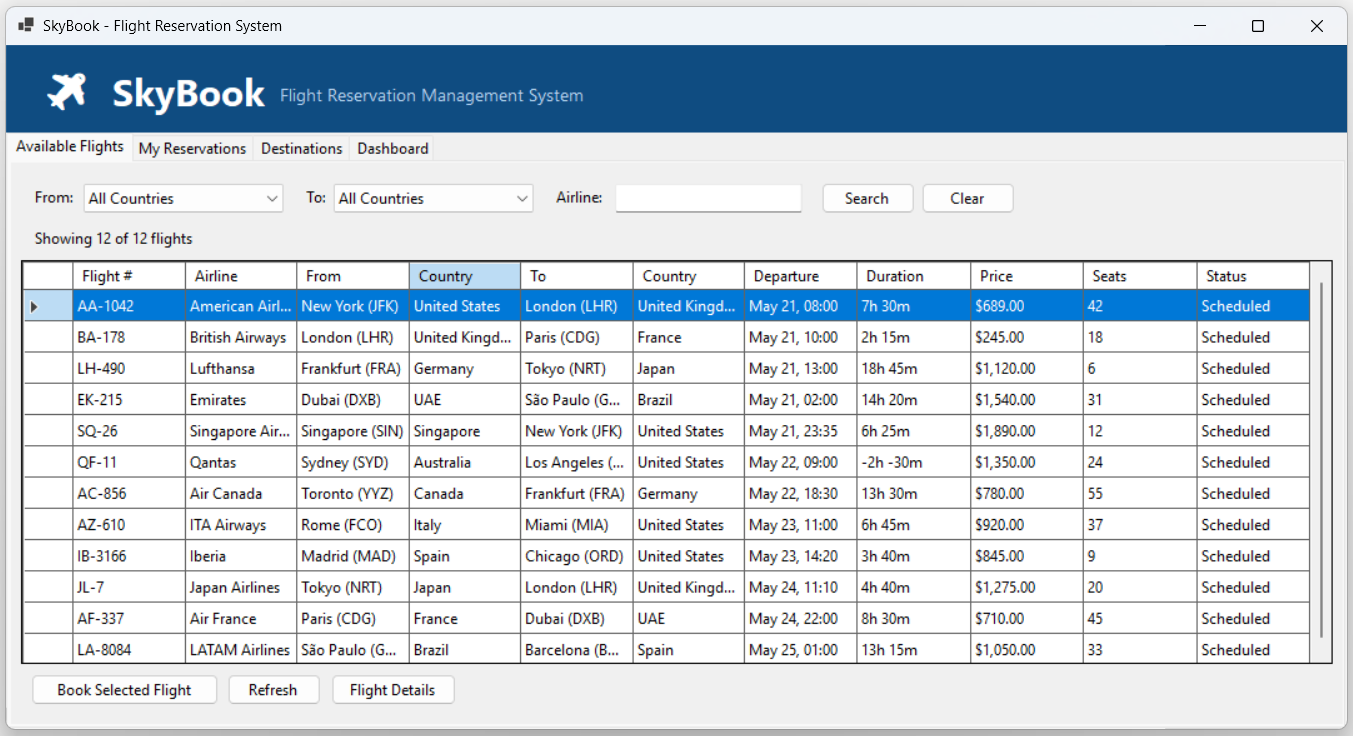
After conversion (Telerik UI for WinForms):
Troubleshooting
The following table lists common issues during migration:
| Issue | Cause | Resolution |
|---|---|---|
| Build errors after conversion | Properties removed because they have no Telerik equivalent. | Review the itemsToReview output. The agent suggests alternatives or you can remove the lines manually. |
| NuGet restore fails | Telerik NuGet source not configured or credentials expired. | Verify the Telerik NuGet feed is added and your credentials are current. |
| MCP server not responding | Server not started or license not configured. | Restart the IDE and verify TELERIK_LICENSE_PATH is set in .mcp.json. |
| Path elicitation prompt appears | The agent cannot locate the .csproj or a source file. | Provide the correct absolute path when prompted. |
| Trial limit reached (20 files) | Trial accounts have a 20-file conversion limit. | Upgrade to a Subscription license for unlimited conversions. |